Archive for December, 2010
Removing the Engine
by Garage Weasel on Dec.08, 2010, under Disassembly
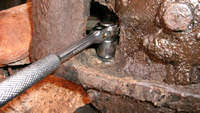
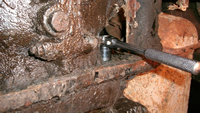
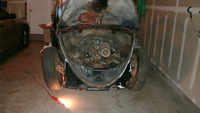
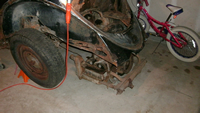
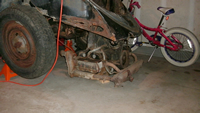
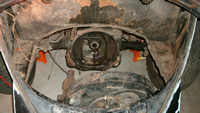
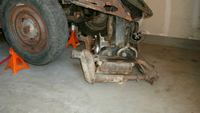
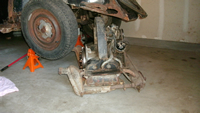
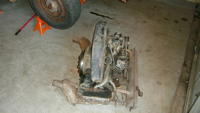
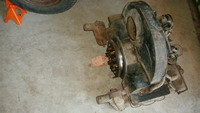
I jacked up the rear of the car and set it down on the top position of my floor stands. I got under the car and removed the bottom two engine nuts. The fuel line was missing and the heater cables and choke cables were already disconnected, so there wasn’t anything else that needed to be or removed or disconnected. I placed the jack under the engine and raised it until it was barely lifting it. I then wiggled the engine back to clear the main transmission shaft and the bottom engine studs and found that there wasn’t enough space to pull it back and clear the shaft and studs. The engine was hitting the rear apron and still needed another ½”- ¾“. No matter how much I pulled back, there just wasn’t enough space. After dropping the engine a little, I was able to get it to clear the rear apron, but it required quite a bit of wiggling and rocking it around. I also had to turn the distributor to get the vacuum unit out of the way and remove the distributor cap as well. Once it was lowered down to the floor, I set it on a couple of short 2’’x 4” wood scraps.
Because my jack wasn’t able to lift the body high enough to get the engine out directly under the rear apron, I had to lift it as high as it would go and slide it out on the side, next to the rear driver side wheel. Not the best way to do this, but the only option I had with my tools. I plan to make a dolly to put the engine on so that it can easily be moved around the garage. With limited space, I constantly have to move things around to make space to work and will need an easy way to move it.
Preparing for Removing the Body from the Chassis
by Garage Weasel on Dec.24, 2010, under Disassembly
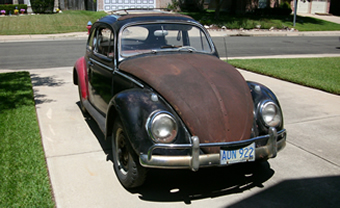
I began removing the bolts attaching the body to the chassis. I started on the driver side and immediately realized what a chore this was going to be. These is so much serious rust where these bolts are located and they are in the areas that have been most exposed to moisture for the last 50 years – especially the last 25 or so years where it’s just been sitting out in the elements.
I went through and loosened each of the 14mm bolts on the driver side. On two of them, I broke the heads off and the others just tore away the metal that they were bolted onto and they would just spin. I used a mini hacksaw, which is basically a handle that holds one end and the middle of a hacksaw blade leaving around 4” of the other end protruding, to cut through the spinning bolts. I used this type of tool with the blade sticking out so I could slide it between the floor pan and the body gasket to cut the bolts. It’s a lot of work, but was the best I could come up with, with the tools I had on hand. I cut the remaining 14mm bolts on the driver side.
The three 17mm bolts on this side were another story. The two bolts on the front that bolt into the front of the heater channel, I was only able to remove 1 bolt. The other one just tore through the bottom plate of the frame head and shouldn’t hinder the body from being lifted away. The head of the 17mm bolt on the rear shock tower was so rusted that it rounded out and I was unable to turn it. With a hacksaw, I cut though the head and then drove a large screwdriver tip through it like a wedge and broke the head off in two pieces. One side done…
On the passenger side, it went much easier. The first 14mm bolt I tried, I was able to remove it completely. It was the one and only floor pan bolt to come out in one piece. The rest of the 14mm bolts on this side ripped out immediately when trying to remove them and would just spin like the ones on the other side. This side is more rusted than the driver side. Since there was so little metal left on the bottom of the heater channels where they bolted on, I didn’t see the need to cut them. With the three 17mm bolts on this side, the front two came out with much work and the head of rear bolt on the shock tower twisted off immediately. This side is also now done.
There are six bolts under the rear seat area — four 14mm and two 17mm. Since these were all inside and more protected from moisture, they all came out fairly easy.
The last two bolts I removed were in the front trunk that attach the body to the top of the front axle. These were protected enough that they were easy to remove.
Lastly, I removed the steering wheel, disconnected the steering shaft from the steering coupler, and removed the steering column. Removing the steering wheel was fairly simple although I did have to purchase a socket to fit the large 27mm nut that attachess the steering wheel to the steering shaft. Since a 1-1/16″ socket is very close to the same size and several dollars cheaper than the 27mm, I just bought the 1-1/16″ socket instead. Once the nut was loosened and turned most of the way off, the steering wheel came loose with a moderate amount of wiggling and pulling. I left the nut on so that when the wheel broke free, I didn’t hit myself in the face and chest with it. With a few turns, the nut was off and I was able to easily pull the steering wheel off safely.
Disconecting the steering shaft from the steering coupler disc was a bit more difficult. The bolts holding the steering shaft flange to the rubber coupling disc were not only caked with road grime, but were severely rusted. Rather than fight with getting them off, I decided to use a cutting wheel and cut them off.
With the steering column and shaft disconnected, all connections from the chassis to the body have been removed and I should be able to separate them. Before I do that, I want to design and build a frame to set the body on while I do the body work. I want the frame to be high enough to be able to roll the chassis under and back out as needed and wide enough to be clear of the wheels. I also want to brace the door openings to maintain spacing and alignment and to keep the roof from giving way and buckling. The heater channels that normally maintain this spacing are severely rusted and I don’t trust that they will be able to provide this support. I might be wrong about this, but am not willing to find out!
Bracing the Door Pillars
by Garage Weasel on Dec.30, 2010, under Disassembly
As I stated before, I want to brace the door pillars to maintain their approximate positions and also to support the bottom of the body and keep the roof from buckling. With the heater channels in such poor condition, I don’t trust that they will be able to provide adequate support once the body and chassis are separated and the body is supporting its own weight. I also want the braces to be adjustable so that when I am replacing the heater channels, I can adjust the position of the pillars if needed.
To accomplish this, I decided to use ½” EMT conduit, ½” conduit hangers, and 1” U-bolts. I attached a conduit hanger about 7” above the heater channel on each of the A and B pillars with a #10 self-tapping sheet metal screw. I then cut a length of conduit to go from the A to B pillars on each side. Before inserting the conduit into the hangers, I wrapped the areas going into the hangers with a strip of rubber non-slip shelf liner to help the hanger grip the conduit. I inserted the conduit into the hangers and tightened the clamping screws. I then cut a length of conduit to go from the left A pillar to the right A pillar, and from the left B pillar to the right B pillar. I attached these pieces to the ends of the previously installed pieces with the 1” U-bolts. It is surprisingly strong and the materials only cost around $12.
To lighten the body a bit, I removed the doors, the front hood, and the engine lid. I shouldn’t need them for a while and will reinstall them as needed. I am leaving the front windshield, the rear windshield, and the quarter windows installed for now to strengthen the body and maintain their respective openings. I’ll remove them when I get around to working on the metal in those areas.
