Removing Tunnel Bottom Plate
by Garage Weasel on Apr.23, 2018, under Chassis
After considering the pros and cons of removing a section of the tunnel bottom plate, I decided to go ahead and do it. With all of the rust damage that can be seen from outside of the tunnel, I really can't tell if the inside is damaged to the same extent just by looking from the outside. I would expect it to be much less on the top and sides, but the bottom was definitely exposed to water pooling inside of it for many years. Until I take the plate off and look, I will not be able to have an accurate assessment of the damage. Here are some considerations:
Pros: I'll know for sure what damage is there and be able to fully access it to repair it. Areas with rust damage are weaknesses in the structure and must be removed and any rust that is there will just progress and must be stopped. I'll have a better chance of doing that by getting inside and taking a look. Also, large sections of the lip where the floor pans rest on both sides have to be replaced. On the driver's side, it is eaten completely through. Overall, I think it will result in a much better repair when I can get the areas cut out, prepped, and the replacements welded in when having access to the inside. I can also get the inside of that section of the tunnel painted and protected, replace the fuel line, and install seat belt mounting plates.
Cons: The possibility of structural weakness if not properly welded and/or the creation of alignment issues. These are the two biggest downsides to taking the bottom plate off and welding it back on. Of course, any area where the welds are weak are a concern, but so is any unrepaired area with rust damage that is concealed and inaccessible inside of the tunnel. I currently have areas where the rust is a potential weakness and I think as long as I get good weld penetration and good adherence to both parts being welded, structural strength will be achieved. Also, once the bottom plate is removed, the tunnel is very flexible and is easily twisted. This could result in the frame head being in a position where it is not level or tilting. There is going to be a lot welding both for the replacement of the side strips with the floor pan lip and putting the tunnel plate back on and ample chances that those welds will pull the tunnel one way or another. Well on this chassis, so much is going to be replaced and constant checks of alignment and position will have to be made during the rebuilding process anyway. I will just have to check, double-check, and triple-check throughout this process and hope that I can be successful. There are so many areas that are going to have to be replaced on this car with the body as well, so getting this all correct is imperative.
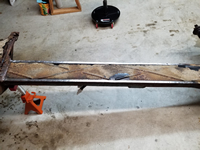
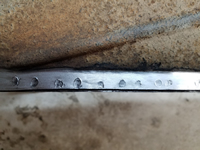
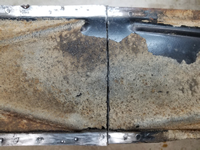
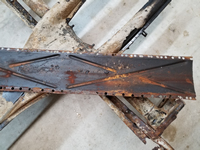
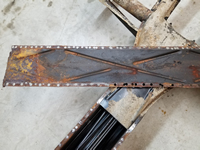
To start taking the bottom plate off, I used a wire wheel in my drill to remove any paint, undercoating, or rust to reveal the spot welds. There are a ton of welds to drill out! My last count was 142.
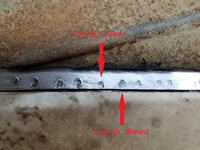
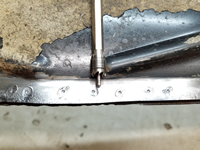
Important Update: Not knowing what I was doing, I drilled out twice as many spot welds than needed. If you look carefully at the close-up of the spot welds below, there are two types of spot welds - ones that are smooth, dished, and even, and ones where the metal is raised and uneven. The smooth and even ones are the ones that were made using a higher voltage to attach the tunnel bottom plate to the tunnel. These two pieces are thick and the higher voltage melts the metal more, creating a dish in both. The other raised and uneven welds were created when attaching the floor pan to the lip of the tunnel and were created with a lower voltage since the floor pans are thinner. Because of this lower voltage, it doesn't penetrate fully though the tunnel bottom plate and therefore these do not need to be drilled out. An important lesson learned that I will not forget! These were typically alternated, so basically half them were unnecessary.
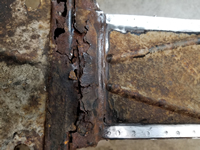
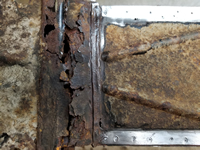
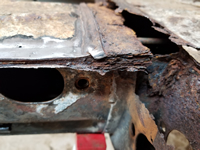
The area I am going to remove starts with the frame head bottom plate and goes down to where the tunnel starts to flare out to the forks. That area appears to be in great shape, so no need to do anything with it. At the front end of the tunnel bottom plate, it is overlapped by the frame head bottom plate. In its current condition, the overlapped area is just a huge stack of rusted metal that is bulging outward.
The spot weld cutter that I'm using has a pilot to hold the cutter in one place to cut the holes. This works for about three holes and then it starts skating and making deep circular scratches as it skates away. The duller the tip of the pilot gets, the more uncontrollable it becomes. I discovered that if I take a center punch and mark the center of each spot weld and then use a small drill bit around the size of the pilot to drill a shallow hole in each punch mark, the tool is much easier to control and use. It actually saves time in the long run as you are not fighting to keep it on the correct spot and having to stop and restart the cut. Trust me, it's worth the extra effort. It cuts a 3/8-inch hole which is kind of large, but it does a great job of getting the whole spot weld. These are available from Harbor Freight for $5 each.
Next, I made the cross cut at the frame head plate and at the other end of the tunnel plate. Once the cut was made at the frame head end, big chunks of rusted metal just fell off.
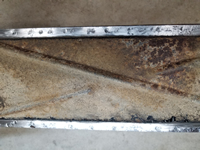
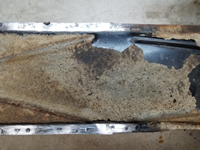
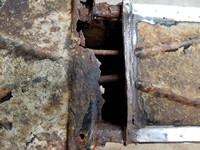
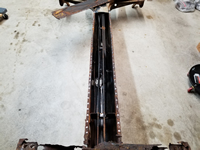
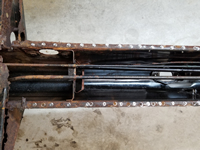
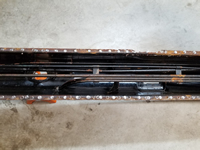
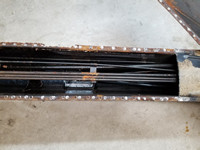
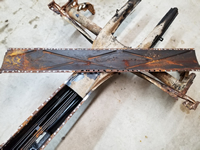
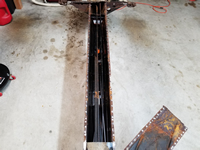
And finally, cutting out the spot welds. This took many hours and the good part of one day to accomplish. I started on the driver side at the frame head and would cut out several of them and then gently pry up with a screwdriver to see if the plate was breaking free. I tried very hard not to drill into the lip below it to keep that section intact as much as possible. I would drill down watching the cuttings carefully and looking for rust to appear. Once I saw the rust, I would vacuum the area and look into the hole to see if I was all the way through the plate. This worked well until I got to the middle of the plate. I couldn't see any signs that I missed a spot weld and it just wasn't moving. so I started at the other end thinking that would help, but it was the very same even once it was free on both ends all the way to the middle. I used the screwdriver to attempt to pry it free. No such luck. I decided to take a break and when I was getting up from sitting on my stool, I barely bumped the Napoleon hat with my drill and the whole side popped loose. Of course, the other side was cooperative until I got to the middle and the same thing happened. I started on one end, gave up and started on the other, and got to the middle and it wouldn't break free. In this case, I had a couple of welds that I didn't cut quite deep enough and once I did that, it was completely free. It is amazing how much just part of a couple of spot welds will hold a piece in place! As expected, the top and sides of the inside of the tunnel were in excellent condition looking pretty much the same as they did the day they were initially assembled. The bottom plate itself is in good shape except at the end by the frame head. That end will require a inch or so cut out and a couple of inches added so that it extends to fit underneath the new frame head plate. It's a relief to get the plate off, but I know that I just added many more tasks and many more days of work to an already never-ending list of things to do. Next, I tackle getting the frame head bottom plate off. Should be fun!
September 11th, 2018 on 11:20 am
I might have to do something similar to my Ghia pan. What kind of welder did you use to re-attach the bottom plate? I’m wondering if my beginner Eastwood 135 Mig welder will be hot enough.
September 11th, 2018 on 3:00 pm
Well, I haven’t welded it back on yet. I still have quite a bit of repair to do to the tunnel and frame head before I can weld the bottom plate back on. I’m waiting for cooler weather to start the extensive welding needed to do this. Your Eastwood 135 should be able to weld this plate to the tunnel, especially if your are plug welding it back on. I think they are rated up to 3/16″ materials with solid core wire, although I think that might be a little hard to get consistently great penetration. Welding the bottom plate should be fine with your welder.
September 13th, 2018 on 8:38 am
Cool, thanks! Good luck with your project. My bottom plate is in much worse condition than yours. I was considering acid dipping but I found a rusted through hole so now I need to patch weld a donor piece in.
January 1st, 2019 on 7:04 pm
Great job on this – any updated photos? Where you able to buy a replacement pan (if so where did you get it?)
Thanks,
Bob
January 1st, 2019 on 9:26 pm
Unfortunately, it’s still in the same condition as pictured. I haven’t made any progress in a while. I intend to keep the same pan and repair it, if possible.