Tag: heater channel
Initial Body Rust Repair Assessment
by Garage Weasel on Feb.18, 2011, under Body Work
Now that the body is off the chassis, I can get an even better view of the rust damage and what needs to be replaced. Basically, most everything on the bottom 4-5 inches of the body will need to be replaced with donor parts or new panels. The bottom areas of the body suffered the most moisture exposure while sitting idle for 20+ years in the harsh Minnesota weather. I was told that it was sitting under a shed most of this time, but I’m guessing that snow and rain were still able to reach the underside of it. And if it spent the first 25 years in this harsh environment as well, it had probably already experienced some rust damage before it was parked for another 20 or so years.
So here is my initial assessment of what will need to be repaired:
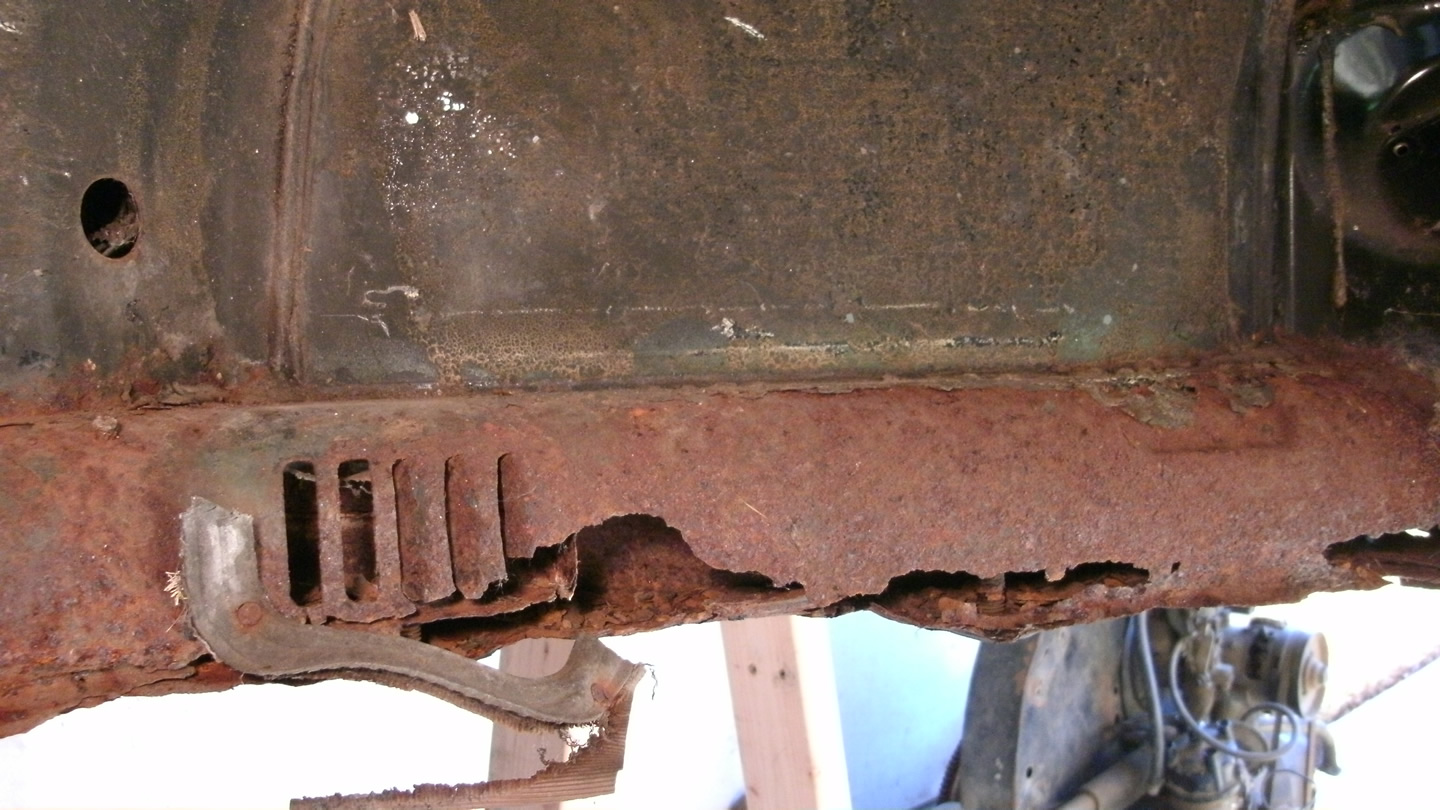
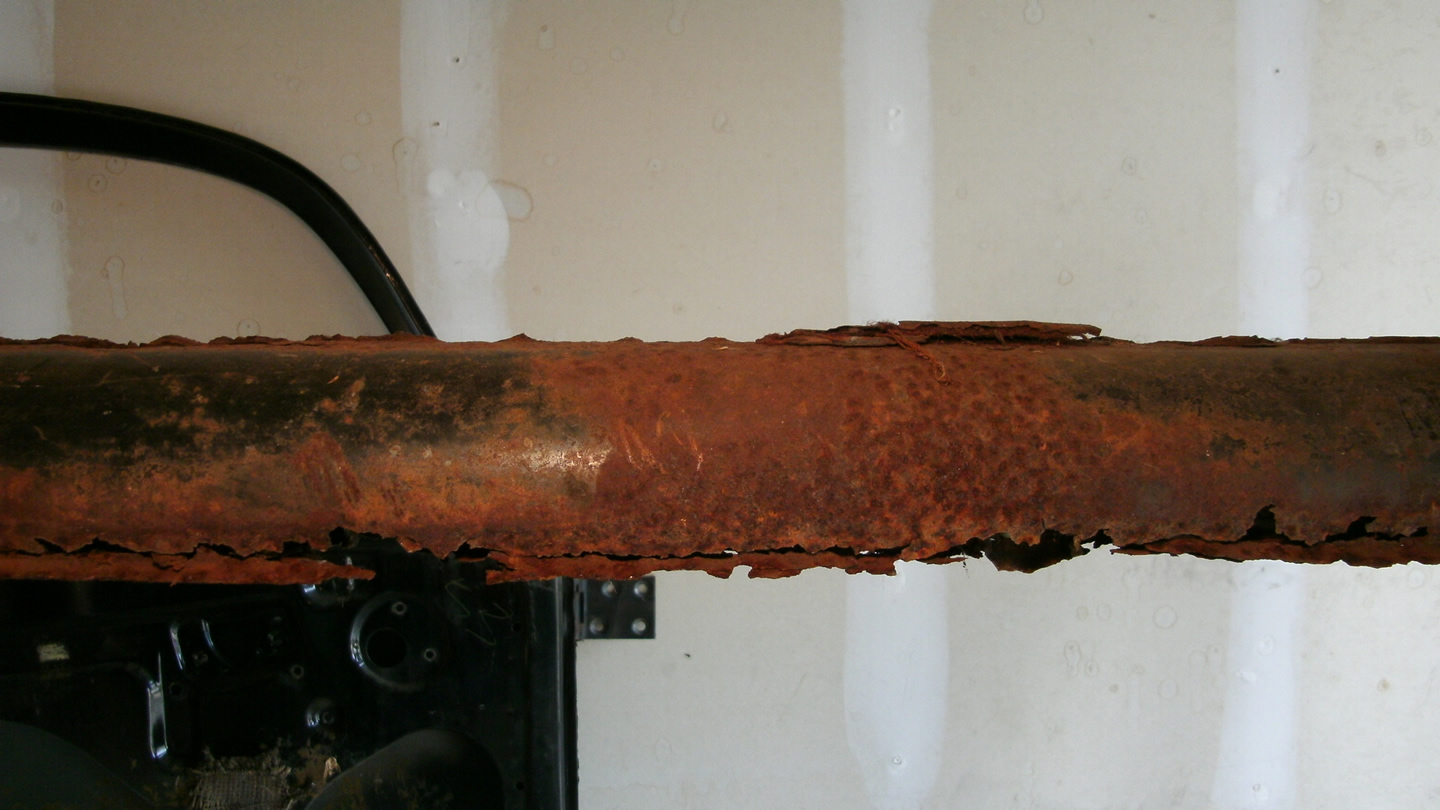
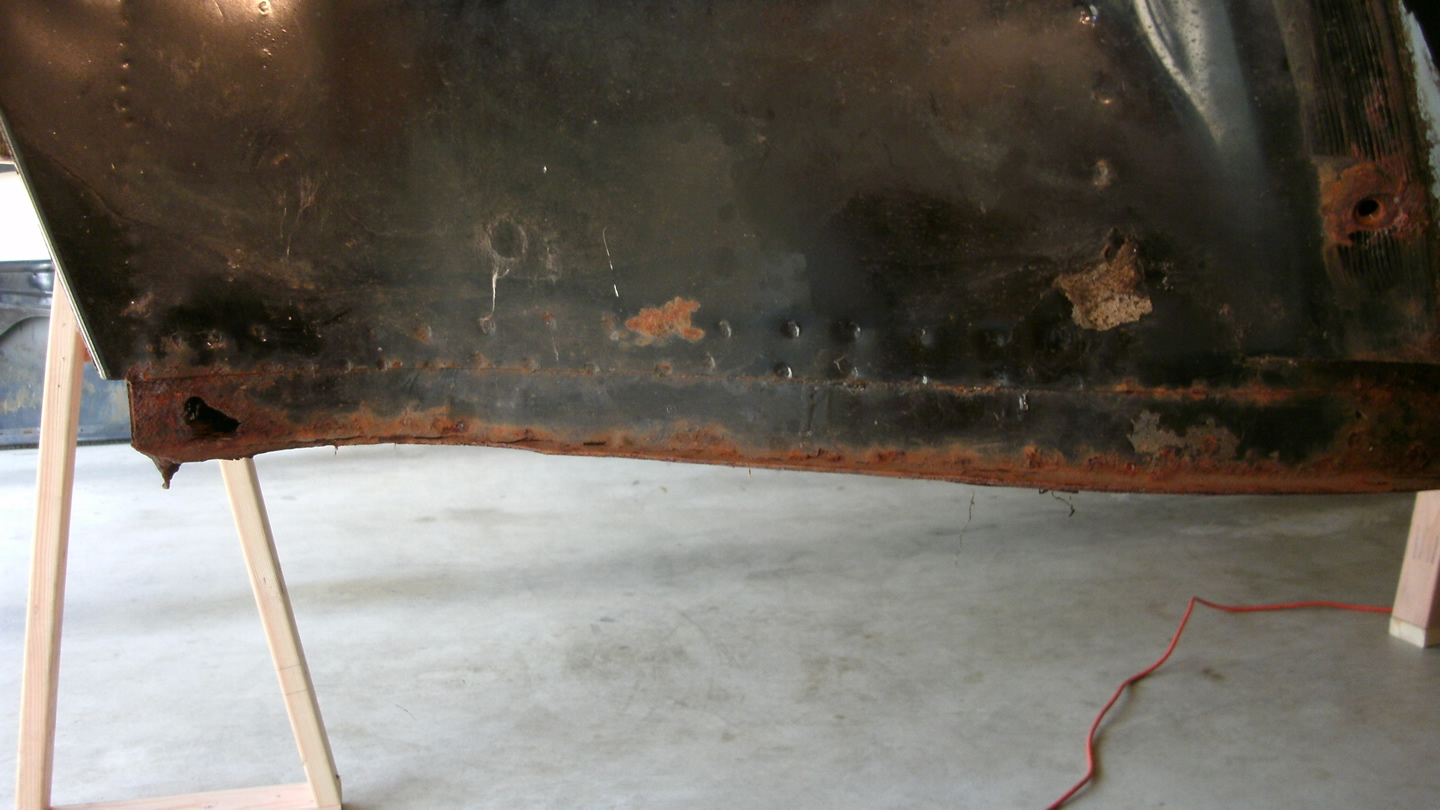
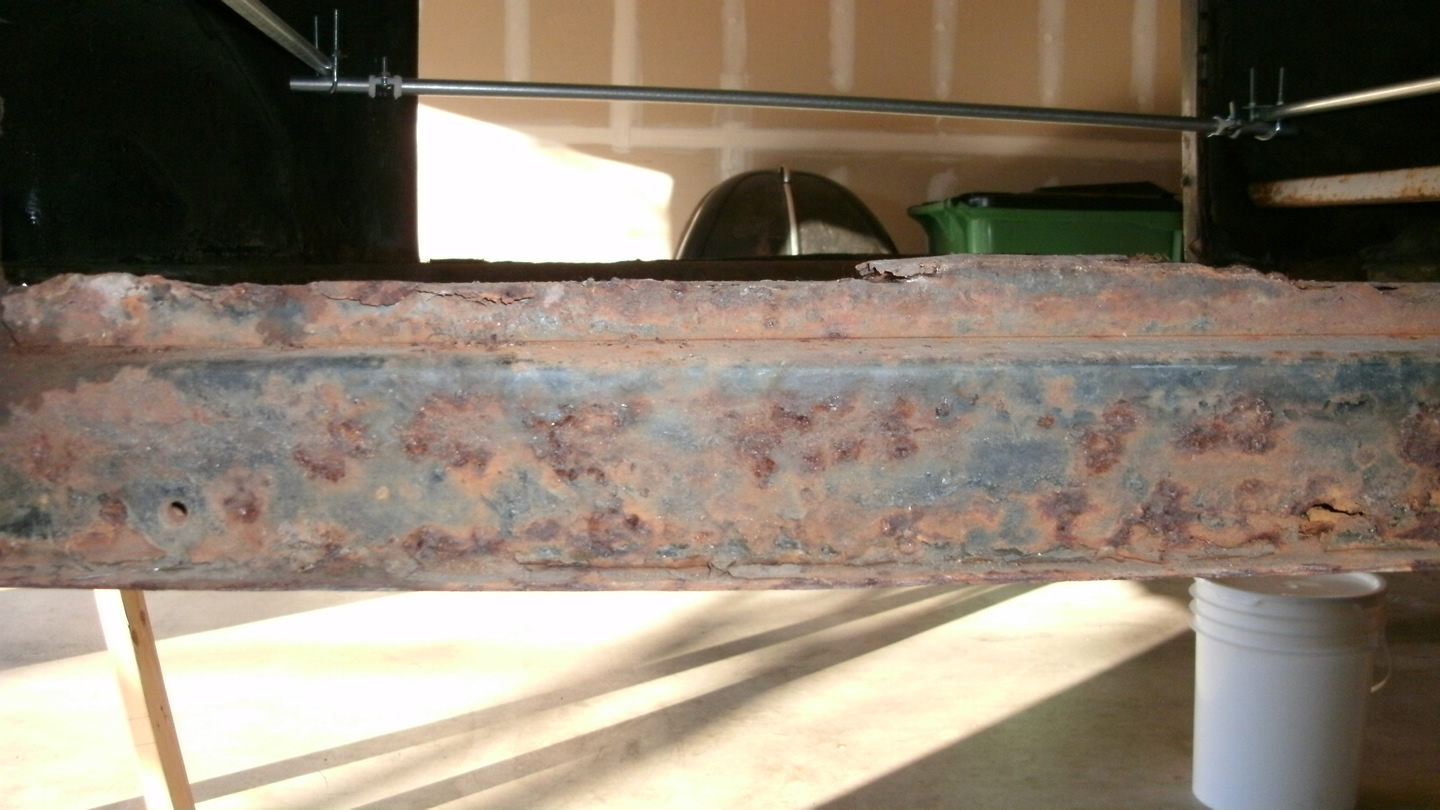
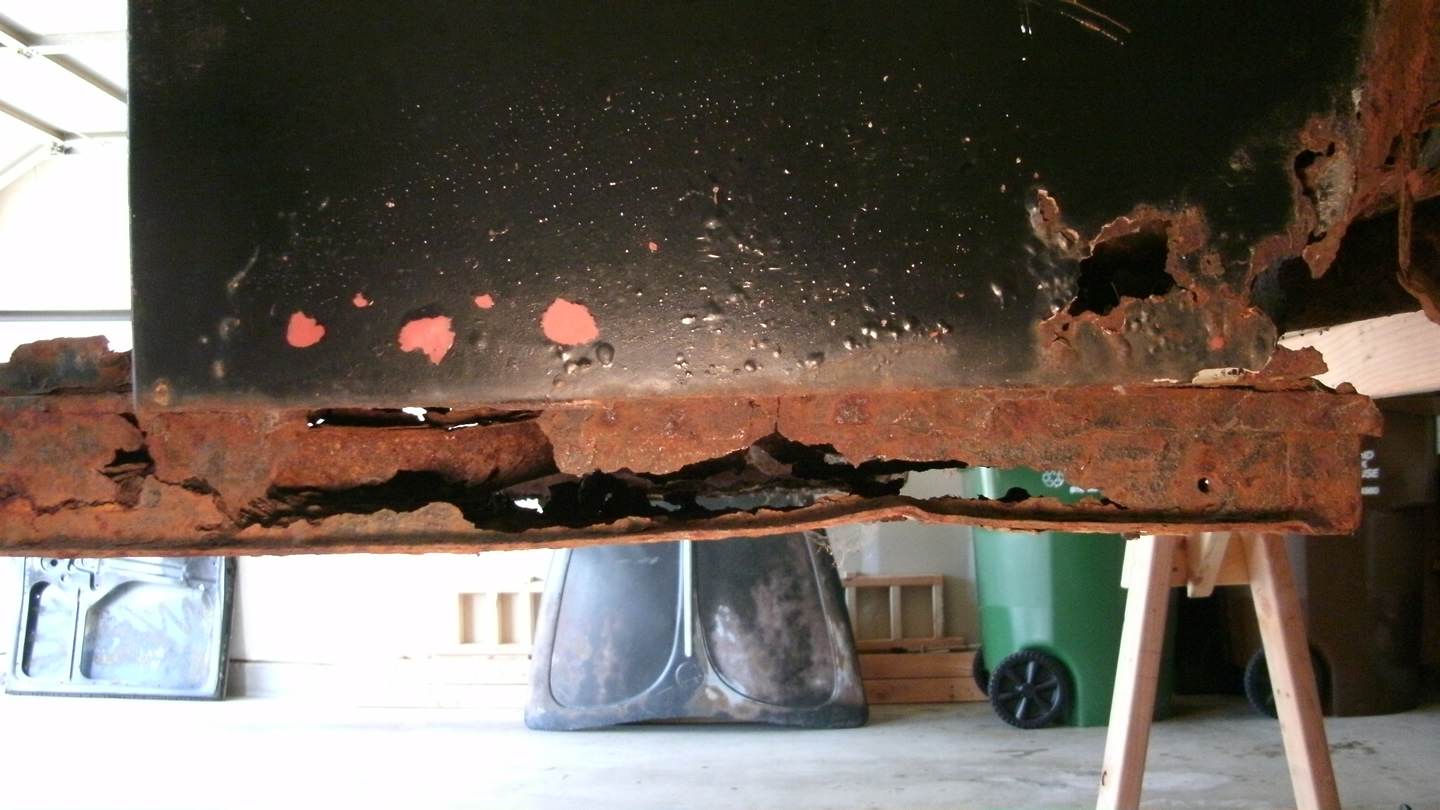
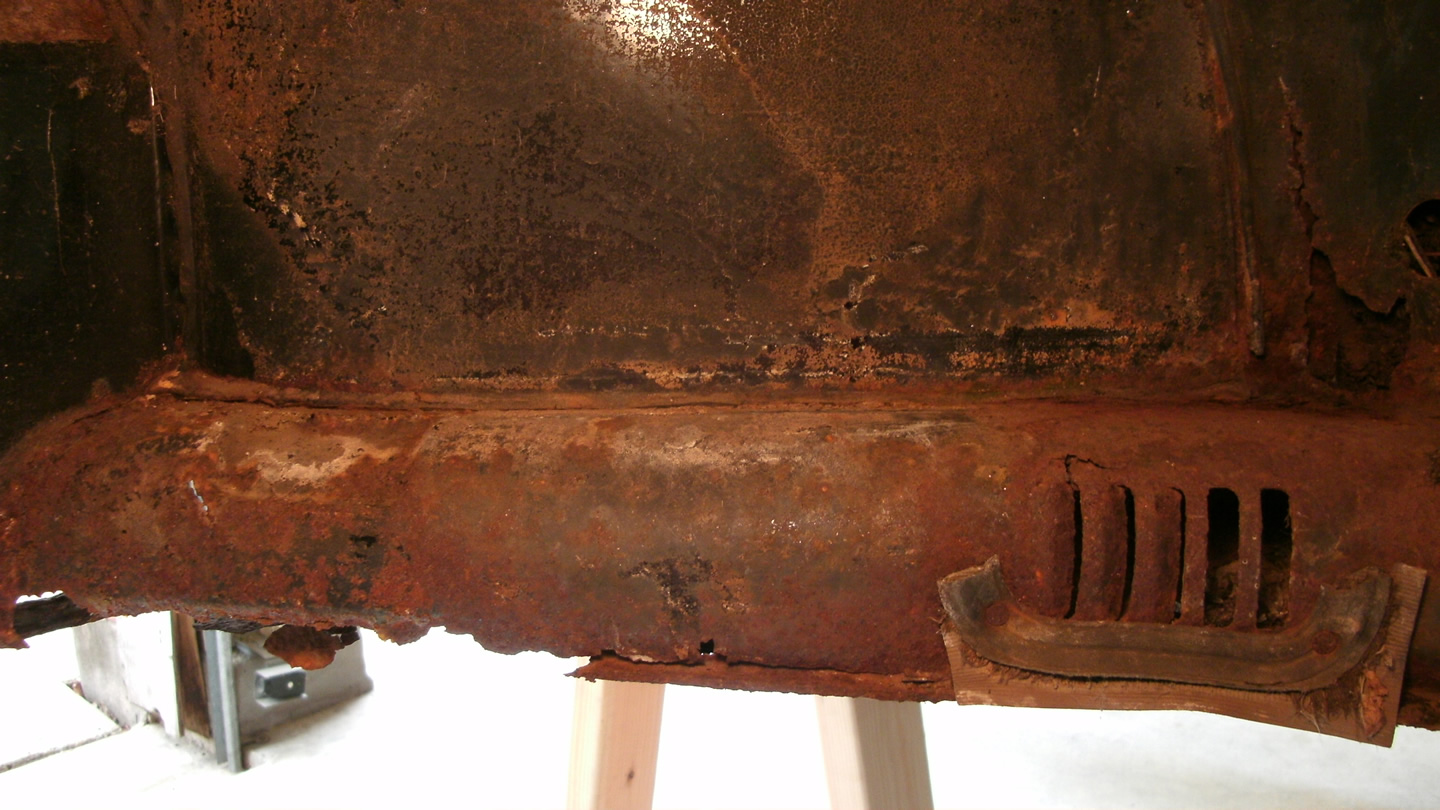
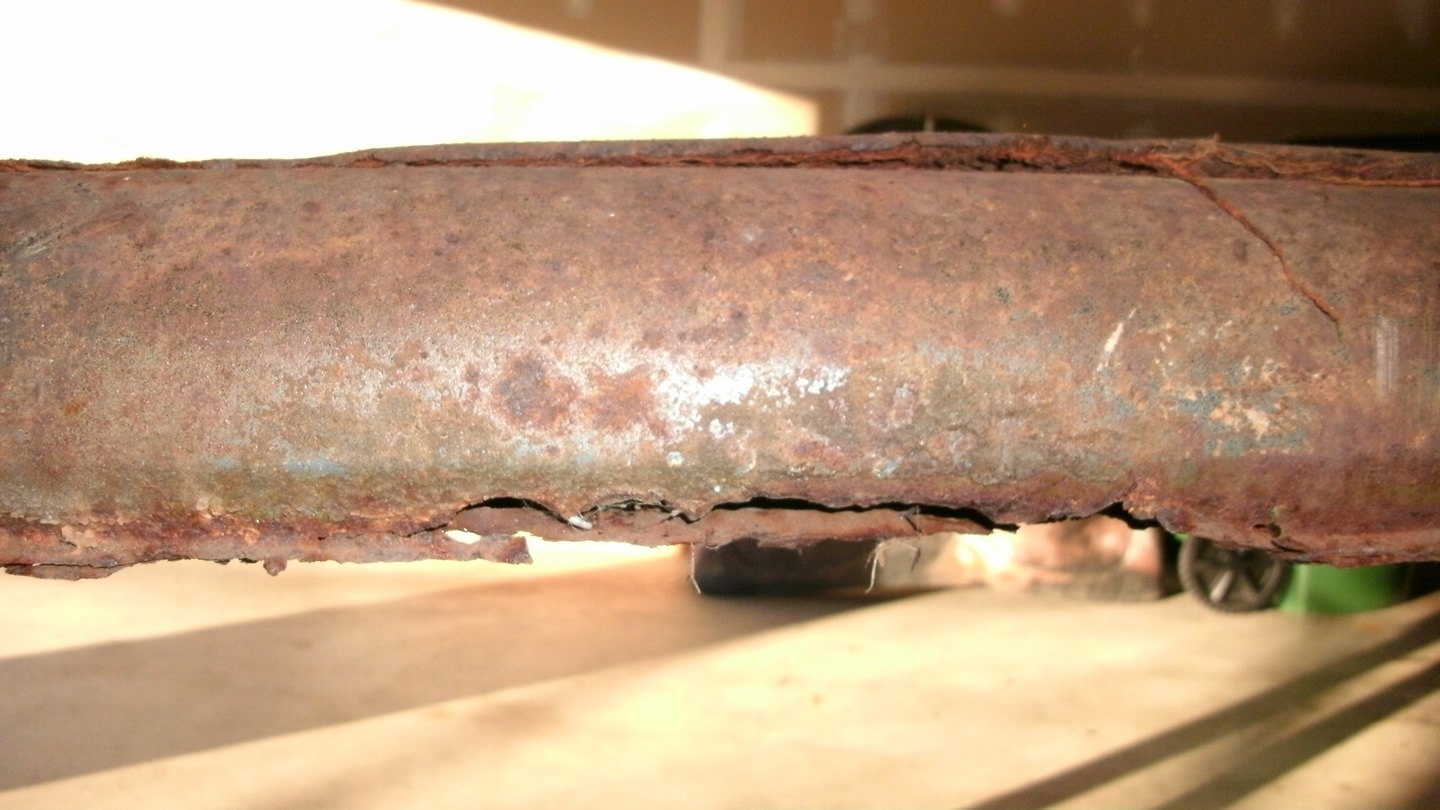
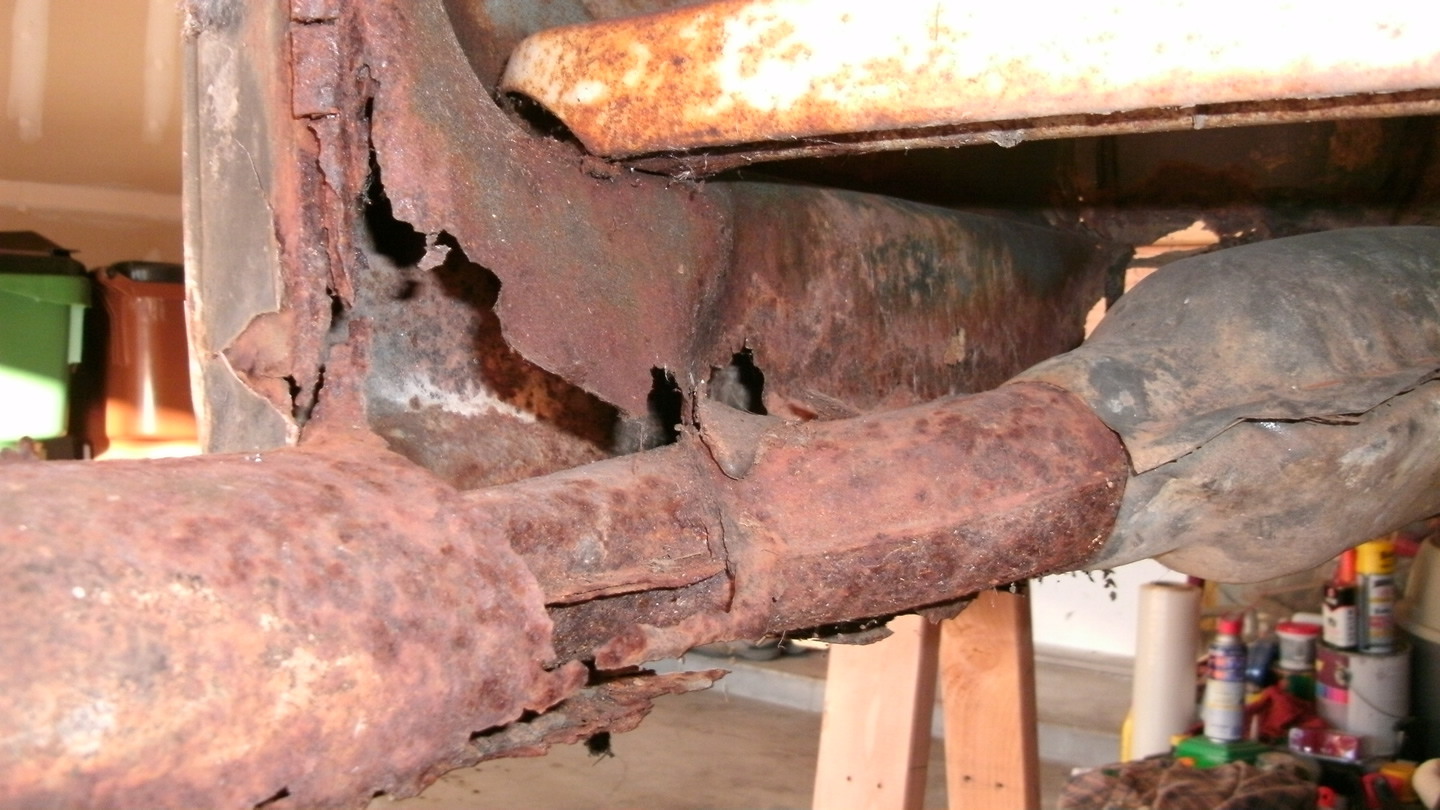
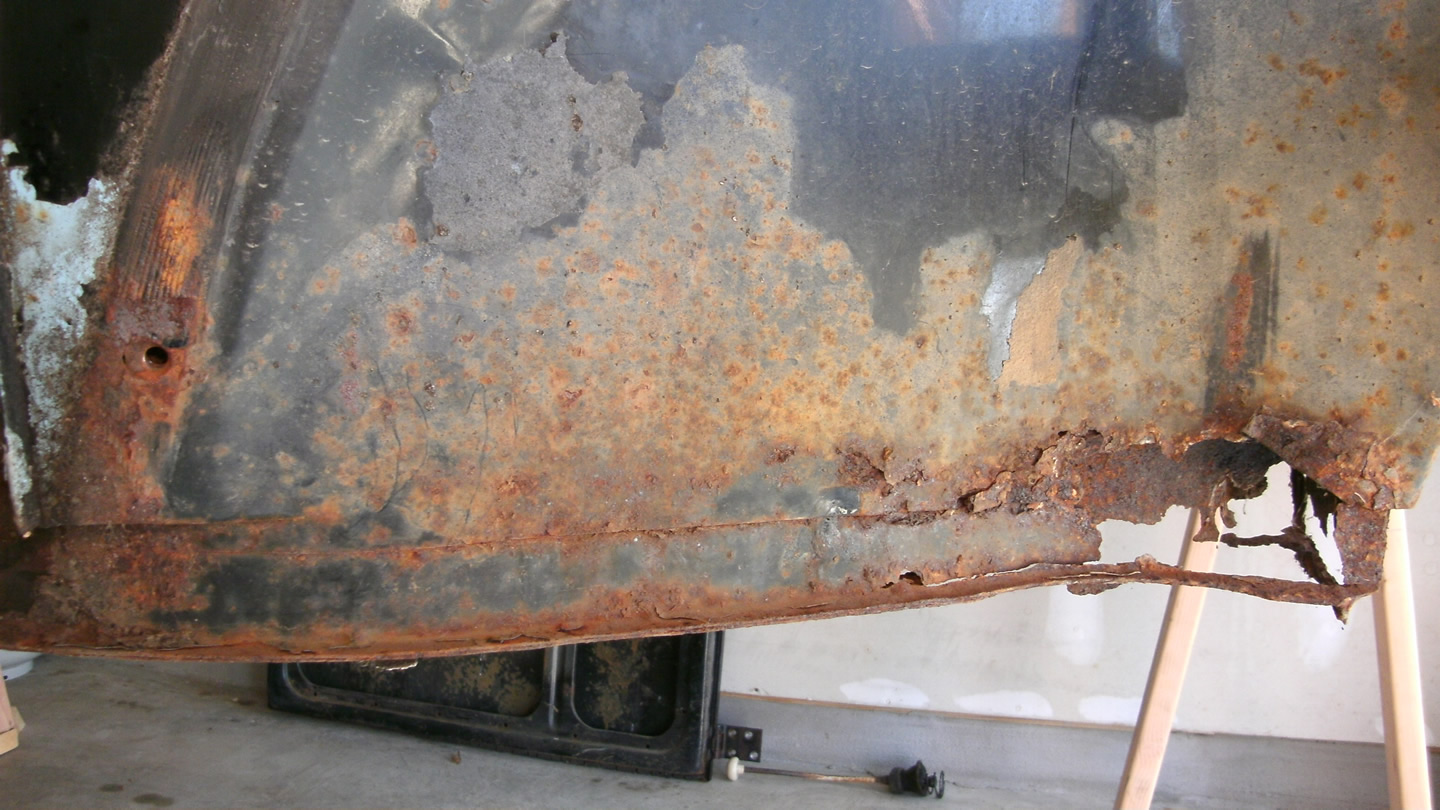
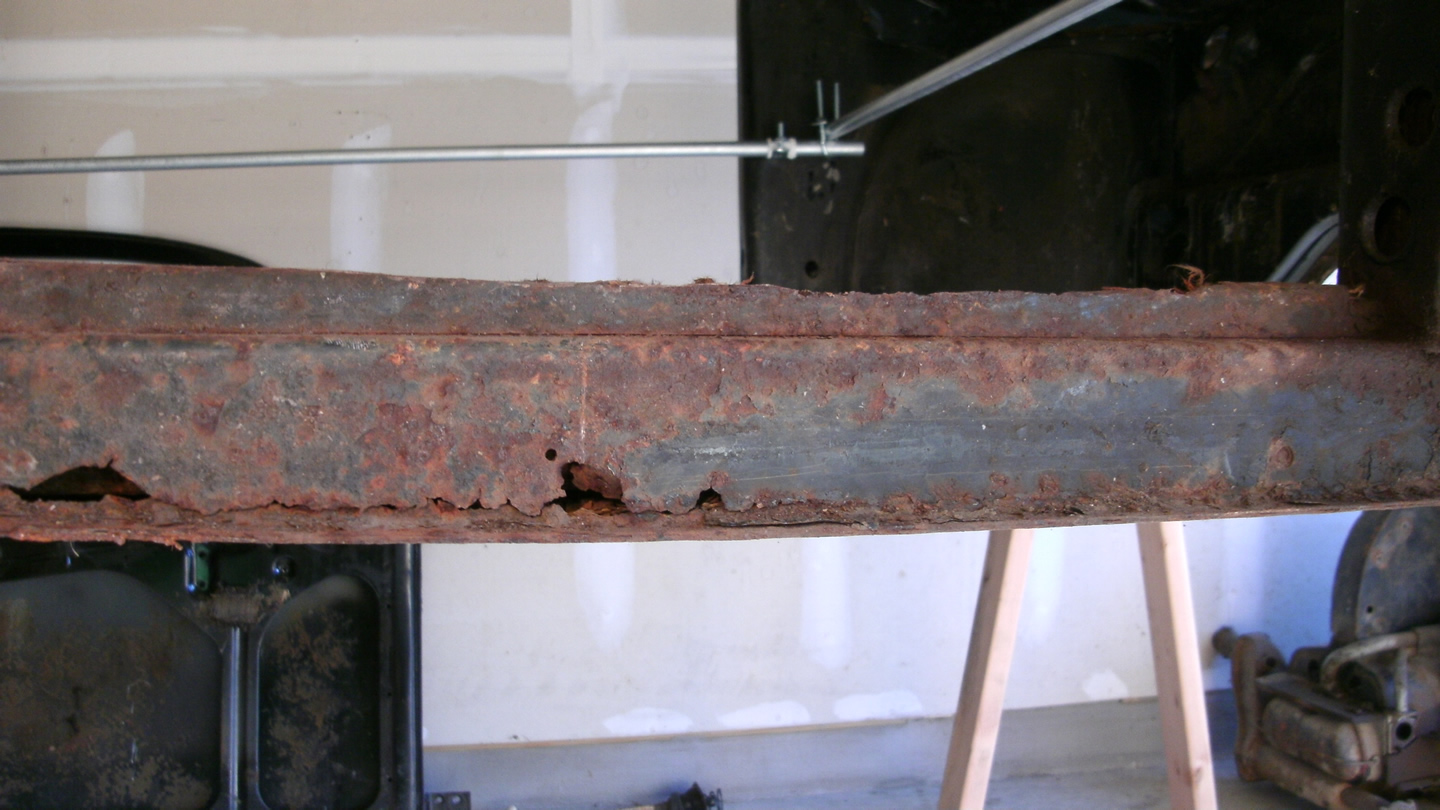
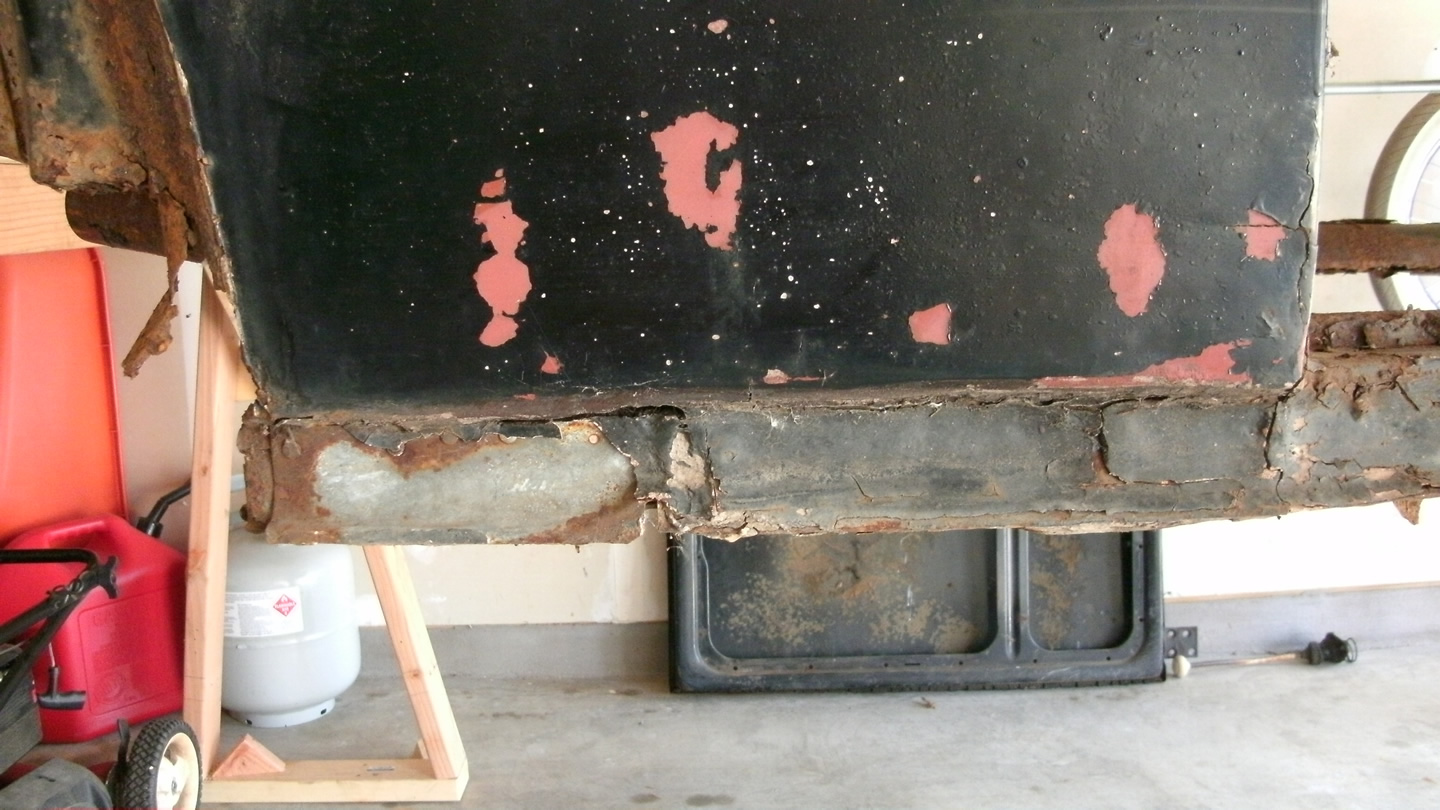
Heater Channels: The heater channels have been destroyed by rust both inside and outside and will need to be replaced. The rear sections suffered the worst damage and have disintegrated completely. Both sides had mouse nests inside the channels. Since the replacement aftermarket heater channels available today are so different in both design and fit from the original parts, I have decided to purchase donor channels from a car of a similar age. I found donor parts on thesamba.com and they were shipped via Greyhound bus from California which is, by the way, an economical way to ship large bulky items. There is no guarantee that the donor channels will be a perfect fit, but they should be much closer than the new aftermarket parts and will have the same contours, stampings, and vents.
 |
 |
 |
 |
 |
 |
 |
 |
 |
 |
 |
 |
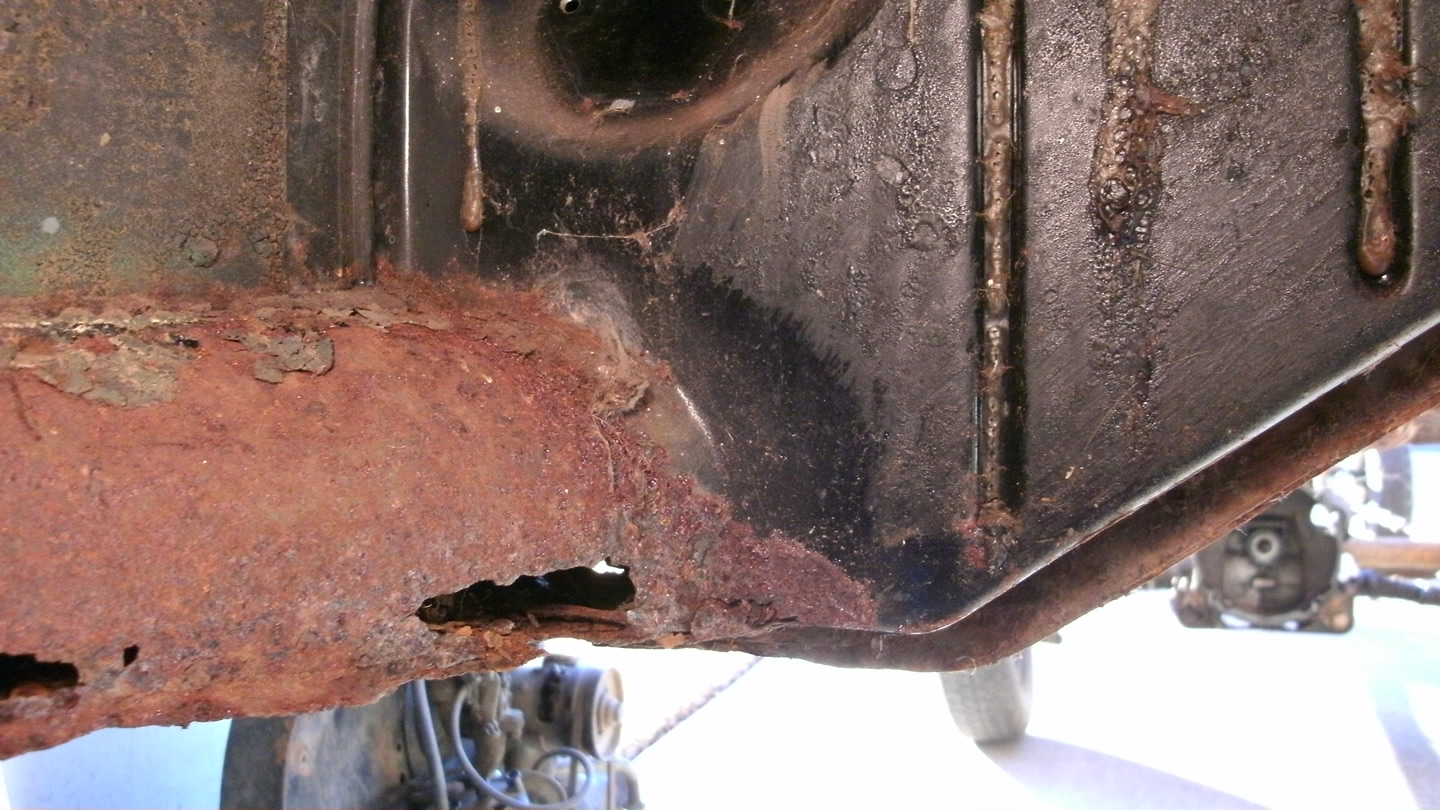
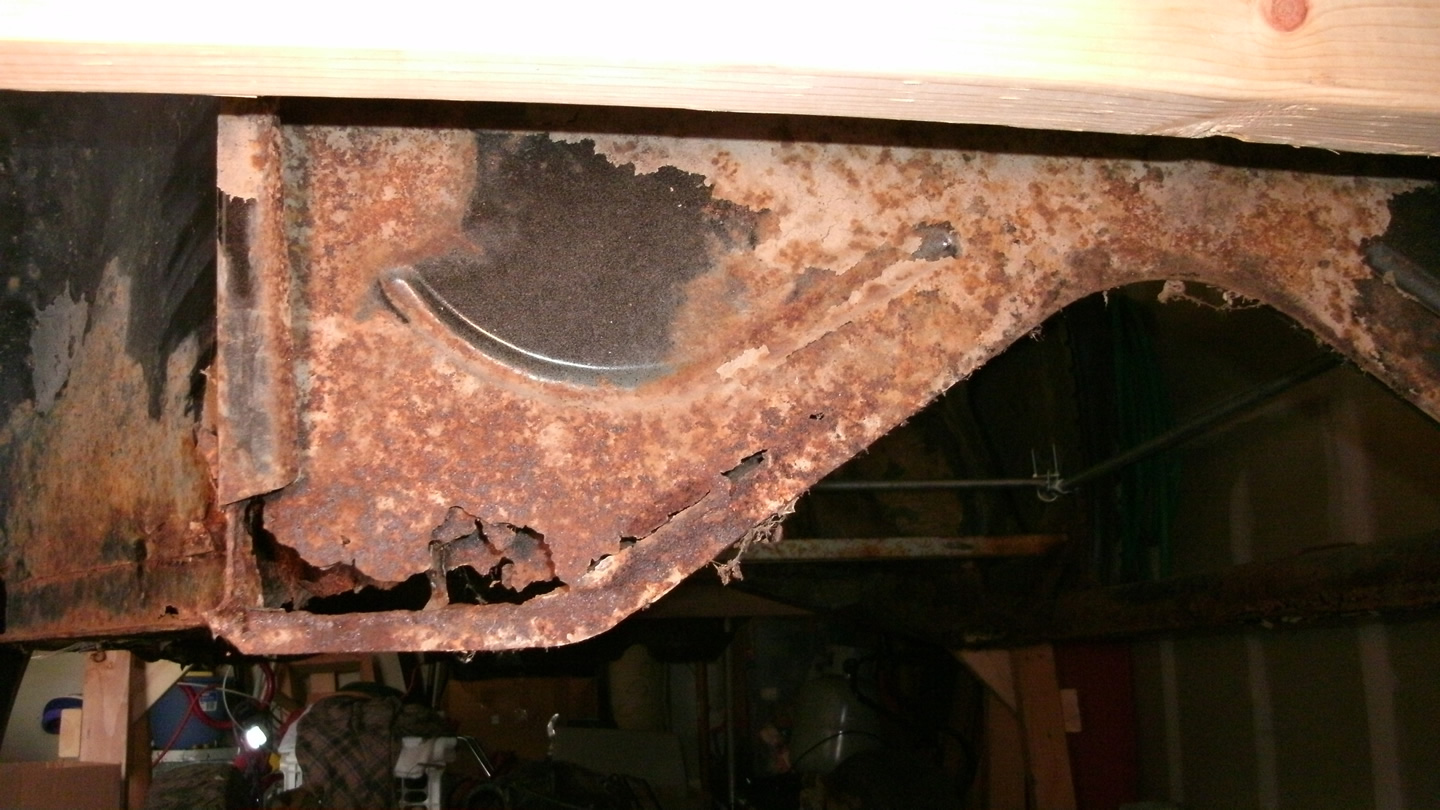
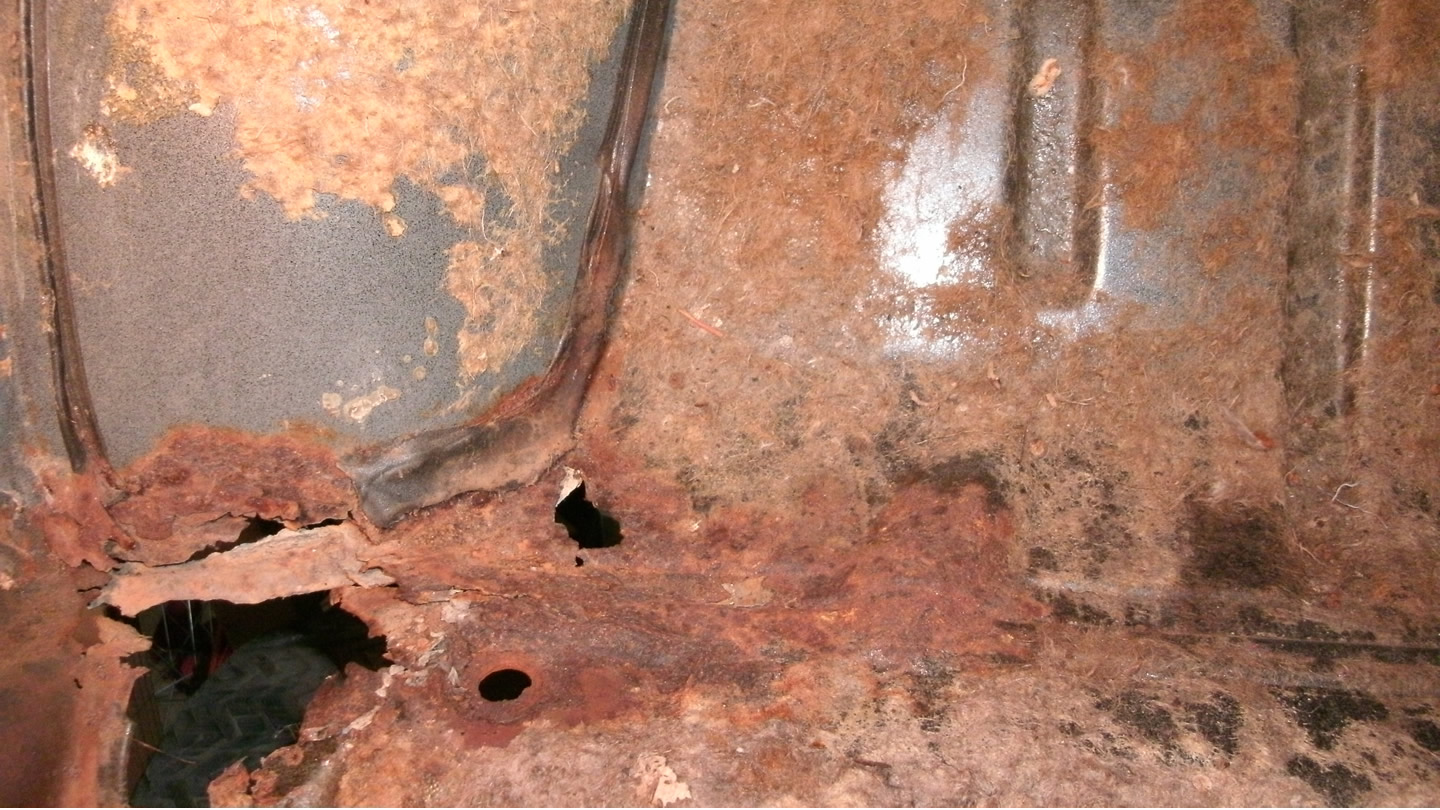
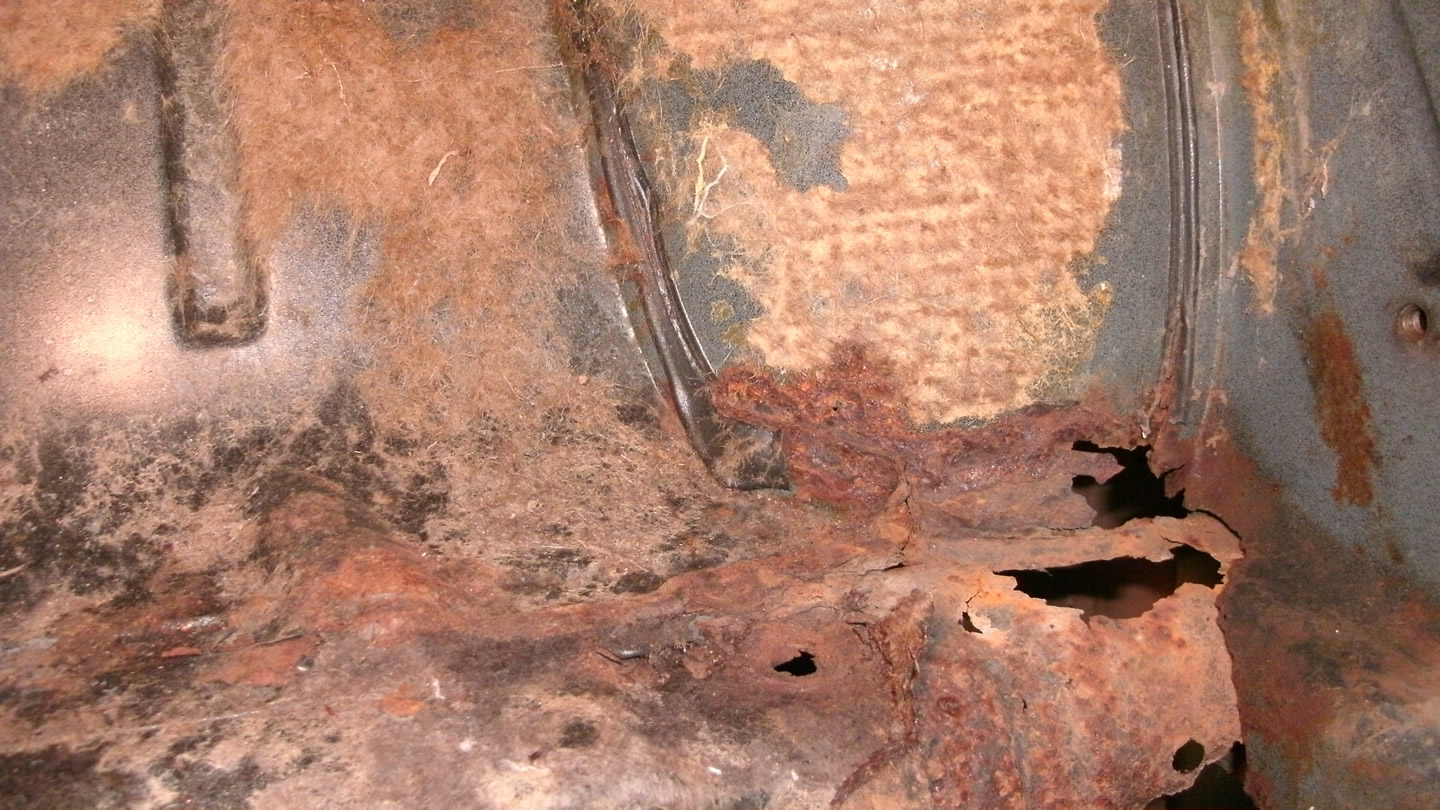
Front firewall: The front firewall is in fairly good shape. There are significant areas of rust on the bottom left and right corners where it attaches to the heater channels, but I should be able to graft in areas from new or donor parts. The areas that need to be replaced are really the only areas on the new aftermarket parts that are close to the original parts, so I may just buy a new panel and cut out the sections I need. Otherwise, the rest of the new firewall panels are significantly different than the originals and are missing the fuel valve hole, choke cable hole, and recessed stamping for the high beam switch and it would not be worth replacing the whole panel with a new one. Besides, there are many spot welds to drill out to remove the current one and just as many welds to make to install a new one.
 |
 |
 |
 |
A-Pillars: I know the passenger side A-pillar has rust damage because the lower door hinge would flex quite a bit as something inside the pillar was loose. I’m not really sure what condition the A-pillar is on the driver side and will not really know until I can take a good look inside of it. From the outside, it looks in pretty good shape. The correct replacement panels cost $120 each, so I will try to find a good donor panel first. Once I remove the heater channel on each side, I can see inside the pillars and get a better idea of the extent of the damage.
 |
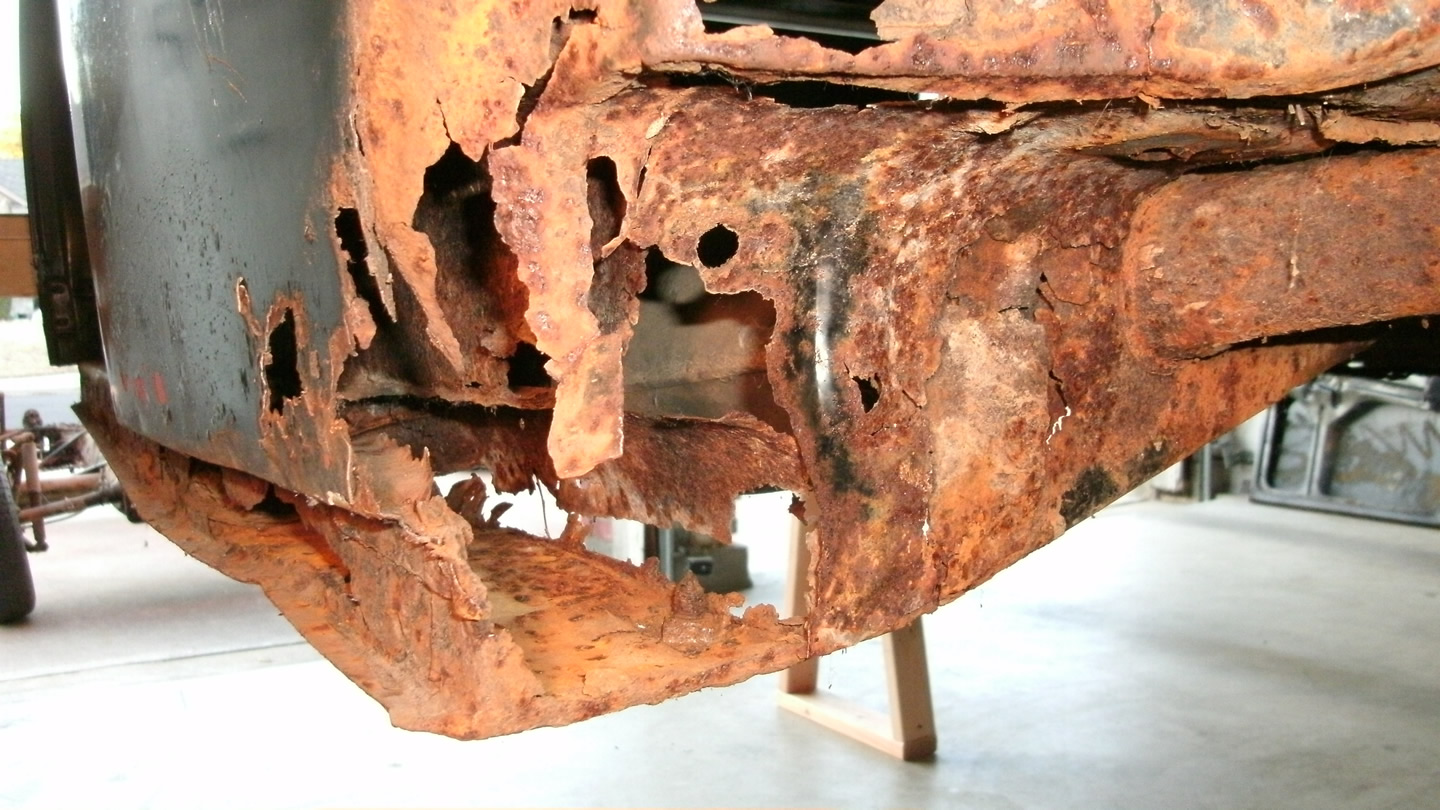
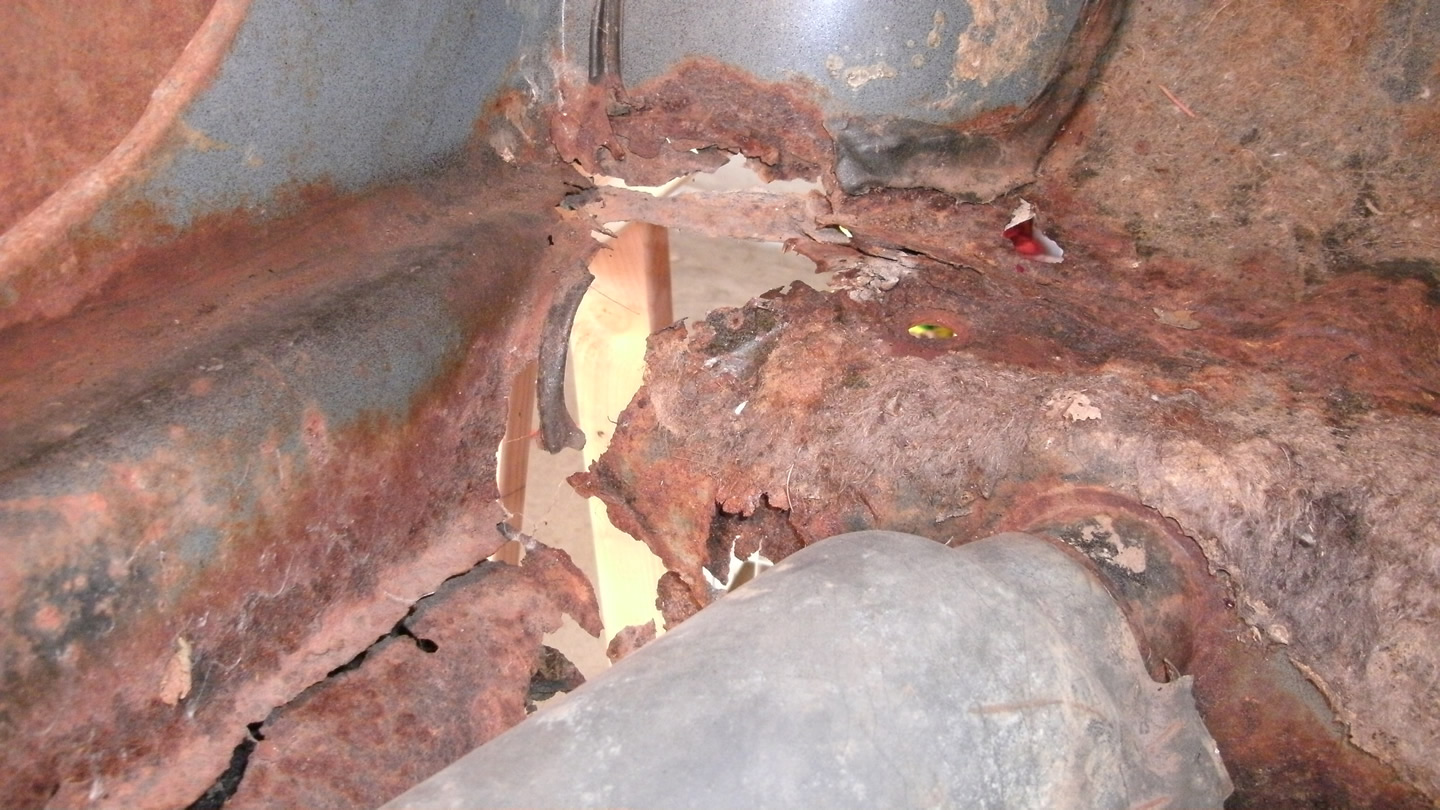
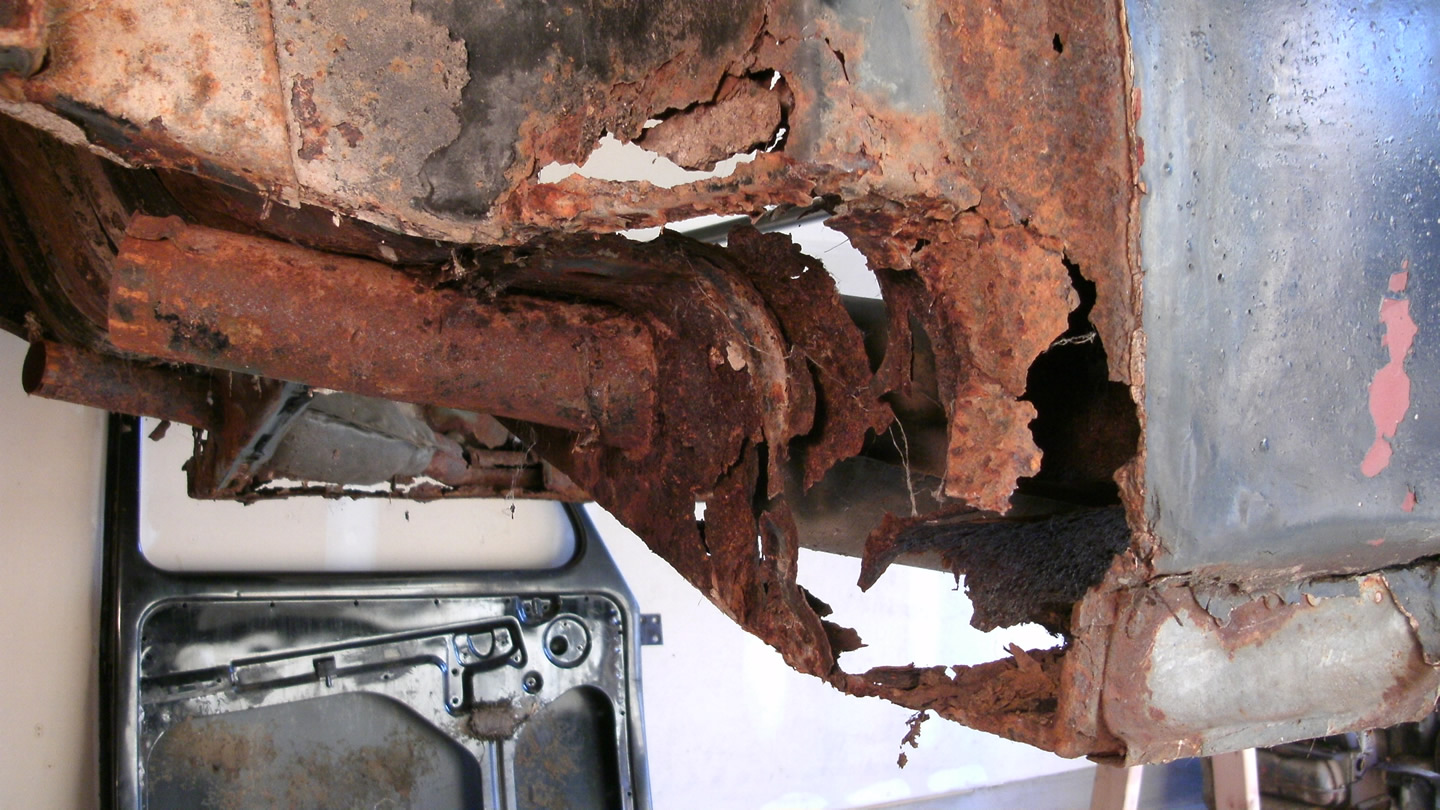
Rear Cross Members: The outside ends of the rear cross members are rusted, so I plan to only replace these areas. Aftermarket replacement panels are available and aren't too different than the originals, but I will look for donor panels because I intend to replace the ends of panels just past the heater tubes and want the tubes to match the originals. It will also be less work if I can use matching donor parts as the heater tubes will already be welded to the panels. With new panels, I have to move the tubes and weld them on.
 |
 |
 |
 |
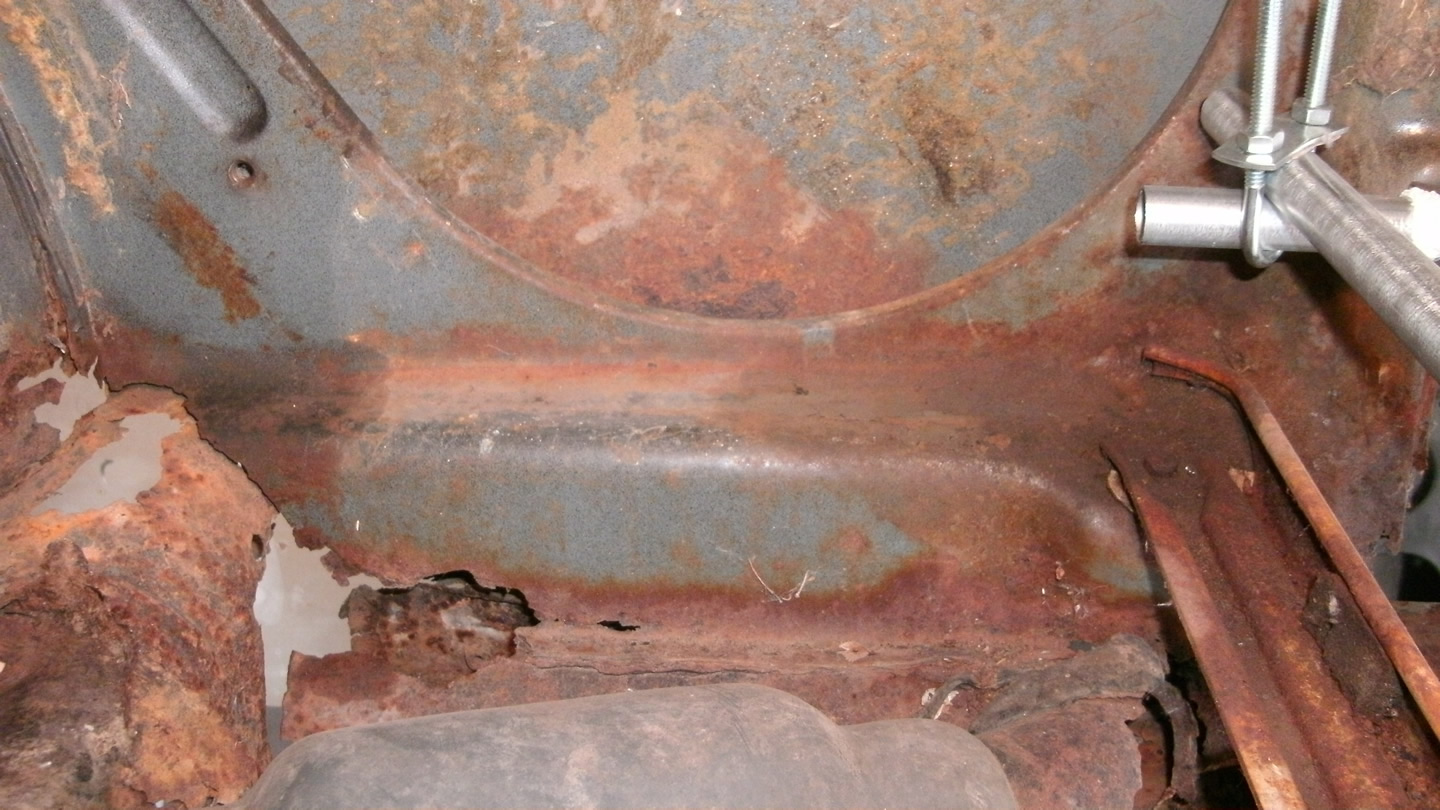
Luggage Shelf: The luggage shelf is also in fairly good condition, except for rust on the very bottom left and right corners where they attach to the rear cross members and rear wheelhouses. I will look for a donor panel to cut pieces out for replacement. I did find a supplier that sells a donor clip with the entire luggage shelf with the rear cross members as well. That may be an option that will provide panel grafts for both.
 |
 |
 |
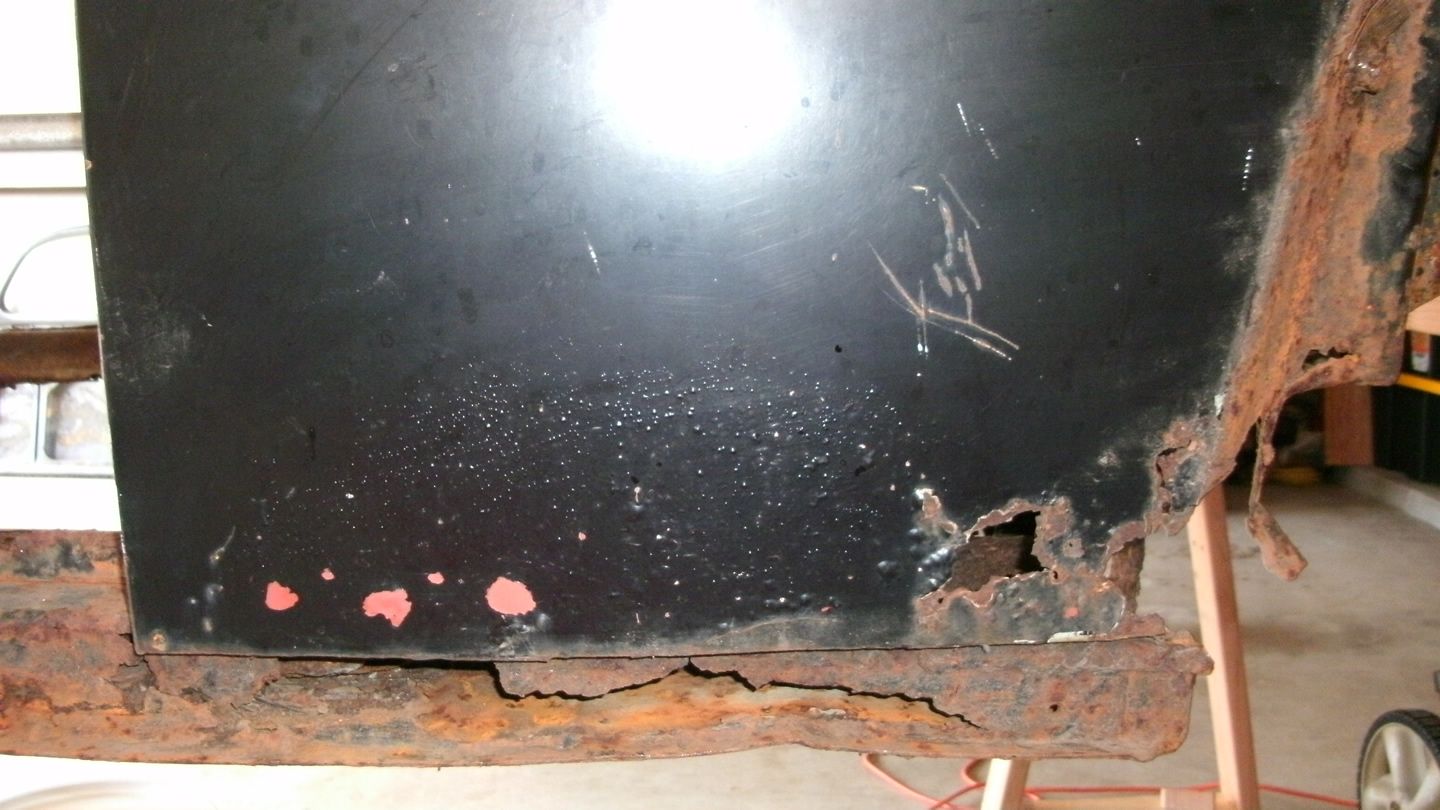
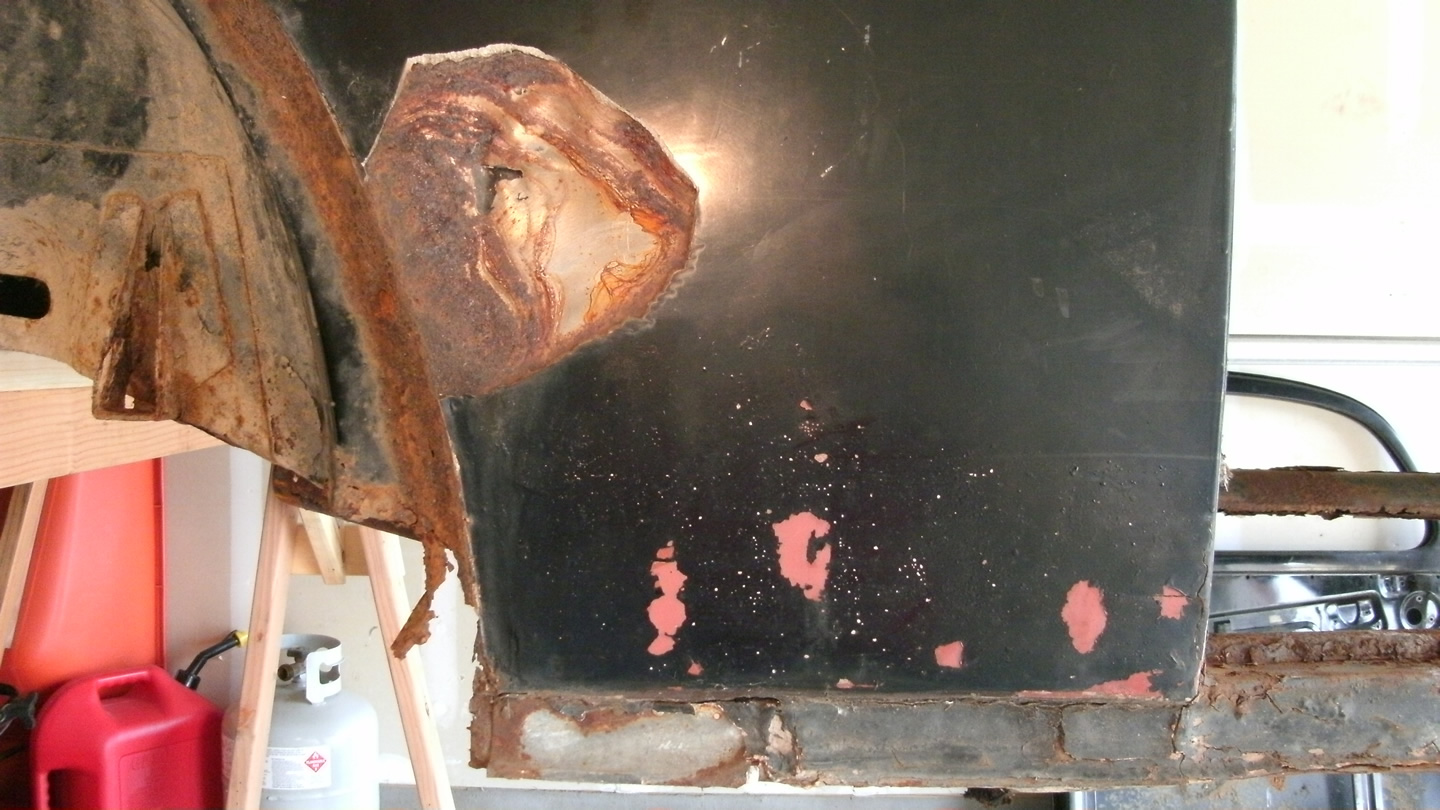
Rear Quarter Panels: The bottoms of both rear quarter panels are heavily rust-damaged. In fact, both the inner and outer portions of the panels will need to be replaced. Since the heater channels that I am purchasing will include the rear quarter panels, I will cut sections from the donor panels to replace the damaged areas. The passenger side panel has a large dent in it that is covered with body filler. I will likely replace the panel past the point of this dent.
 |
 |
 |
 |
Front Apron: The front apron is in usable shape, but will need some repair. The overrider holes are mangled a bit from when the bumper was damaged. As long as there isn’t any rust damage on the underside of it, I may just weld in a patch where the overrider holes are and re-cut the holes. The spare tire tray that attaches to the bottom of the front apron will have to be replaced. I will likely use a new panel as they are close enough to modify to be like the original panels and they are inexpensive.
 |
 |
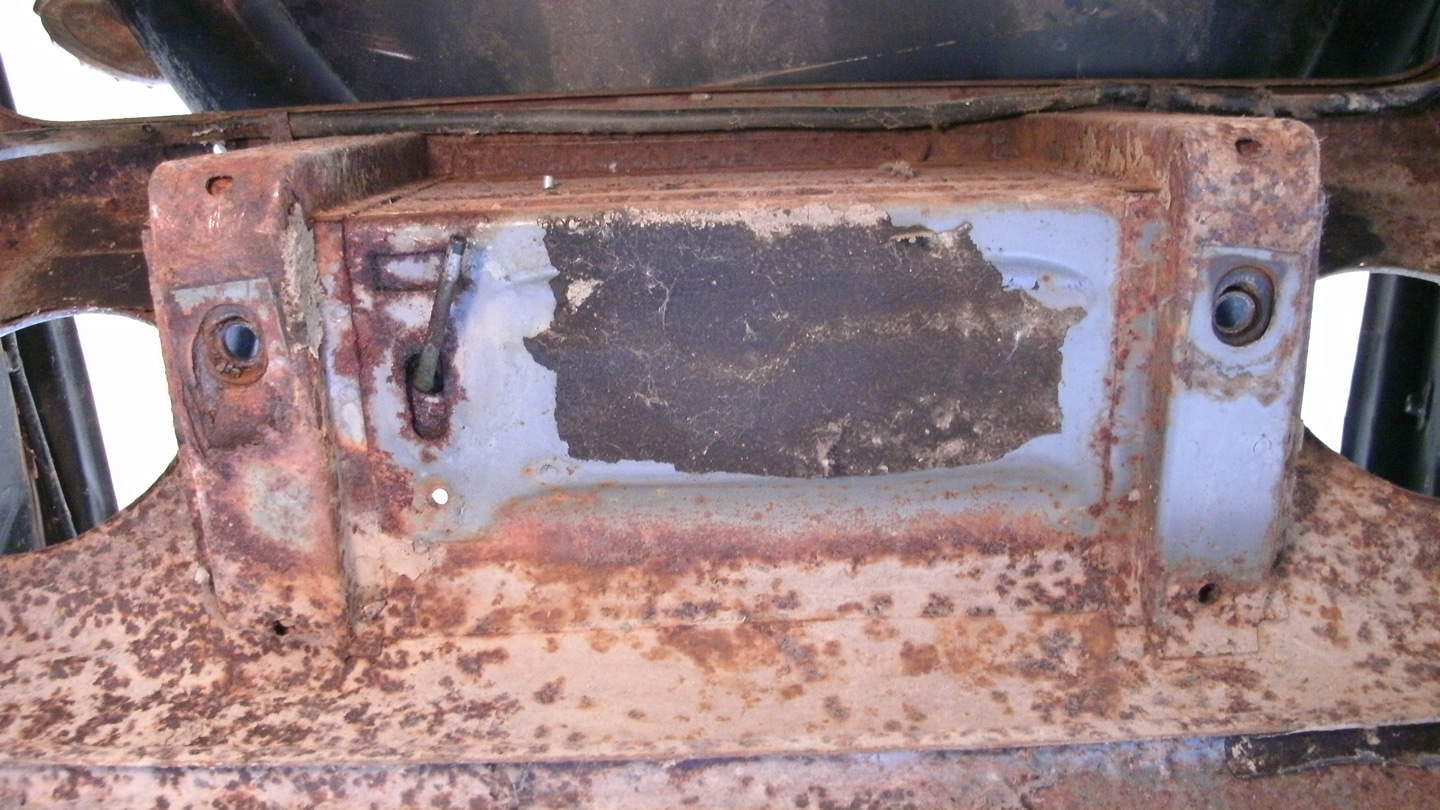
VIN Plate\Brake Fluid Reservoir Well: The VIN plate\brake fluid reservoir well has some significant rust, namely under where the reservoir is mounted and on the front mounting bracket that mounts the body to the front axle. This panel will need to be replaced. Since aftermarket parts are not available, I will need to find a donor part or try to fabricate parts, which would be very difficult to do. Brake fluid is a great paint remover, so an area like this that would normally be dry and safe from moisture, was soon bare and vulnerable to rust. Because of this, it suffered quite a bit of errosion and pitting.
 |
 |
 |
 |
Rear Apron: The rear apron is pretty banged up. The bottom of the panel is bent upward on one side and there has been some questionable body work done on it at some point. Apparently, to get the bottom corners to match the rear fenders, someone beat in the corners and then filled them in with body filler. The underside has a lot of surface rust, so I may have to replace the bottom portion of the apron with either a new or donor panel. The bottom portion of a new panel, from the weather seal down, should be fairly close to the original, but a donor panel would be preferable, but perhaps harder to find.
 |
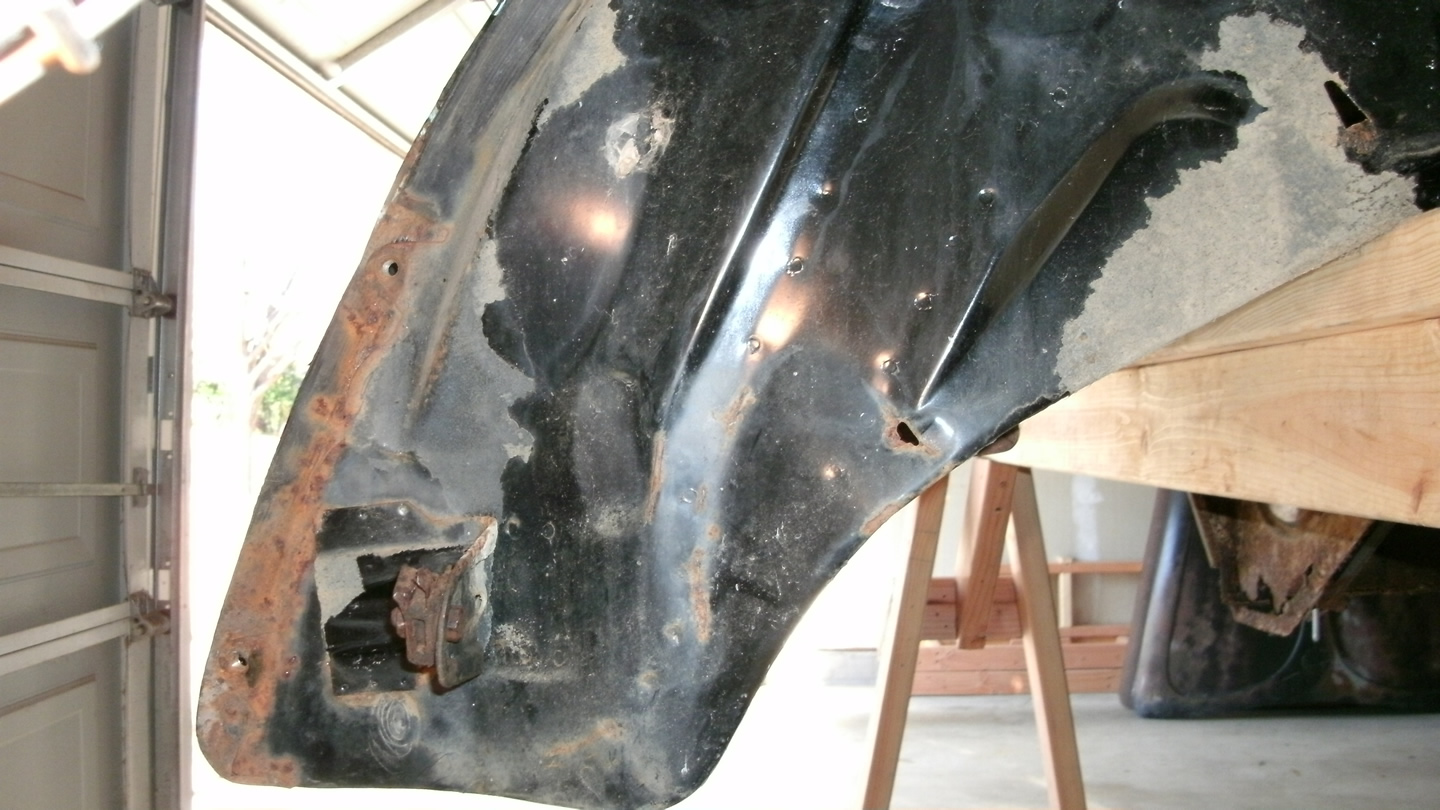
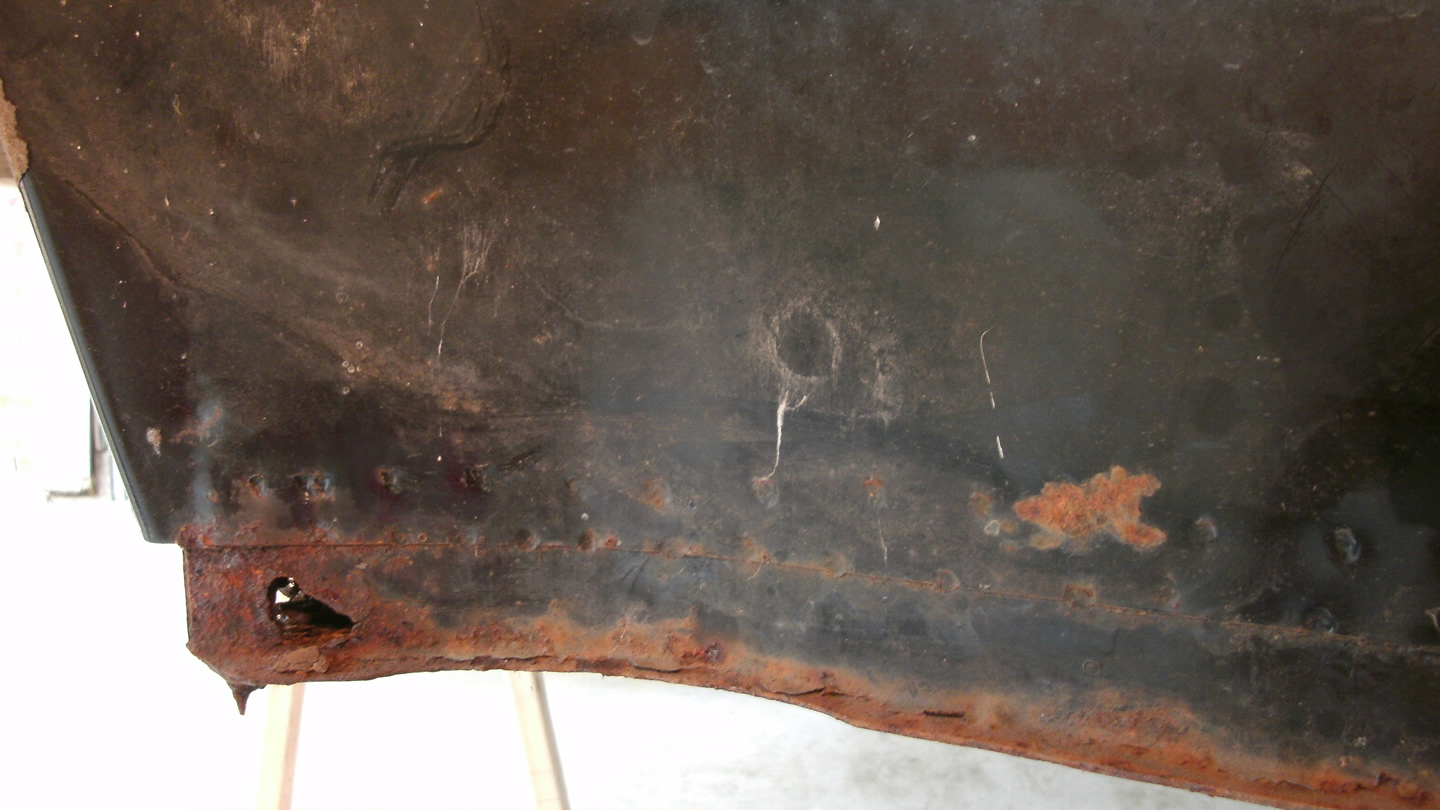
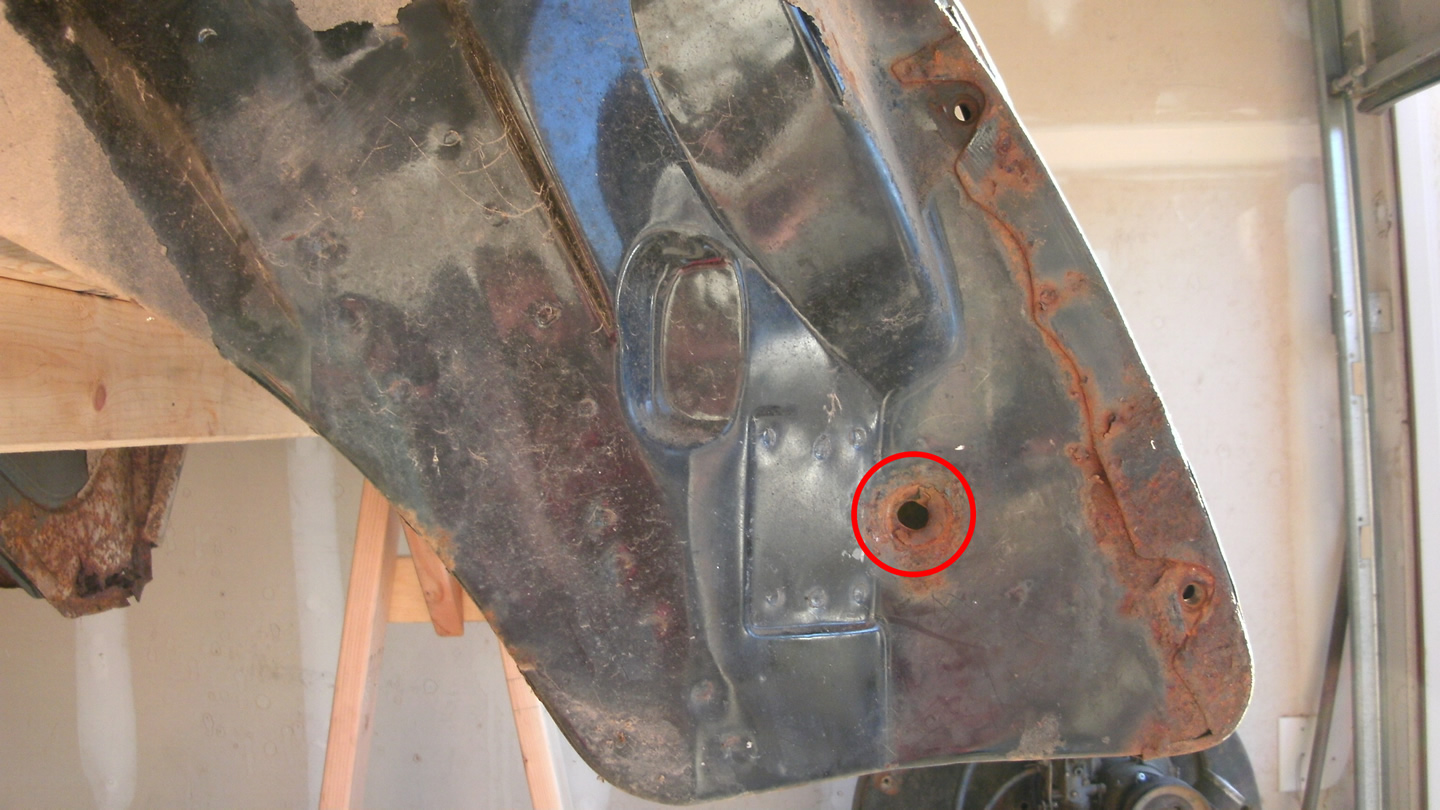
Front Wheelhouses: The front wheelhouses are in good shape except for the areas where they attach to the very front of the heater channels and also at the bottom corners of the front firewall. This area on both sides will need portions of a panel grafted in where the metal is rusted. I will use new panels for this. The rest of the front wheelhouses are fairly rust free. I do know that I have to weld one side of the horn bracket because I broke a spot weld trying to remove the horn. I also have a hole that needs to be plugged on the passenger side where a previous owner drilled through it to run a bolt to hold the bumper bracket. Apparently, the bumper mount, which is located inside the spare tire well, was stripped out and rather than repair the threads in the mount, they just drilled a hole through the mount and wheelhouse and ran a bolt through to secure the bumper bracket to the mount. I will either replace the mount or remove it, weld a nut on the back side, and re-weld it.
 |
 |
 |
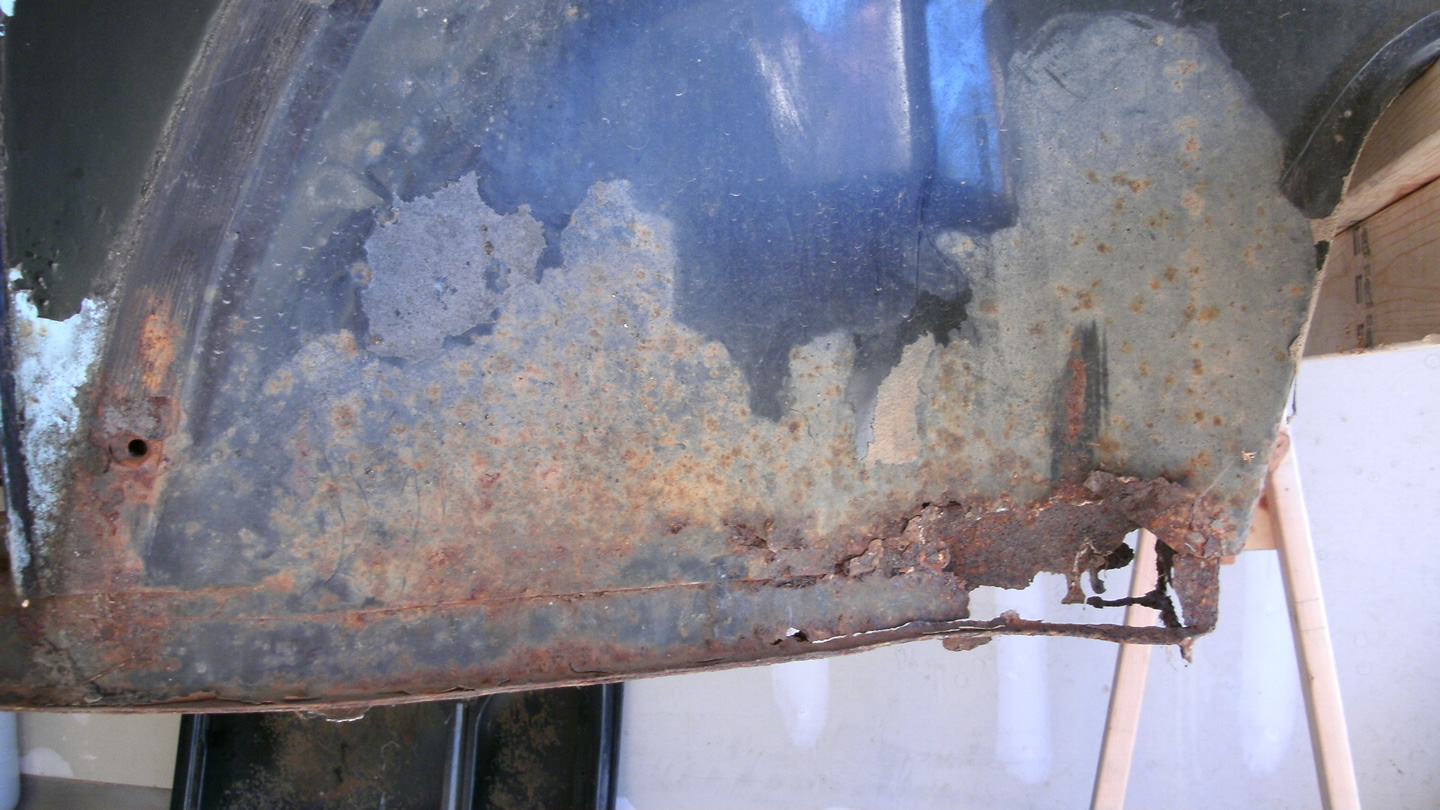 |
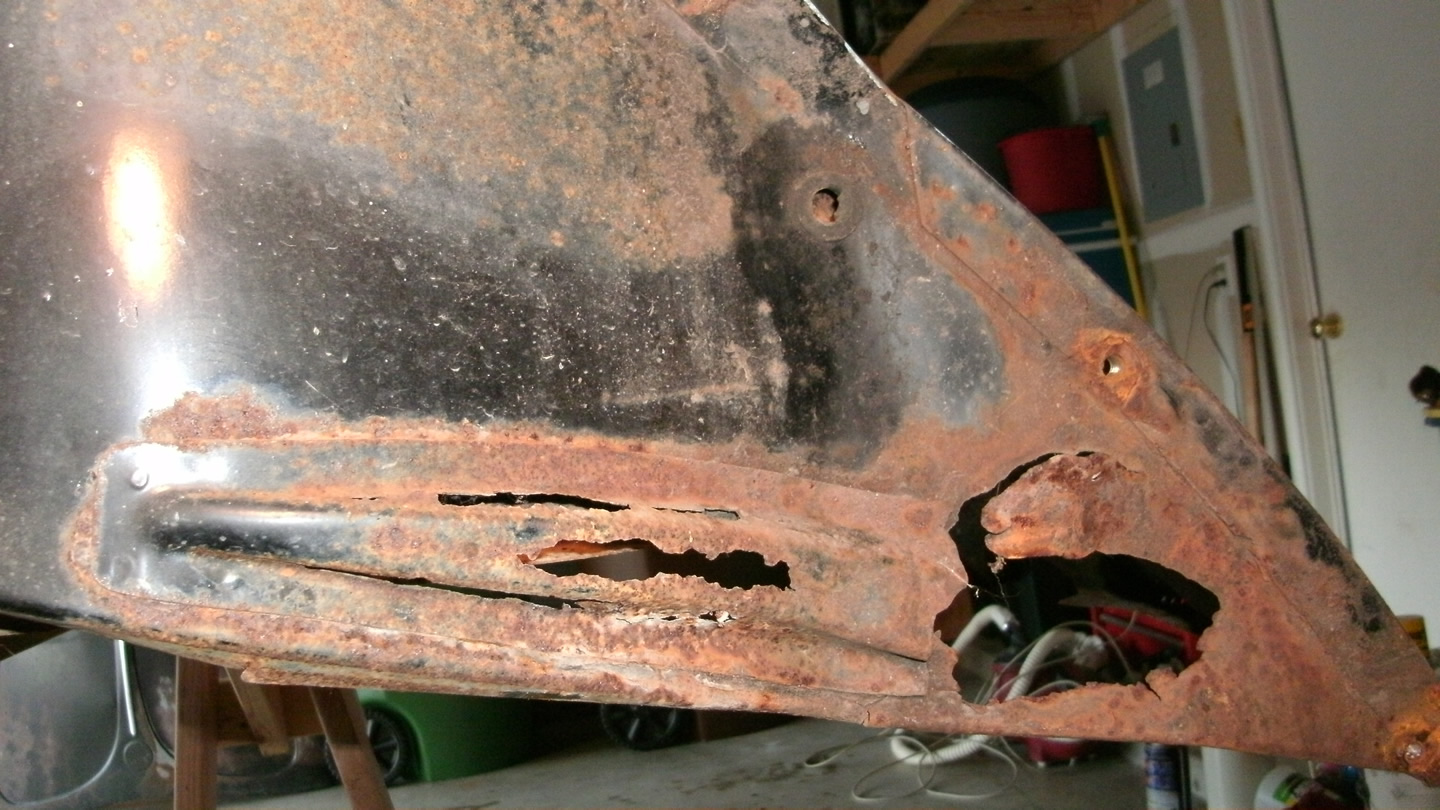
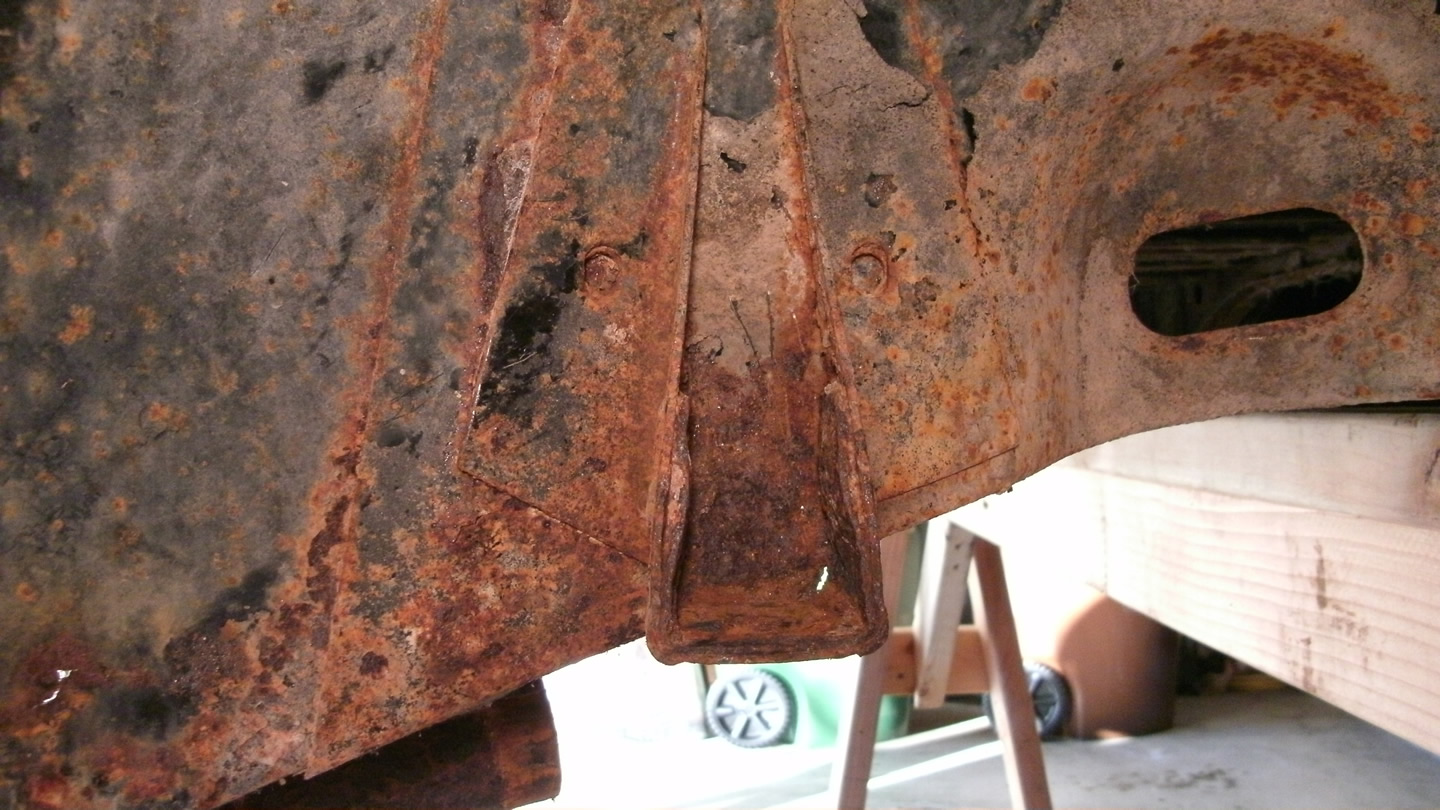
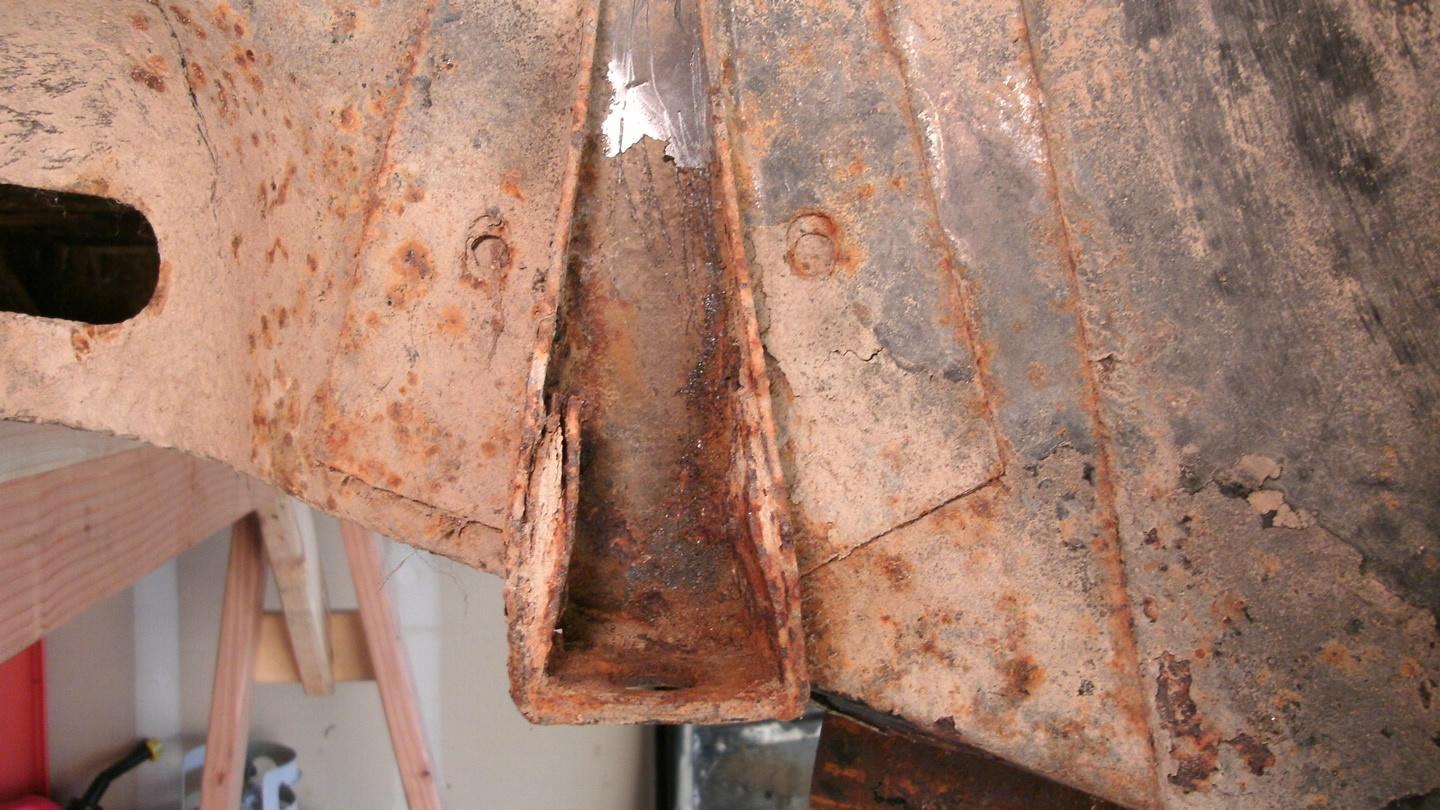
Rear Wheelhouses: Both of the rear wheelhouses need quite a bit of work. Both will need a large section of the very rear of the wheelhouses replaced. These areas include the bumper mount and there is a lot of rust damage there. Since the available aftermarket panels are similar to the original parts, I will use these to make the repairs. Both sides also have quite a bit of rust on the brackets that bolt to the shock towers on the chassis, so I would like to at least replace the brackets with donor or new parts. Also, both sides have a good deal of rust damage on the front of the wheelhouses. The available aftermarkets panels for this area also include the shock tower brackets, so these panels will take care of both issues.
 |
 |
 |
 |
 |
 |
There may be other areas that need rust repair, but these are currently my main areas of concern. There is surface rust throughout the body and I will not really know if there is significant damage until I start removing the rust. I want to get the major work done first, and will address the other areas after the structural work is completed. I’ll also have to tackle repairing and fitting the doors, front hood, and engine lid before getting to the cosmetic work.
There is also a great deal of work to be done to the chassis, such as replacing the floor pans and napoleon hat, which will need to be done alongside of the body repair. This work will be shown in a separate category named Chassis.
July 2011 Update, Donor Heater Channels
by Garage Weasel on Jul.20, 2011, under Body Work
Well, I haven’t done anything to the car at all since the middle of March. I’ve had time to work on it, but I haven’t had the money necessary to buy all the replacement and donor panels I need for the next step. It’s also been way too hot to do any work on it. It’s been unbearably hot in Central Texas this year! Once I have the money for the parts and tolerable weather, I will get back to it again.
 |
 |
 |
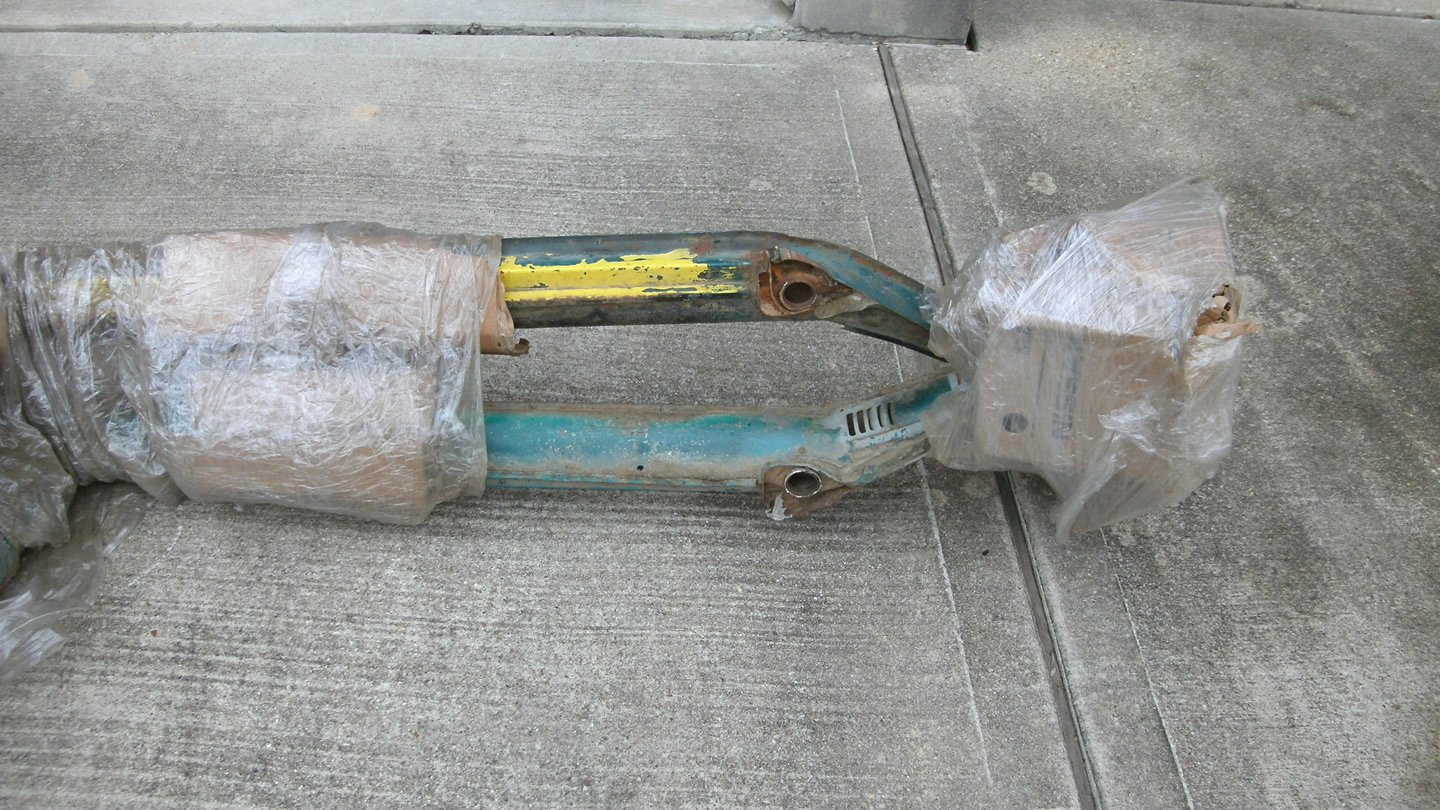 |
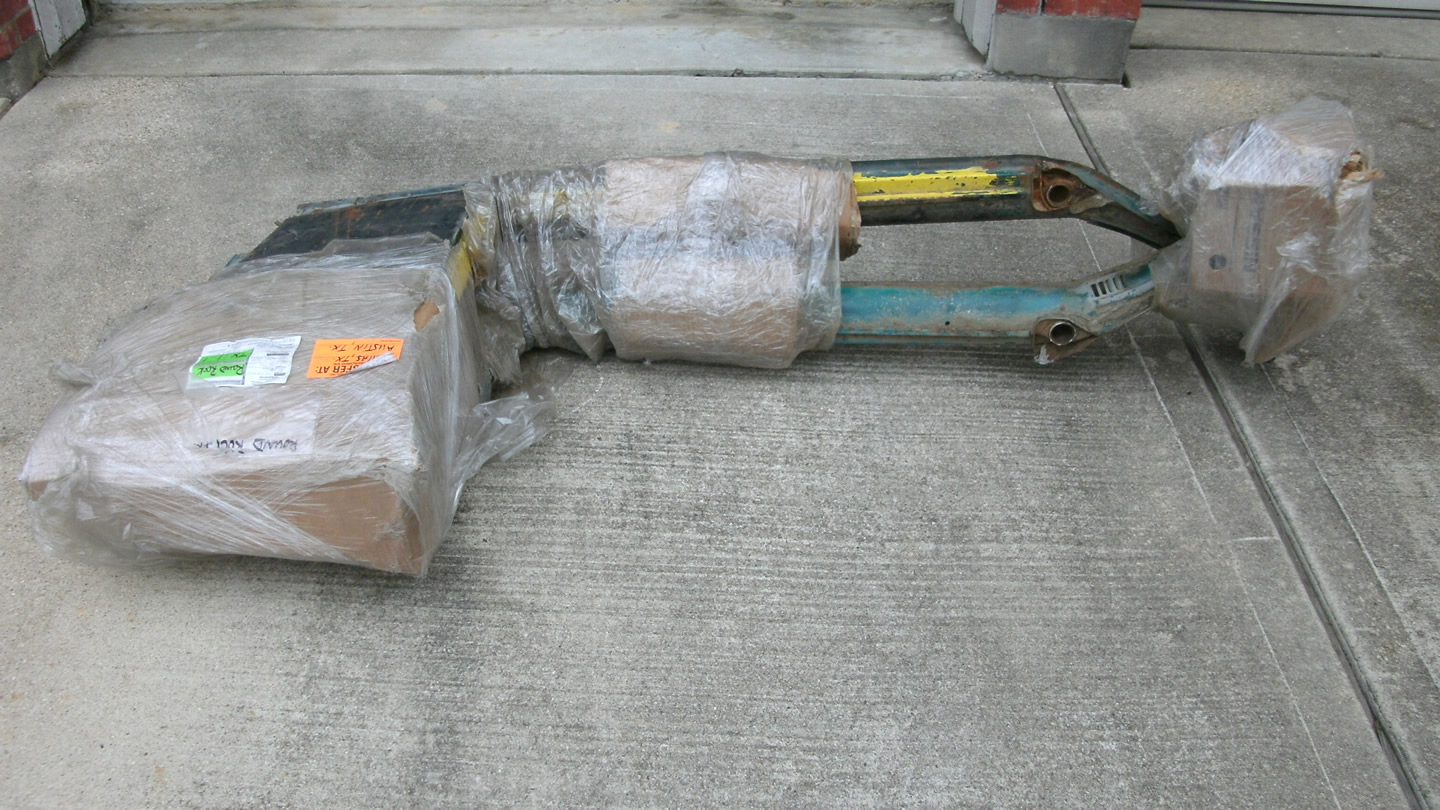
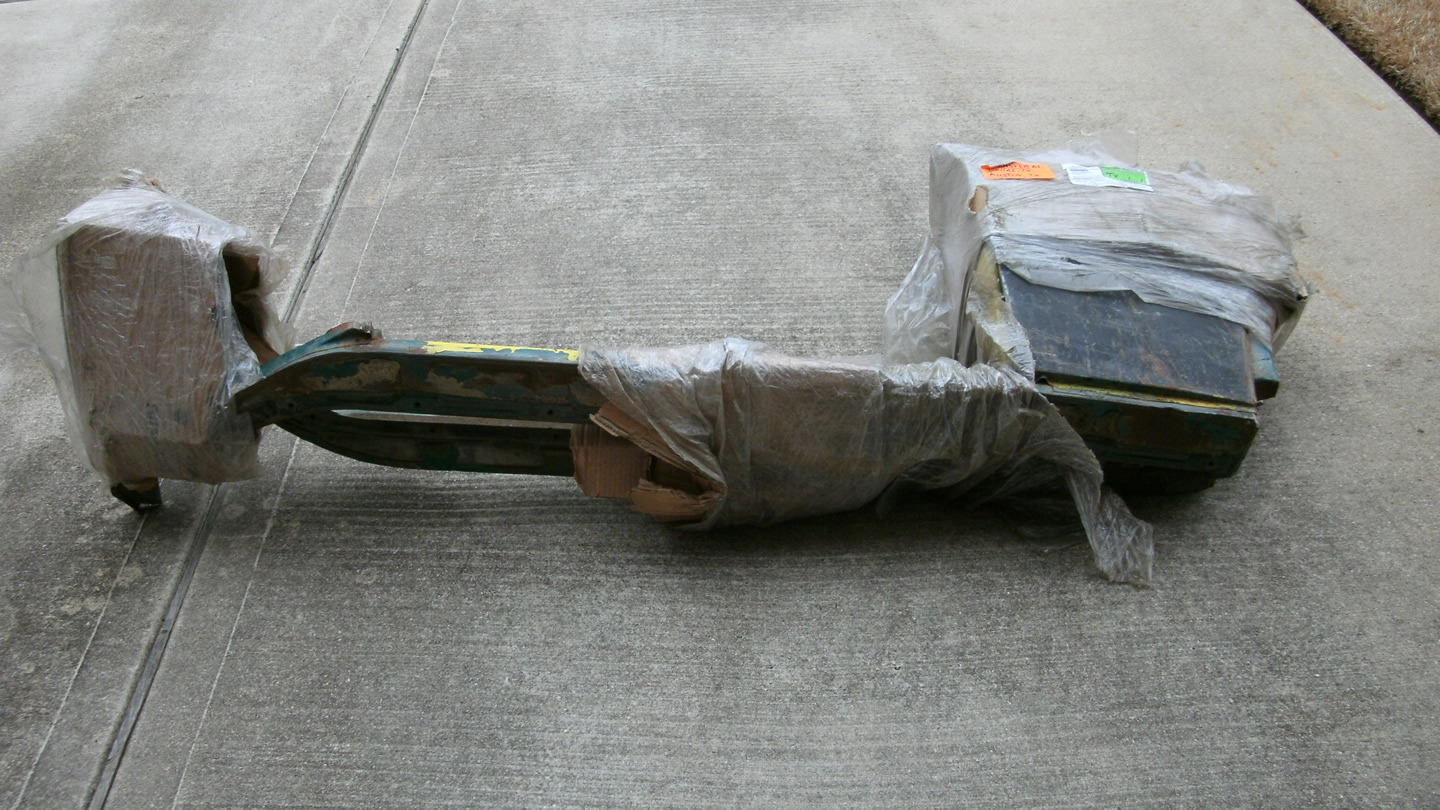
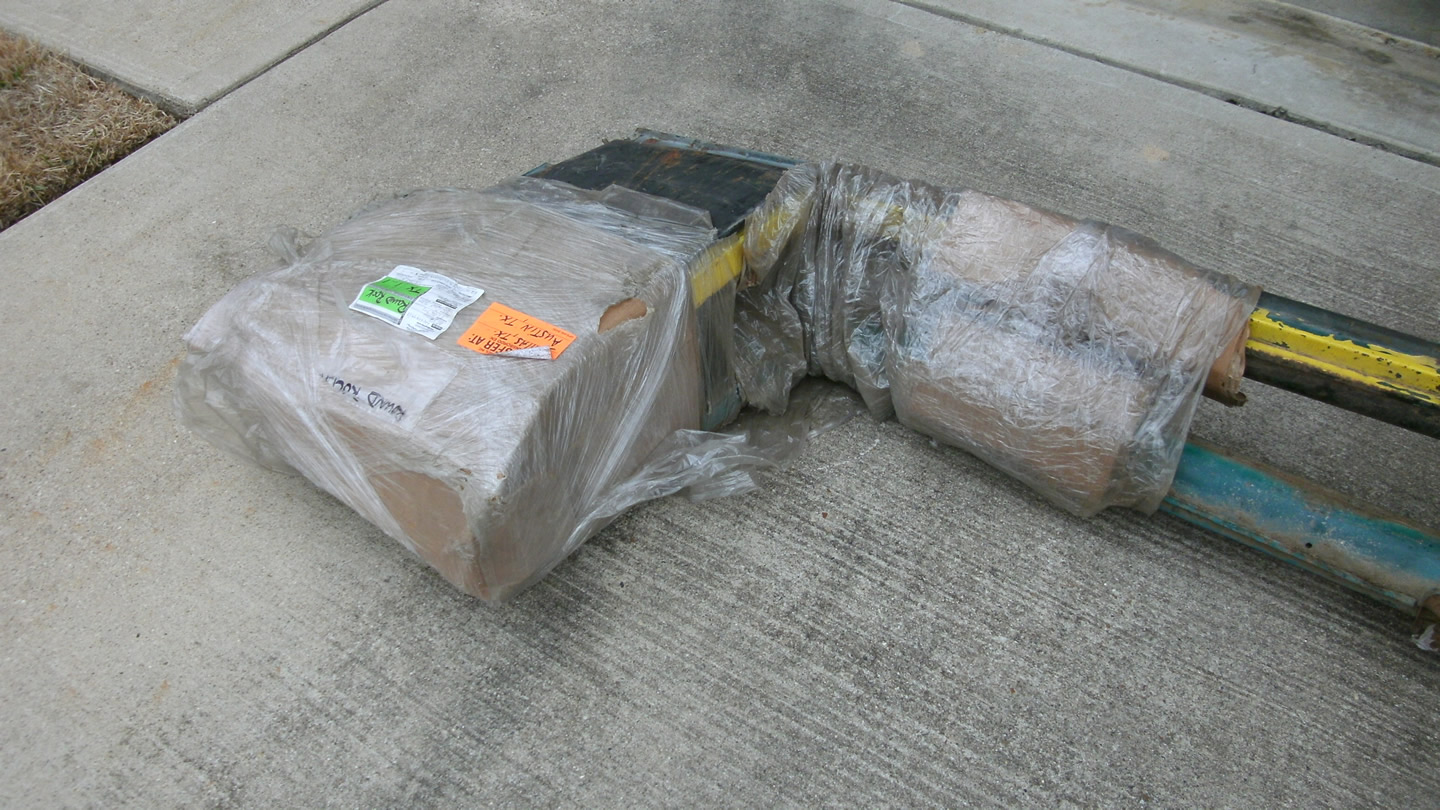
I did purchase donor heater channels from a guy in California and had them shipped via Greyhound bus to Texas. It’s a fairly inexpensive way to ship big, bulky items like this. I would, however, recommend that if you have anything shipped this way to have the person shipping it to you to thoroughly wrap and protect the item. My guy did a terrible job packaging my heater channels they got banged up more than they should have. There was also sharp metal sticking out of the packaging and a bus driver cut his hand (not seriously) unloading it at my local station. The cranky old lady that manages my station complained vigorously about the poor packaging. Being partially covered in cardboard and shrink wrap was not sufficient to protect it… and it was dangerous as well.
The heater channels I purchased included the rear quarter panels. I don’t know just what parts of the quarter panels I will use yet, but I do know that I will need the inner panels for sure. I thought I was getting a matched set of heater channels, but got a pair from two different model years. I think they are close enough to my model to fit well and only the driver side is newer. I think it is only a year or two newer as it has holes in it for the wiring harness, but the vent louvers still match. These should be much better replacements than the new ones available today.
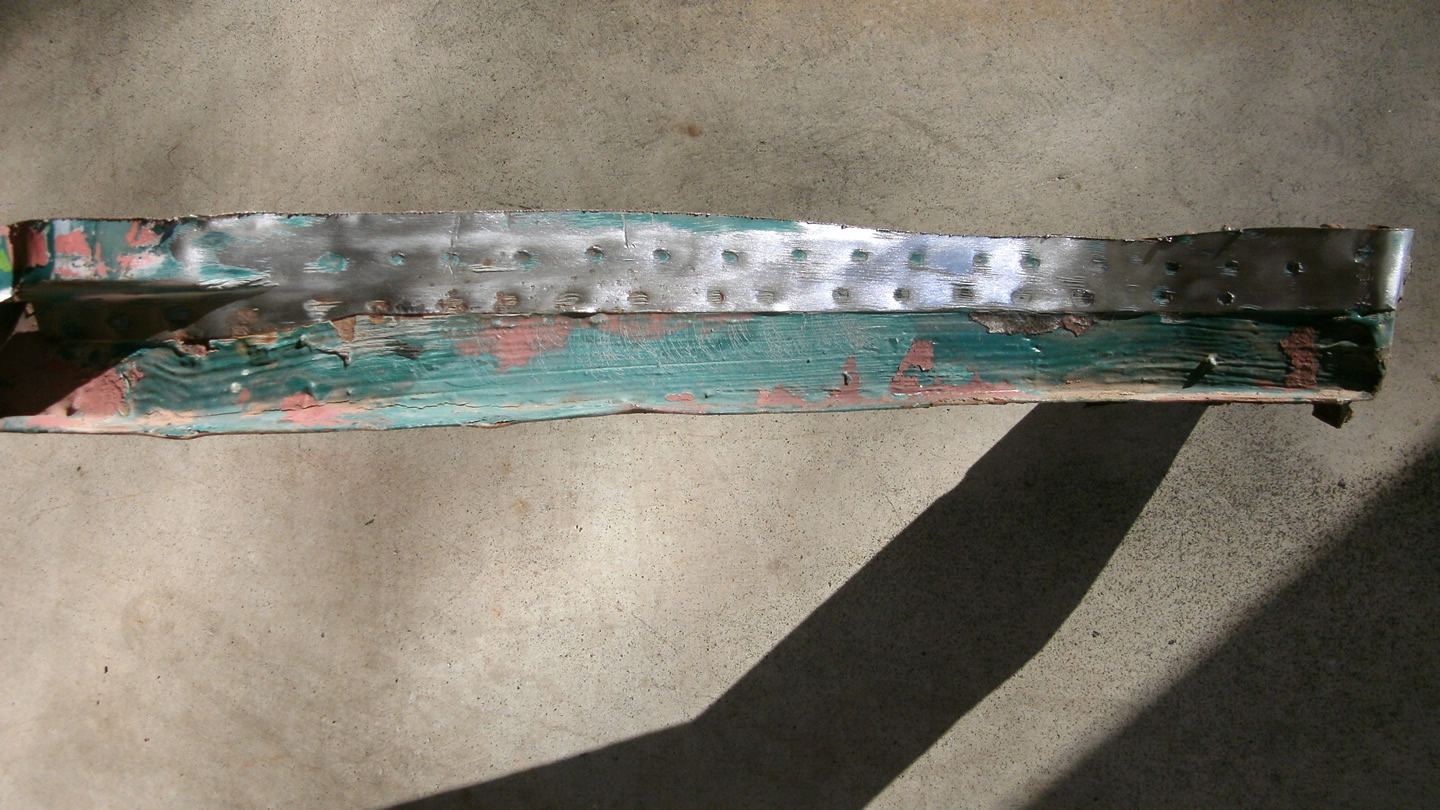
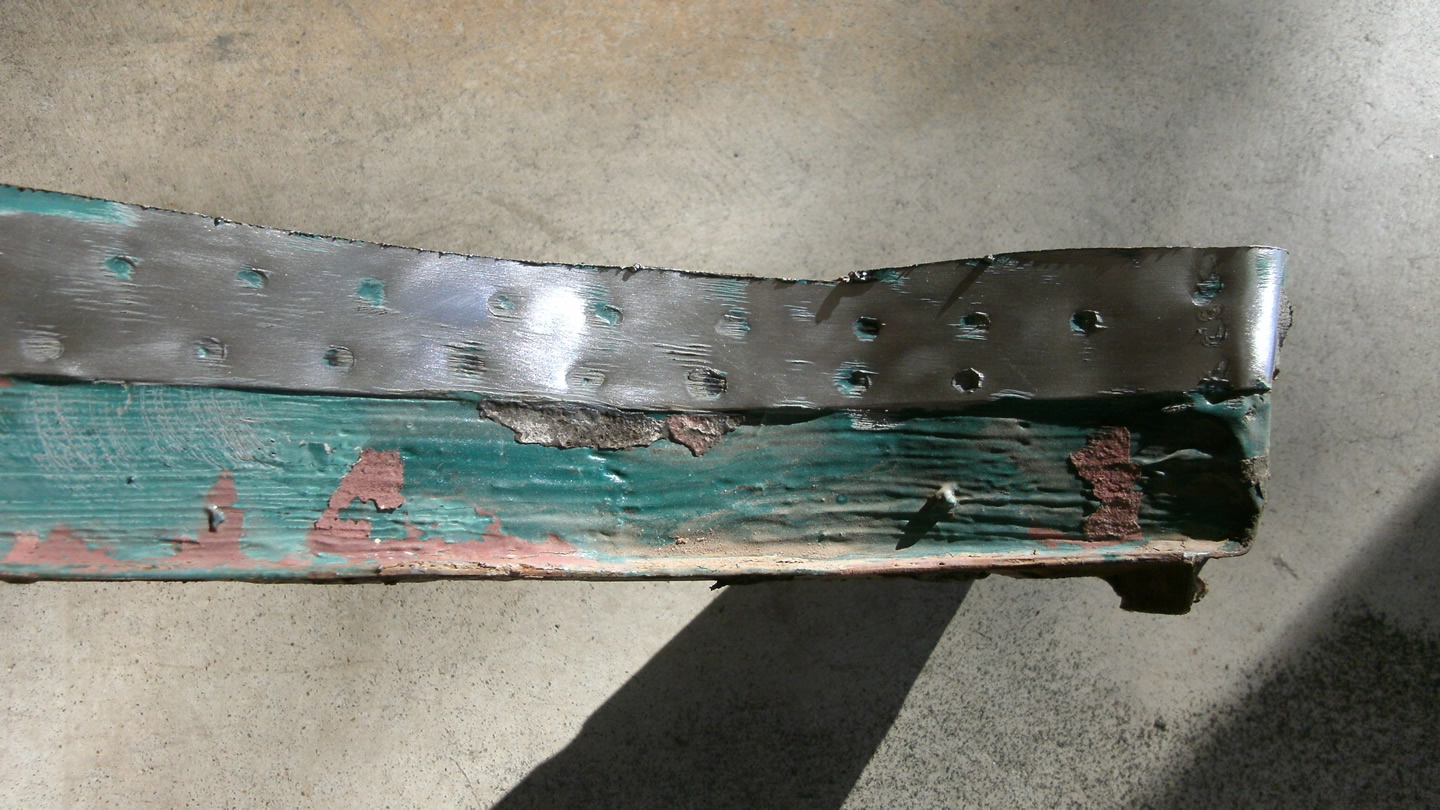
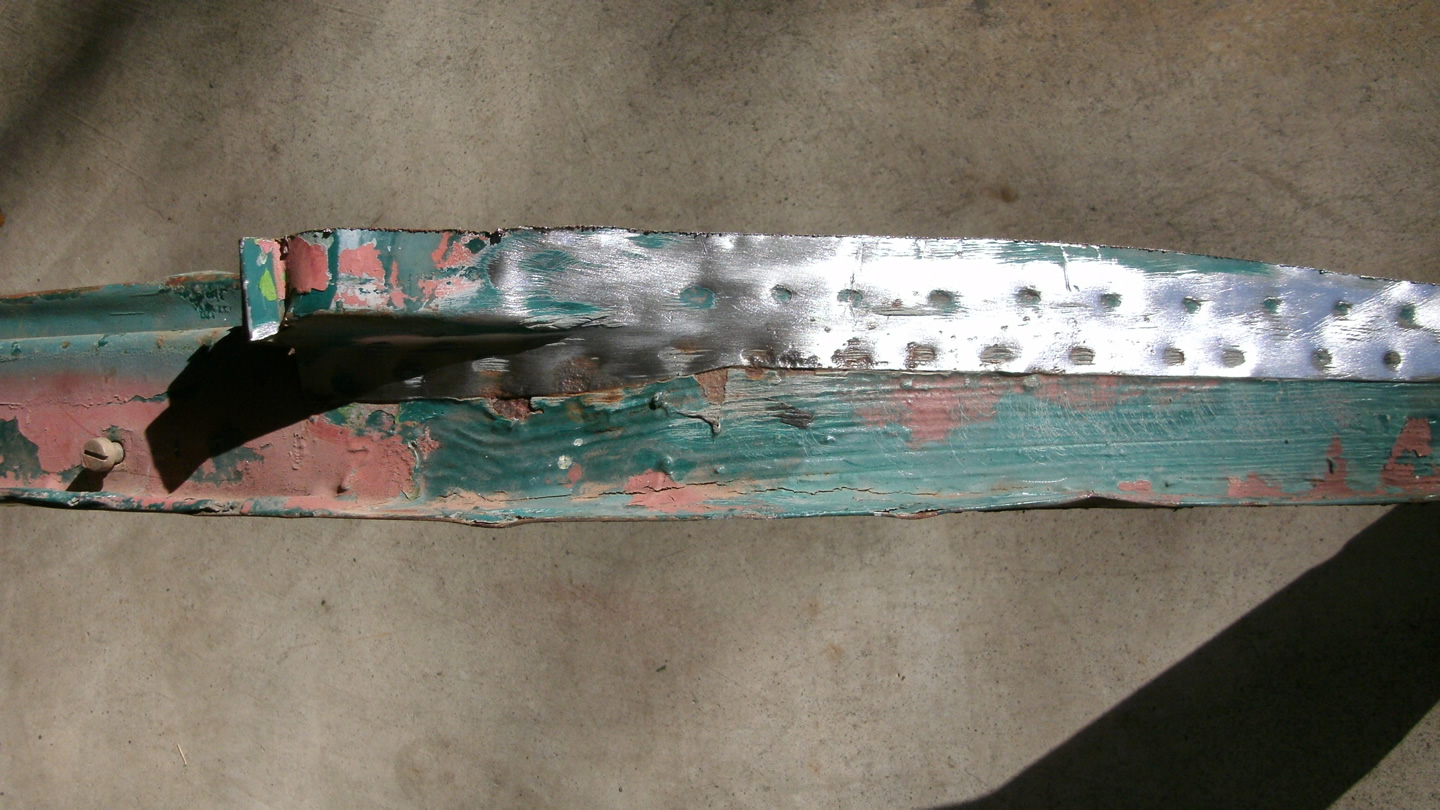
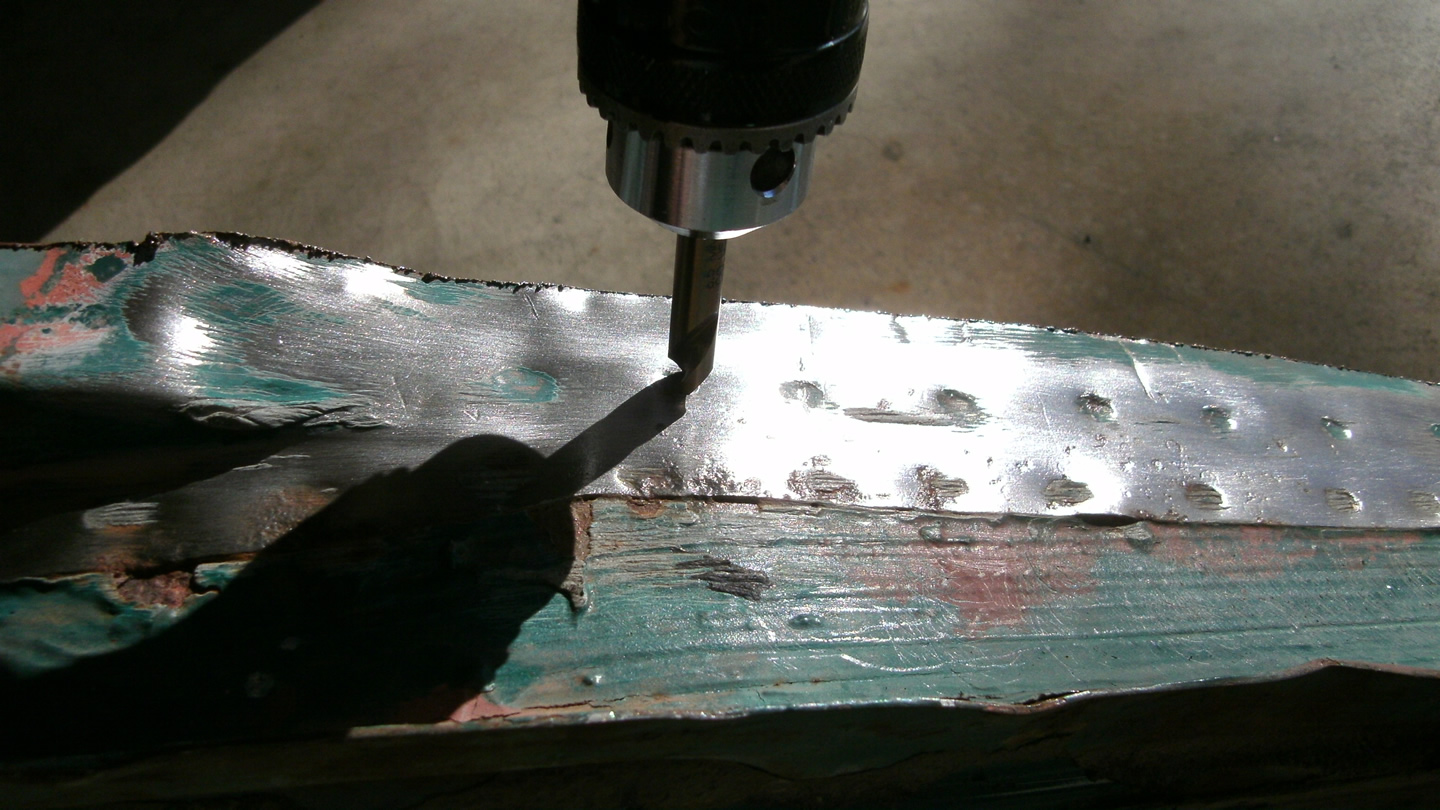
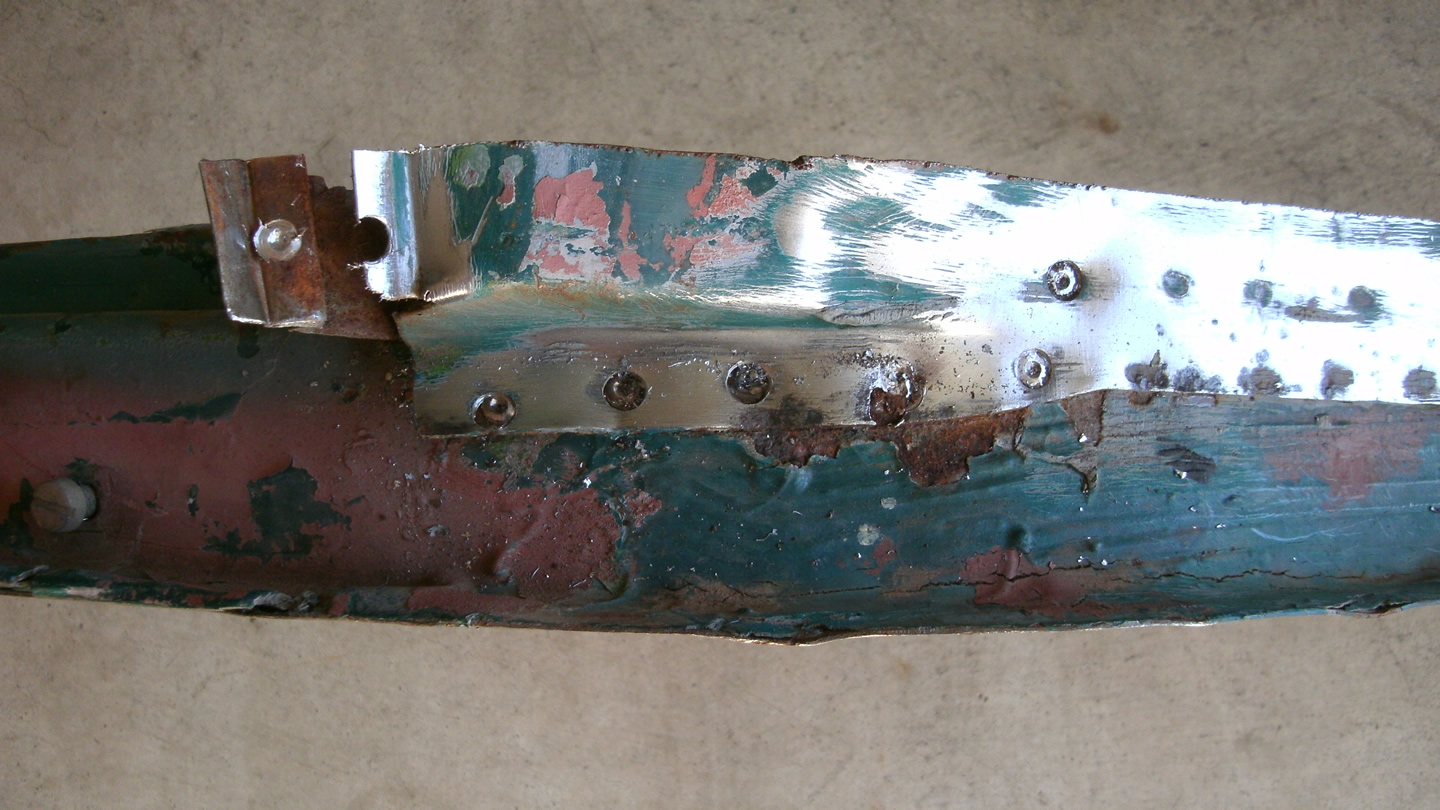
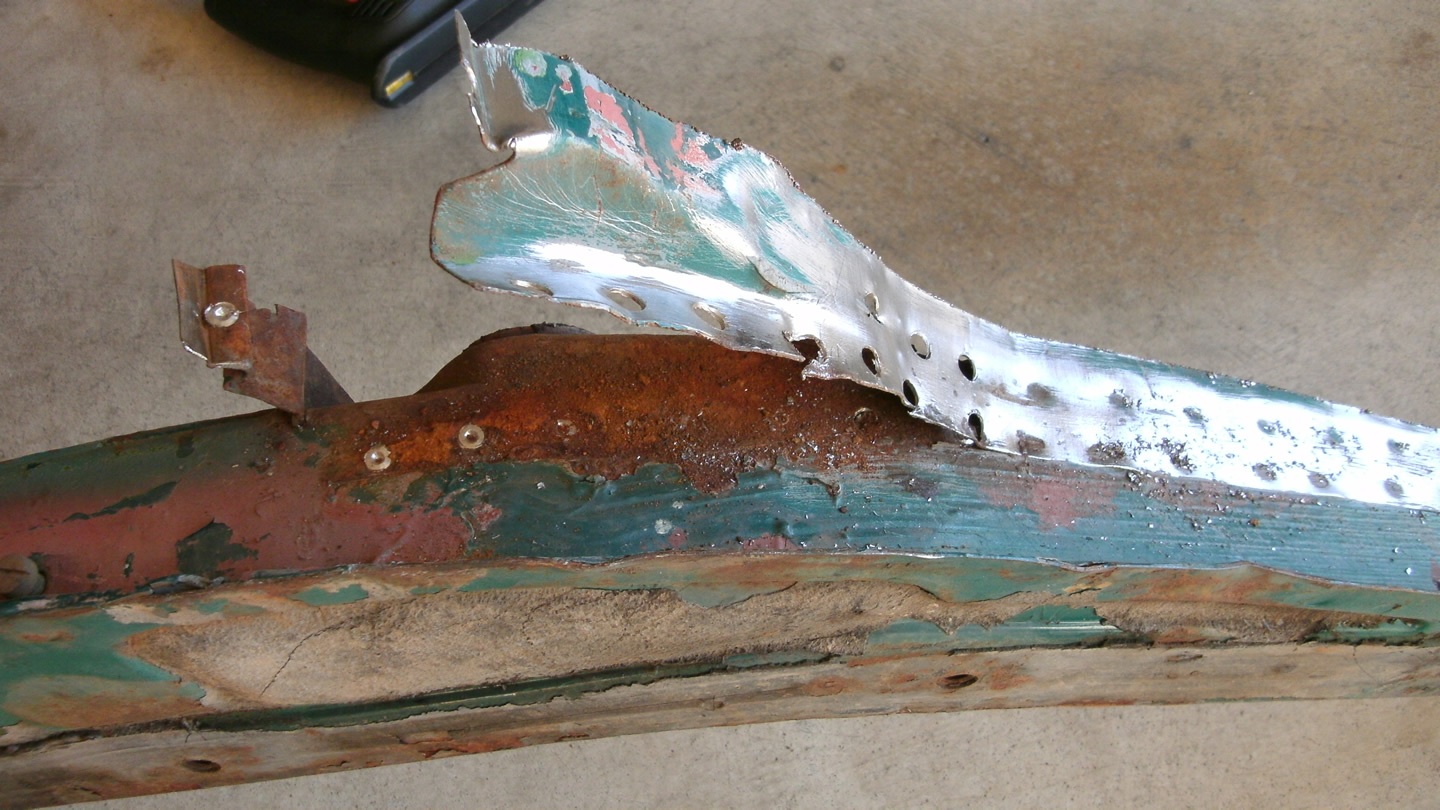
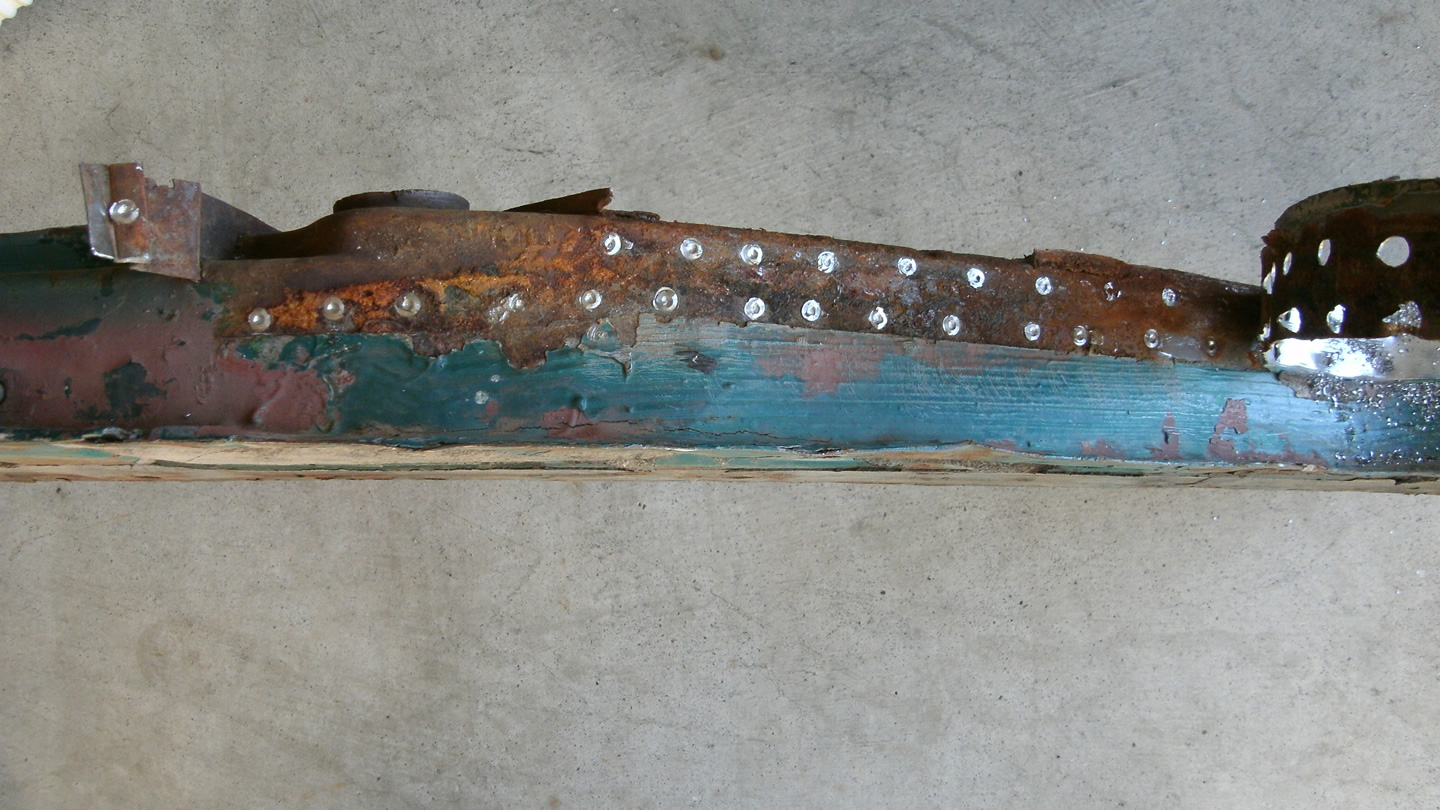
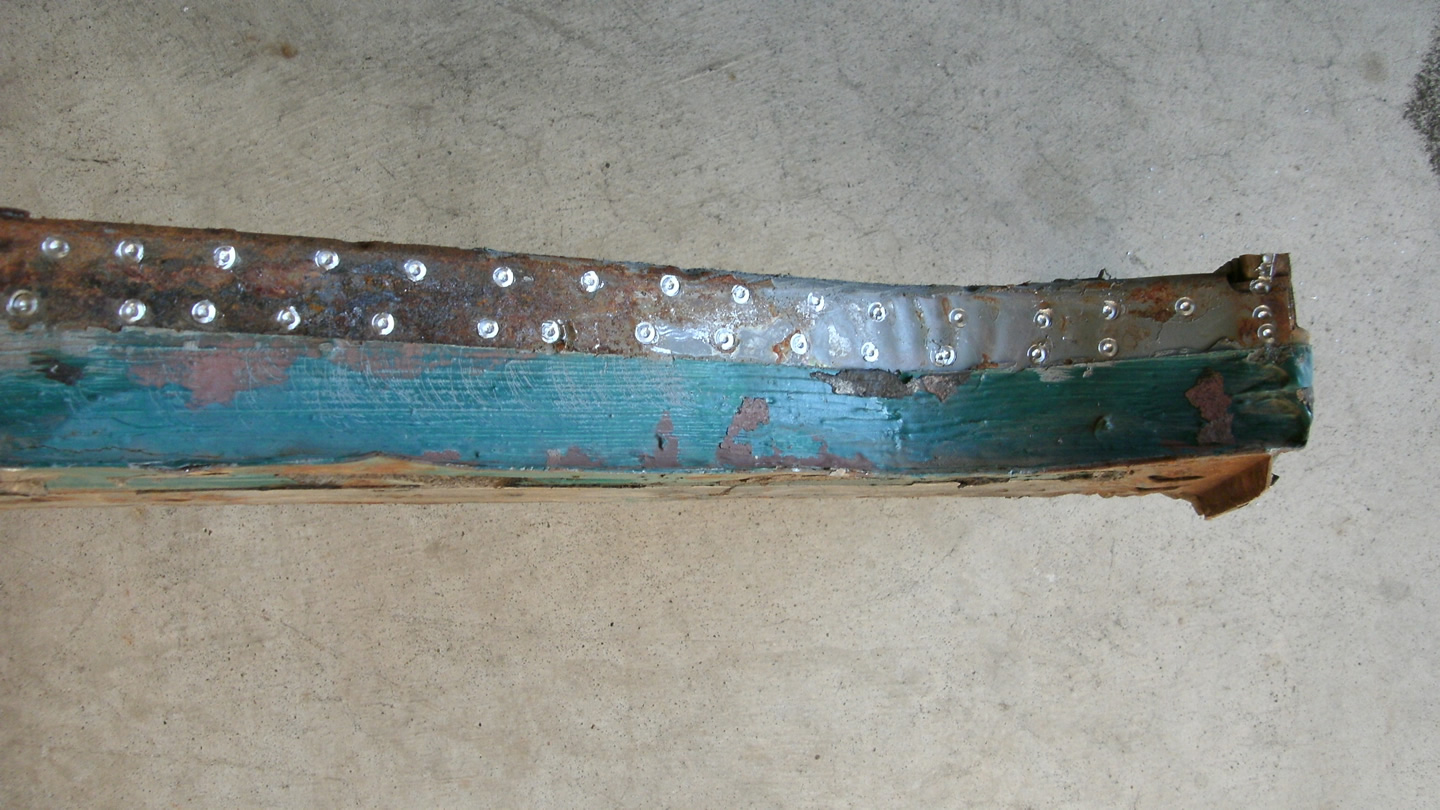
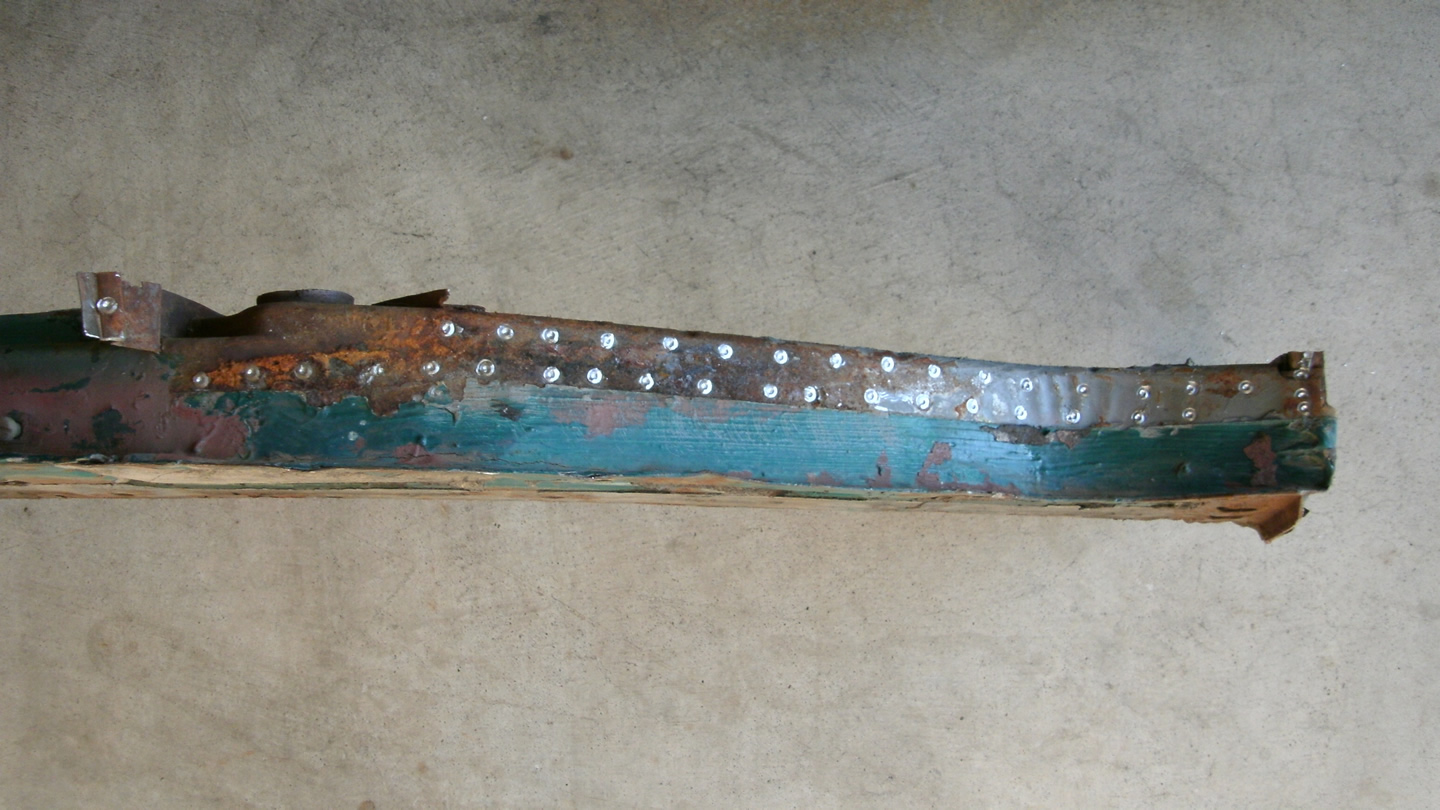
I started drilling out spot welds on the front end of the passenger side heater channel. I first removed the paint and the body sealer covering the welds with a wire brush in my drill. I then removed the remnant of the front wheelhouse. By that time, the inexpensive spot weld bit I was using was really dull. I’m going to need to purchase a much better one before drilling any more of them. There was a little surface rust under the panel, but overall it seems in pretty good shape.
 |
 |
 |
 |
 |
 |
 |
 |
 |
Disassembling the Donor Heater Channels
by Garage Weasel on Jul.21, 2014, under Body Work
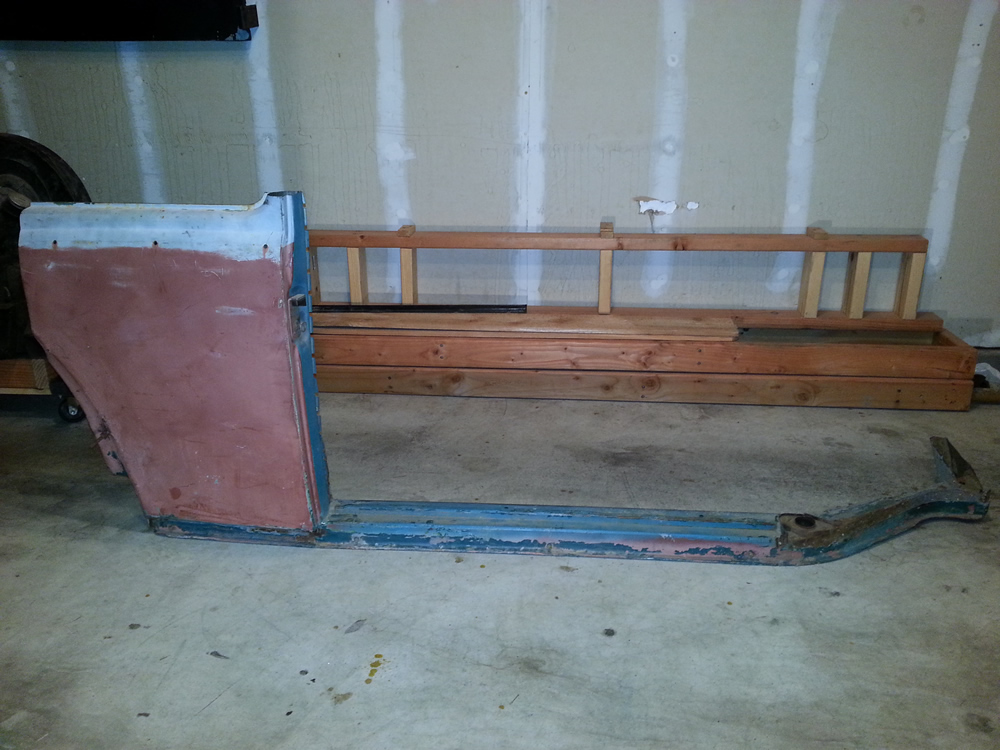
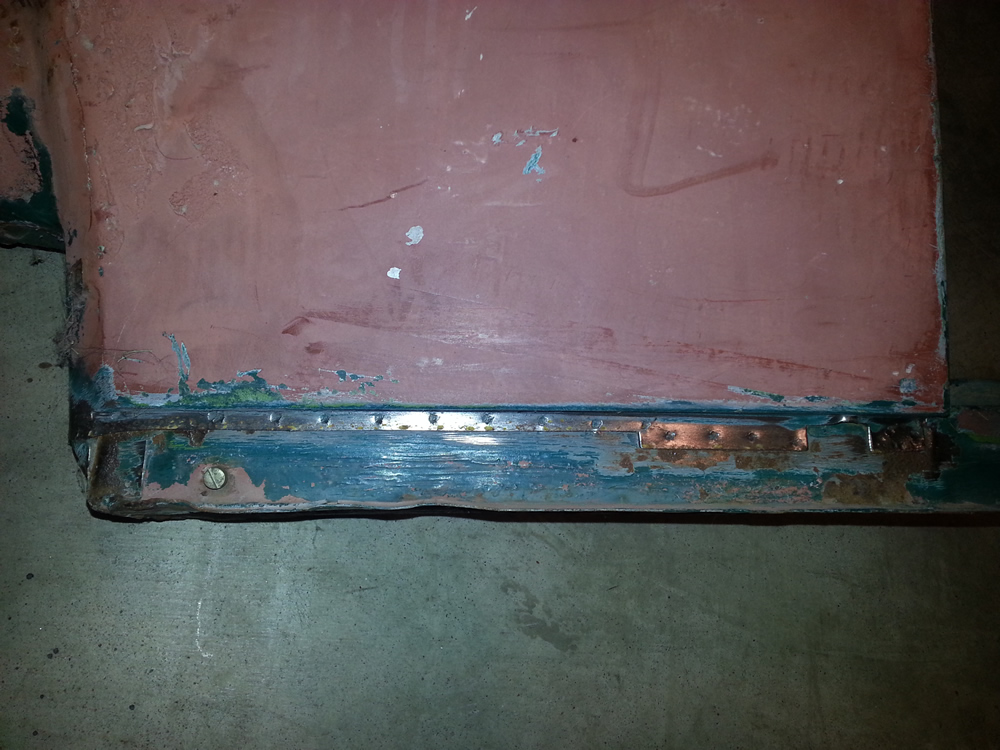
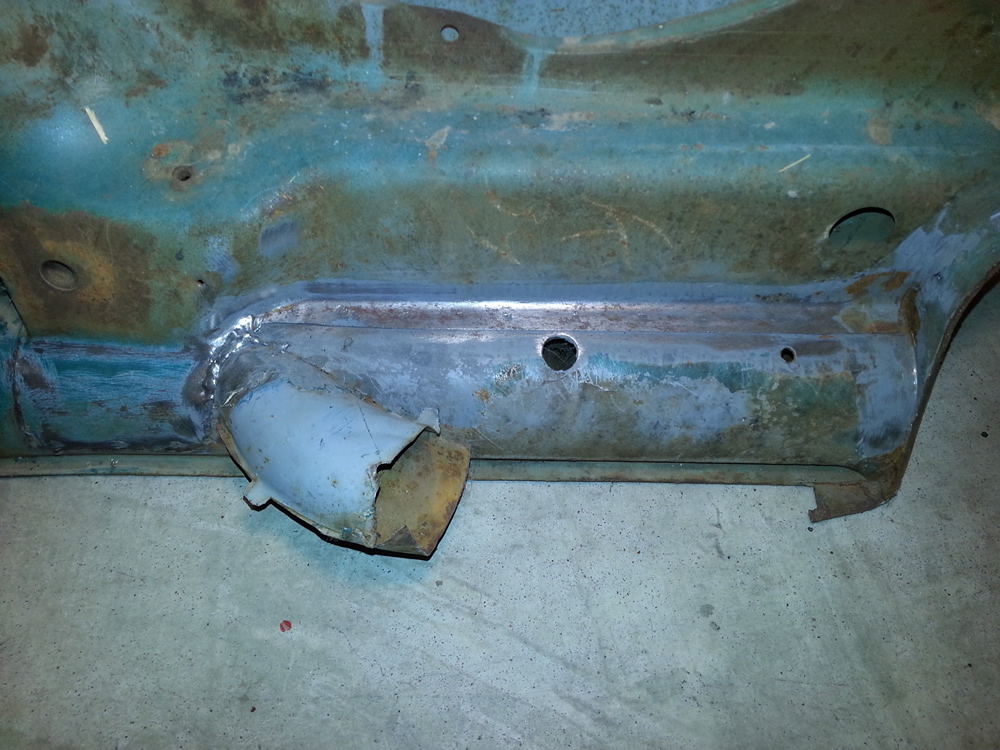
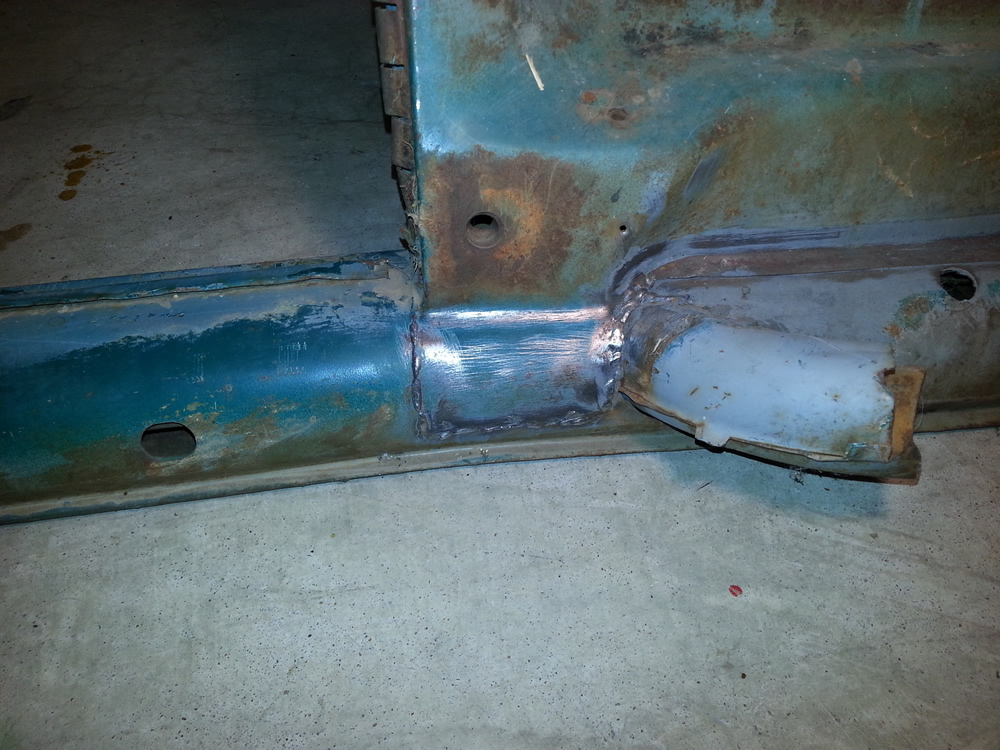
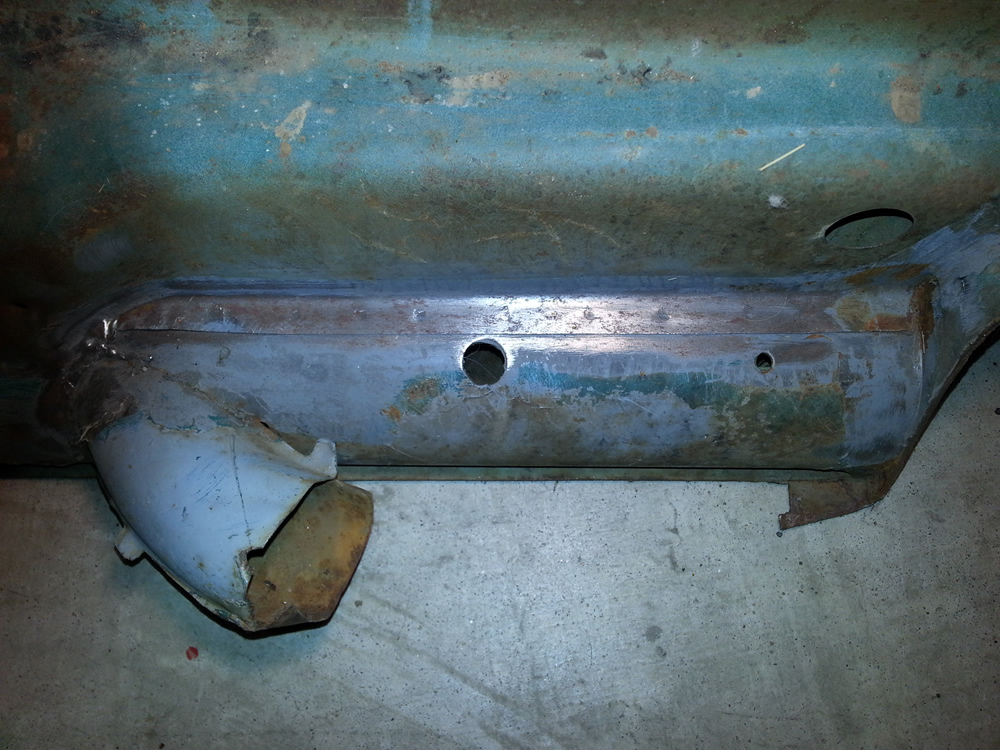
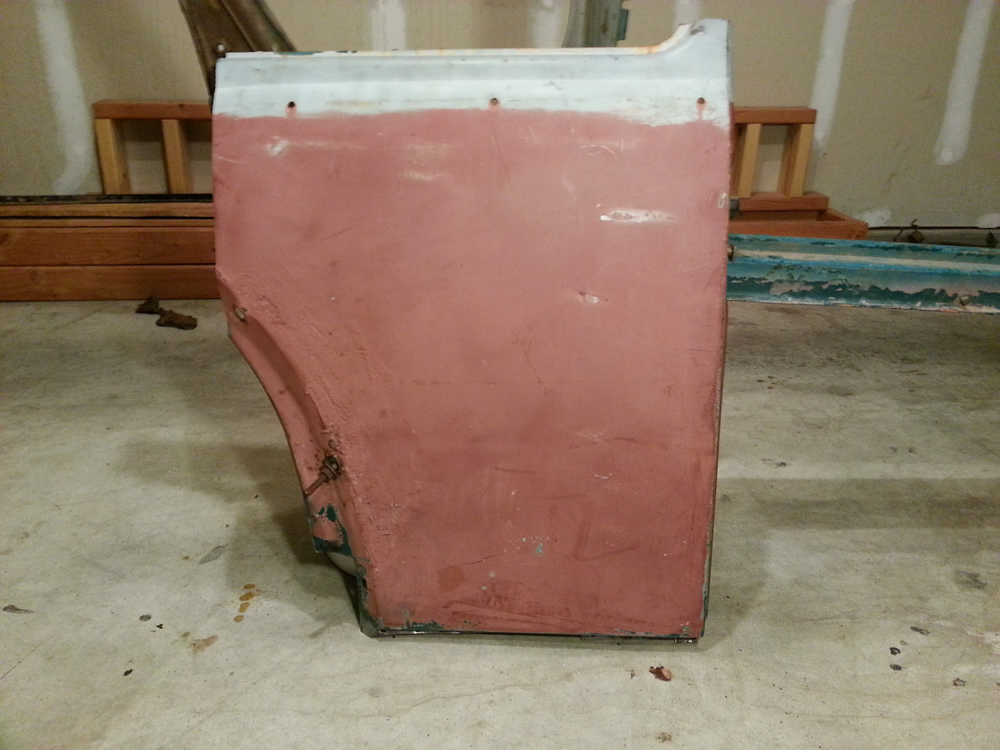
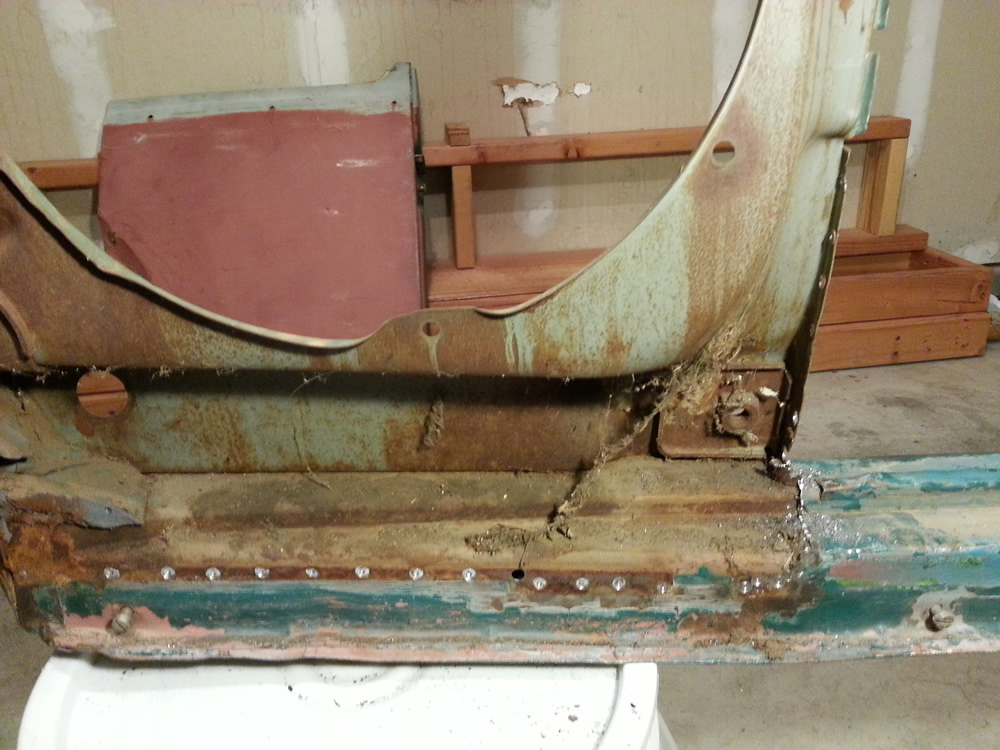
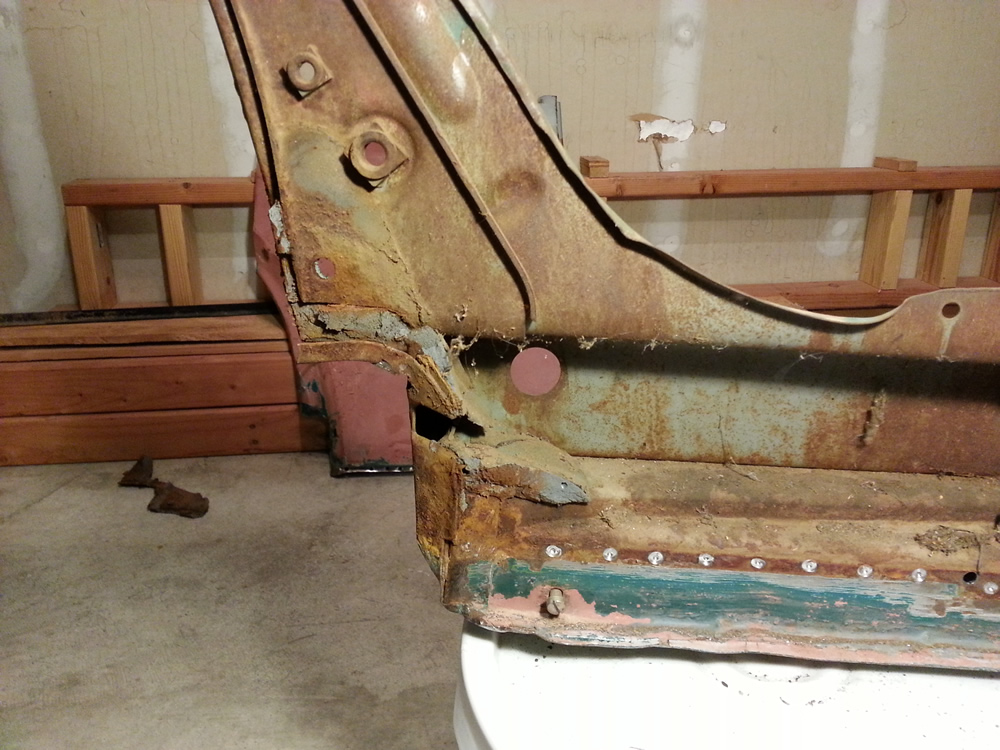
Finally back working on the car! I decided to tackle removing the quarter panels and other pieces still remaining on the donor heater channels that I purchased. Even though the quarter panels that came with the heater channels are in fairly good shape, I decided that it would be better to just remove them and just use the heater channels by themselves. I think it will be too hard to try to cut and splice the channels, and whatever part of the quarter panels I decide to use, into the body all at the same time. I do intend to use the lower part of the inner quarter panels from the donors as the inner panels on my body are severely rusted. I intend to use reproduction repair panels for the outer quarter panels as the ones on the donors both have issues. I started with the passenger side channel.
Even drilling very carefully on the spot welds, I still managed to drill through into the heater channel a couple of times. Oh well, I guess I’ll get a little more welding practice! It’s amazing how well the spot welds hold and just a small area missed can keep the whole area from breaking free. I took my time to do as little damage as possible to the heater channels when removing all the stuff I didn’t want and at the same time, trying to have as much usable area on the removed panels just in case I need something from them later on. Sometimes, though, areas on the panel being removed just have to be sacrificed to be able to get them apart.
|
|
|
|
|
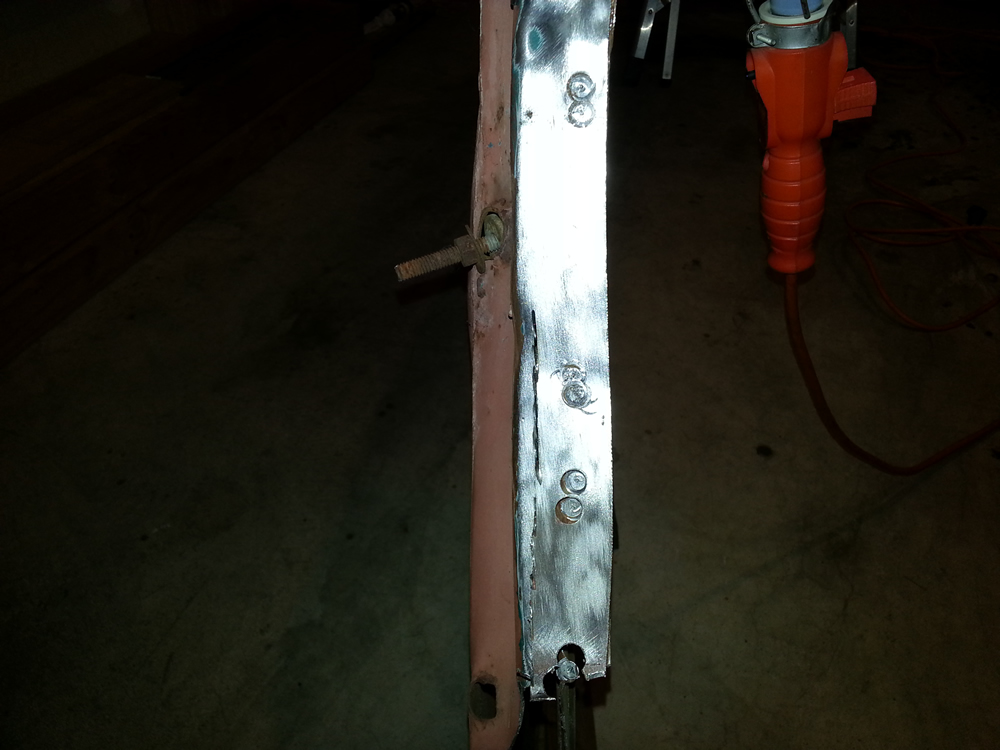
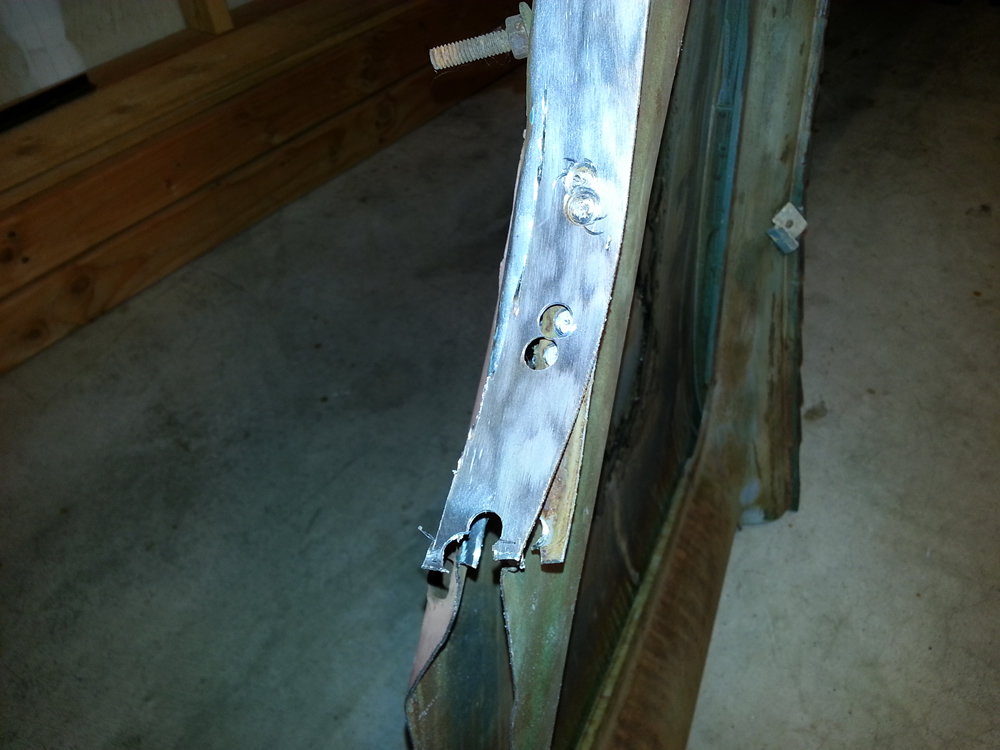
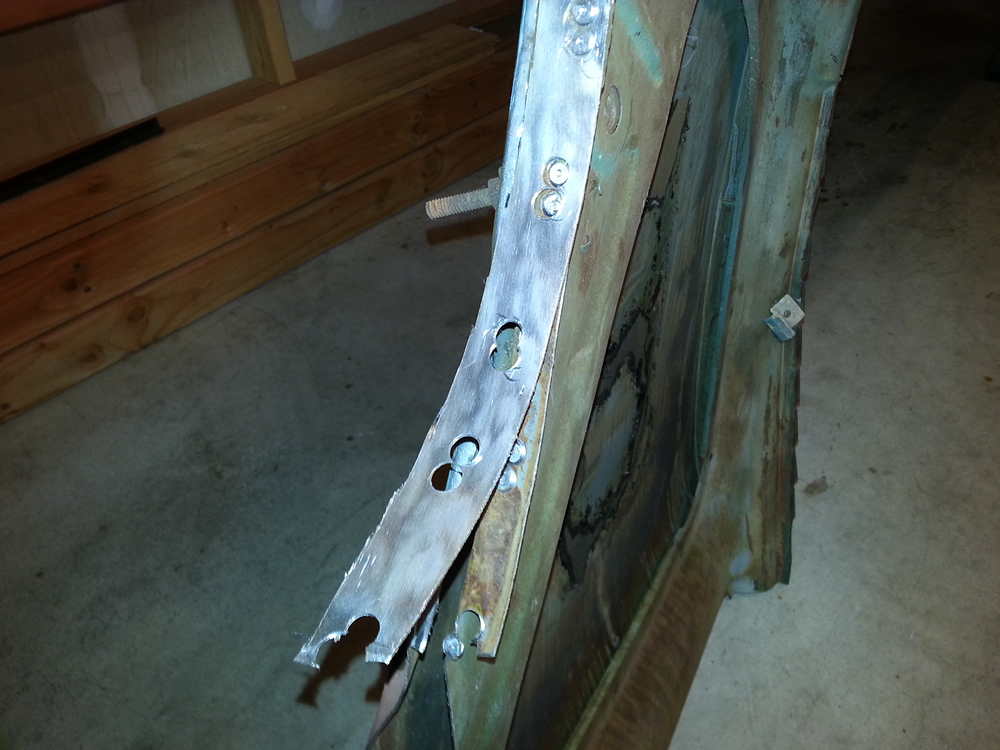
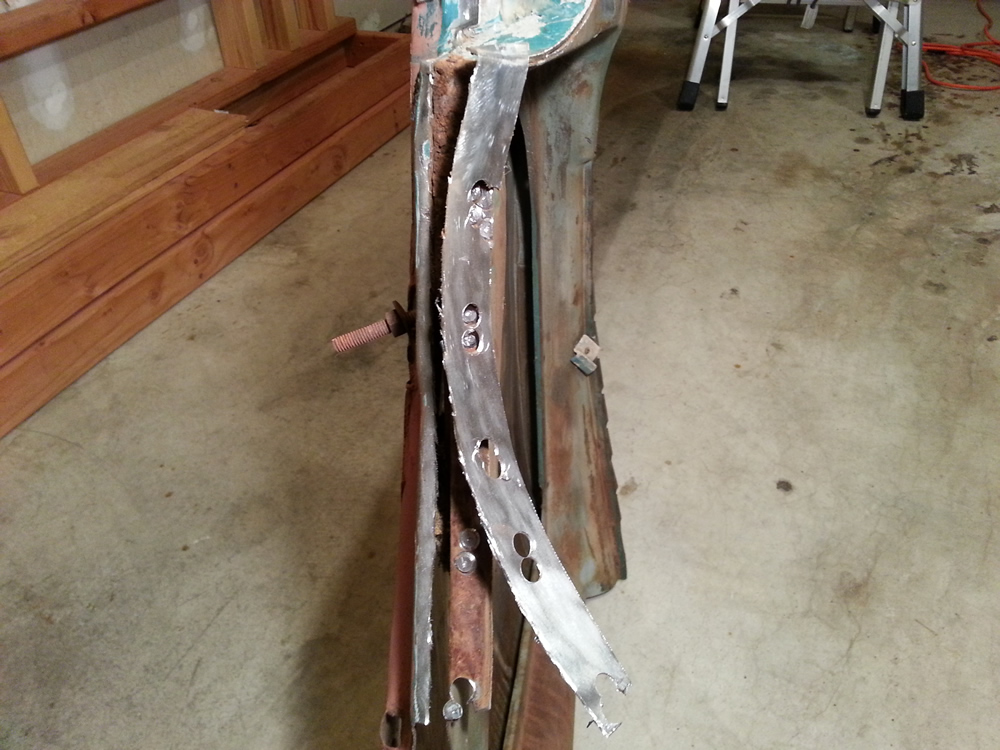
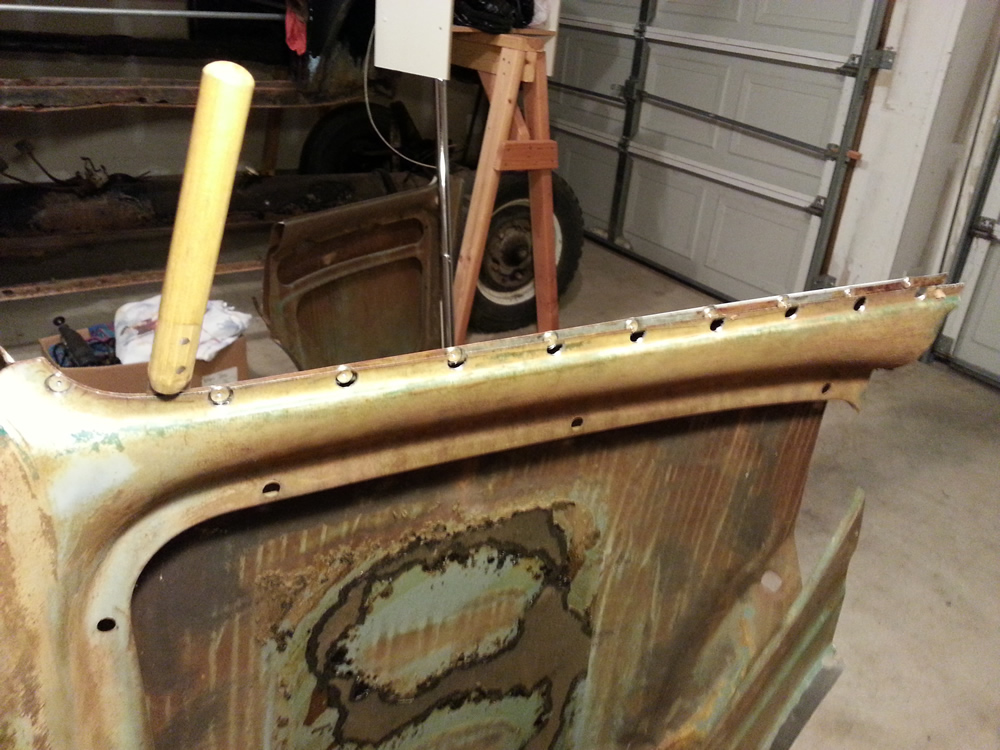
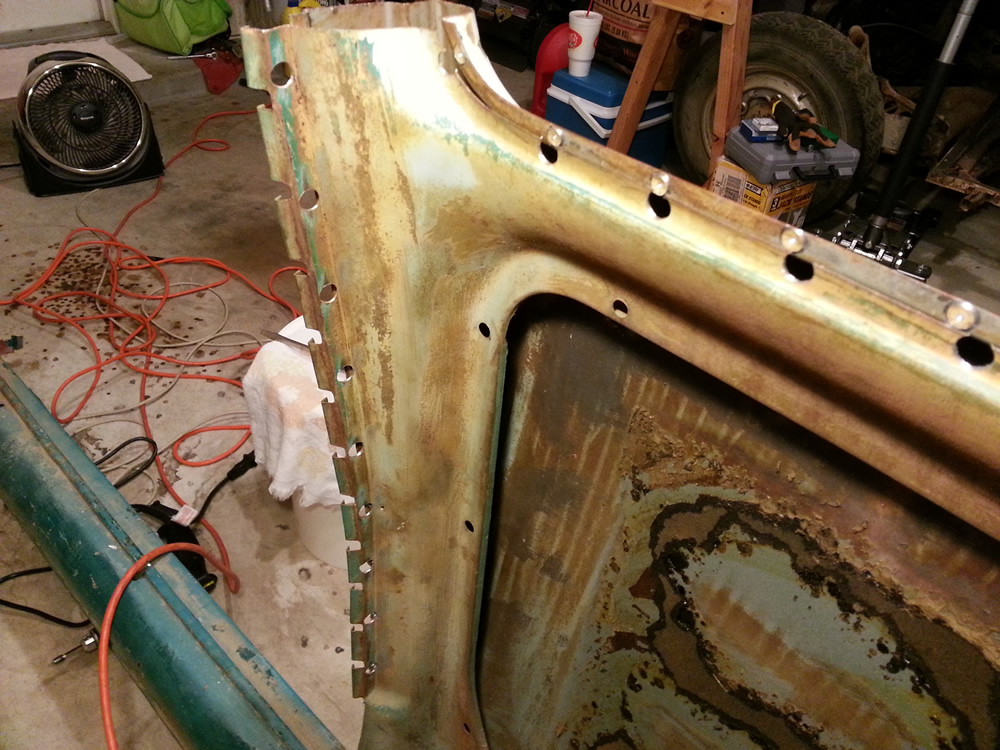
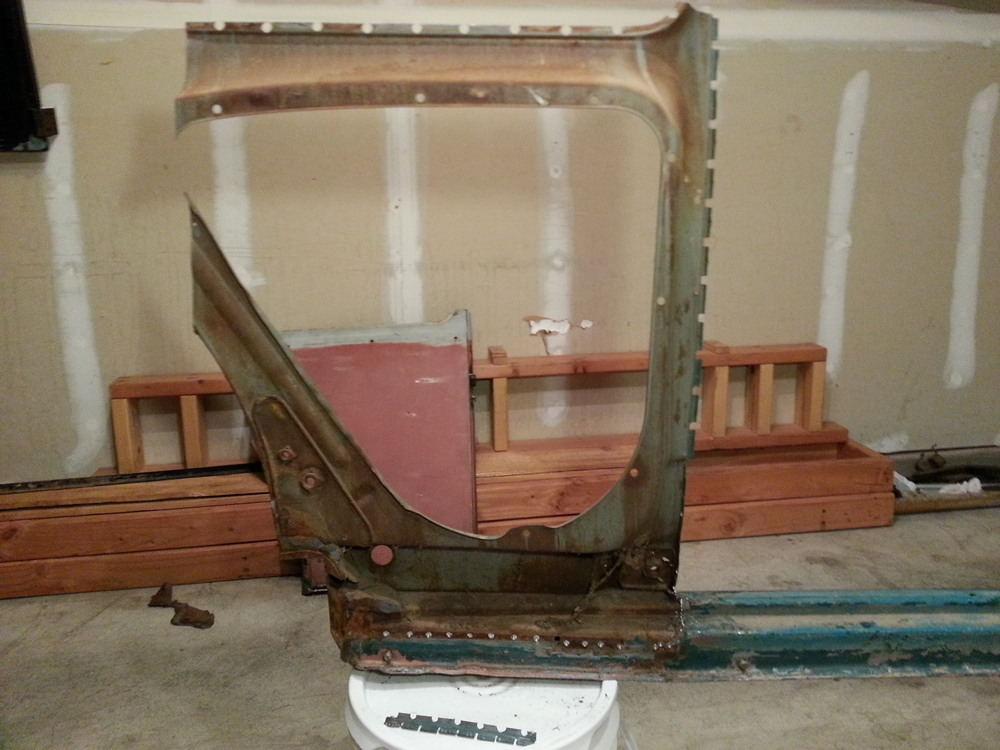
First, I removed the outer quarter panel. I don’t intend to use this panel, but tried to do as little damage as possible so that it is useable either by me or someone else in the future. With the door jamb welded, it is difficult to get in the tight corners and cut it away. I ended up drilling or cutting away more that I wanted, but the main focus is saving the heater channel.
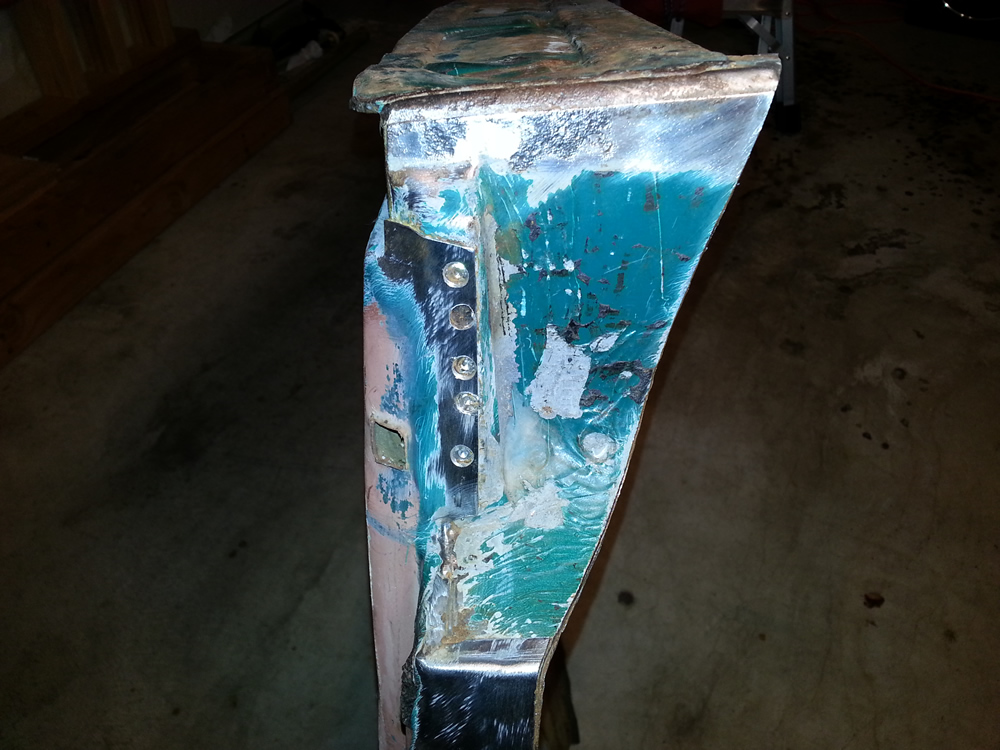
|
|
|
|
|
|
|
|
|

|
|
|
|
|
|
|
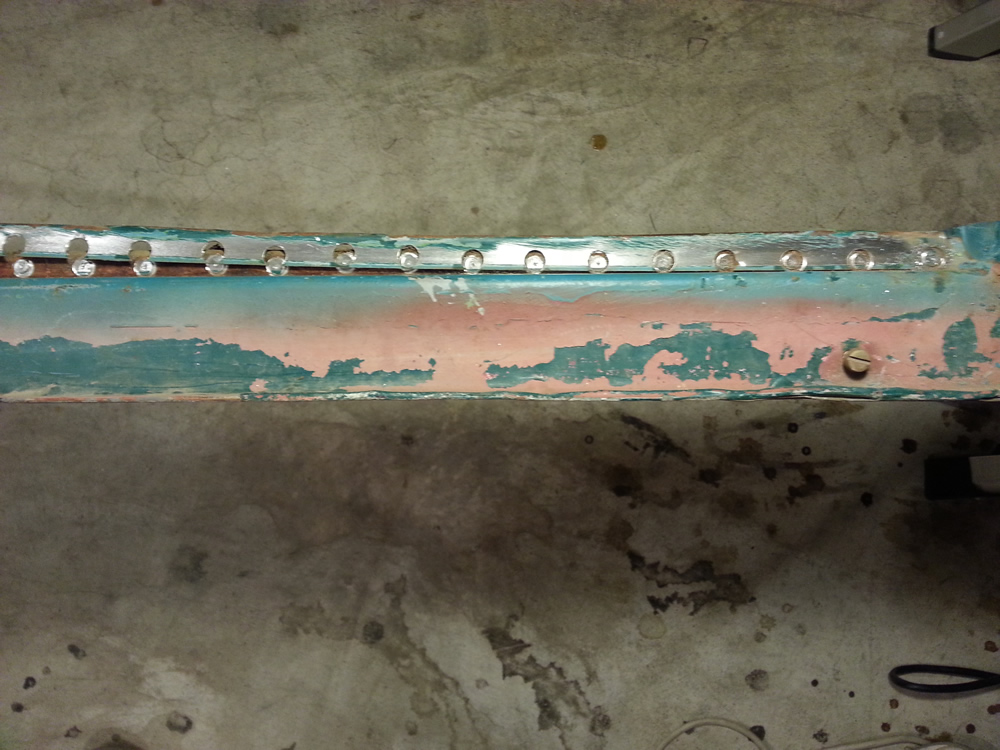
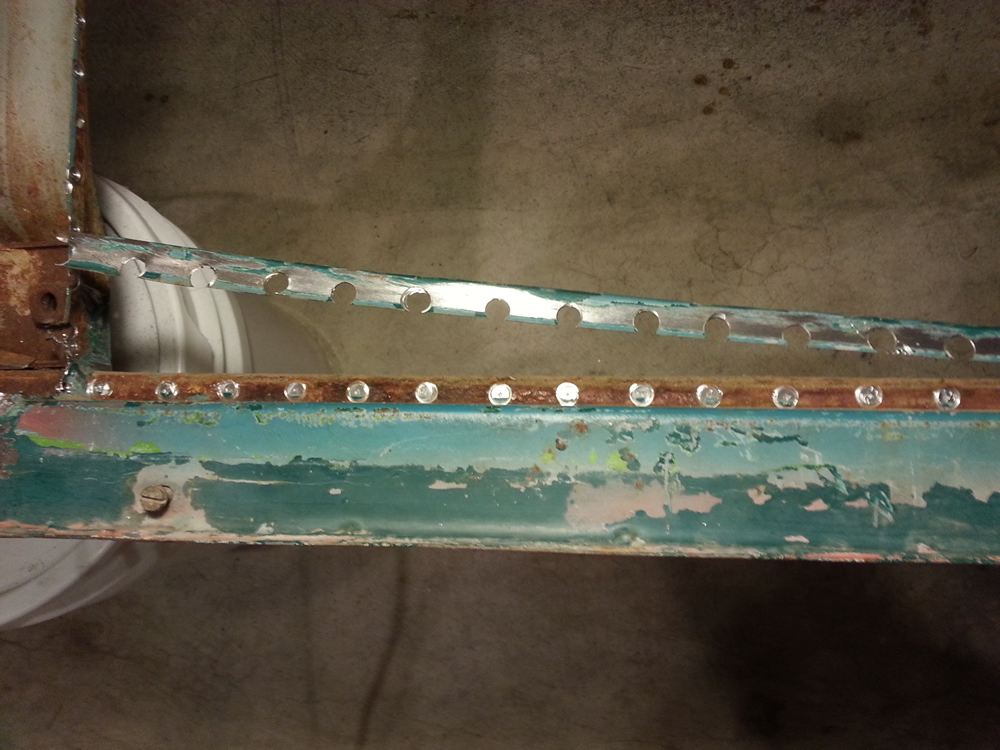
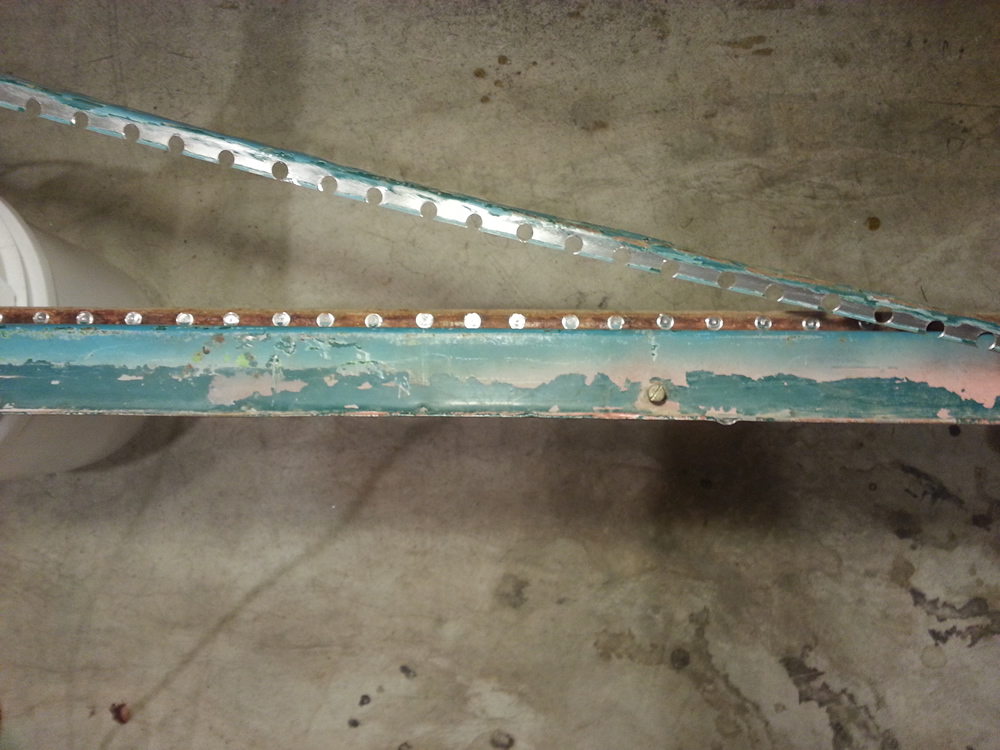
Since the carpet strip on the door threshold is dented, scratched, and bent, I decided to remove it. Replacements are readily available and less than $10 for quality replicas. It was kind of a pain to remove, however, with just over 30 spot welds to drill out and ground down afterwards. I think it will be worth the effort of replacing it though as this is very visible when the door is open
|
|
|
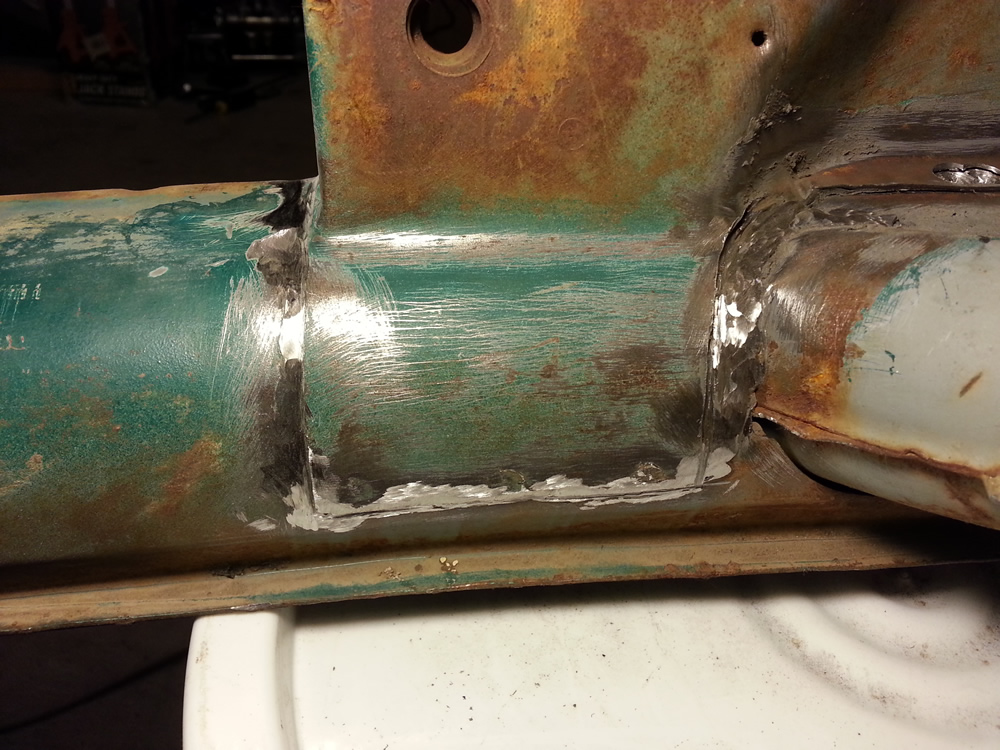
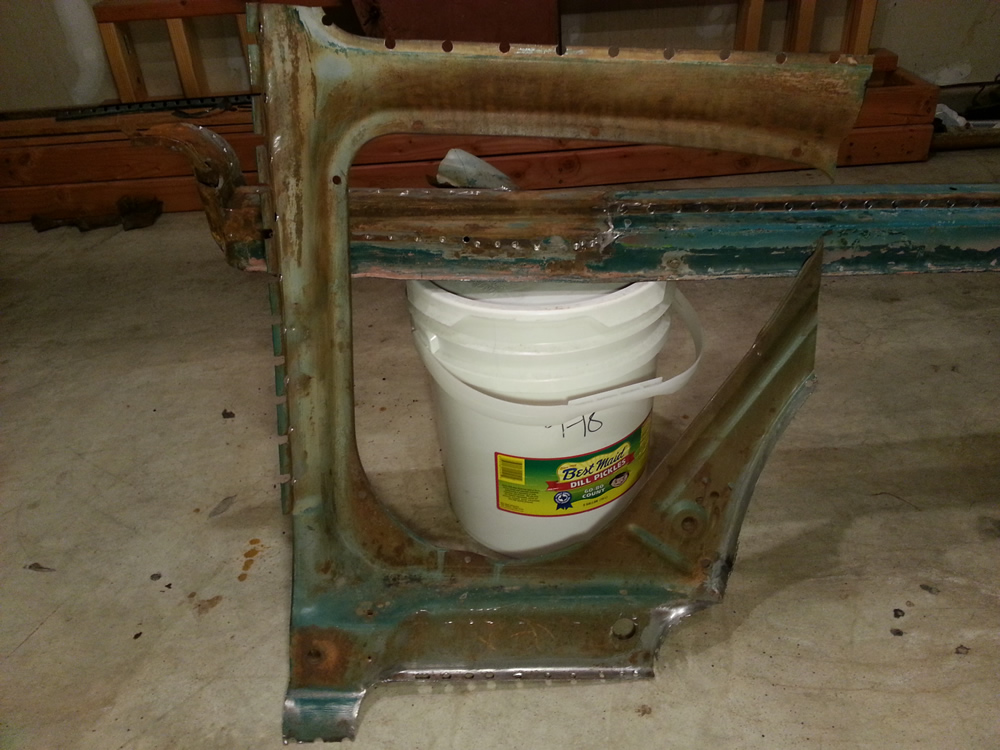
Next, I removed the inner quarter panel. There are several areas that are just difficult to access to cut, grind, and free the panel and not damage or mar it. Also, it’s often hard to tell just where the welds are and just what is preventing the panel from breaking free. This panel is in excellent condition and I will use the bottom of it to replace the completely rusted out panel on the car.

|
|

|
|
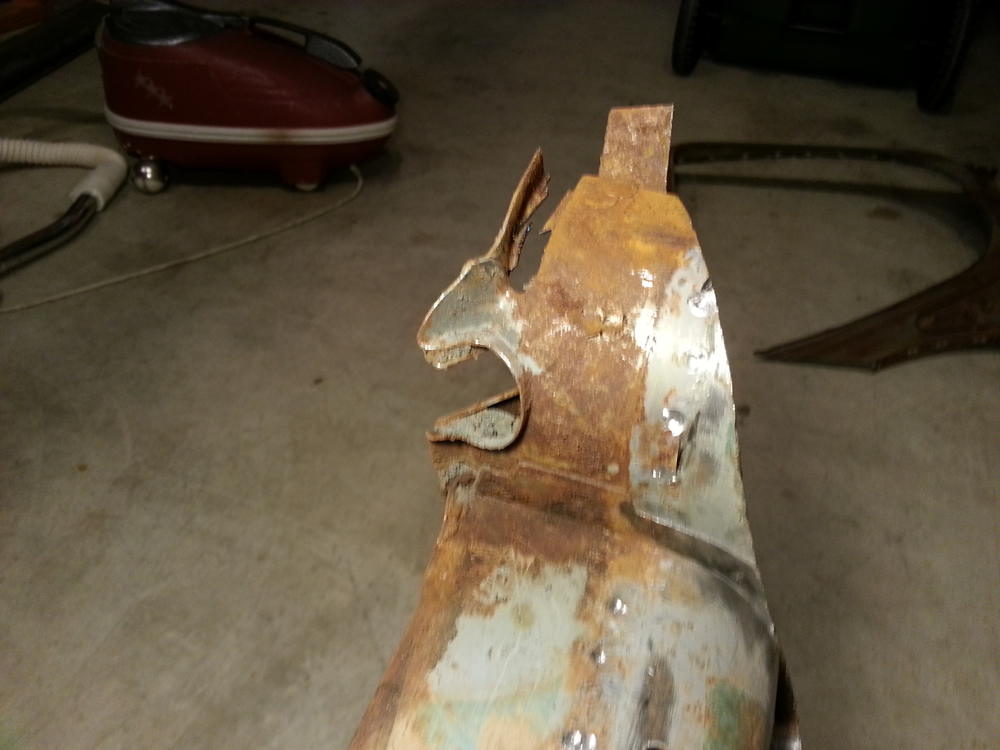
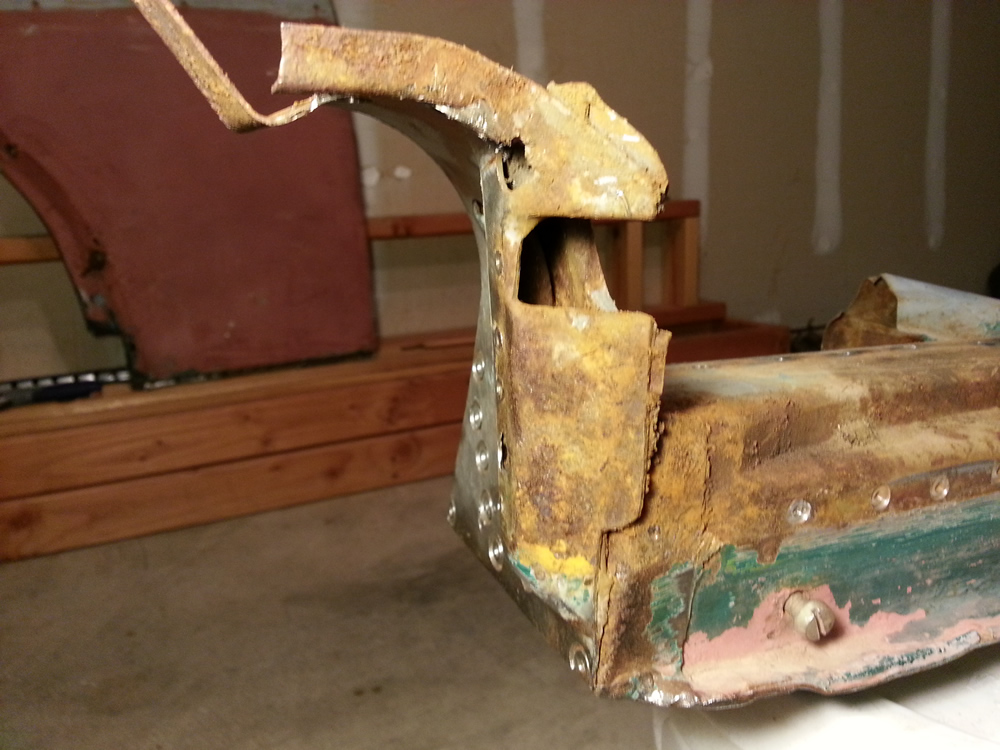
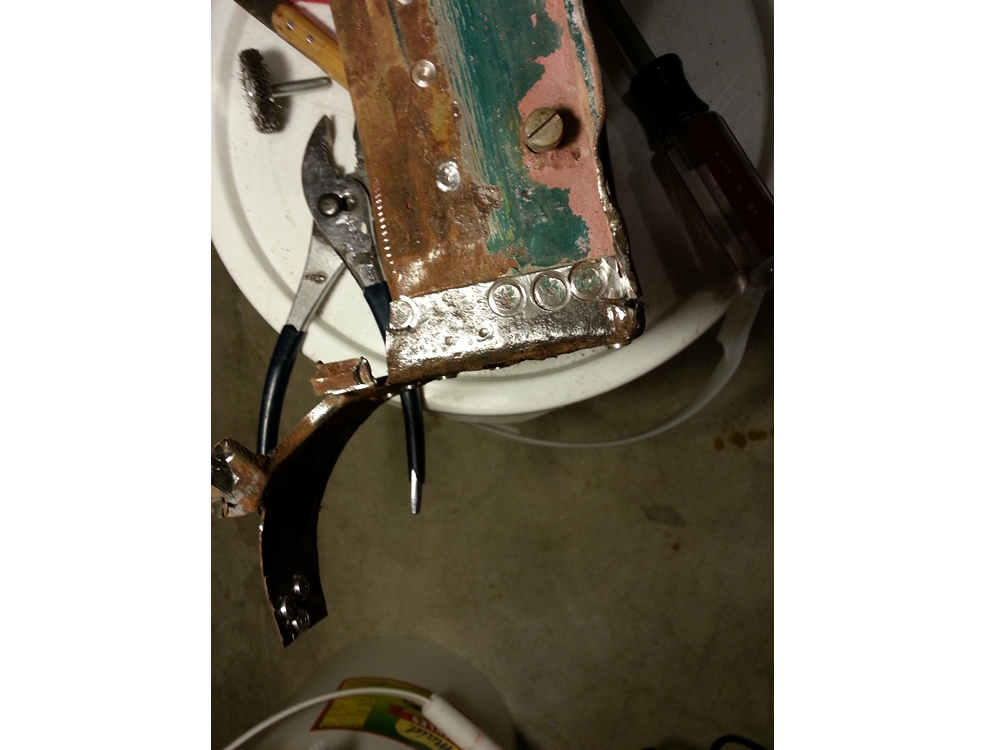
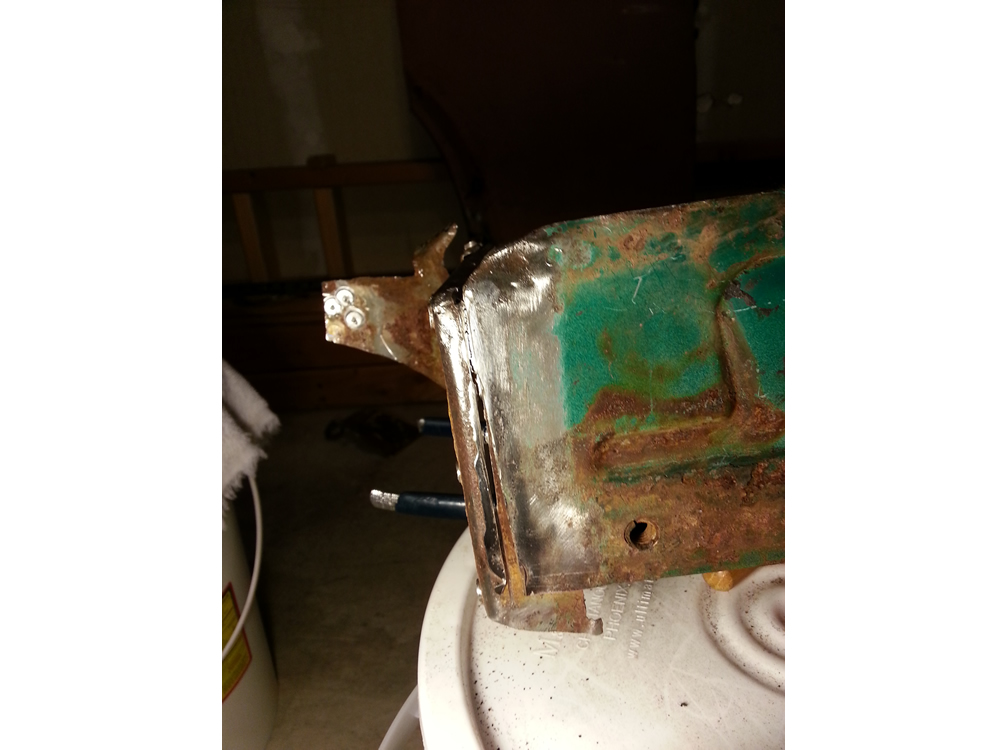
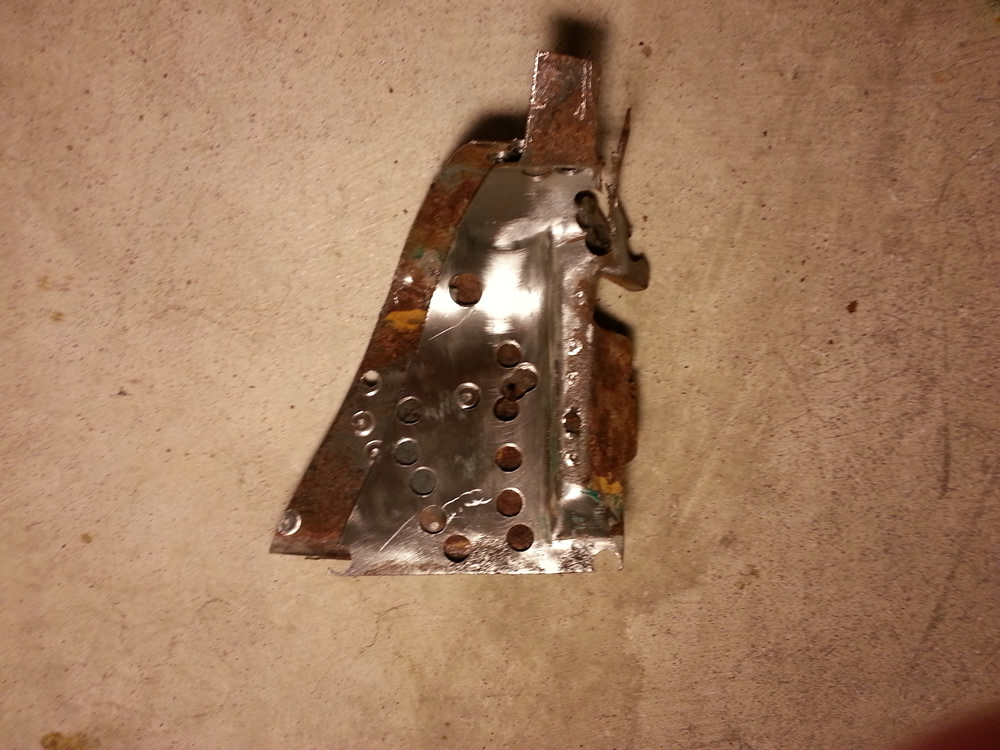
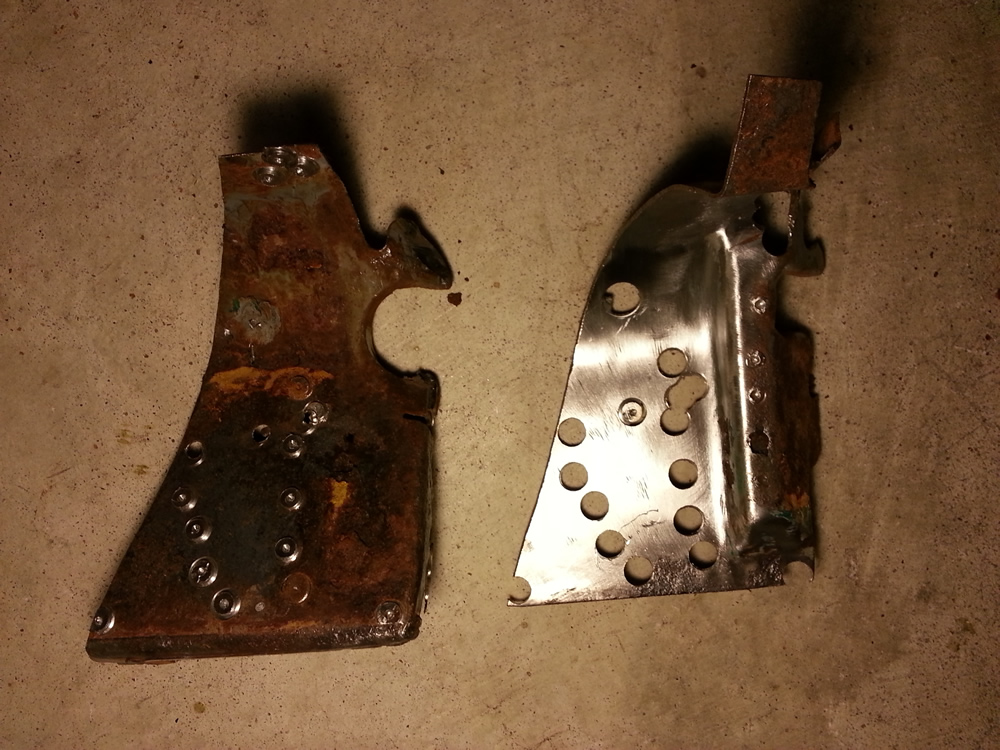
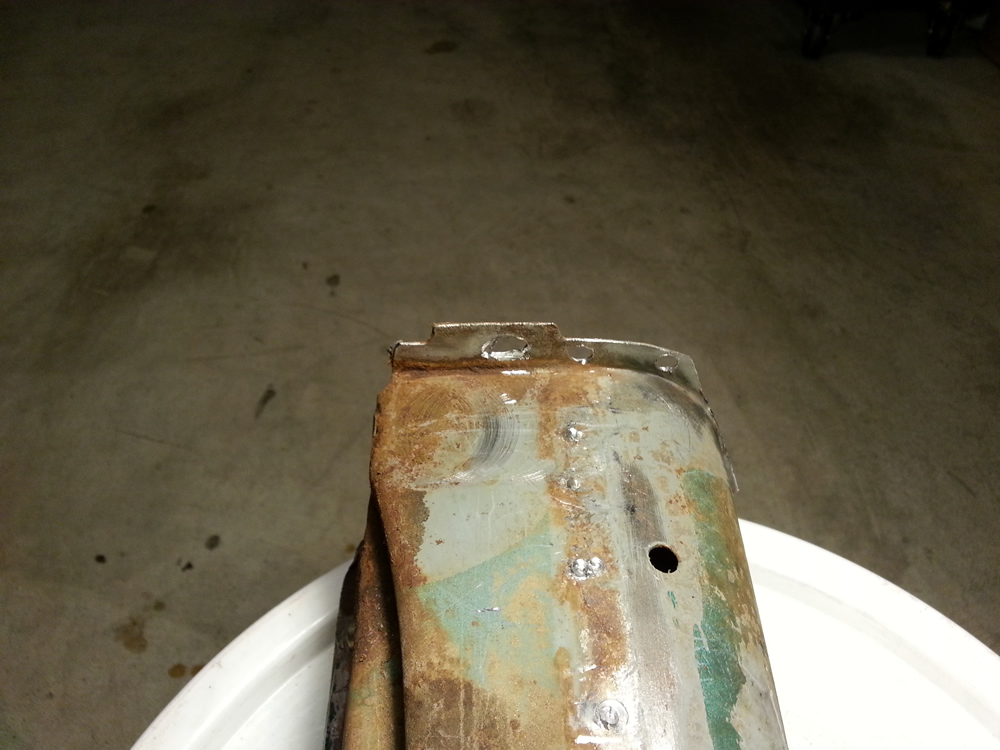
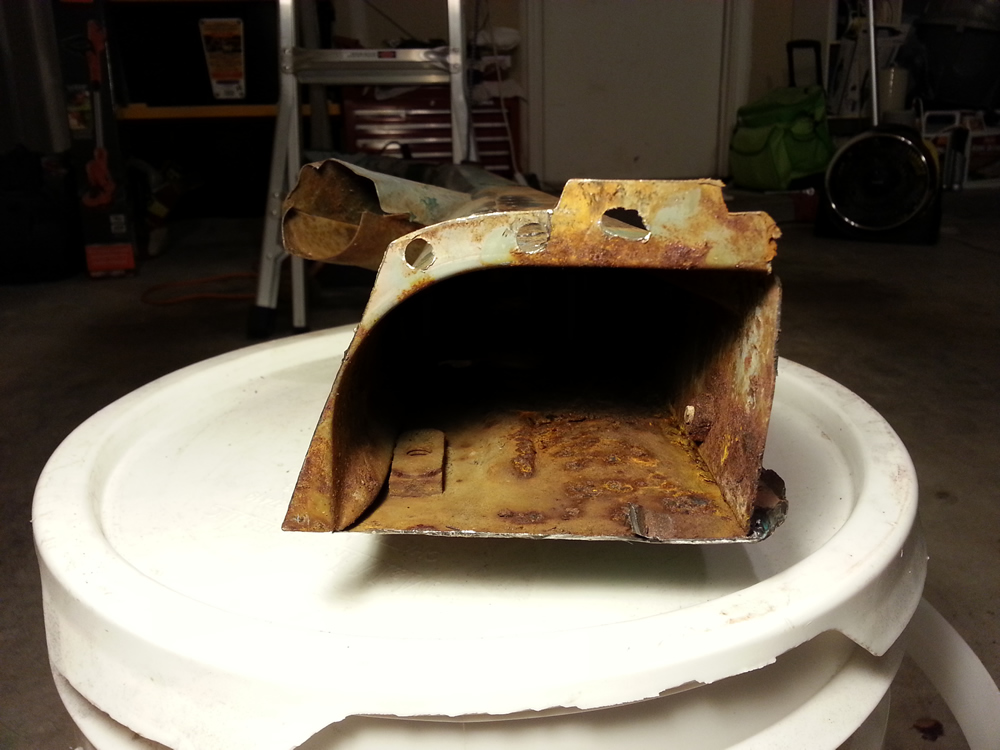
I then removed the remnants of the rear cross member from the rear of the channel. There were two thick layers of metal (the cross member & the reinforcing plate) with a lot of spot welds. The cross member actually fits under the bottom plate of the heater channel and is seam welded all the way across. I cut it just past the seam weld losing very little of the bottom plate. Removing this gives me the first view inside the heater channel. Not too bad for panel that is around 50 years old! I'm considering removing the bottom plate so that I can remove the dents and treat the rust inside. It's a lot of spot welds to drill out to remove it and a lot of welding to reassemble it, but it's really the only way to stop the rust, preserve the good metal, and get it looking its best.
|
|
|
|
|
|
|
|
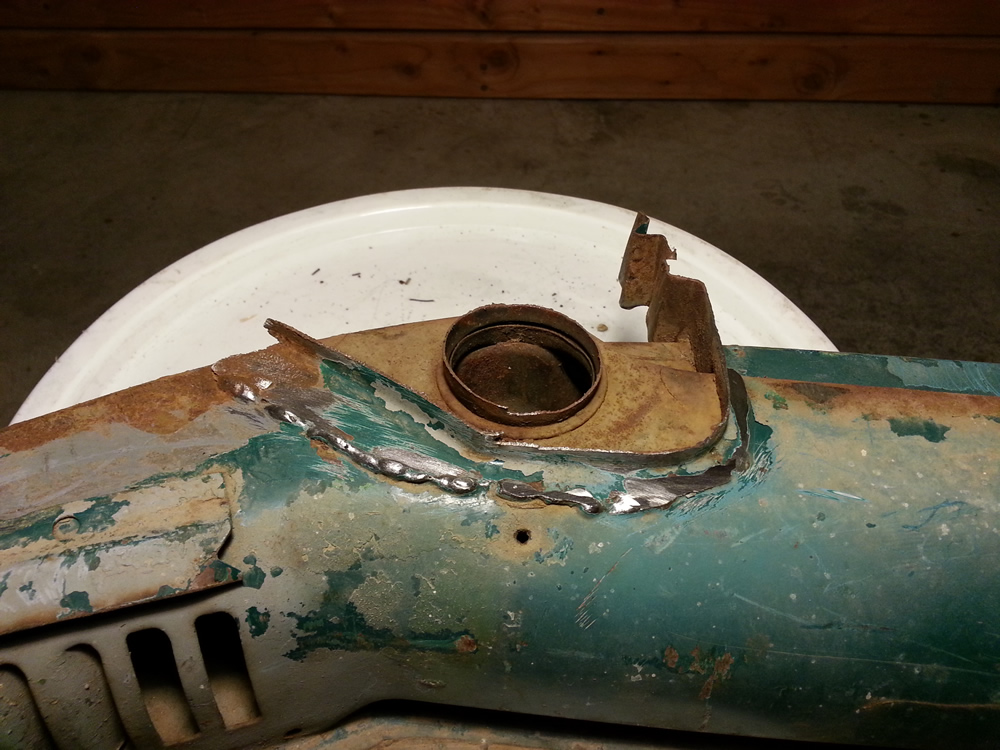
Next up was the remainder of the A pillar. Again, I cut just past the welds to remove the panel piece and then ground the welds down.
|

|
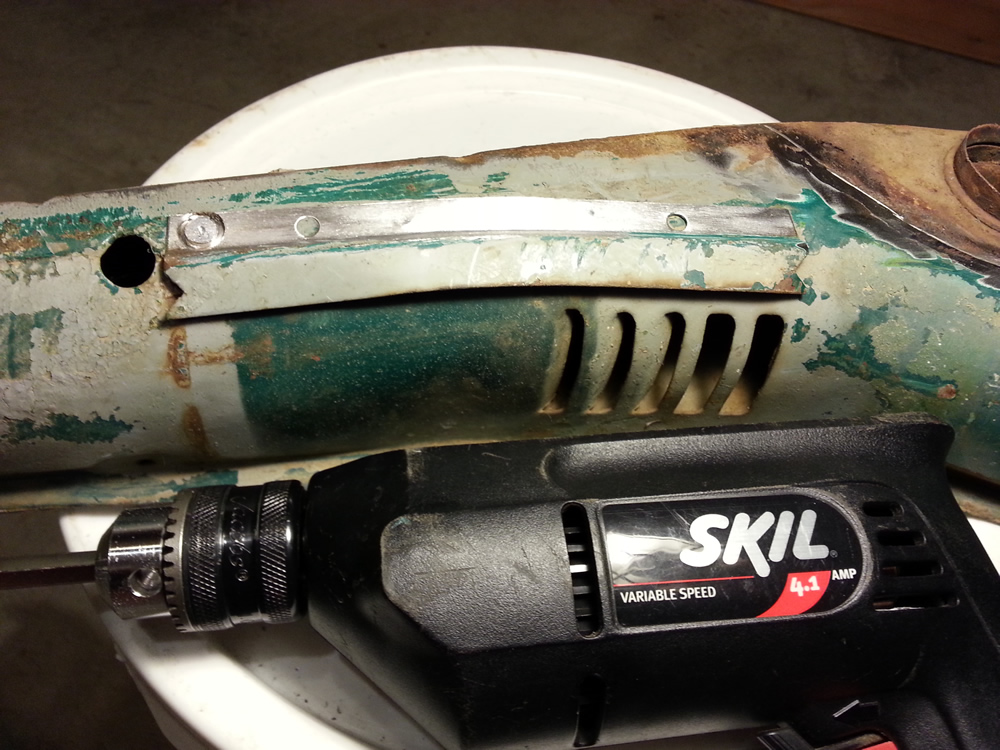
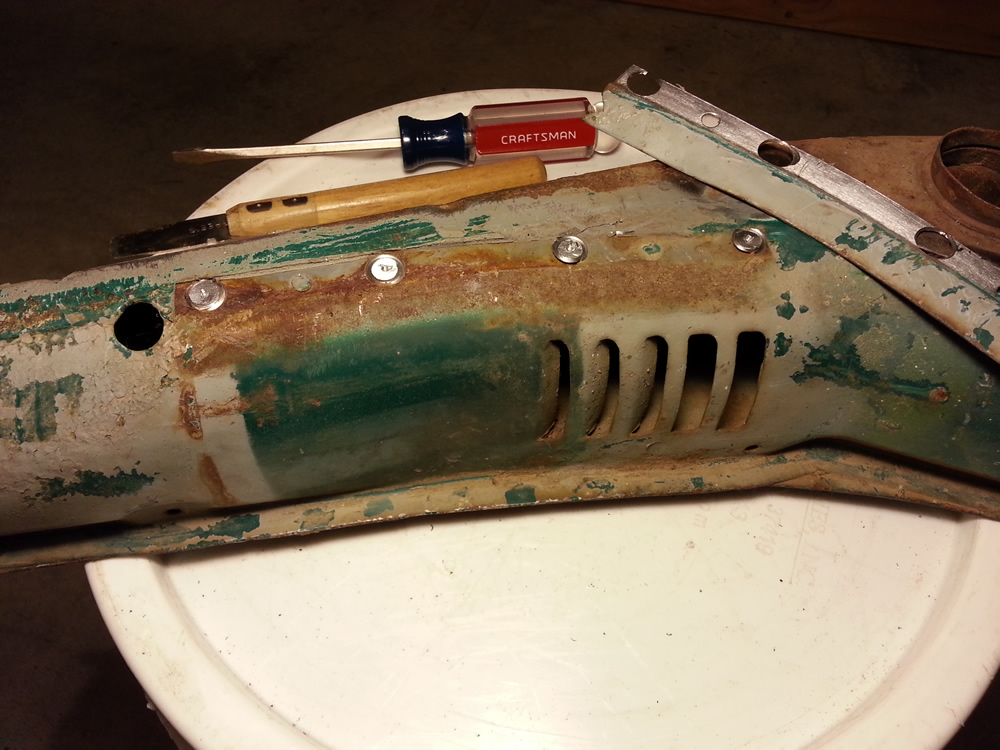
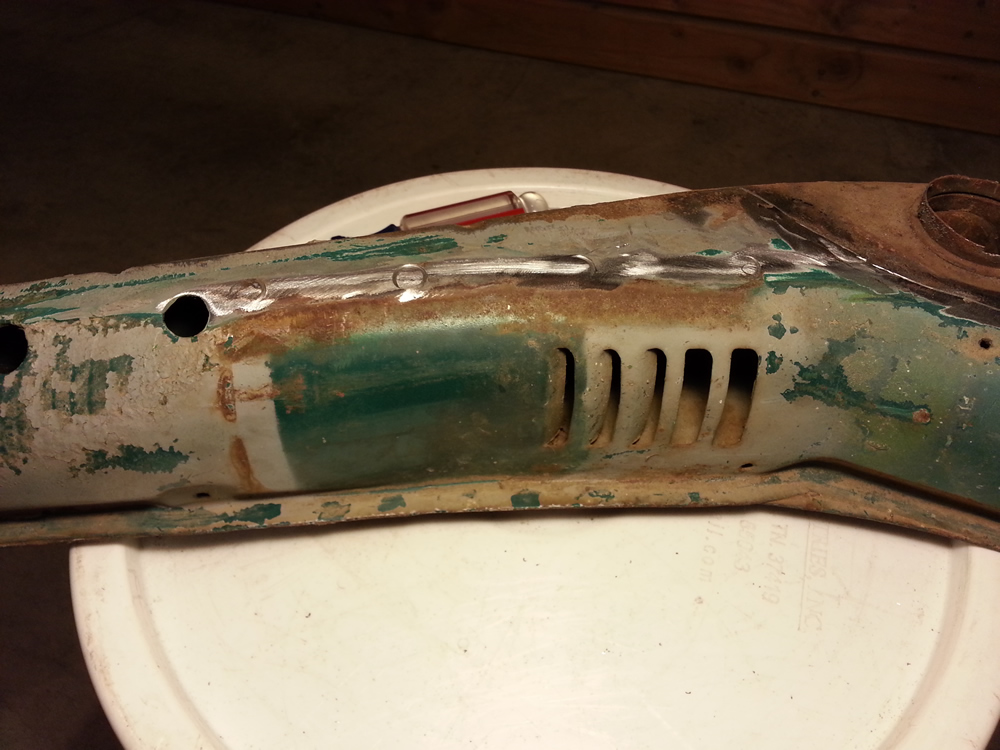
Since my car didn’t have carpet retaining strips over the heater vent louvers, I removed it. I want to keep it as close to what it originally had as possible.
|
|
|
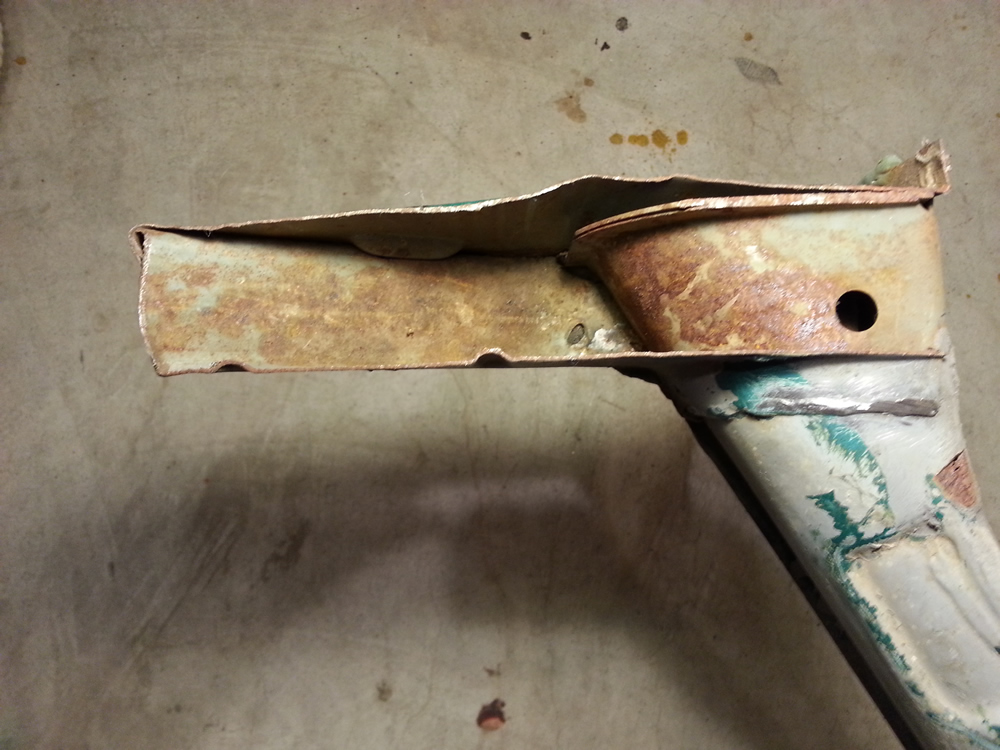
Last, I removed the remaining section of the front firewall. This piece is heavily welded both with seam welds and spot welds. Luckily, I don’t need to keep any of it and could cut and grind it aggressively. One down and one to go!
|
|
|
|
|
|
|
|
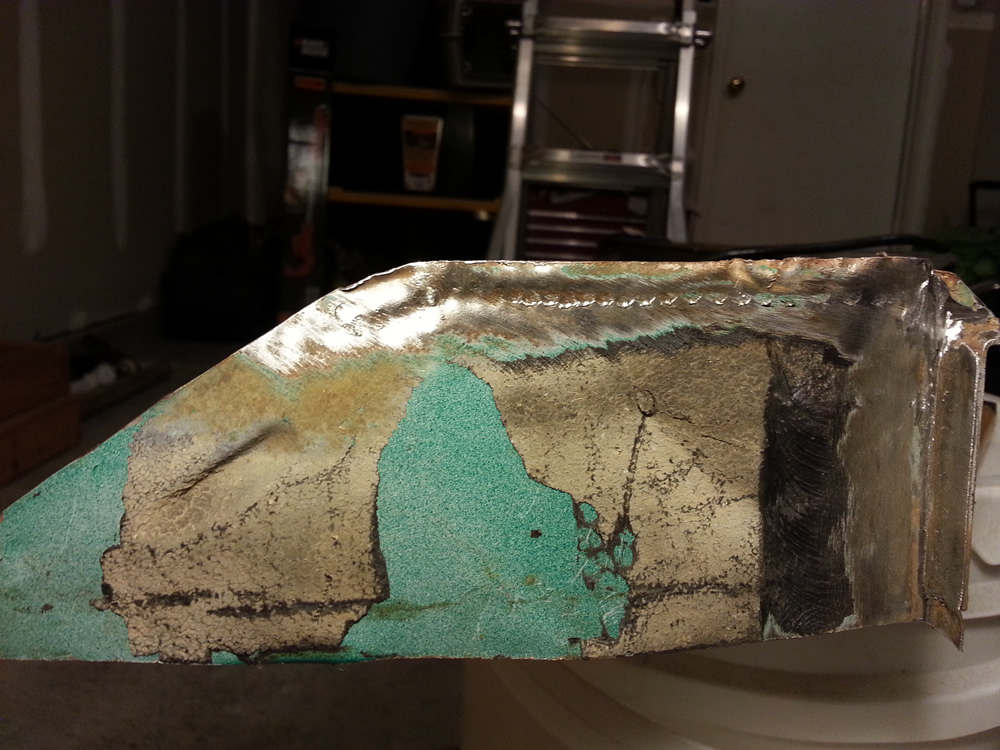
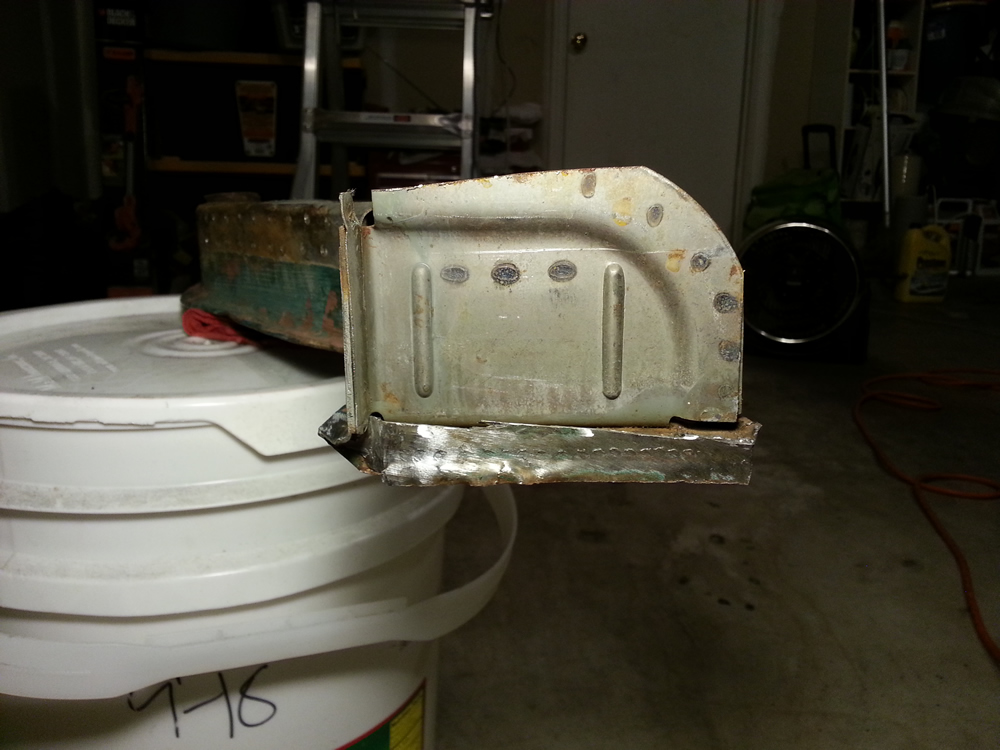
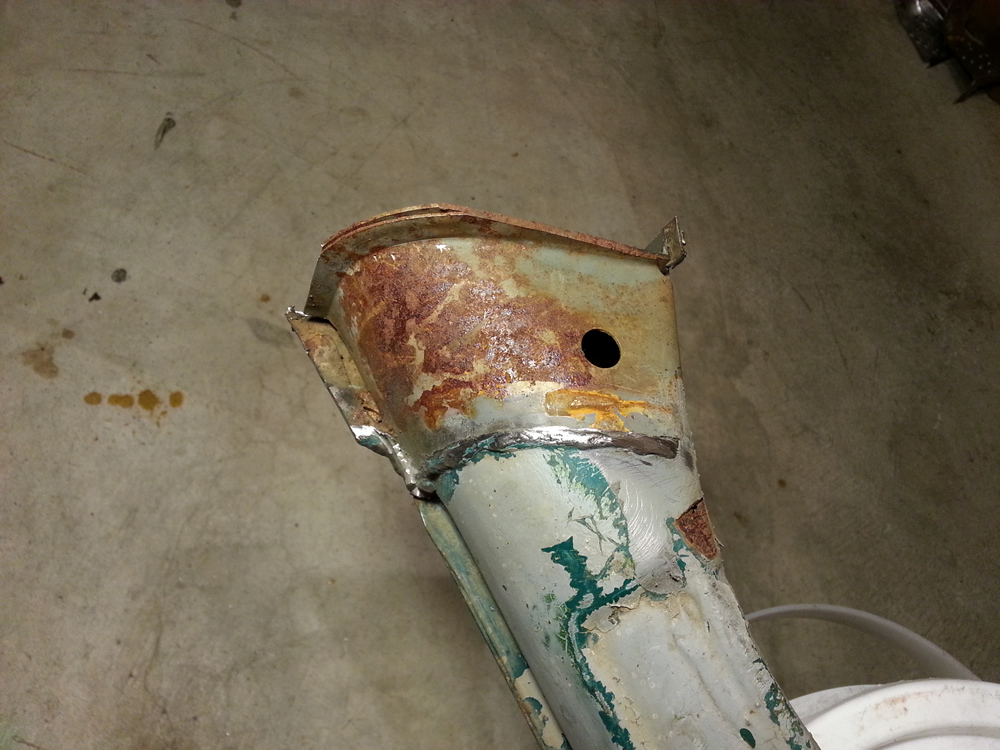
After getting it all apart, I think that this heater channel was cut from a 1967 bug or at least one that had seat belts from a 1967. It had a clip mounted on it that was used to hold back the sheath that covered the bottom part of the 1967 seat belt mechanism. Overall, I’m very pleased with the condition of this heater channel. I think this will be the closest available replacement part and at $100, it’s hard to beat the price as well. The closest quality replacement costs around $300 plus another $120 shipping for each heater channel!
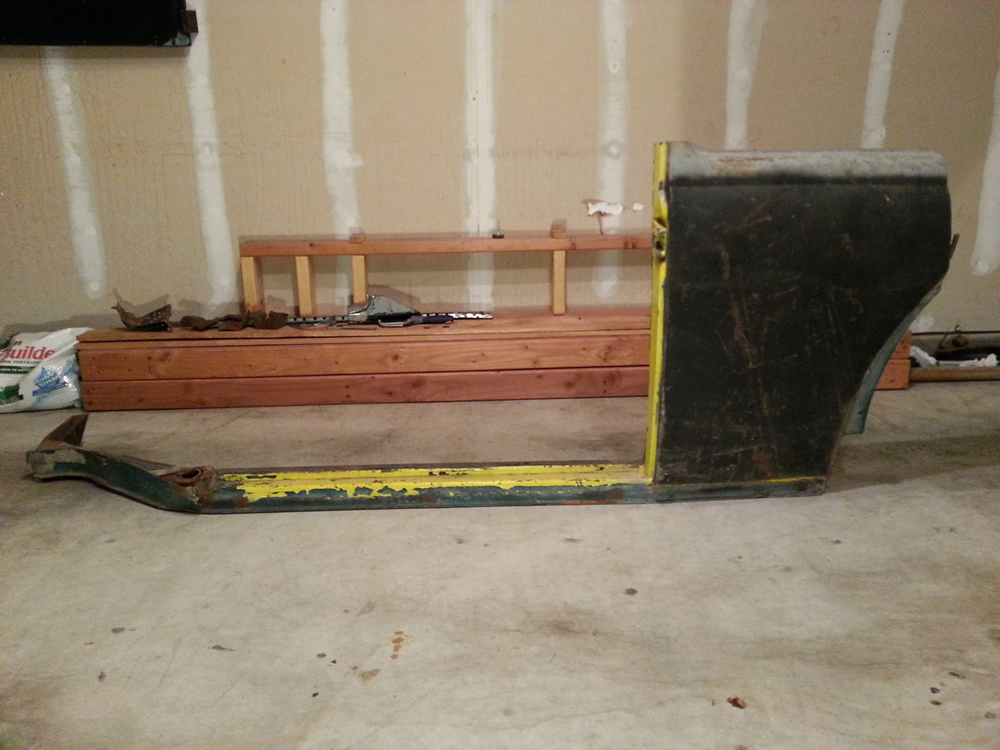
The driver's side donor heater channel came apart pretty much the same way. I'm not sure this heater channel came from the same car as the other, but they were supposed to be a pair from the same body. The paint colors were different except for similar small areas with the same green paint. This side also had the running board bolt holes welded and ground flat to the surface and the molding clip holes on the quarter panel were welded as well. The passenger side did not. I think it's from a 1964-1967 model as it had a drain line in the quarter panel for a metal sunroof. Overall, this heater channel had more rust and rust damage and isn't in as good condition as the passenger side heater channel. Just as the other channel, I think the bottom plate will need to be removed to treat the rust and do other repairs. I still think it will be fine once done and well worth the $100 I paid for it.
|
Repairing Donor Heater Channels and Replacing Bottom Plates
by Garage Weasel on Oct.02, 2024, under Body Work
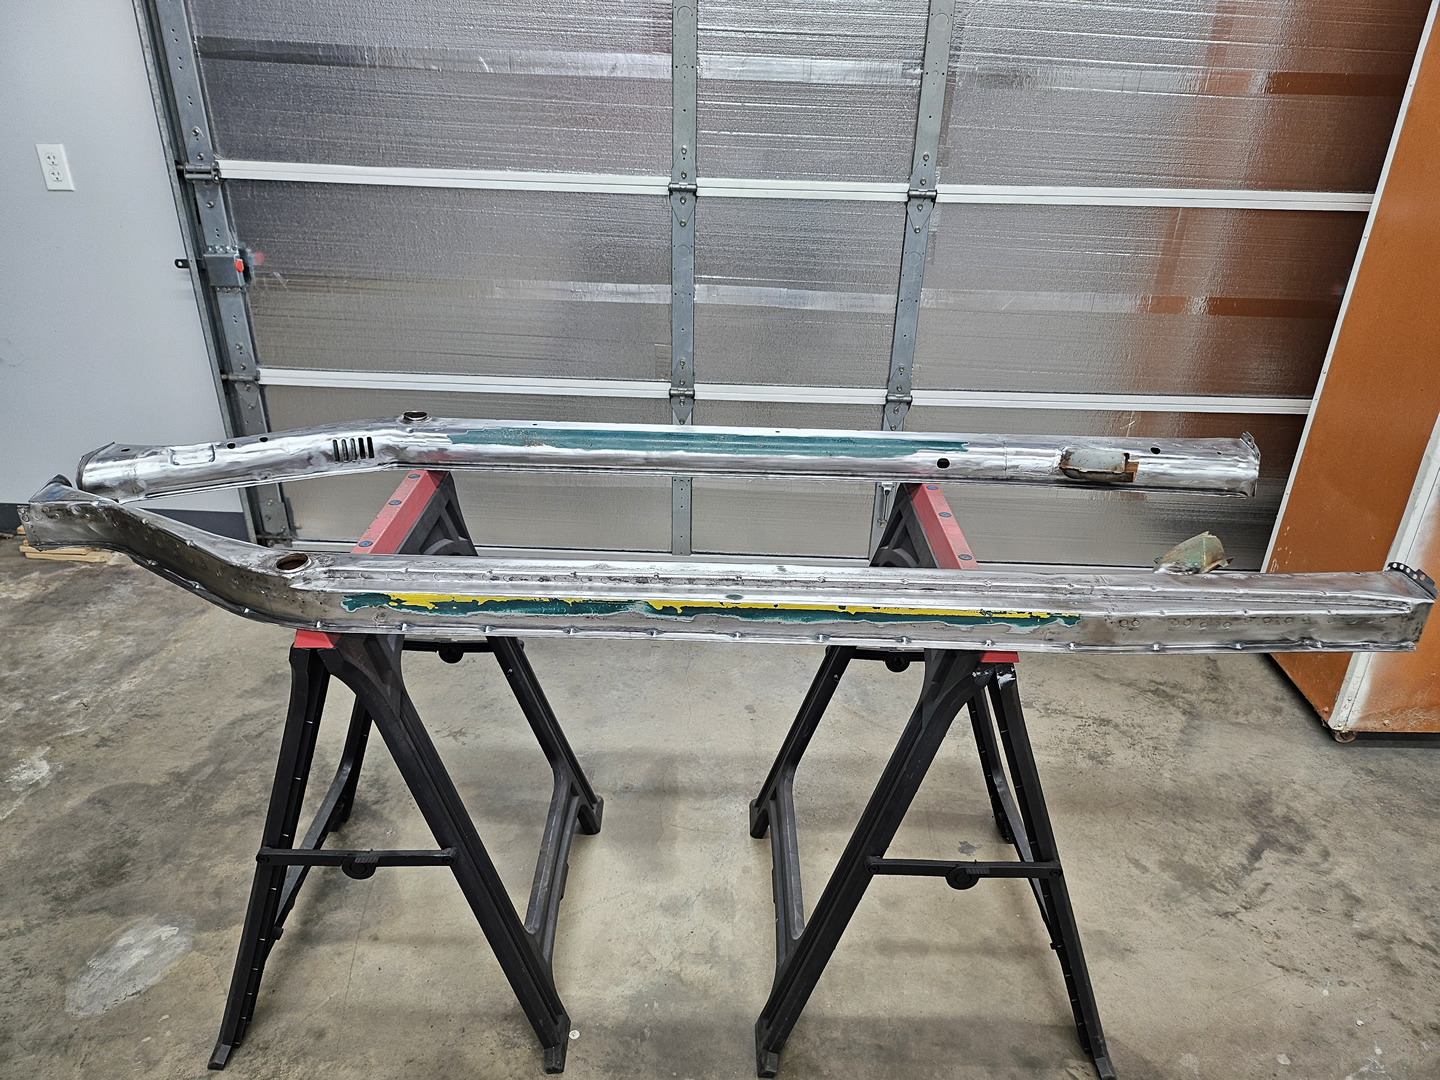
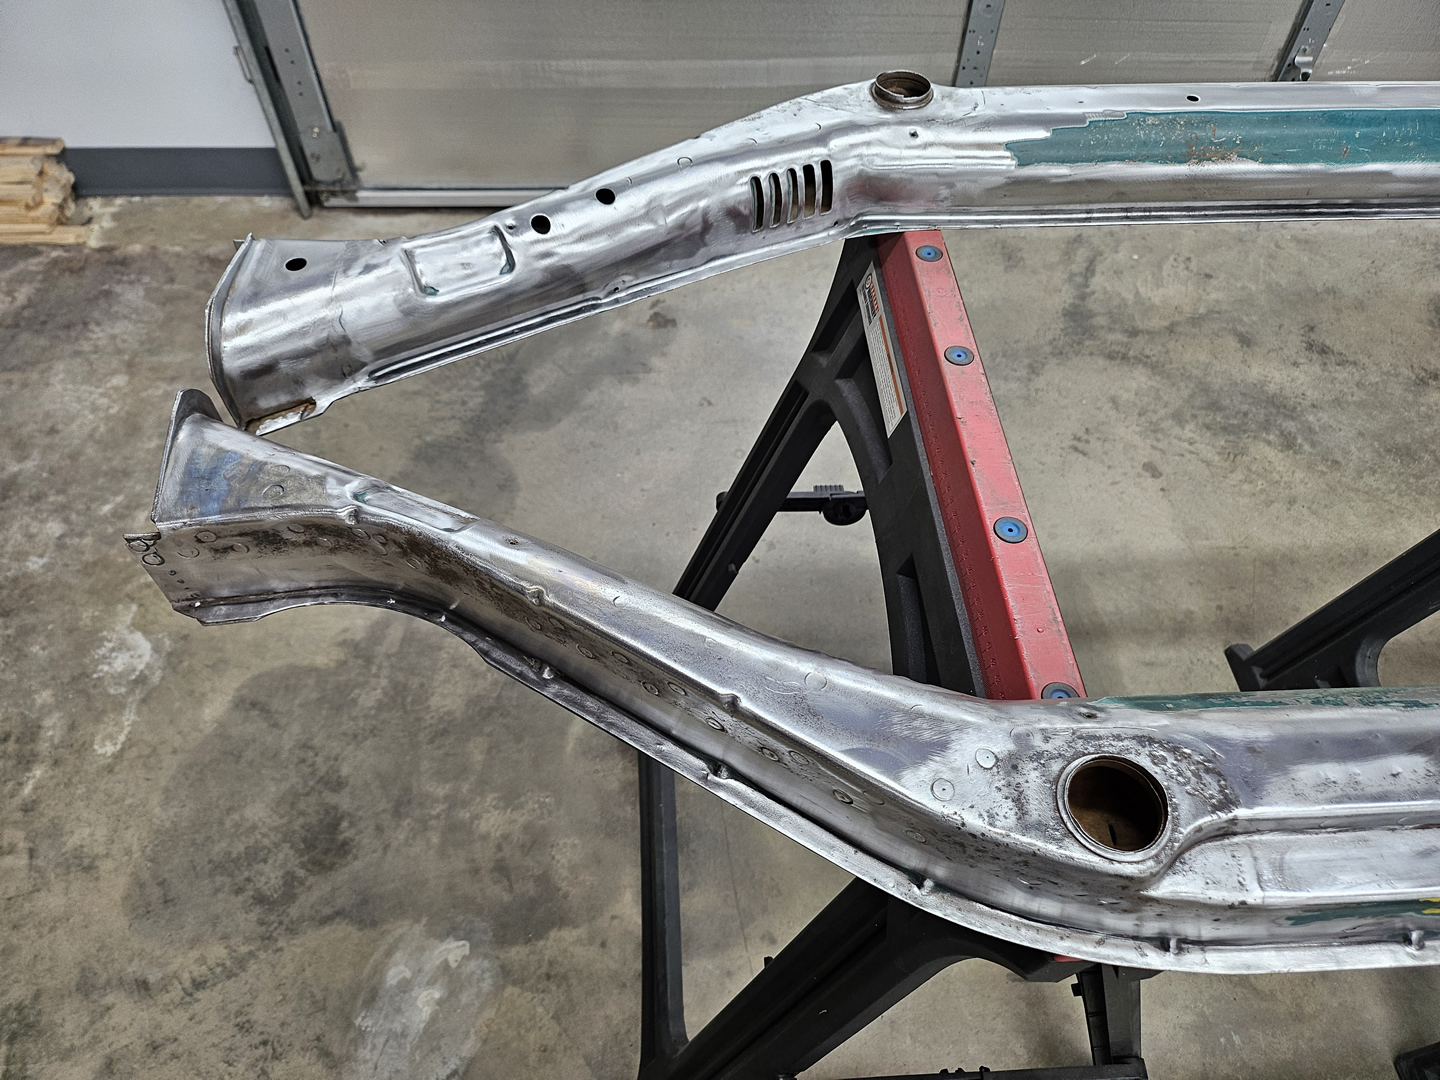
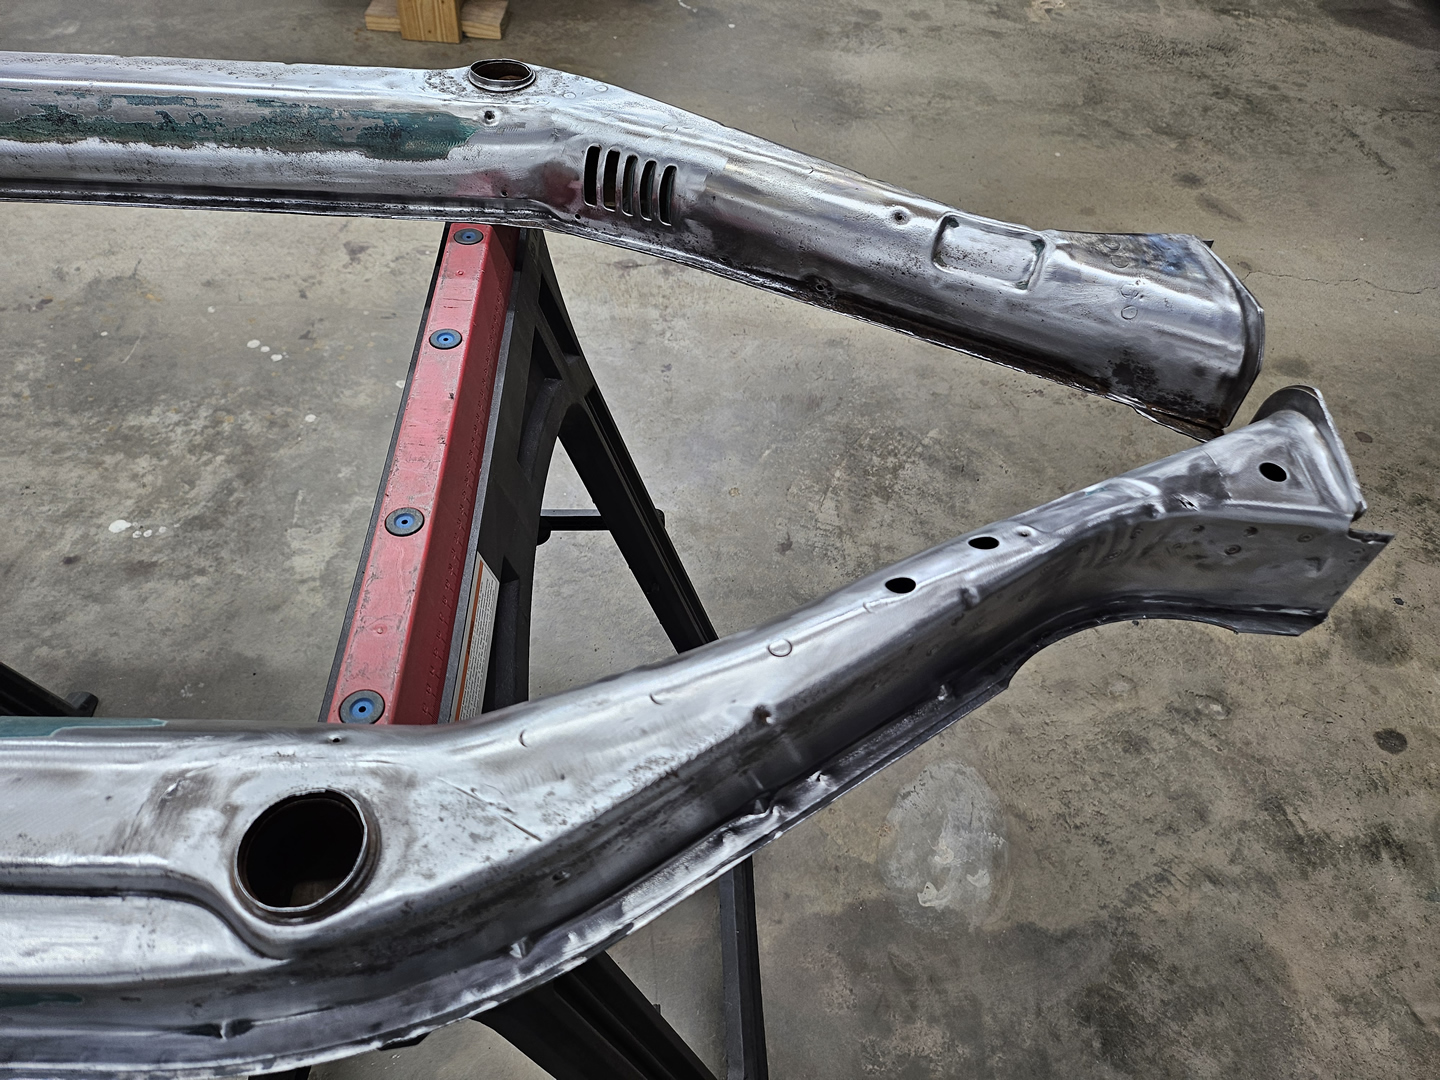
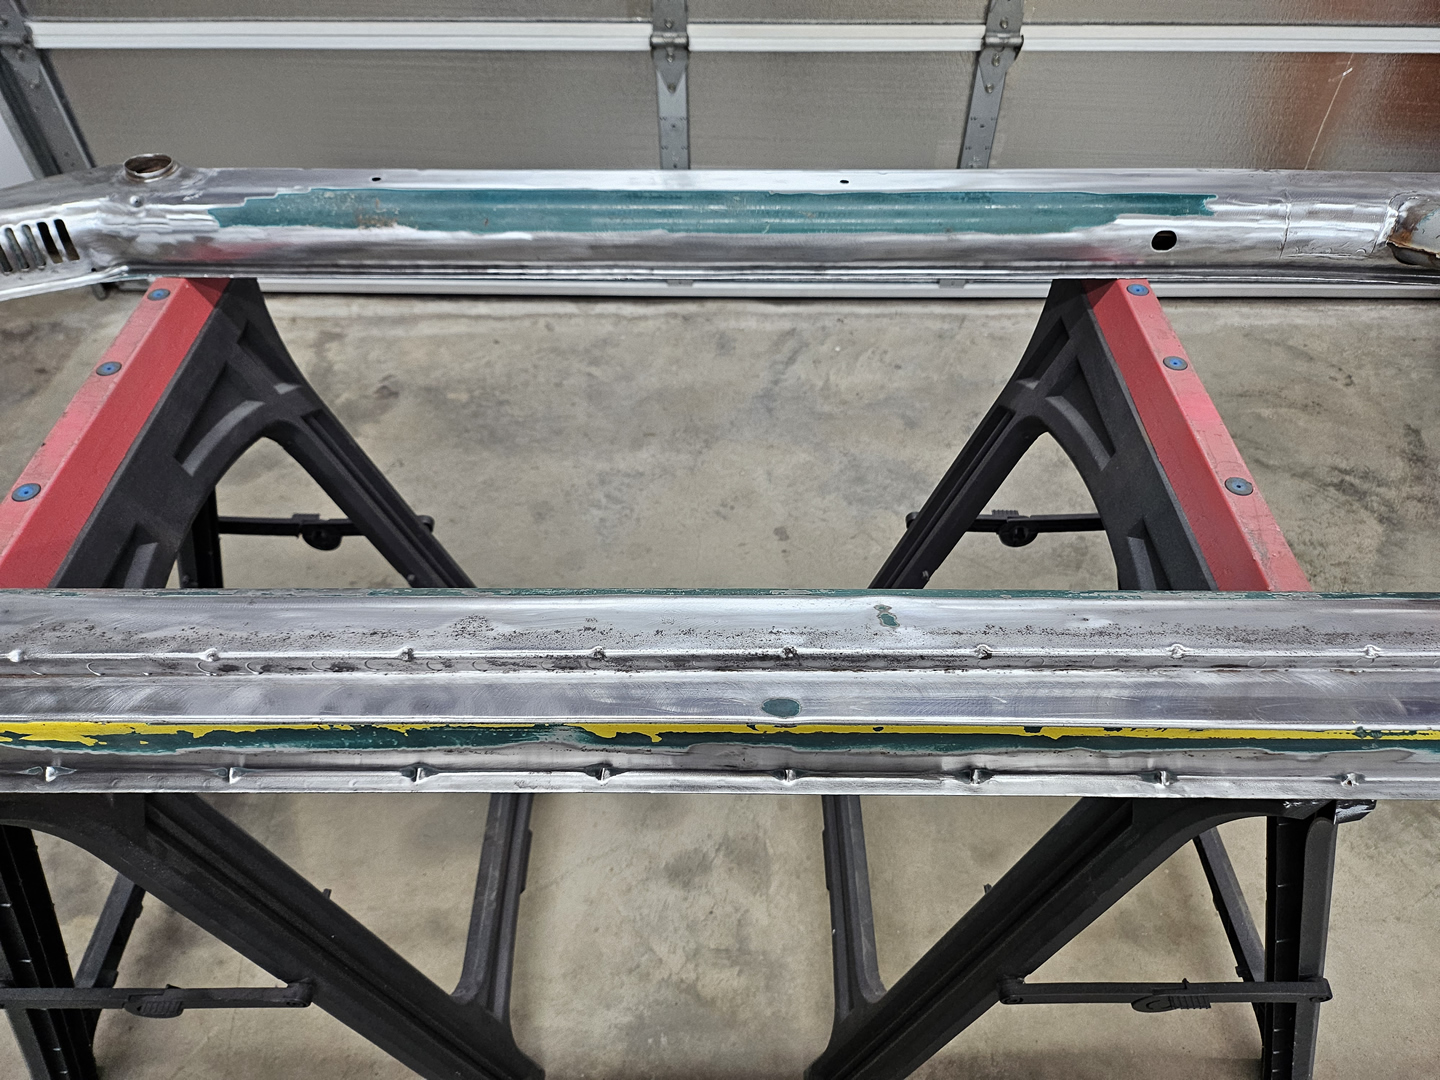
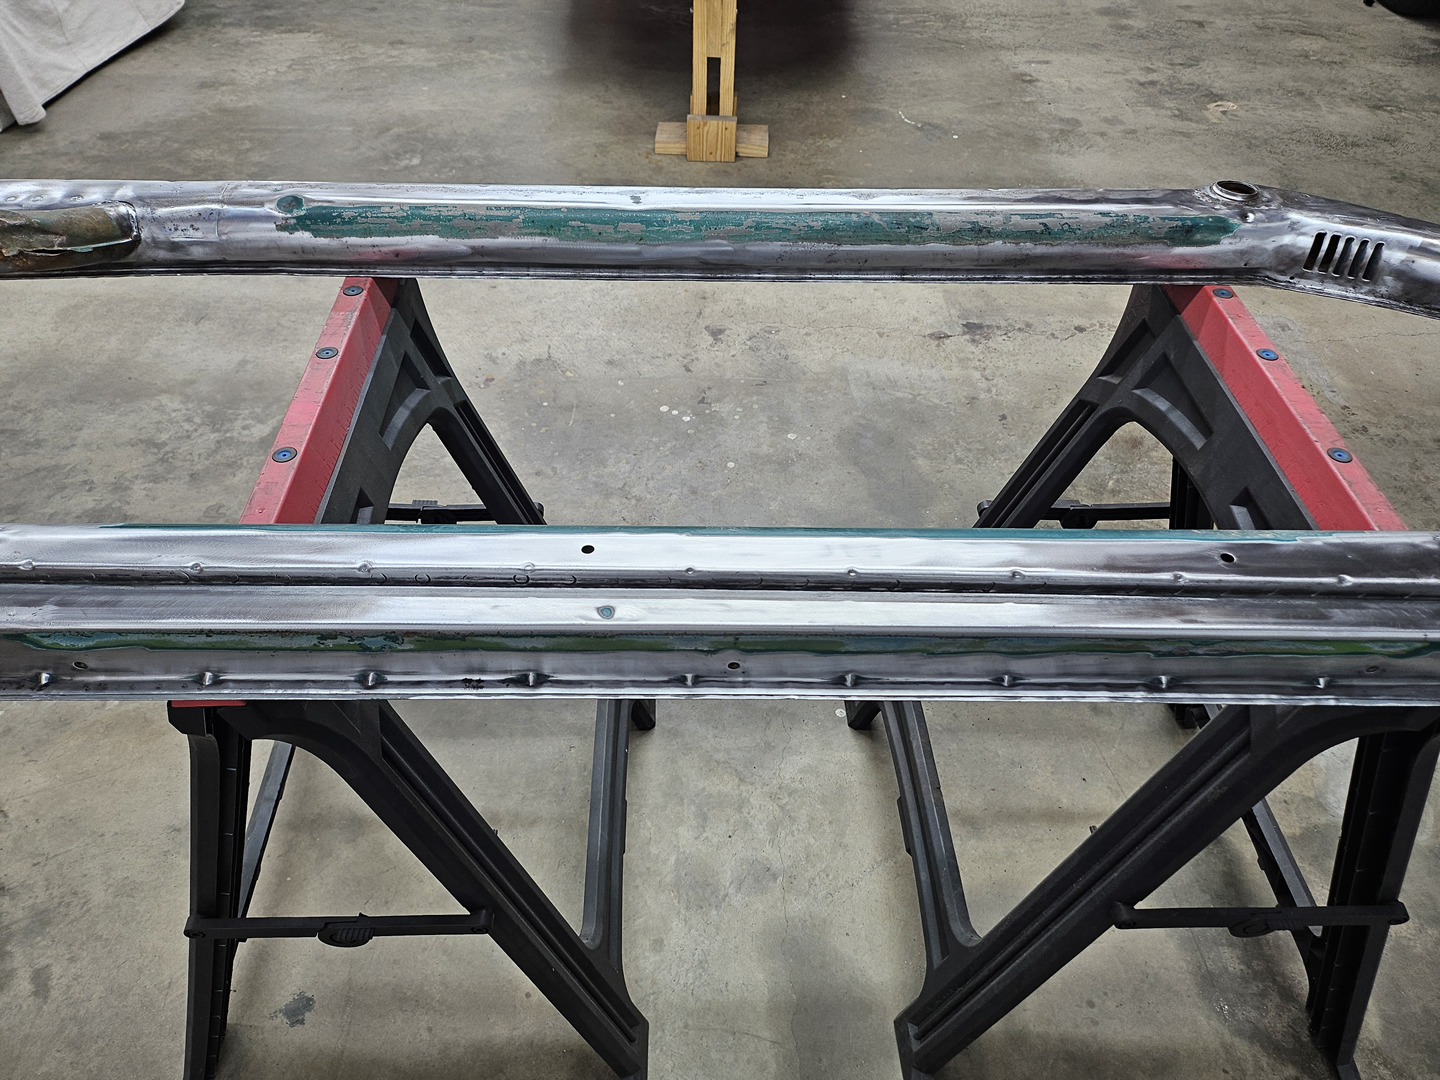
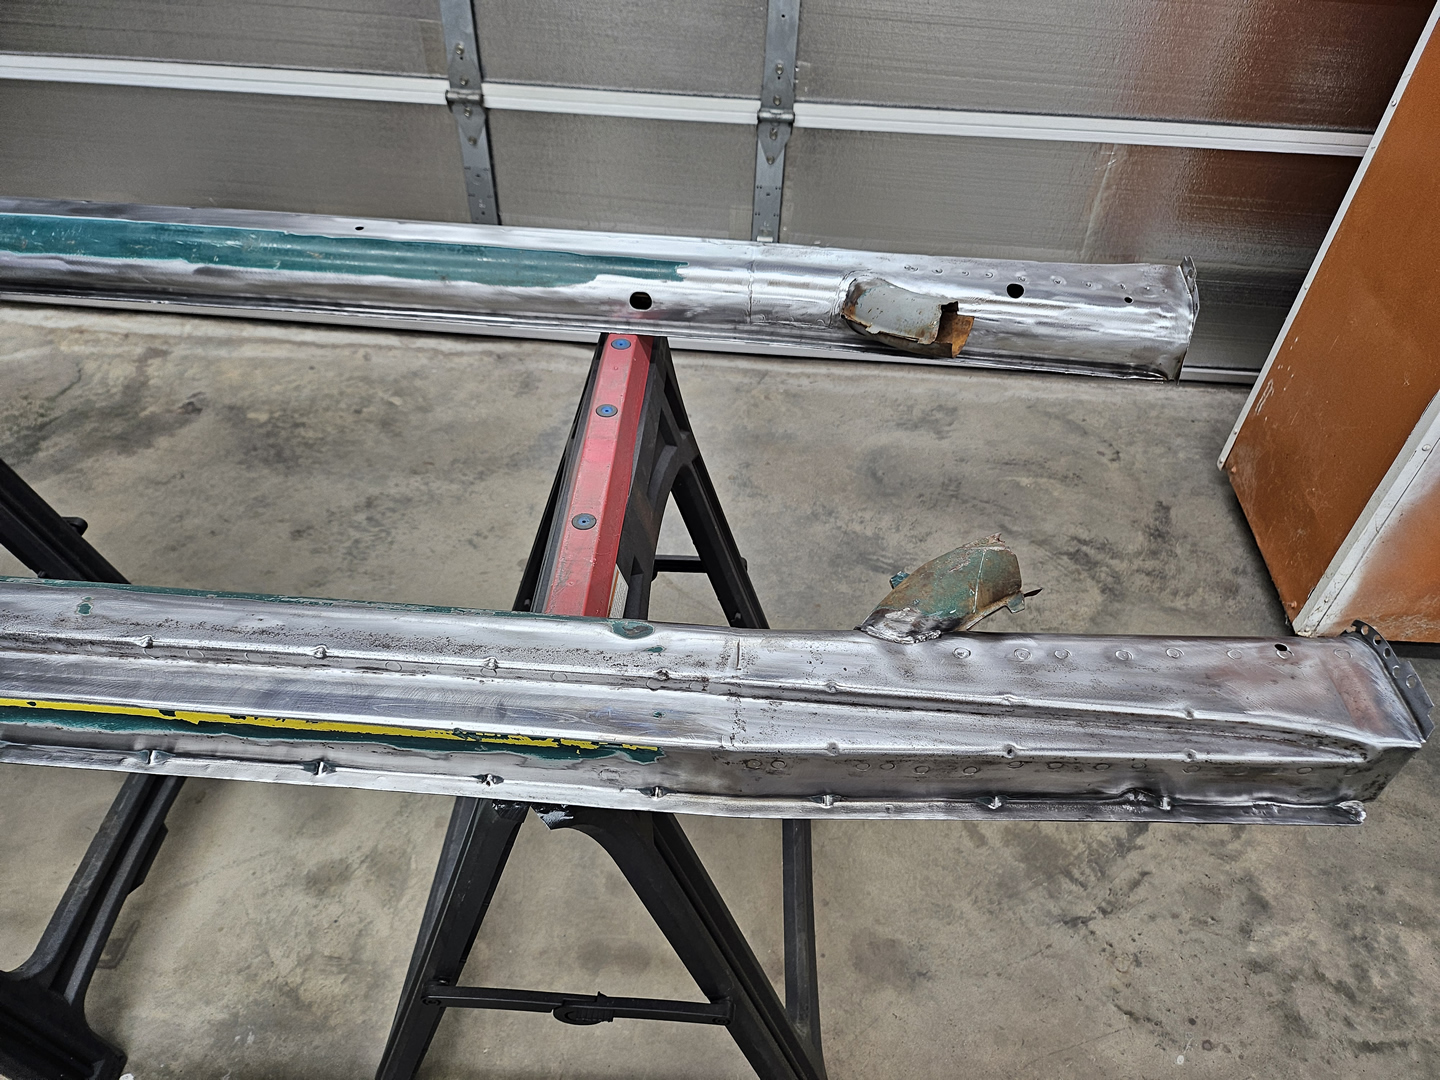
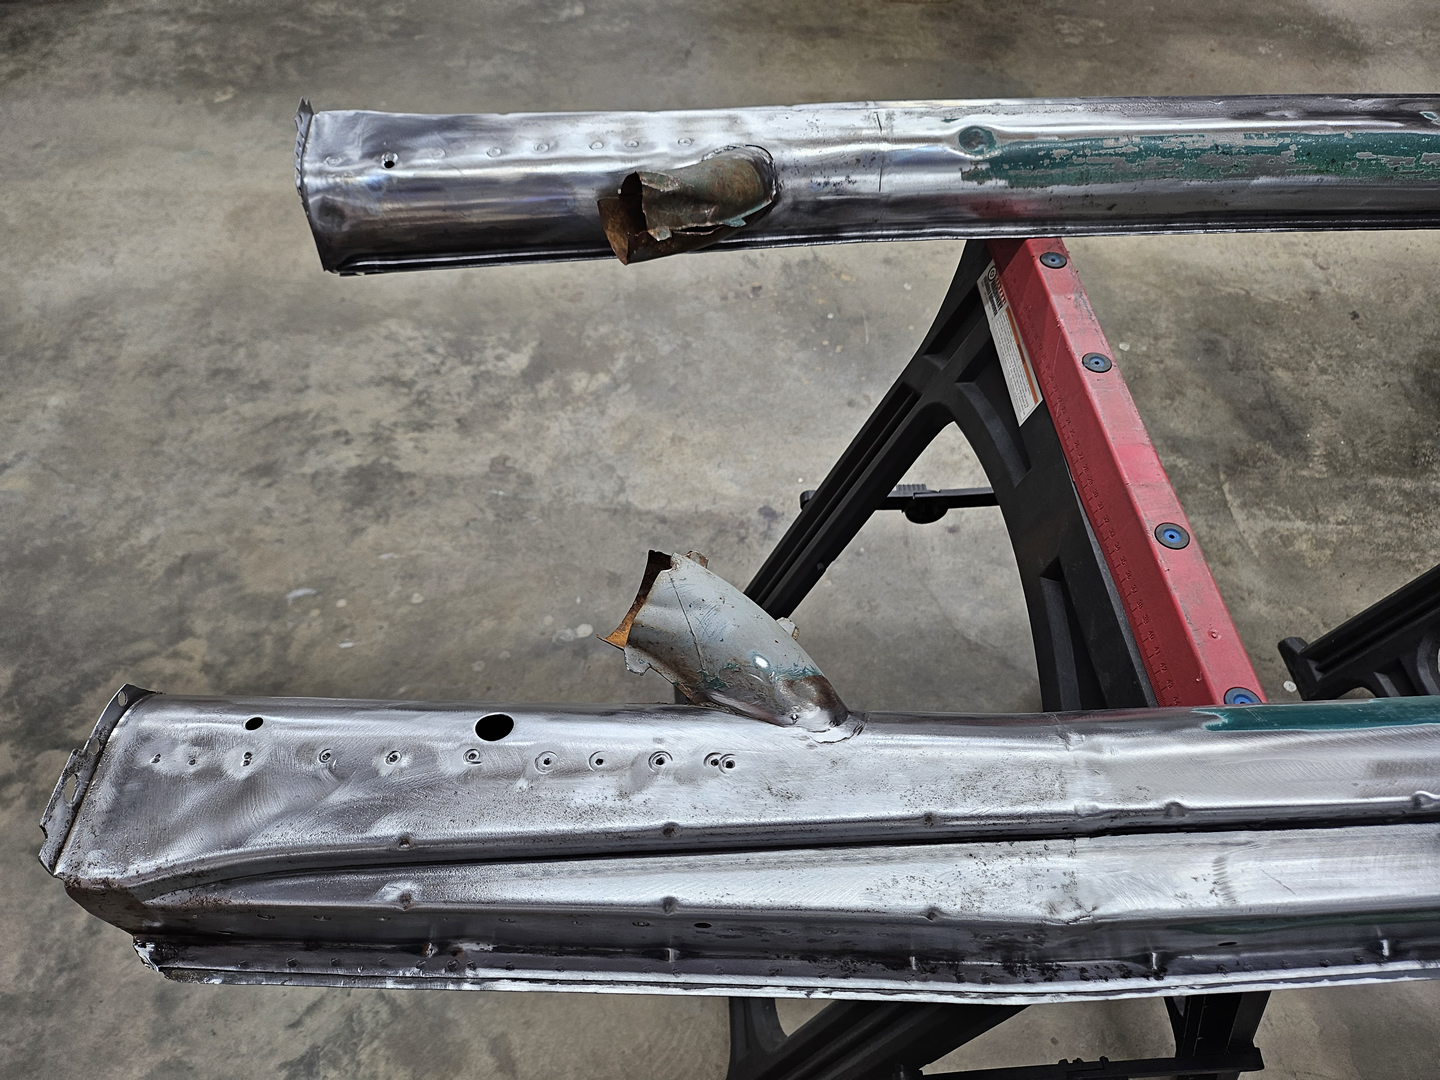
Ten years ago, I purchased two donor heater channels that included the quarter panels. I paid $100 each for them, which is way less than the only acceptable new channels from KlassicFab that are now $500 each with shipping. These will have the bottom plates replaced, which will add another $150 for the Autocraft panels that are almost exactly like the originals. It's a big job to do this, but I want to make sure that they are solid internally and to rust treat and protect them inside and out. Rather than trying to preserve the bottom plates and re-use them, I am going to sacrifice them to make sure that the other parts of the channels are intact. There are many spot welds on the channels, and it would be almost impossible to remove the bottom plates without damaging the plates and/or the channels. There are also quite a few repair that need to be done on both of the channels as well.
|
|
|
|
|
|
|
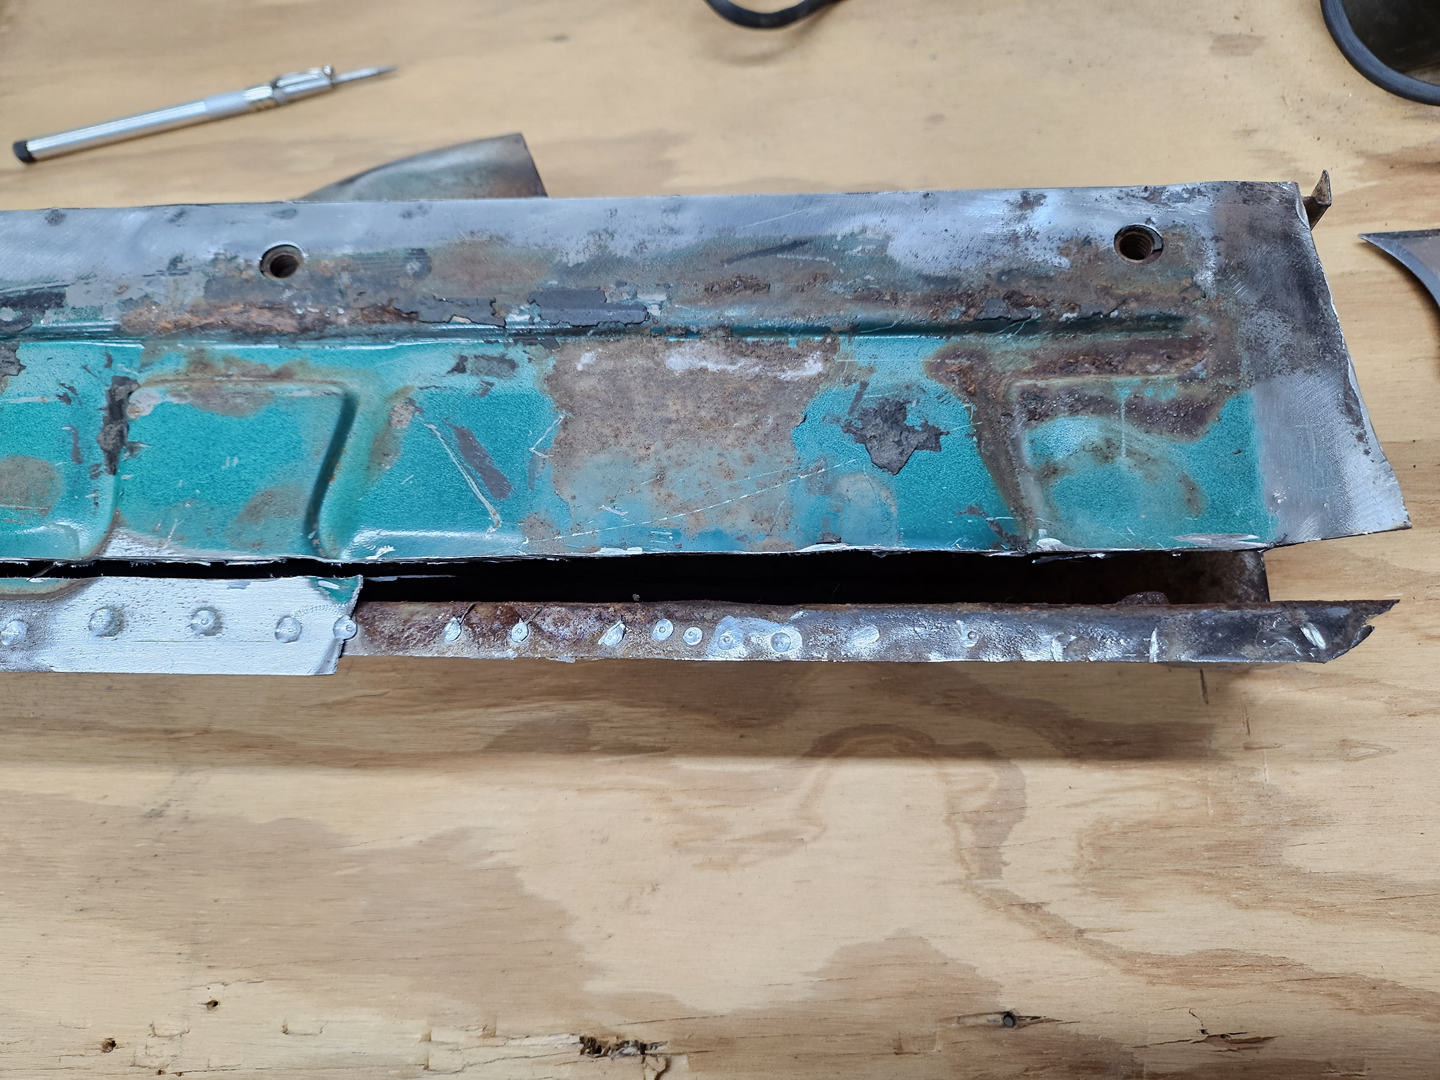
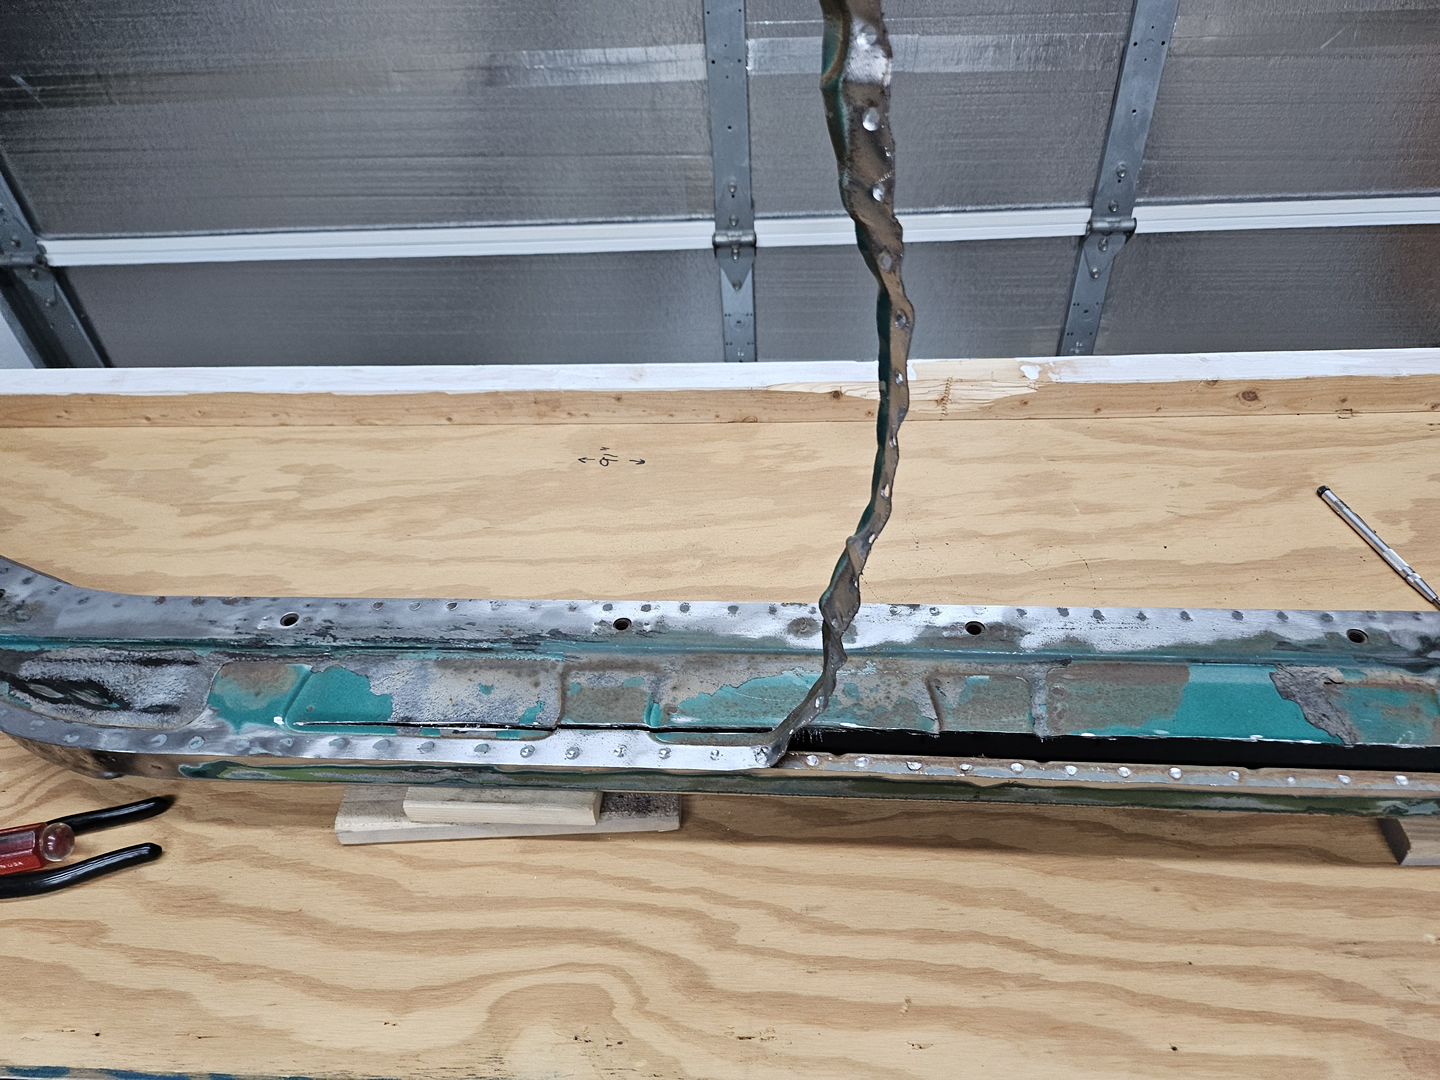
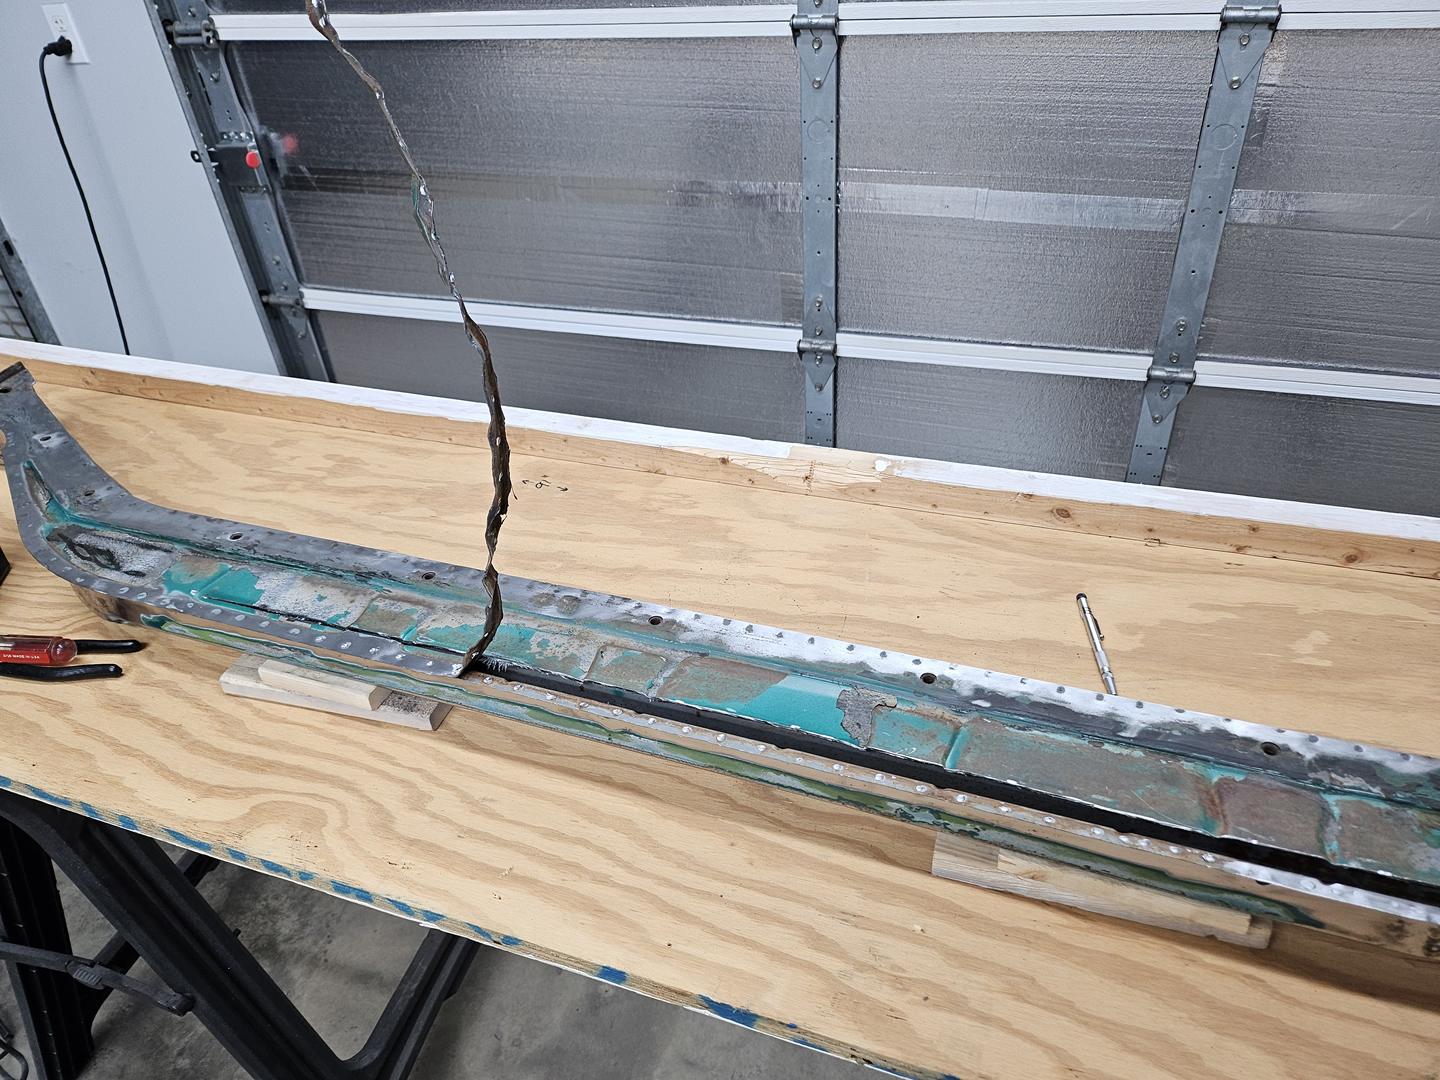
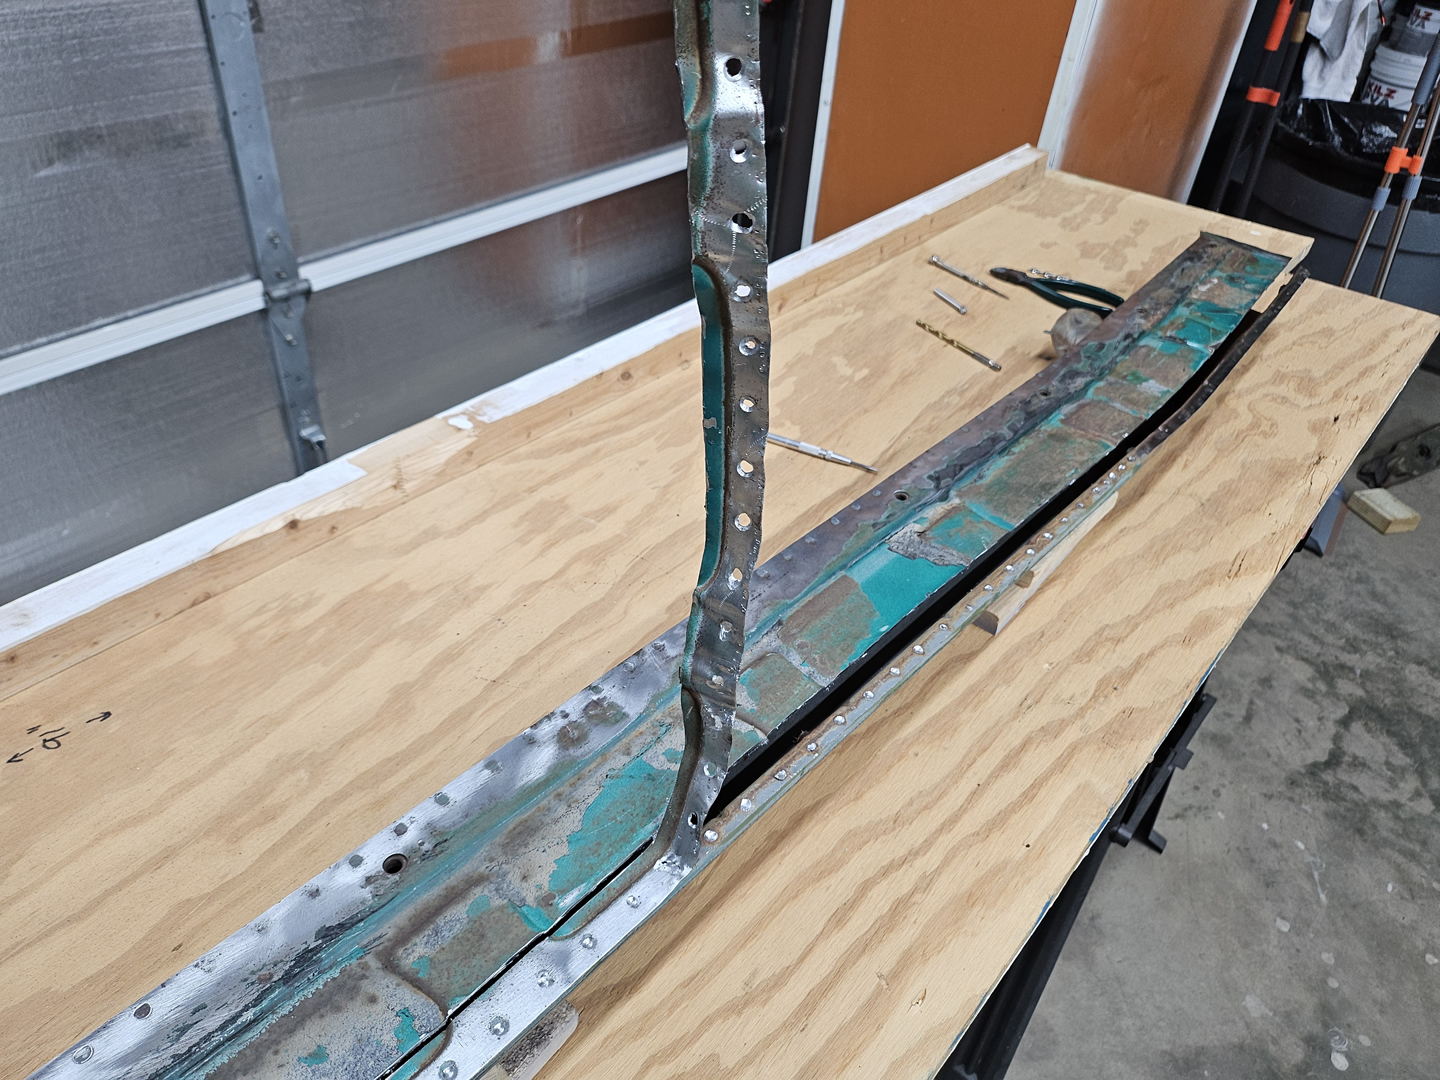
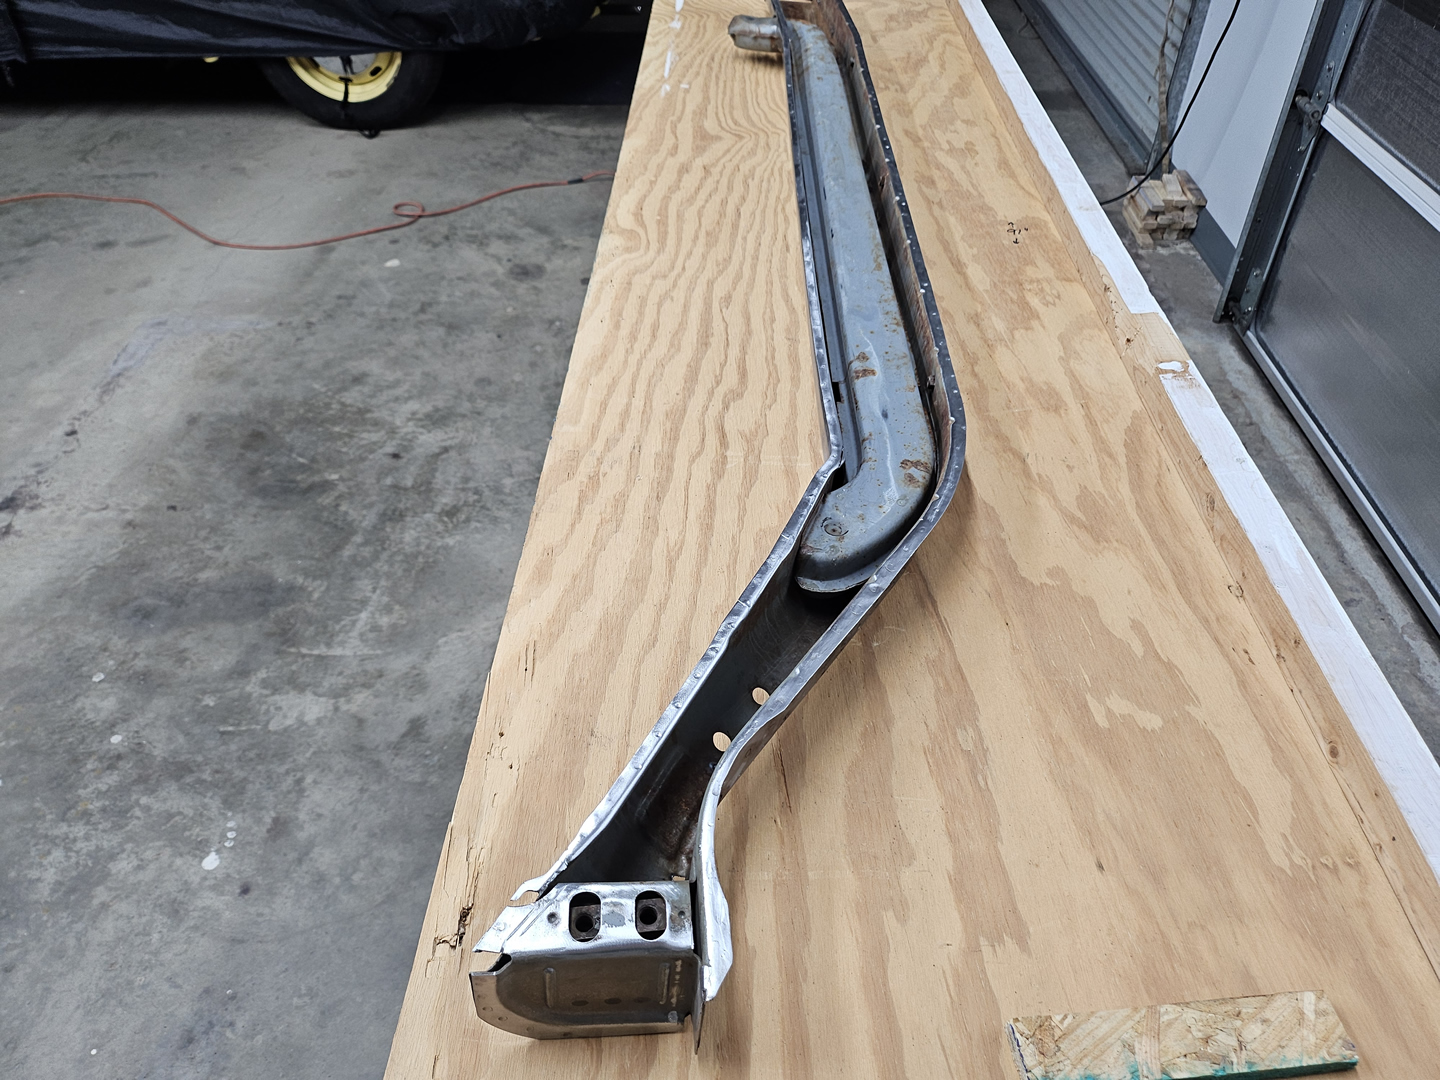
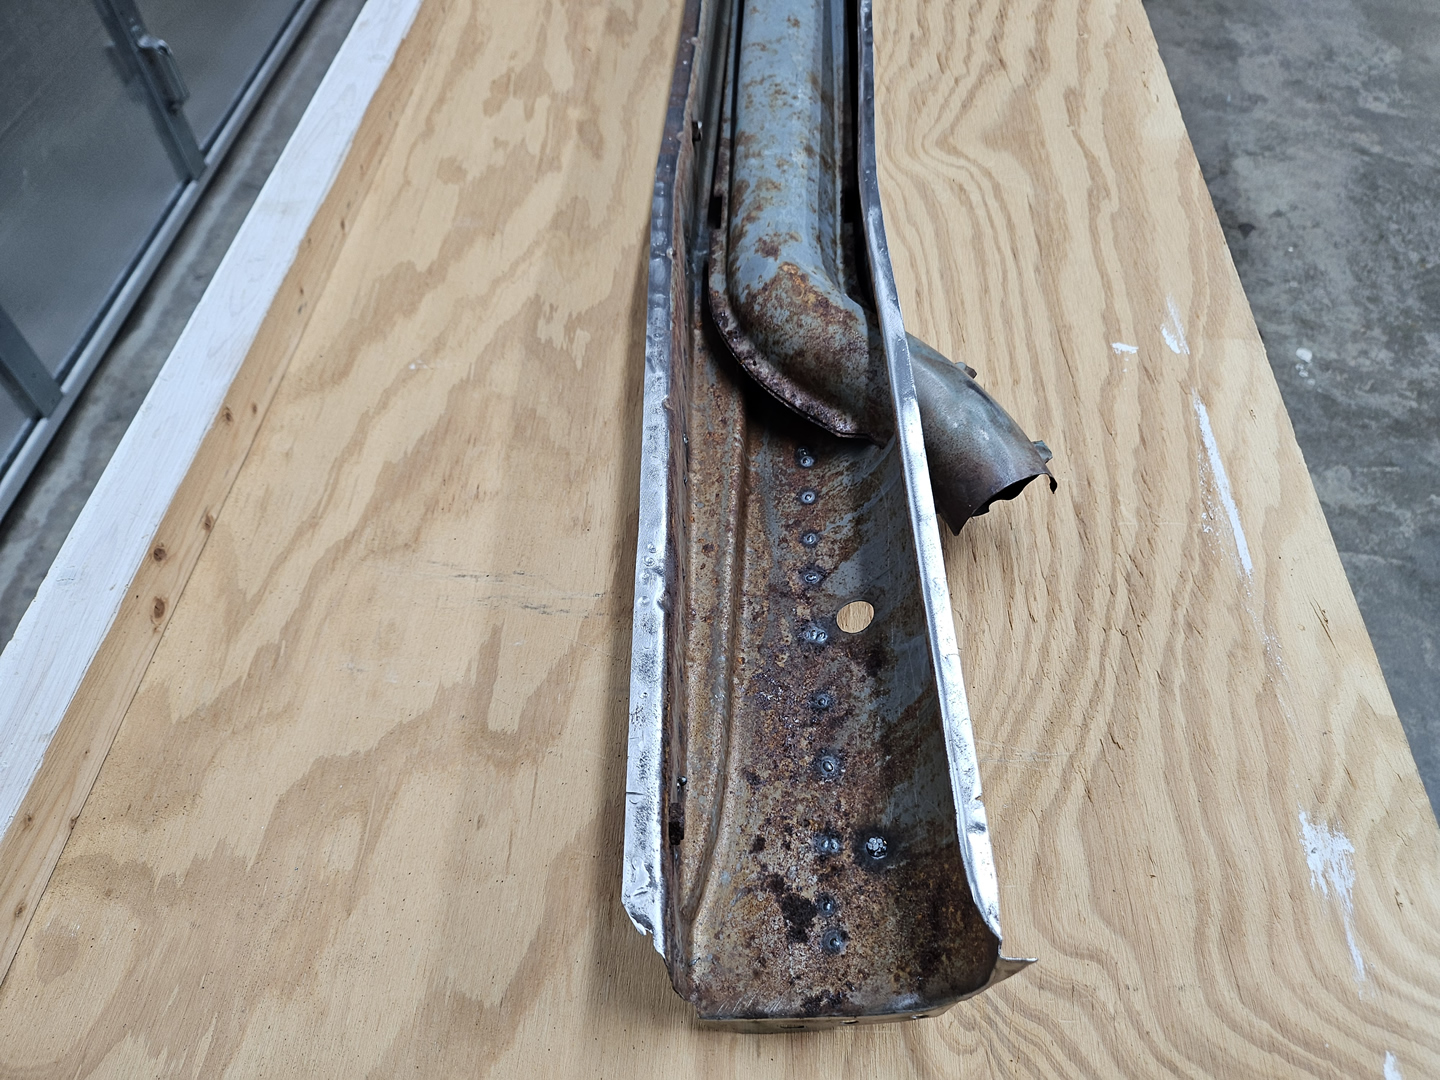
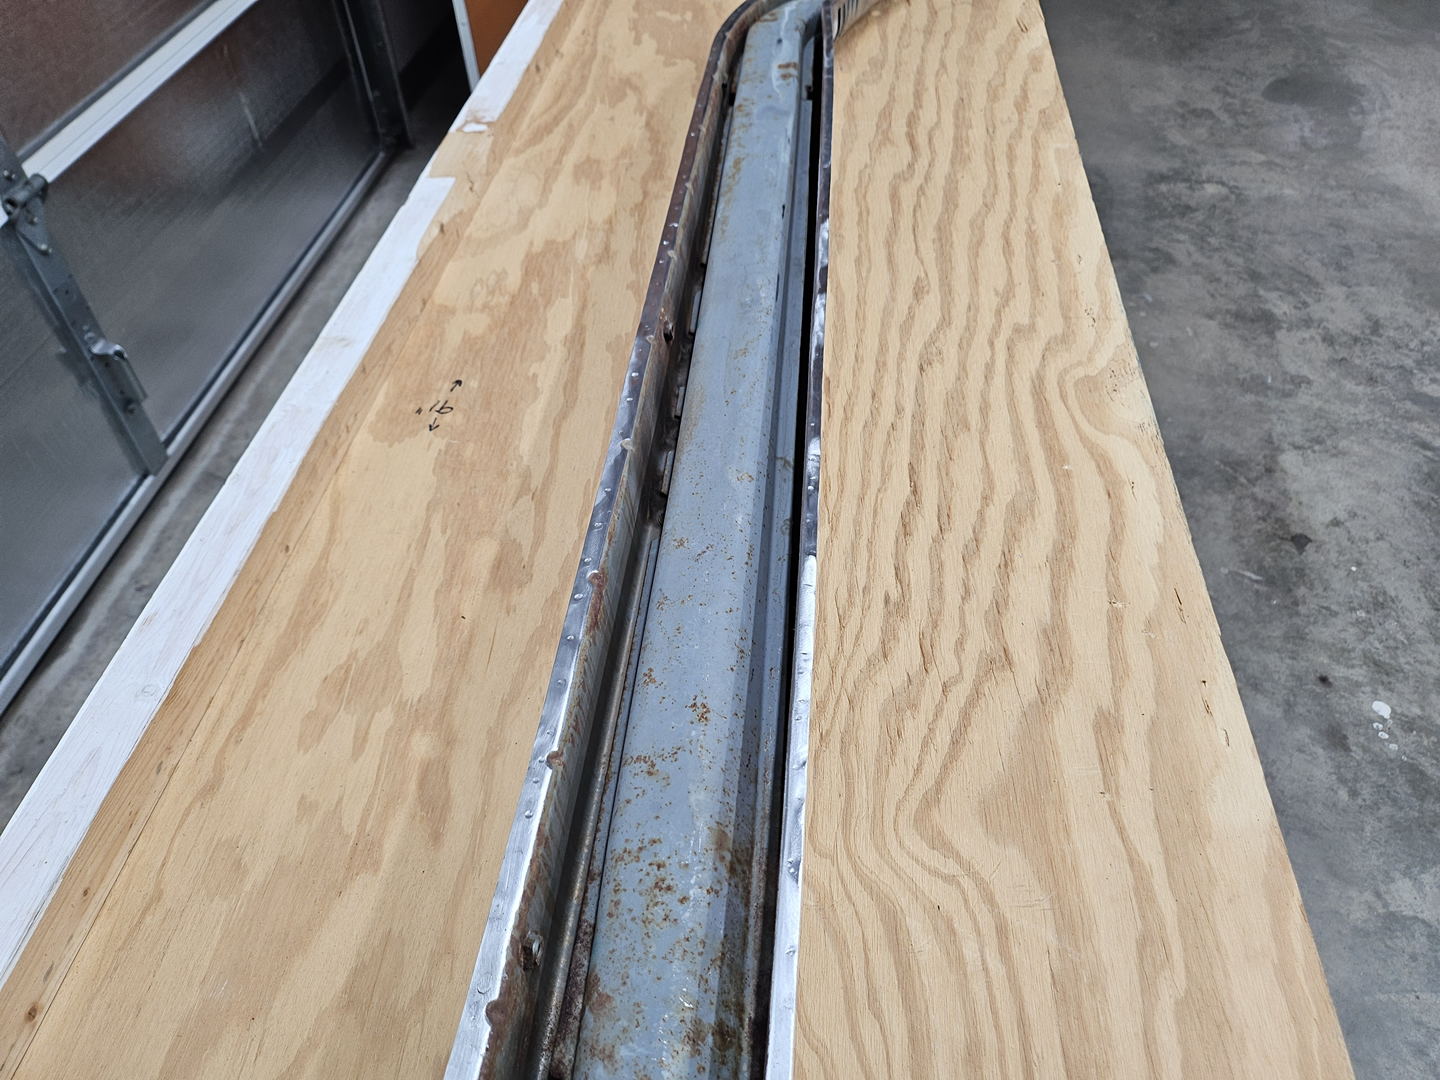
I started on the passenger side heater channel first. It is in the best condition of the two. I first went through and welded up any holes or deep cuts from the spot weld cutters I used when I was removing the remnants of other panels. I then started removing the bottom plate. This is not an easy job. There are around 100 spot welds on each side of the bottom plate. I found that the best way to remove the plate was to grind down into the spot welds, cut the bottom plate on each side about 3/4" from the edge, and then peel off the strip that was left of the plate. This took many hours to do both sides. I took my time and tried to be very careful not to damage the metal underneath the strips. Once all of the plate had been removed, I then ground off the pieces remaining of the spot welds and cleaned up the flanges on both sides. I was pleased to discover that there wasn't a lot of rust on the inside of the channel.
|
|
|
|
|
|
|

|
|

|

|
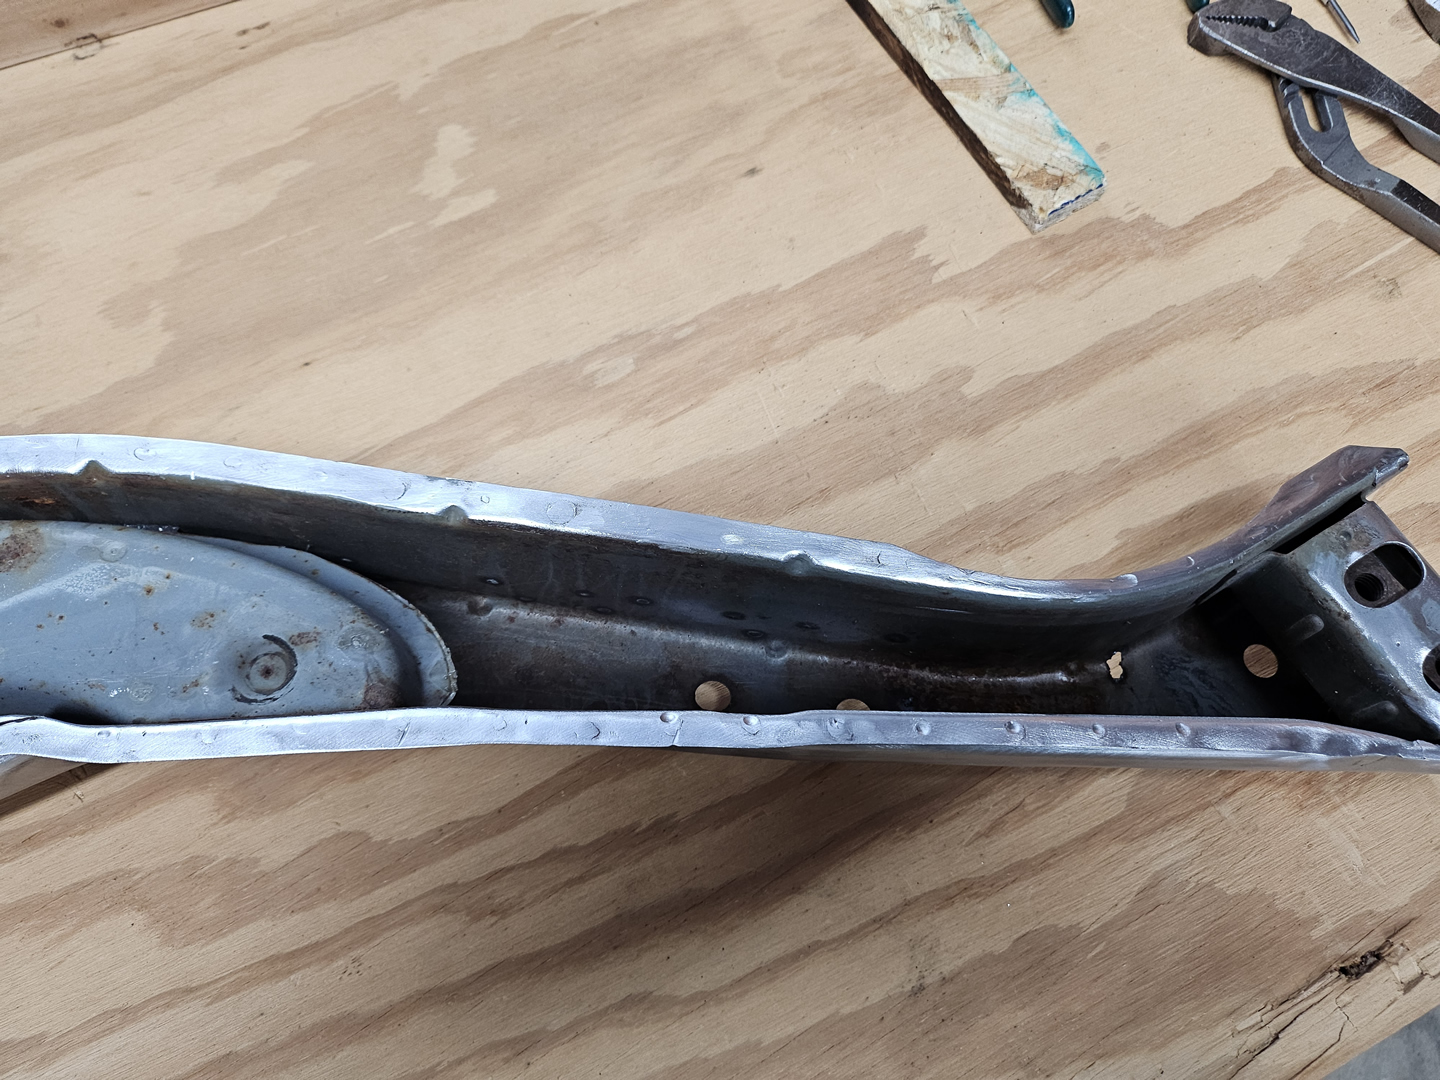
I discovered one weird thing that inner side part of the front end cap where the threaded plate is mounted - this side is not attached to the body of the channel. It is on the outer side, but not on this side. The bottom plate, however, is welded to this part of the end cap. I'm not sure why it is designed this way. Perhaps it is to give it some flexibility to this area when attaching to the bottom of the front firewall.

|

|
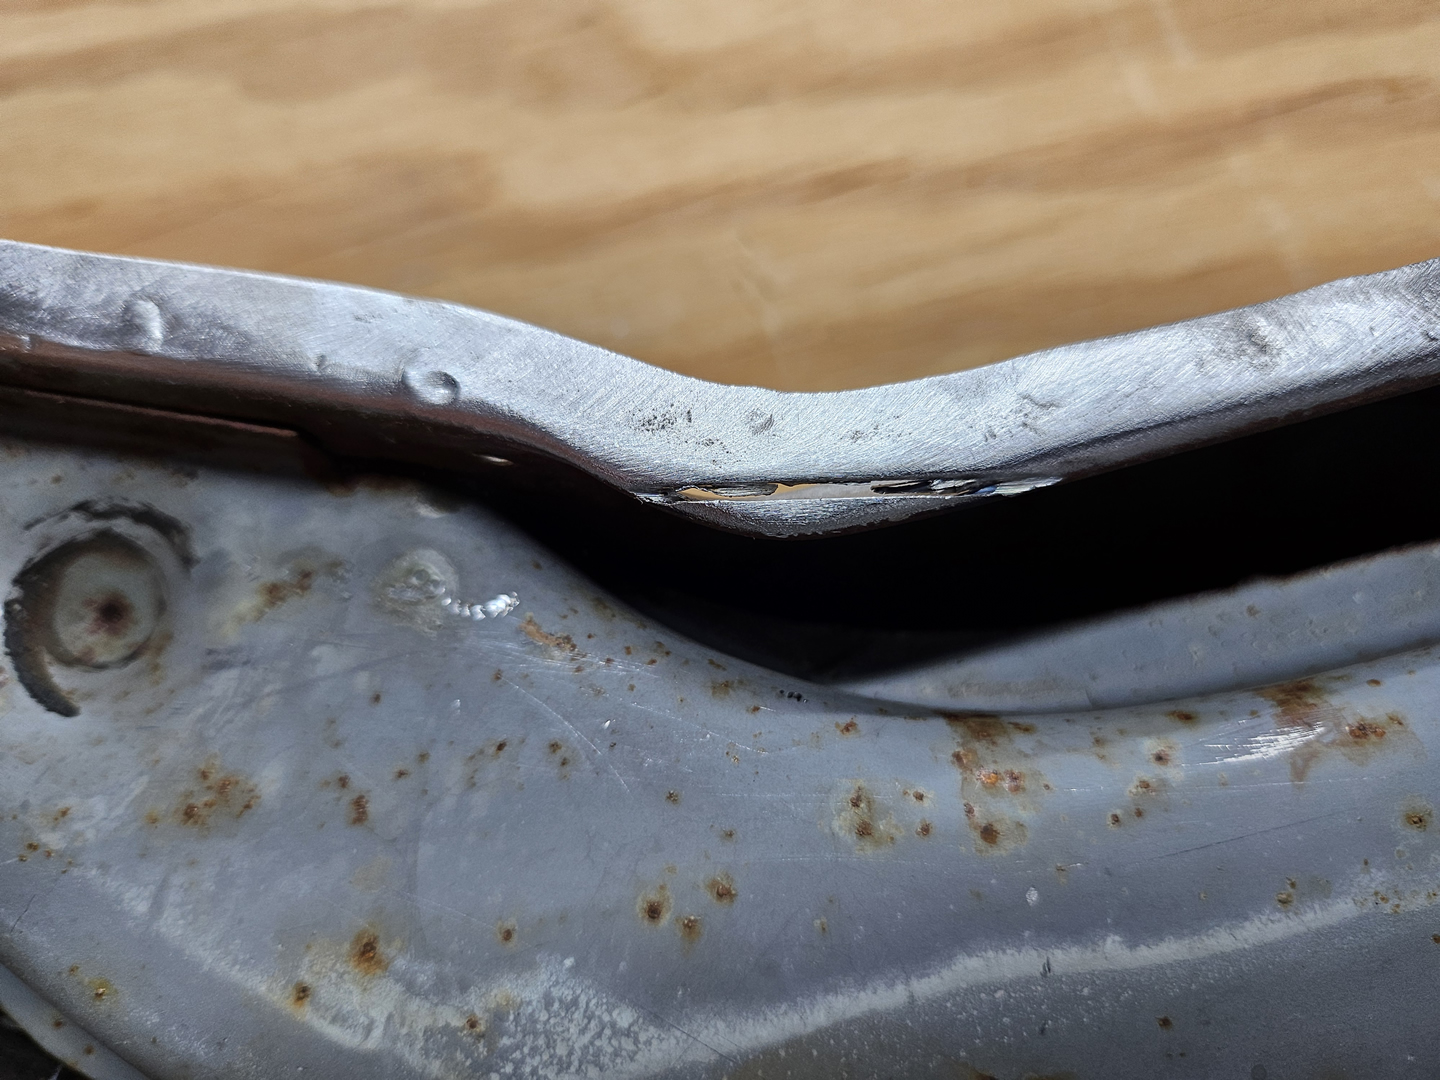
Also, I was a bit careless and cut into a sharp bend of the channel when removing the bottom plate. More welding practice.
|
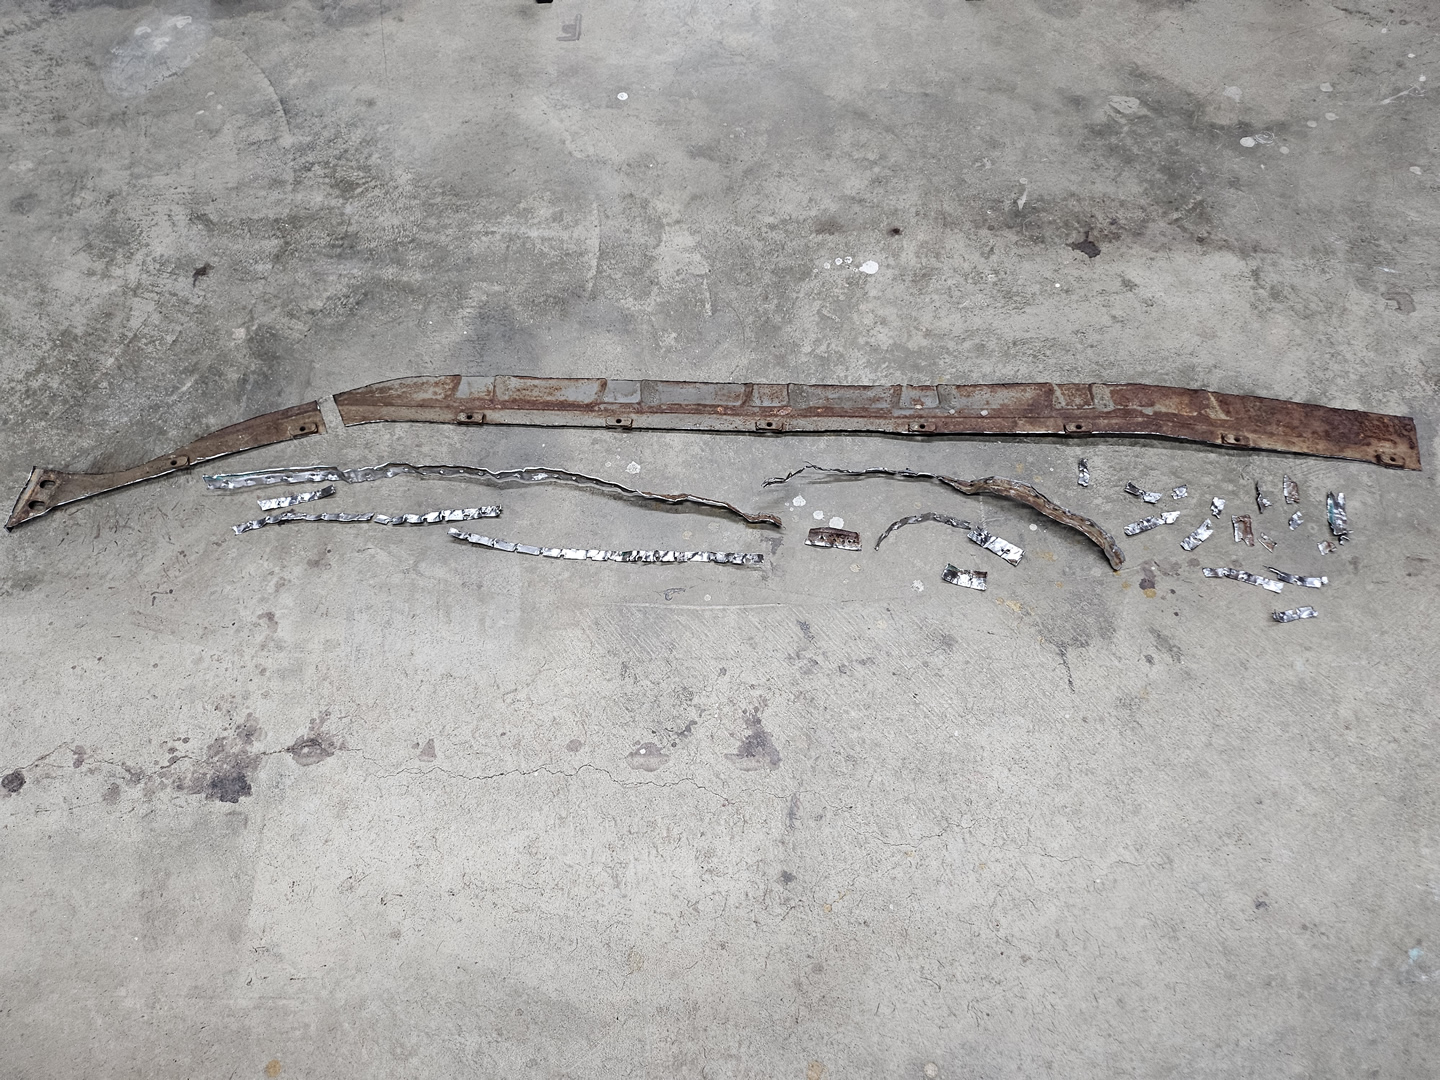
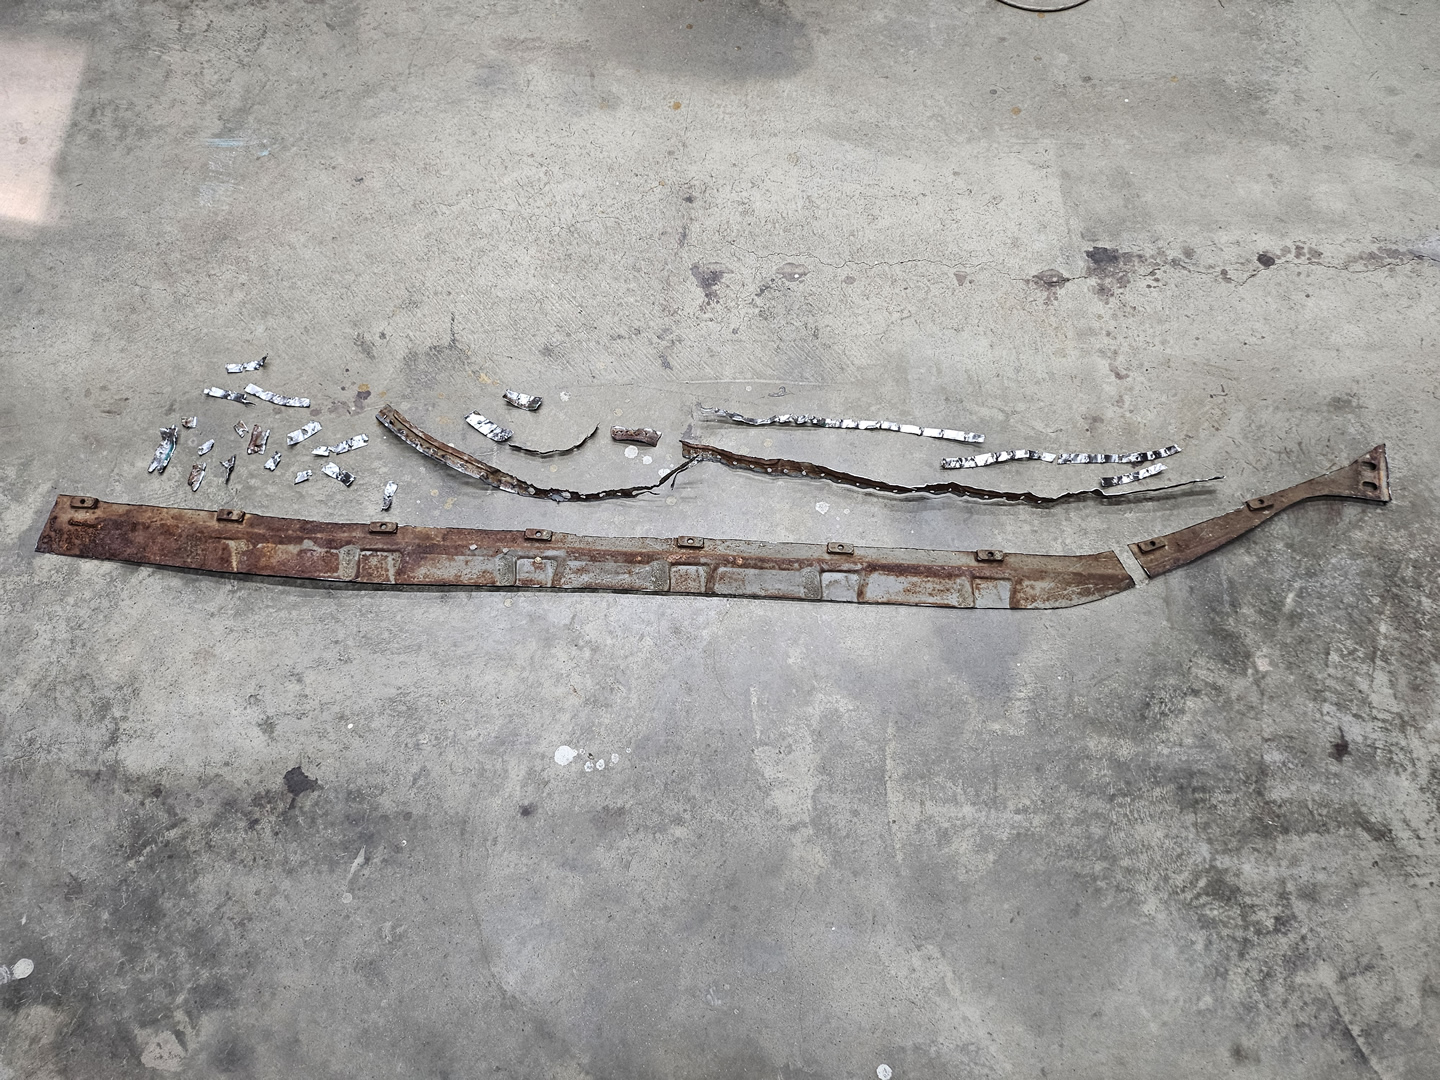
After the plate was completely removed, I was left with a pile of rusty and twisted metal. Overall, it was worth the effort to remove the bottom plate on this channel as it was very rusted and dented.
|
|
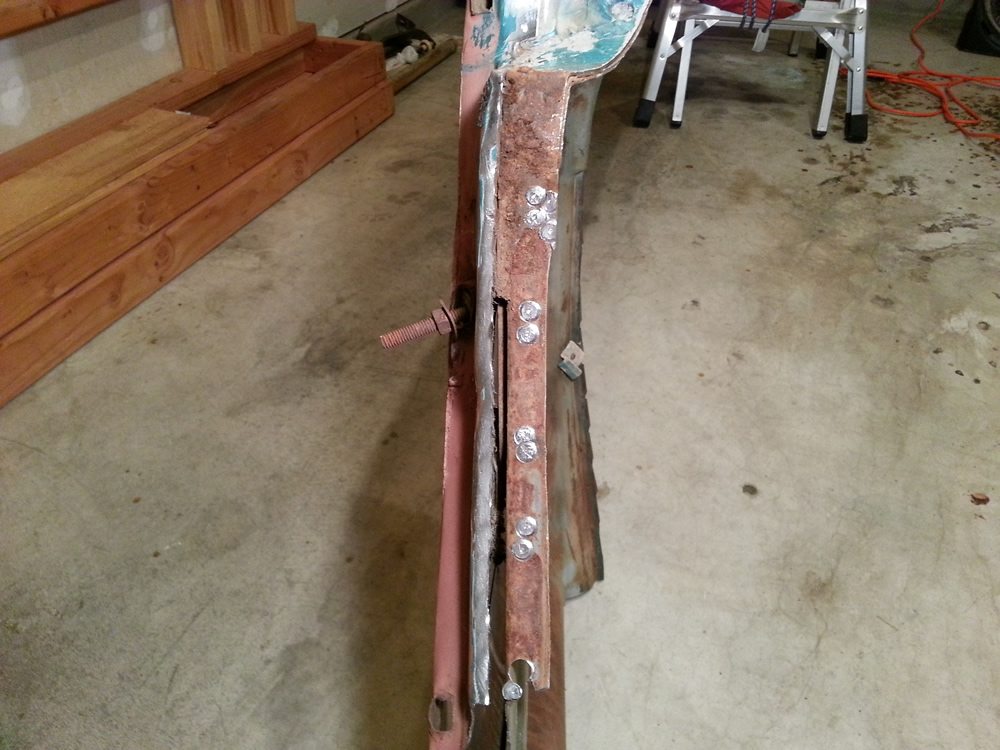
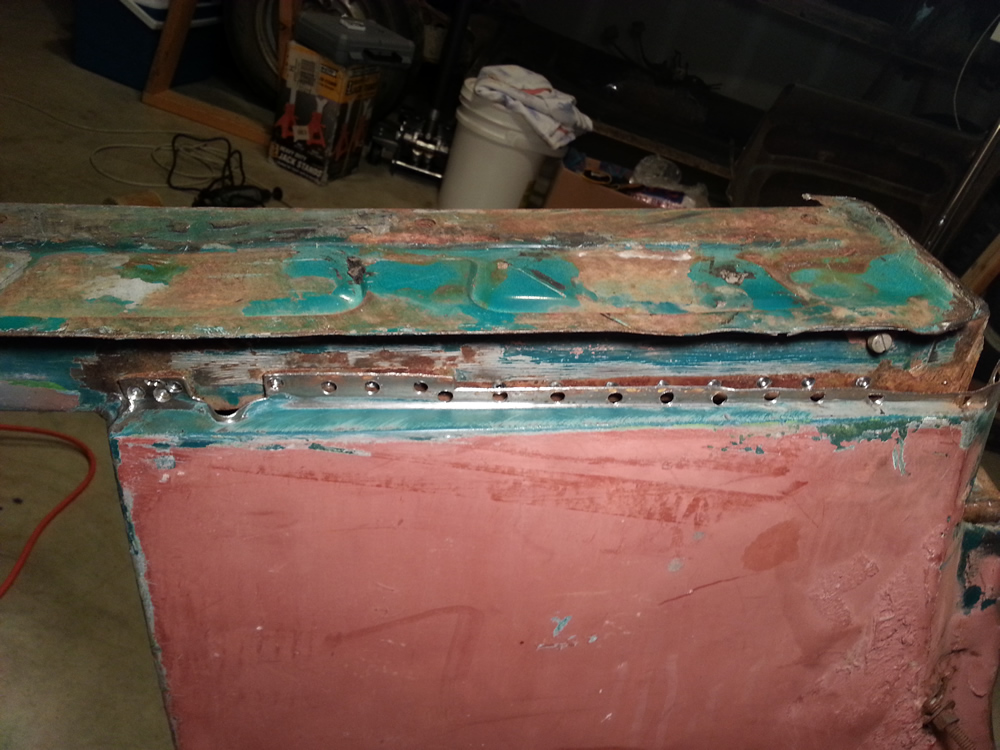
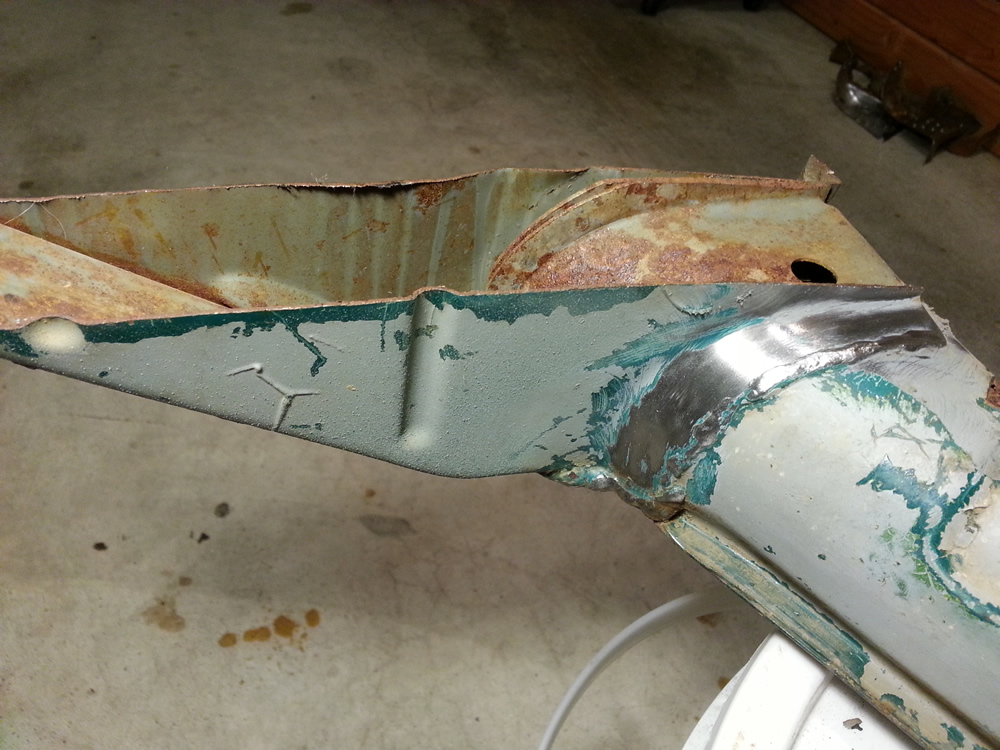
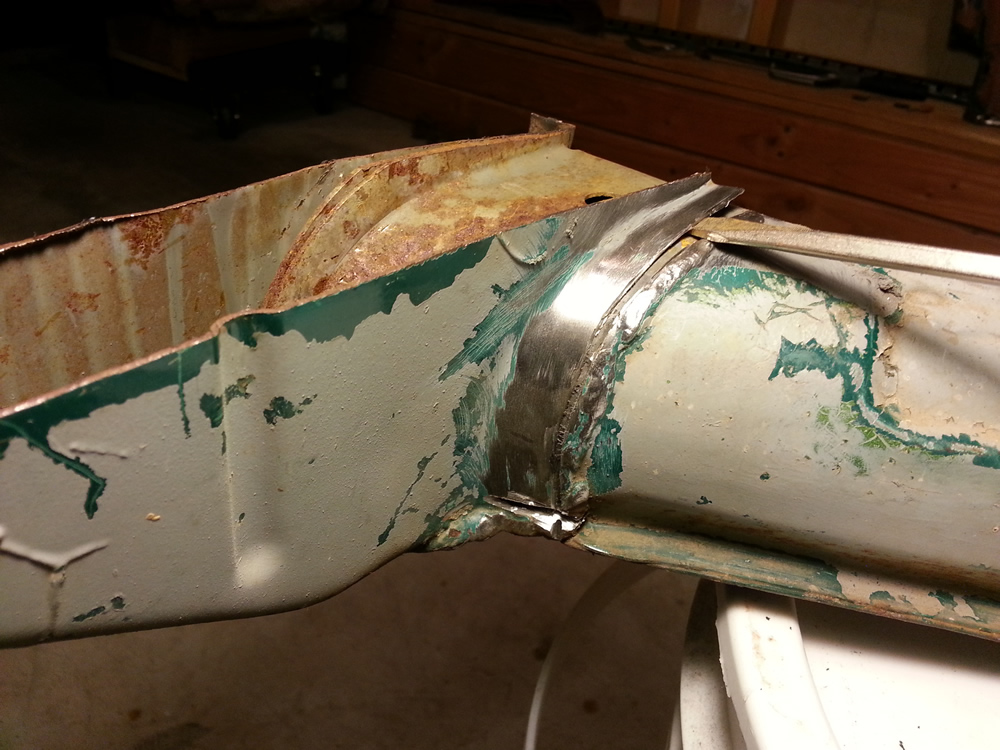
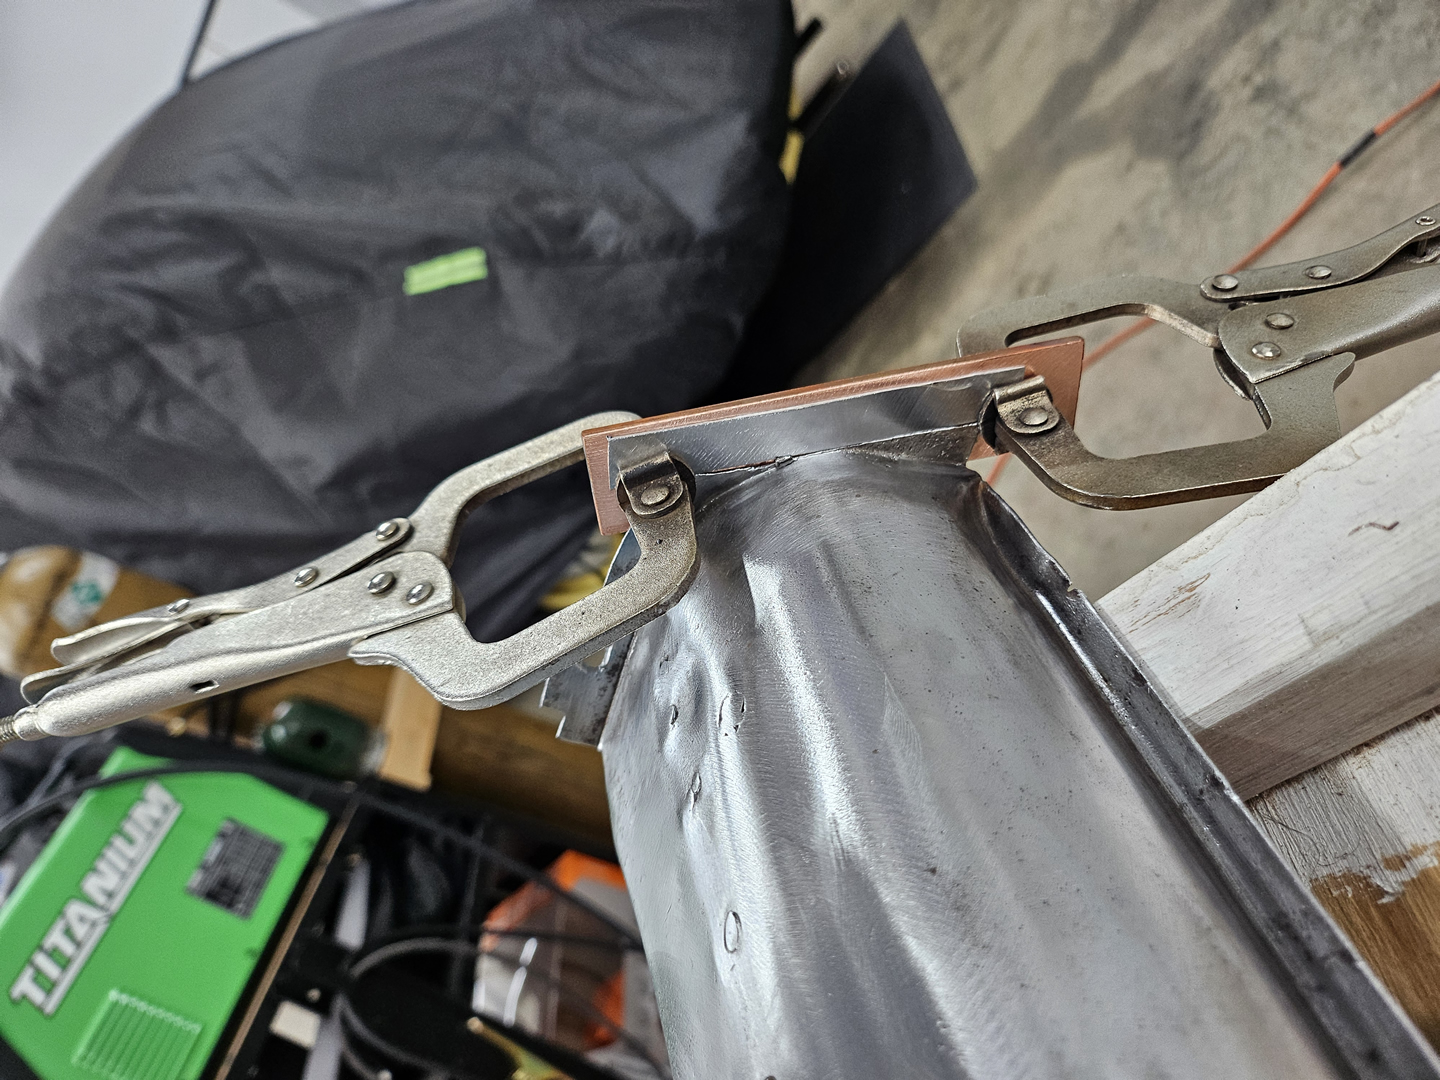
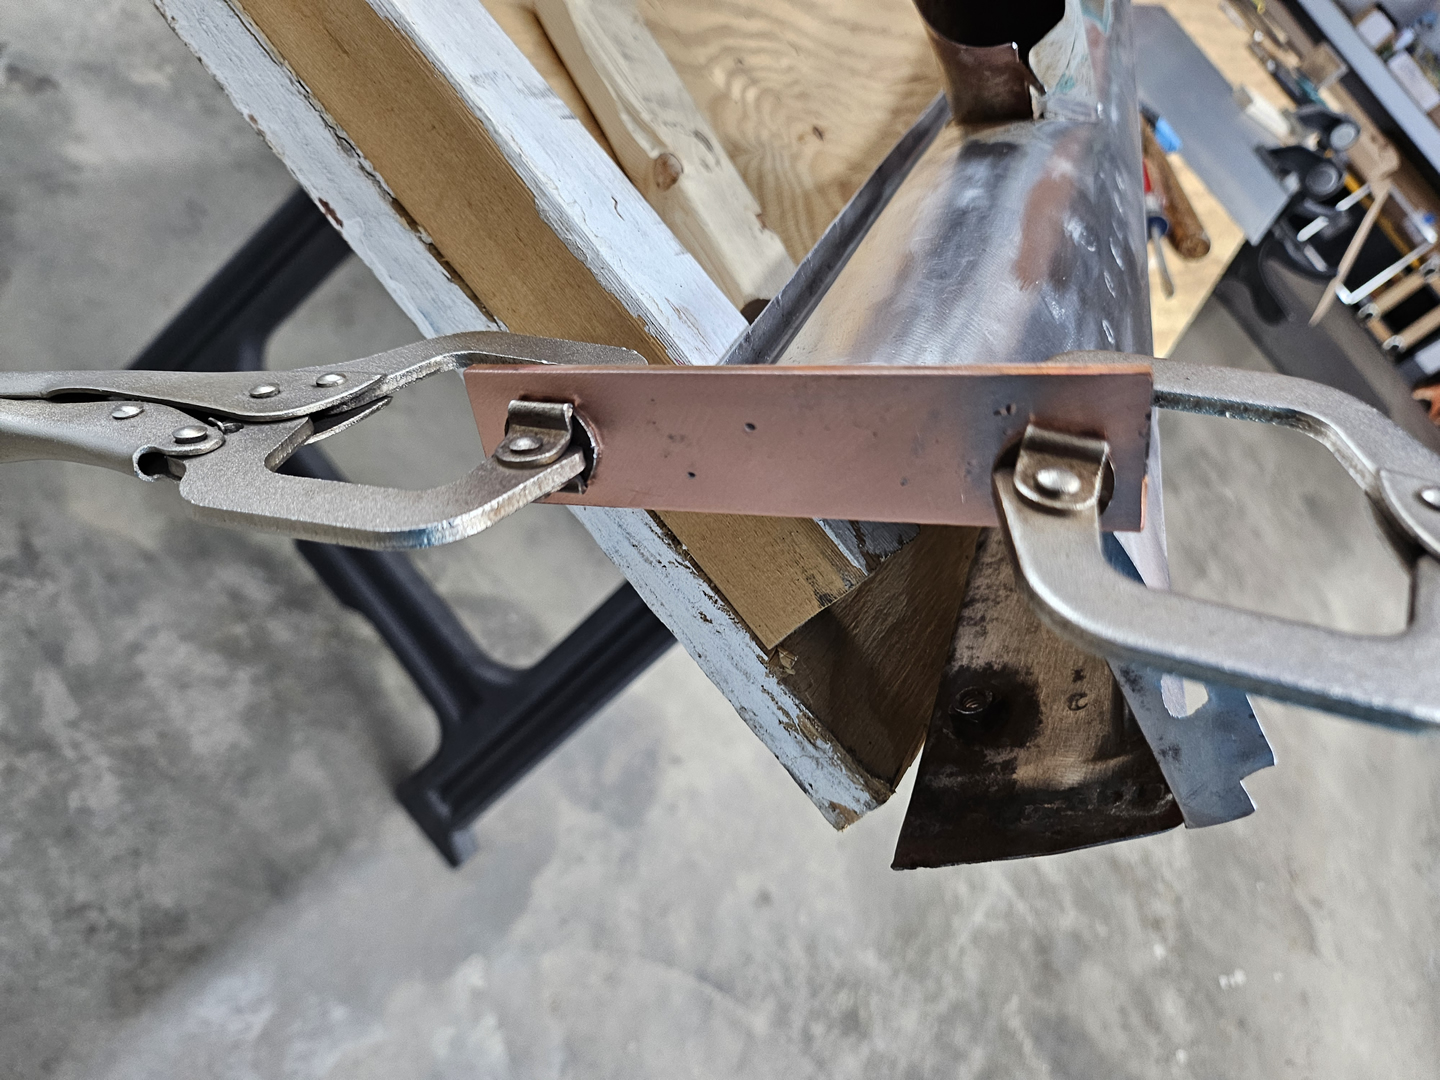
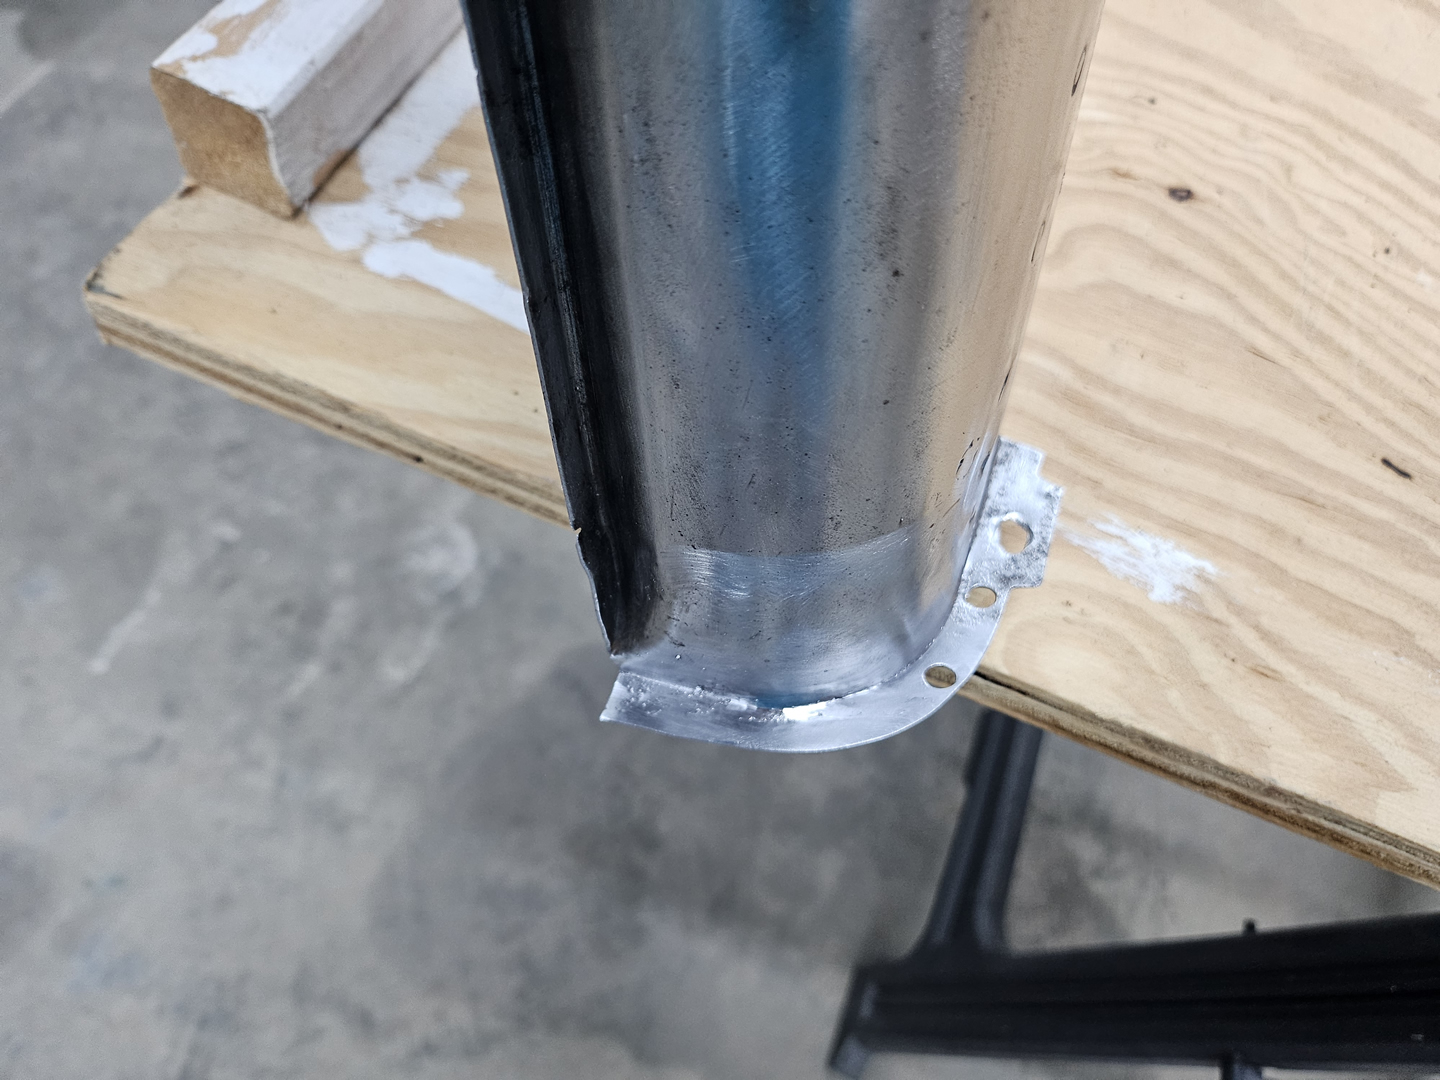
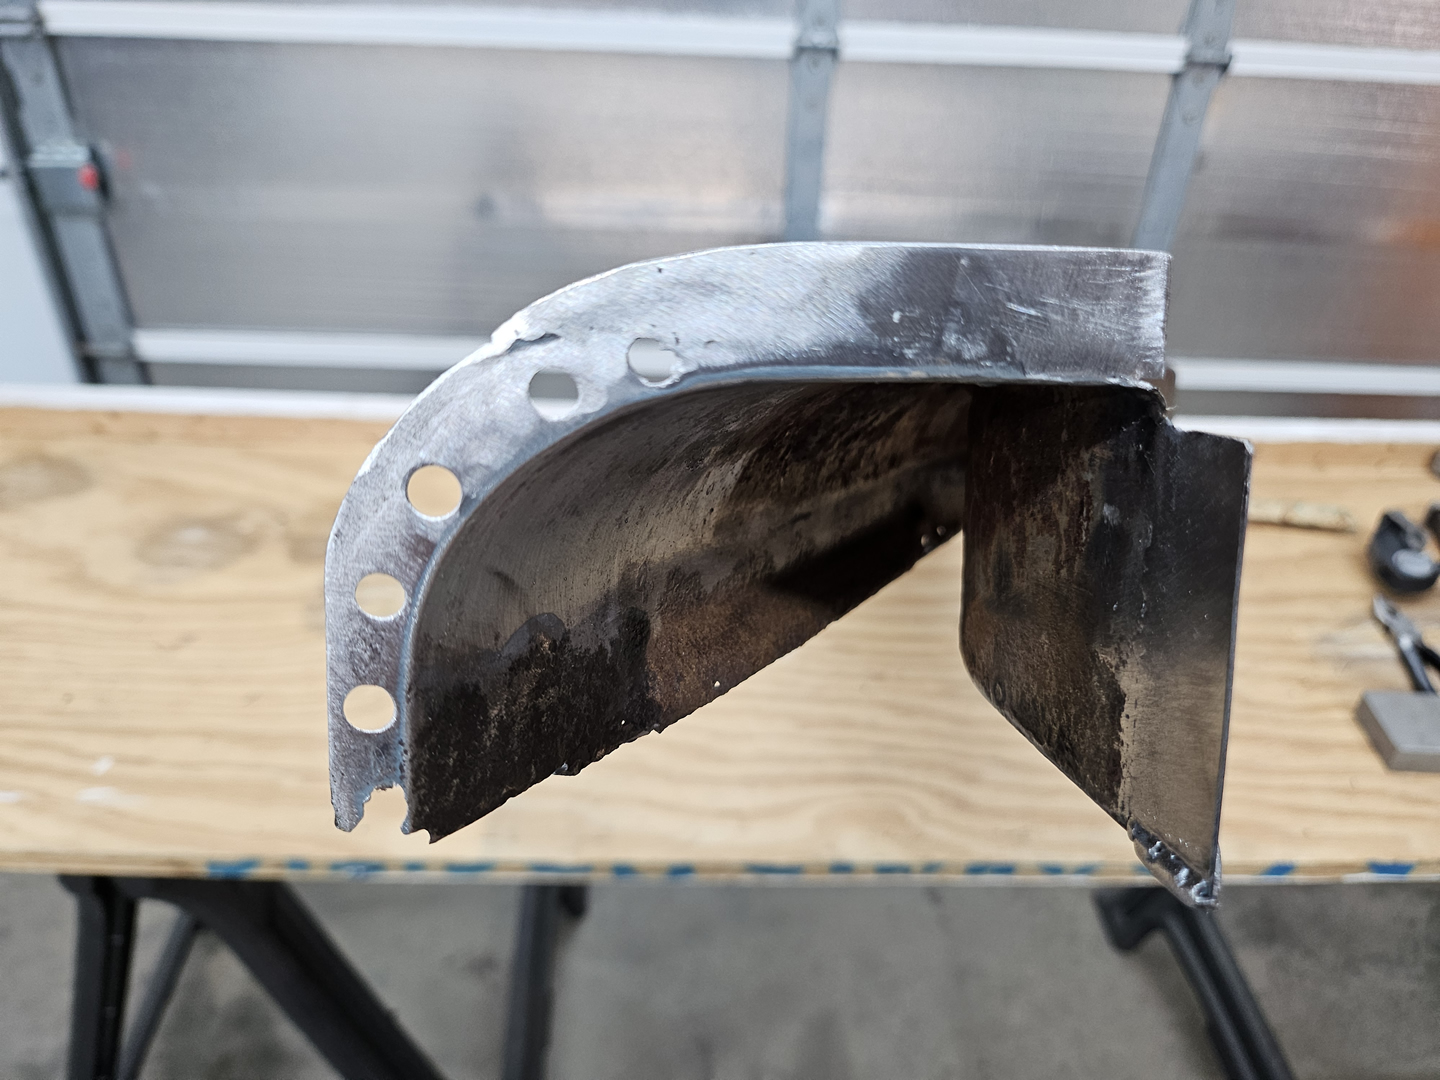
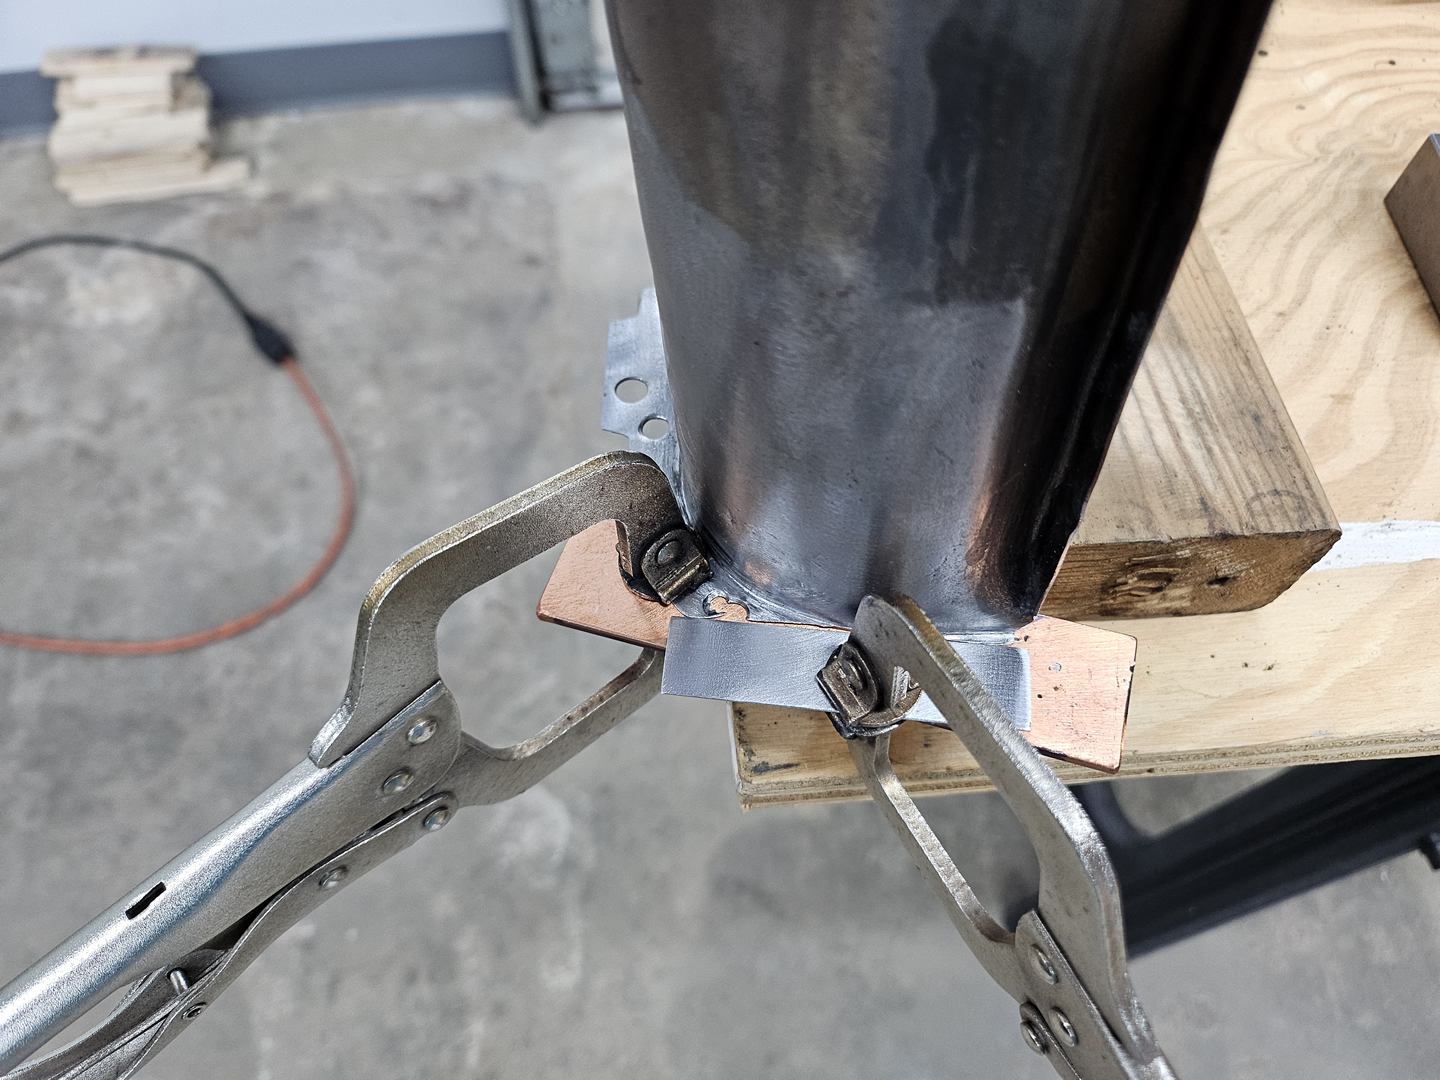
Continuing on with the passenger side heater channel, I decided to repair the flanges on the front and rear ends where they had been cut by the person who cut them off of the donor car. I did the rear flange first. This is where the heater channel is attached to the rear cross members. I used 20-gauge stock which matches the original metal. I used a piece of a flat copper bar which not only holds the repair piece flat and in place, but allows me to weld with a little more heat and get better penetration without blowing through the metal.
|
|
|
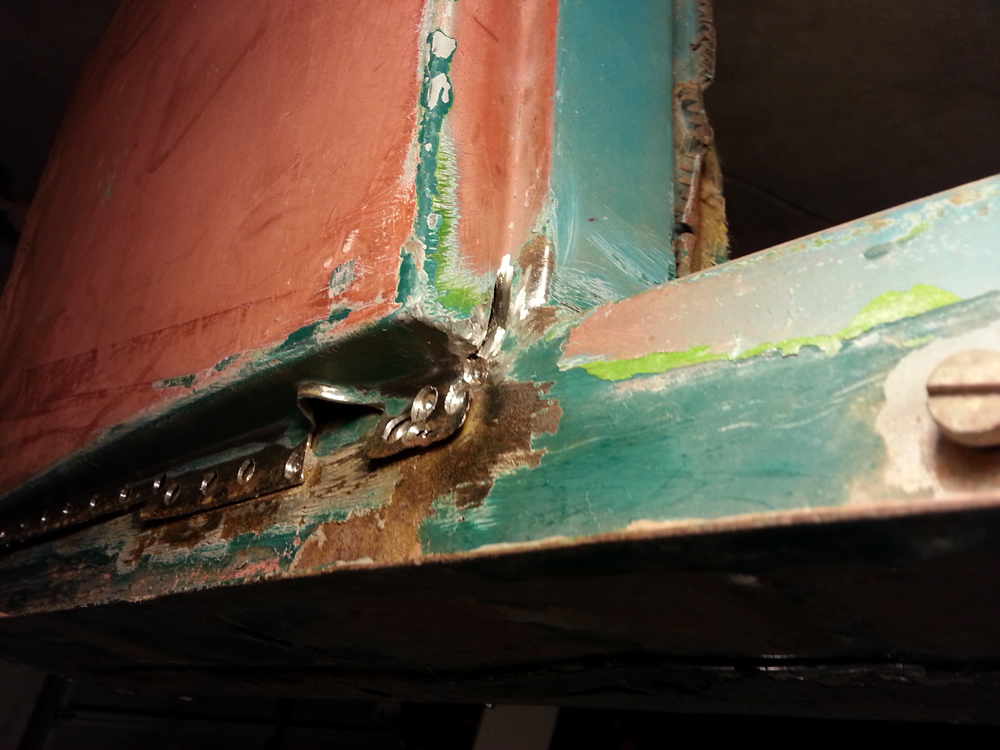
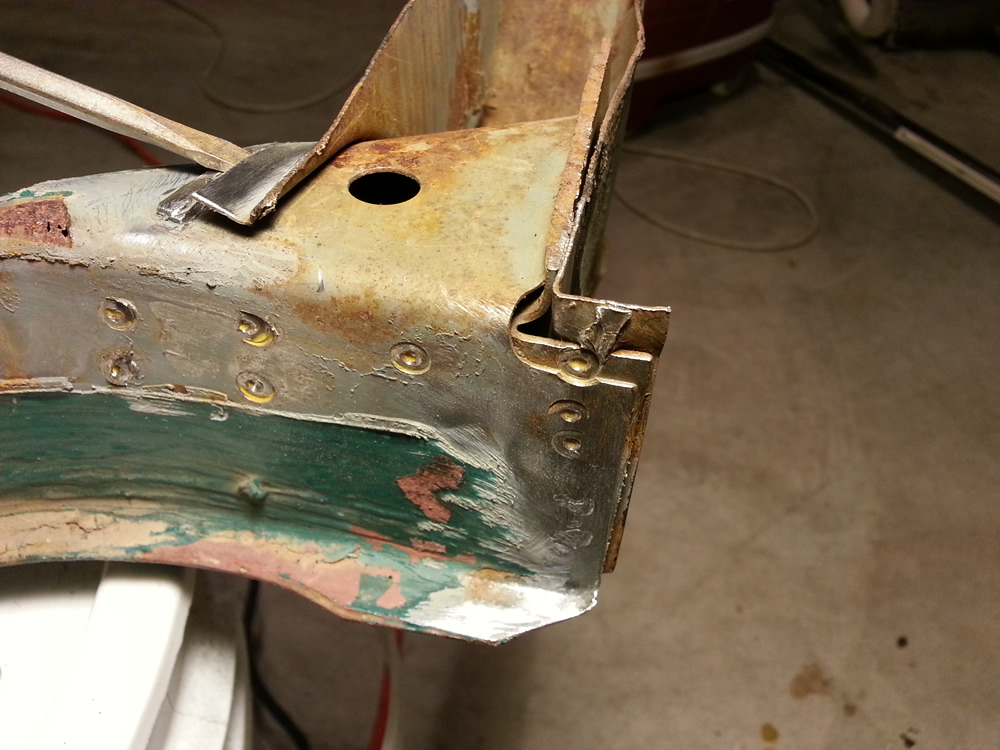
Next, I patched in a piece on the front flange of the end cap. Here, the flange is actually the end cap and the flange on the flare of the end of the body of the channel. But since I wasn't going to remove the end cap for any reason, I just welded in a single thickness of metal that was equivalent to the two pieces combined.

|

|

|
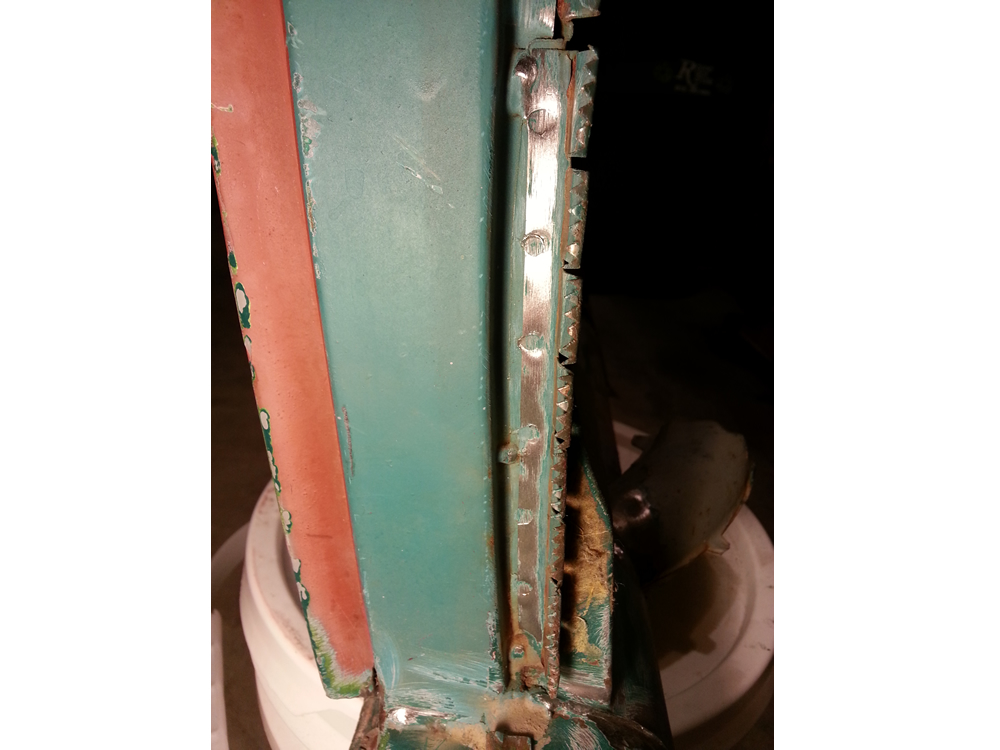
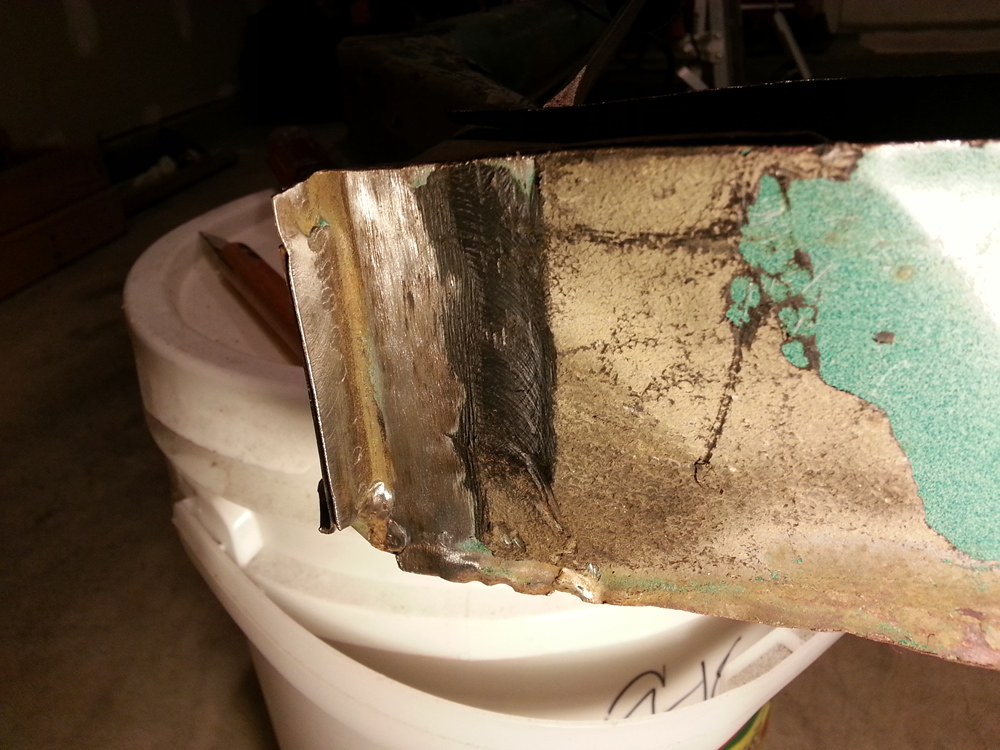
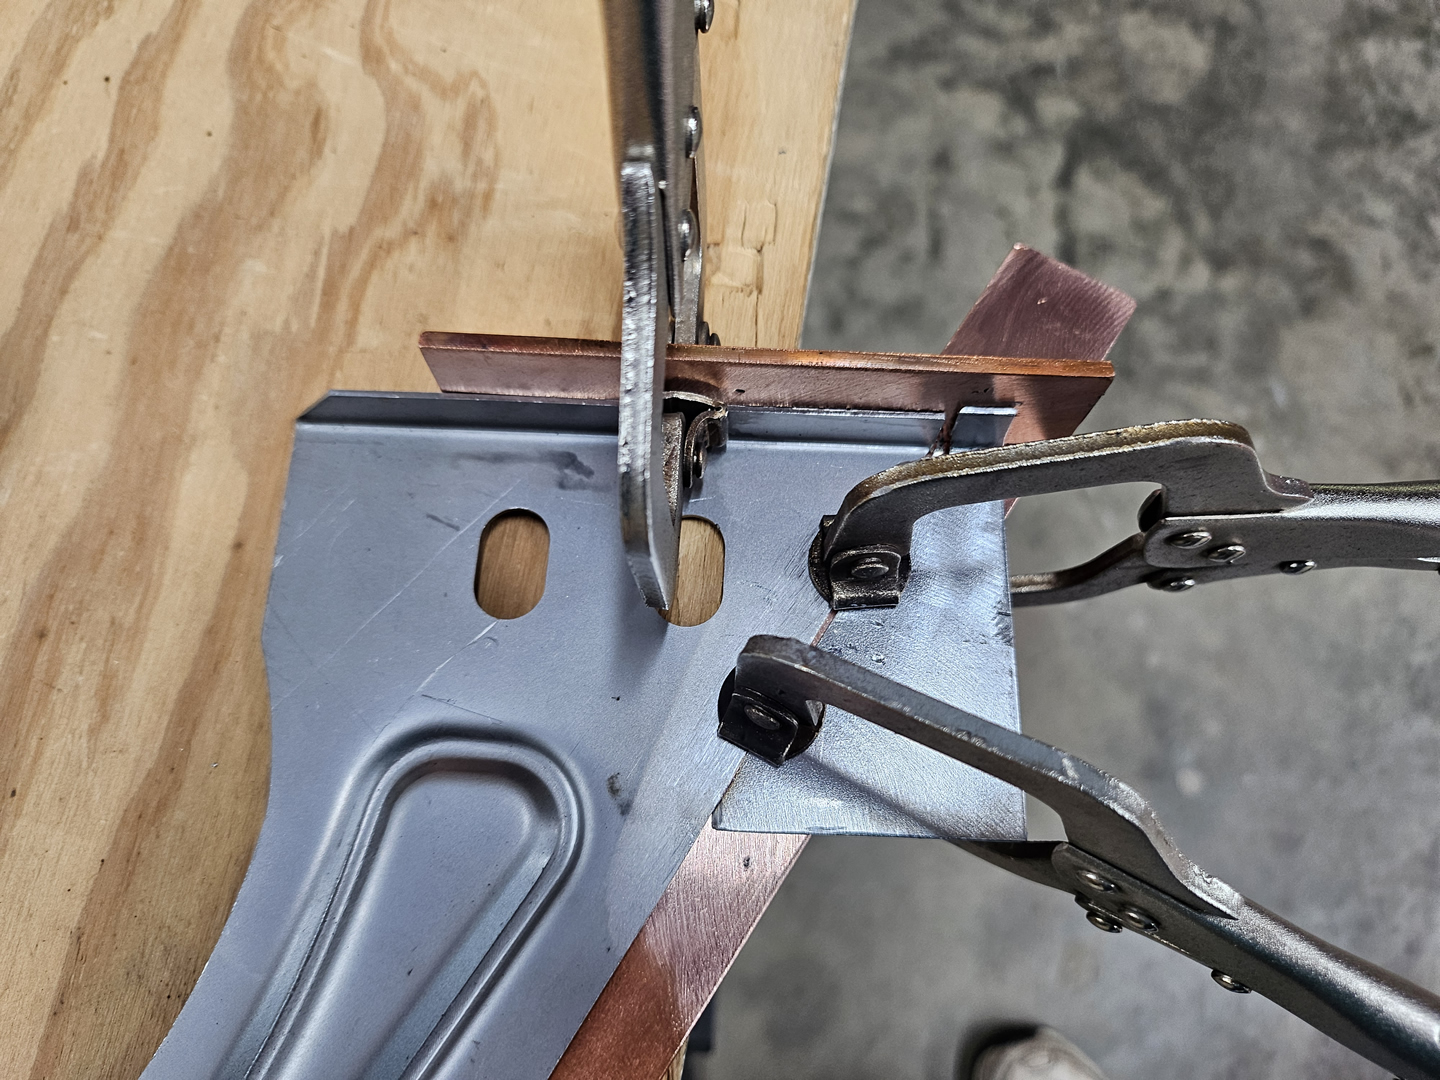
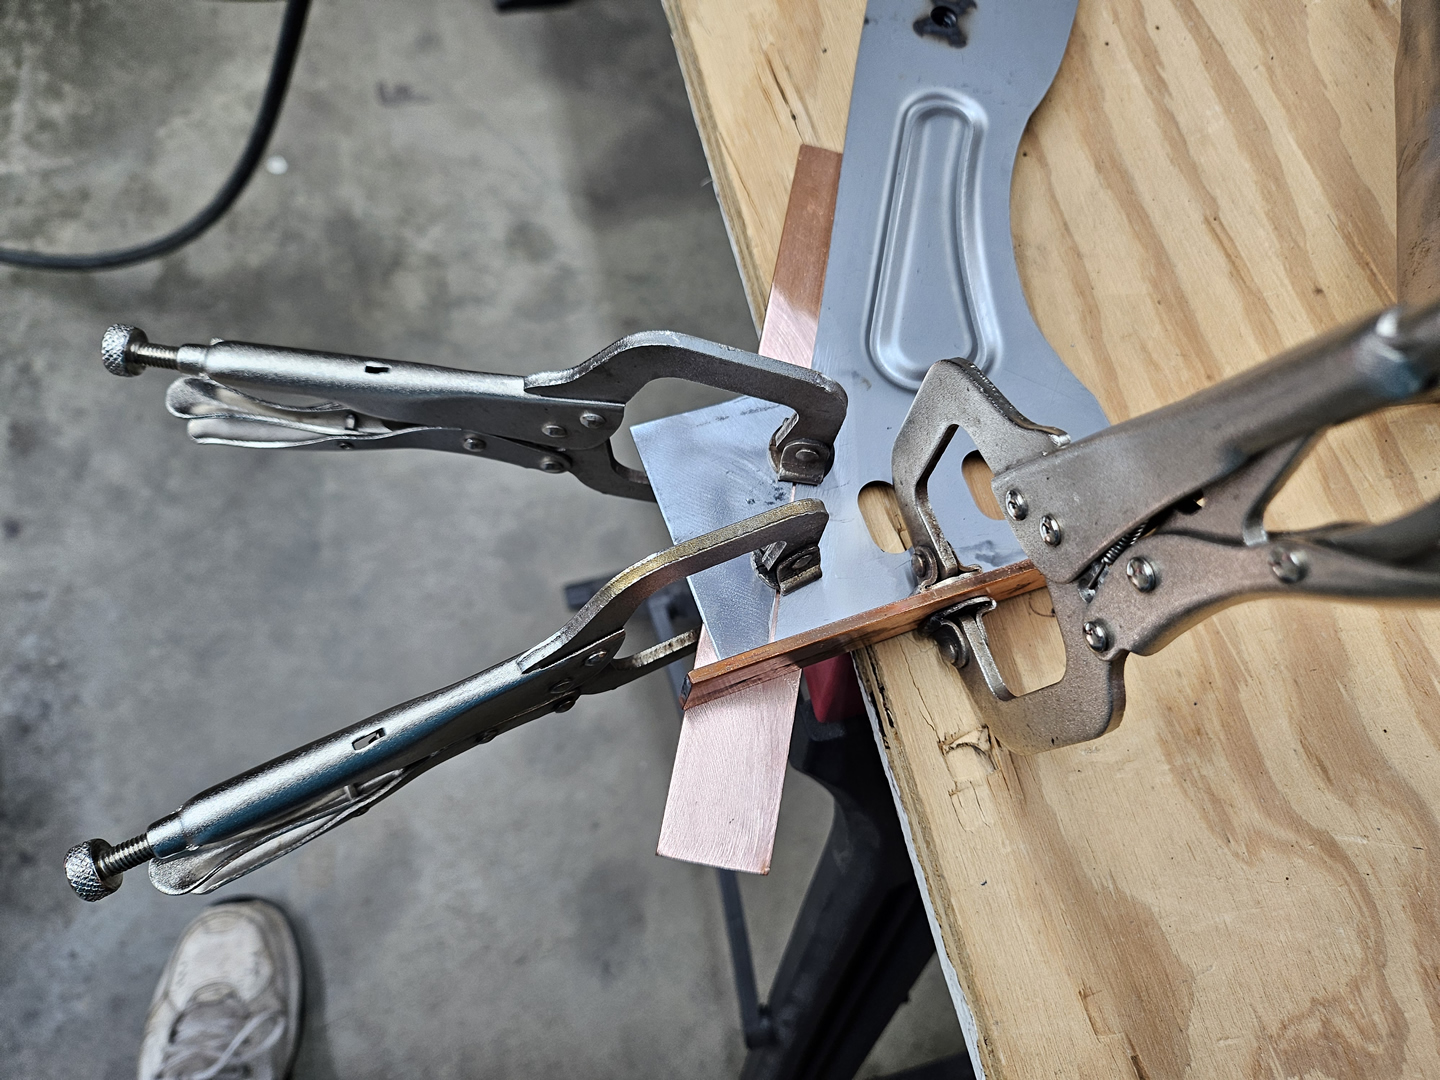
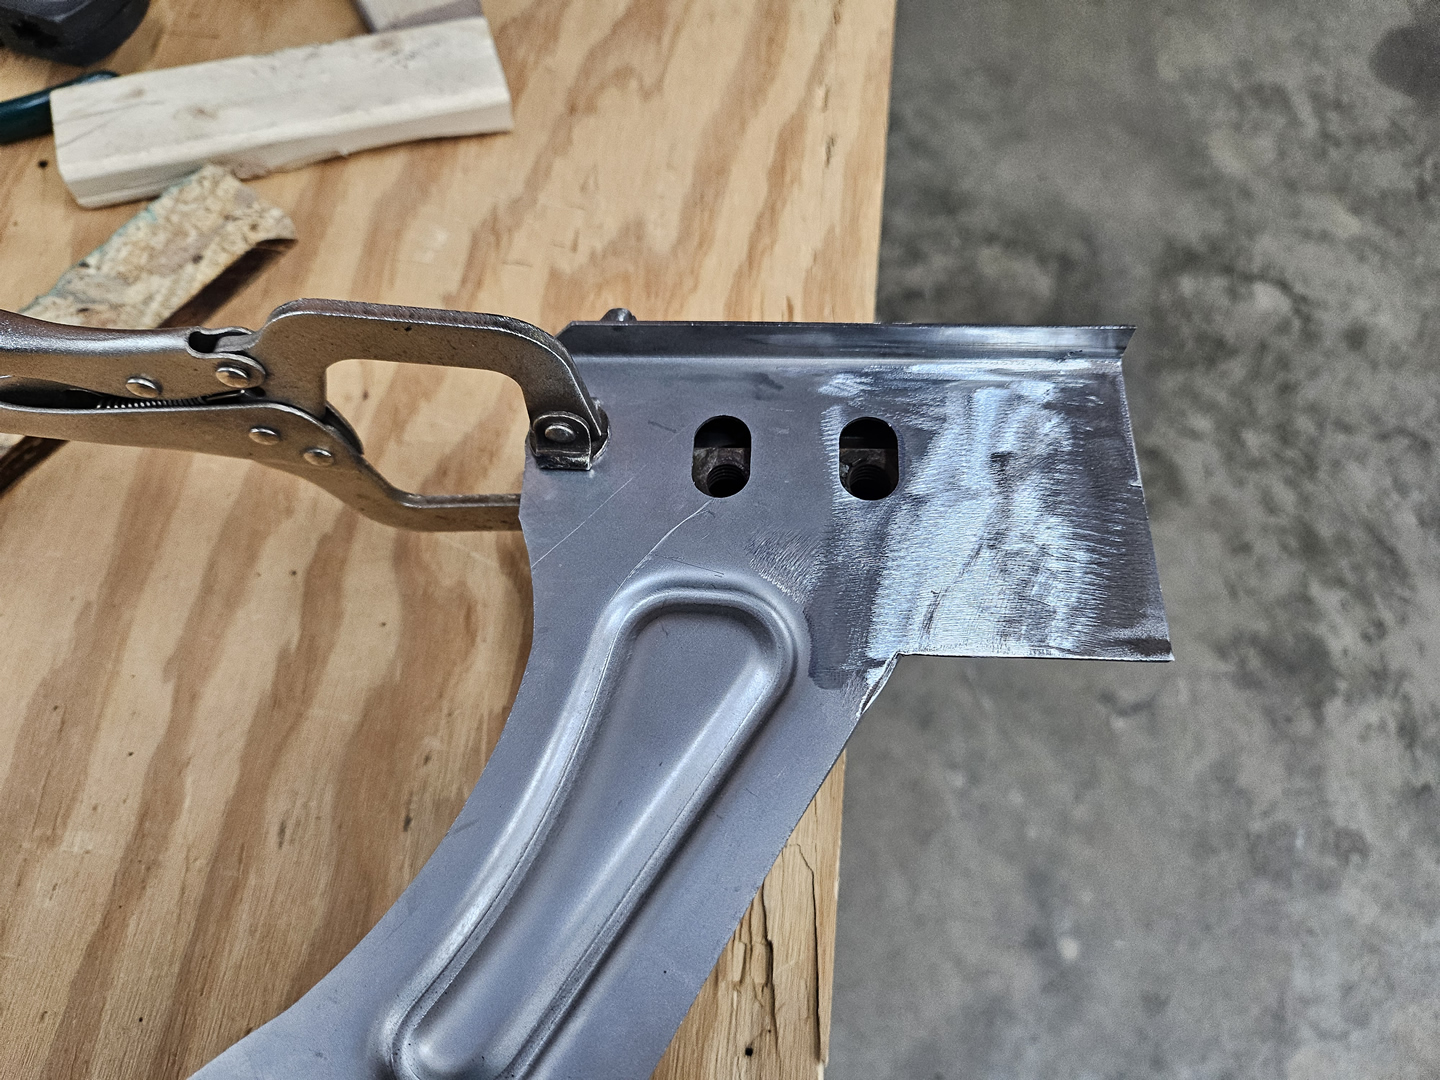
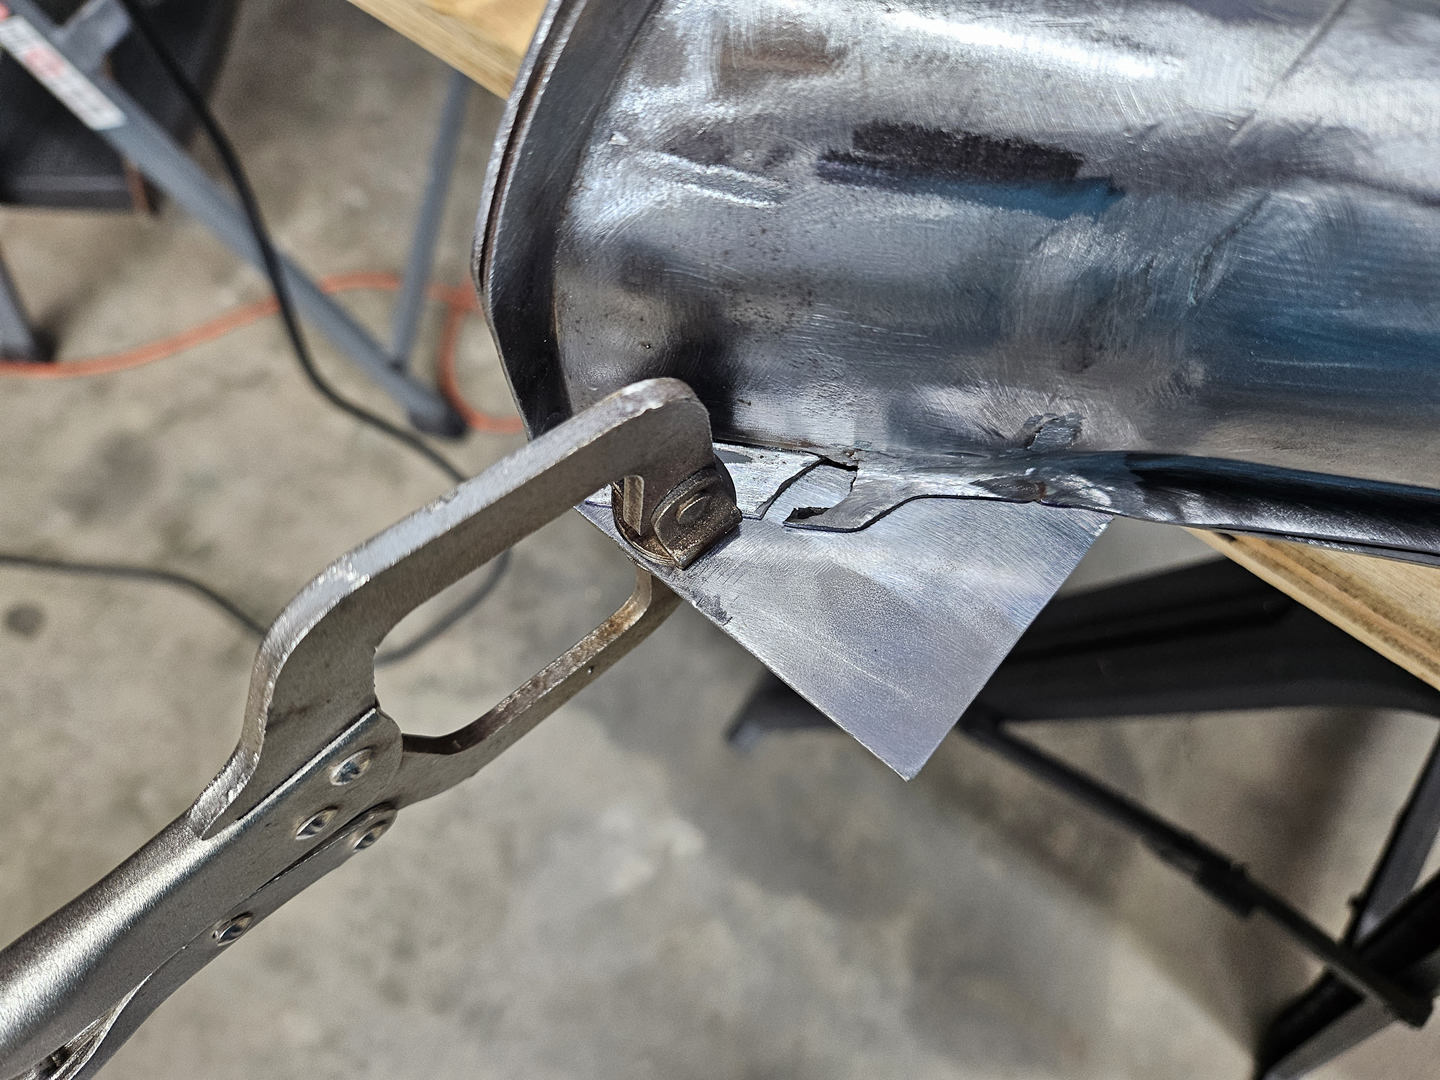
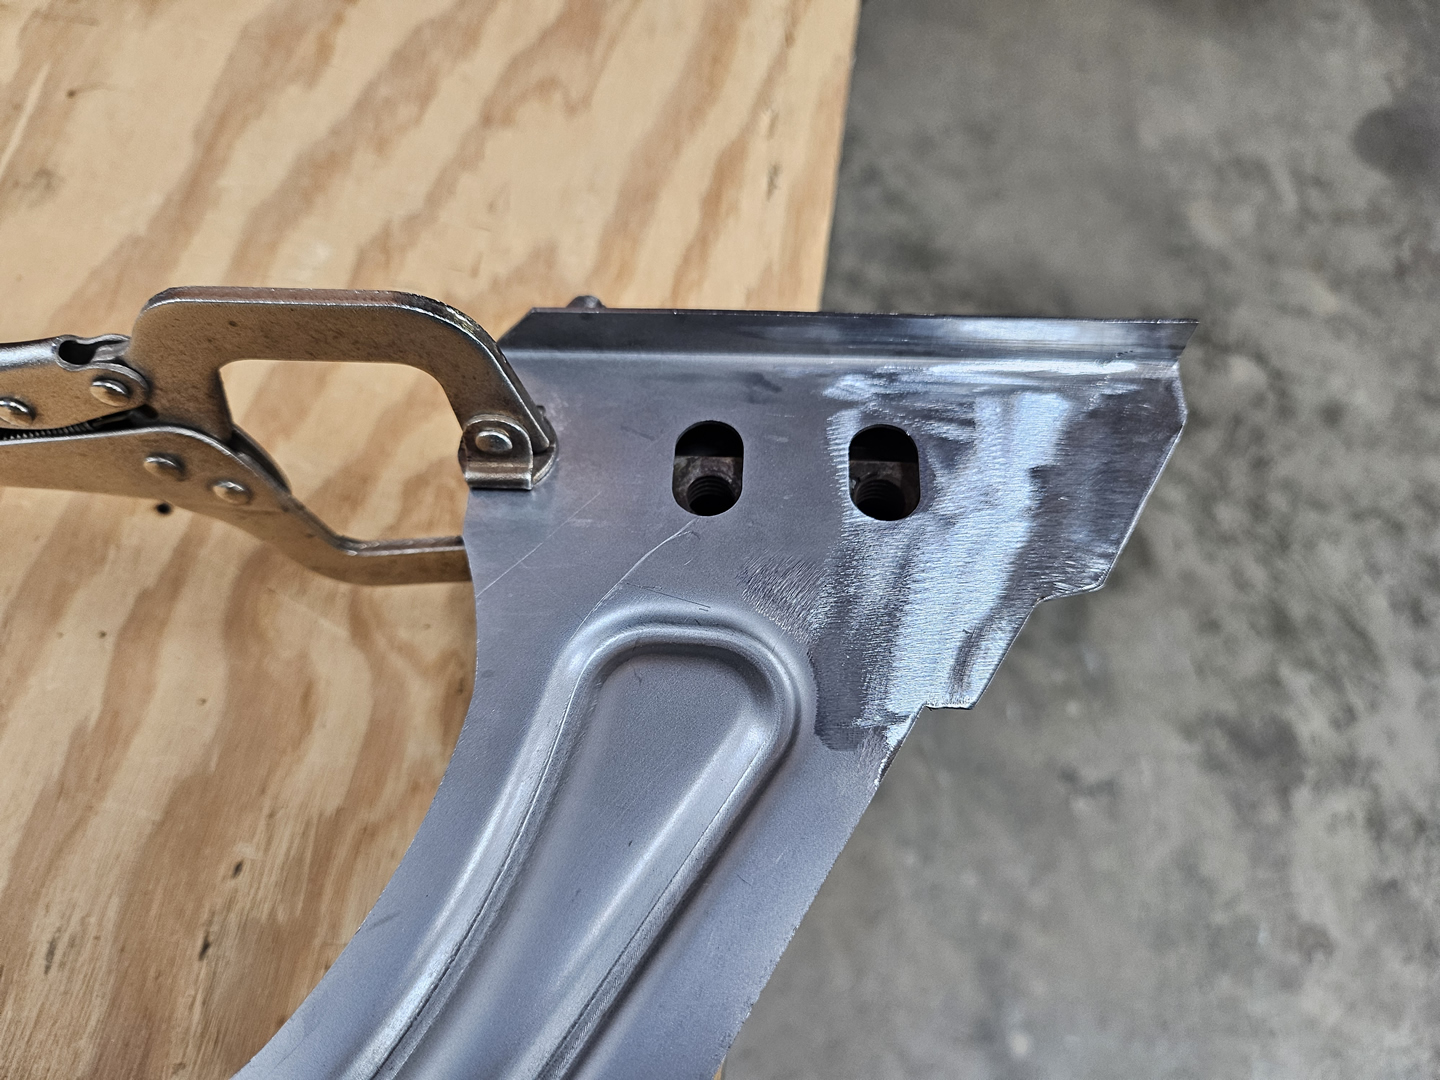
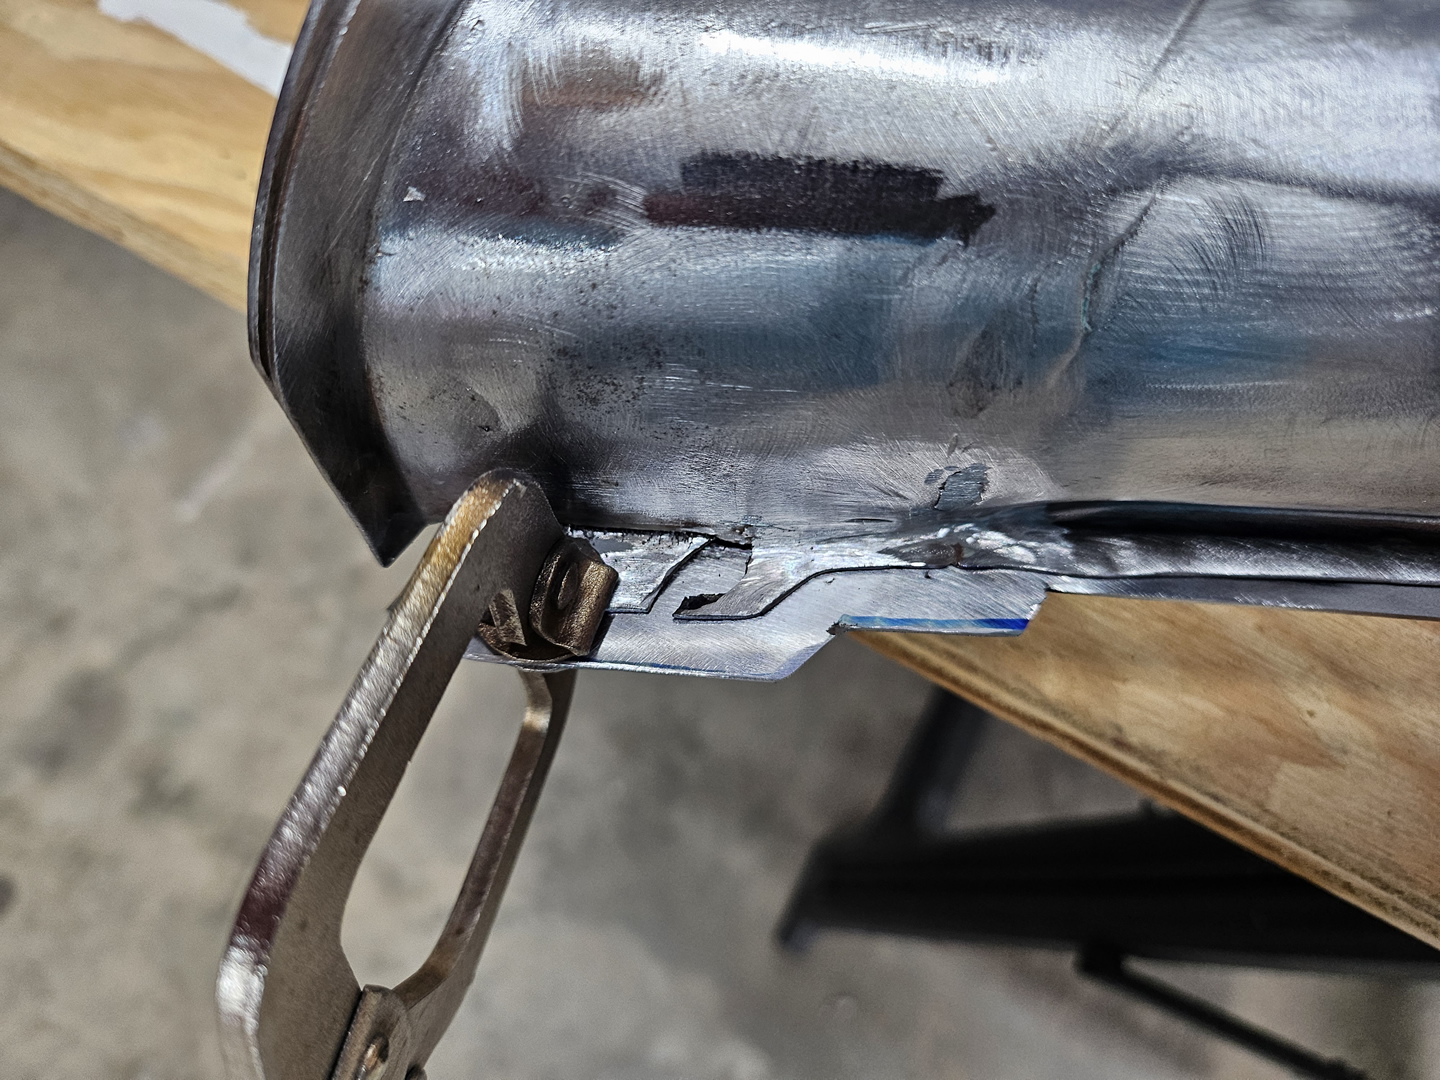
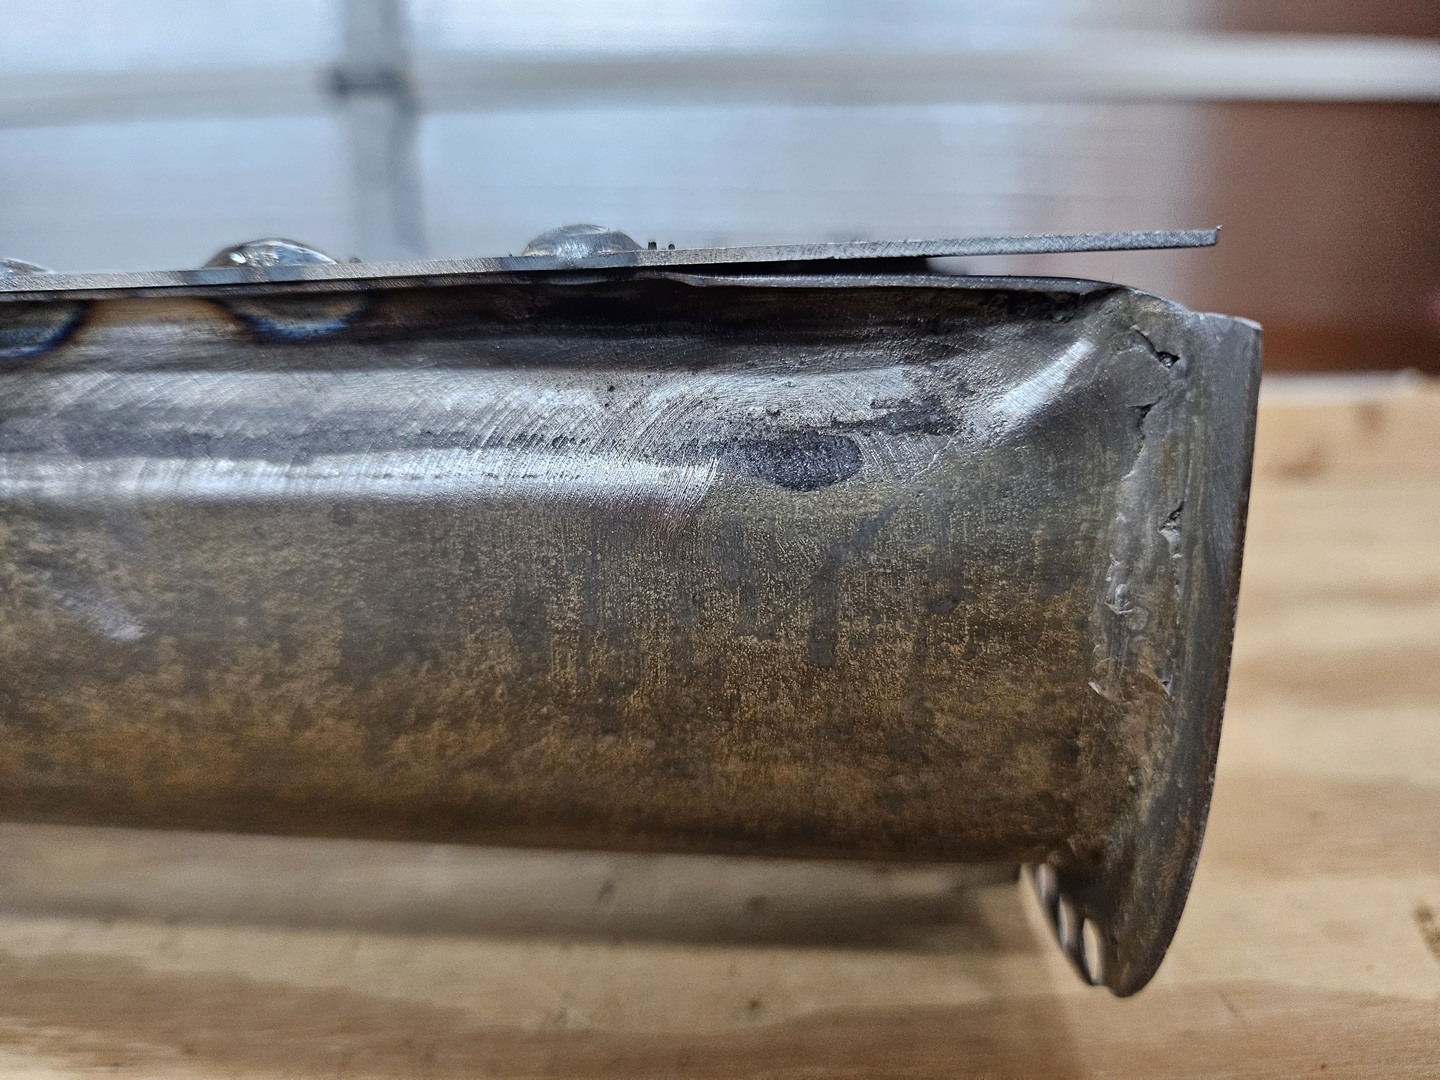
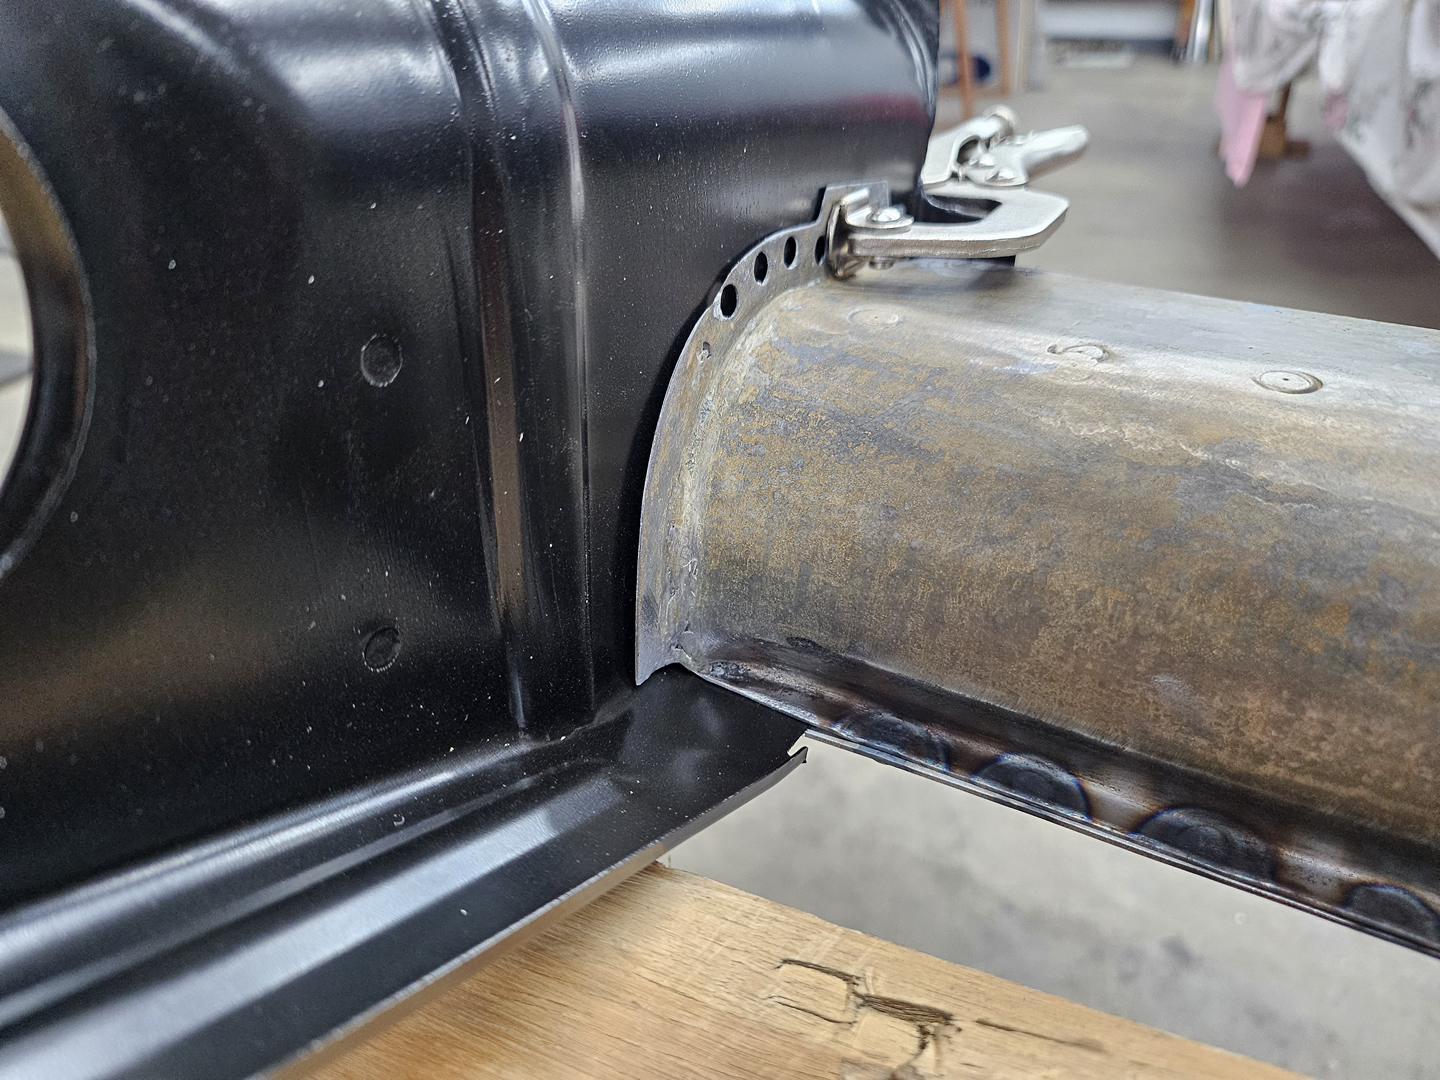
On the bottom plate for the passenger side channel, I added a piece of metal to flare out the inner side of the front edge. Both heater channels had this flare on the inner sides and I am matching what they had originally. This area is seam-welded to front firewall. I'm not sure if this is necessary, but test fitting the channels to the front firewall indicated that this would help to have more metal to seam weld this weld joint. I made the piece oversized and I will trim it later after the bottom plates are welded on and then when fitting the panels.
|
|
|
|
|
|
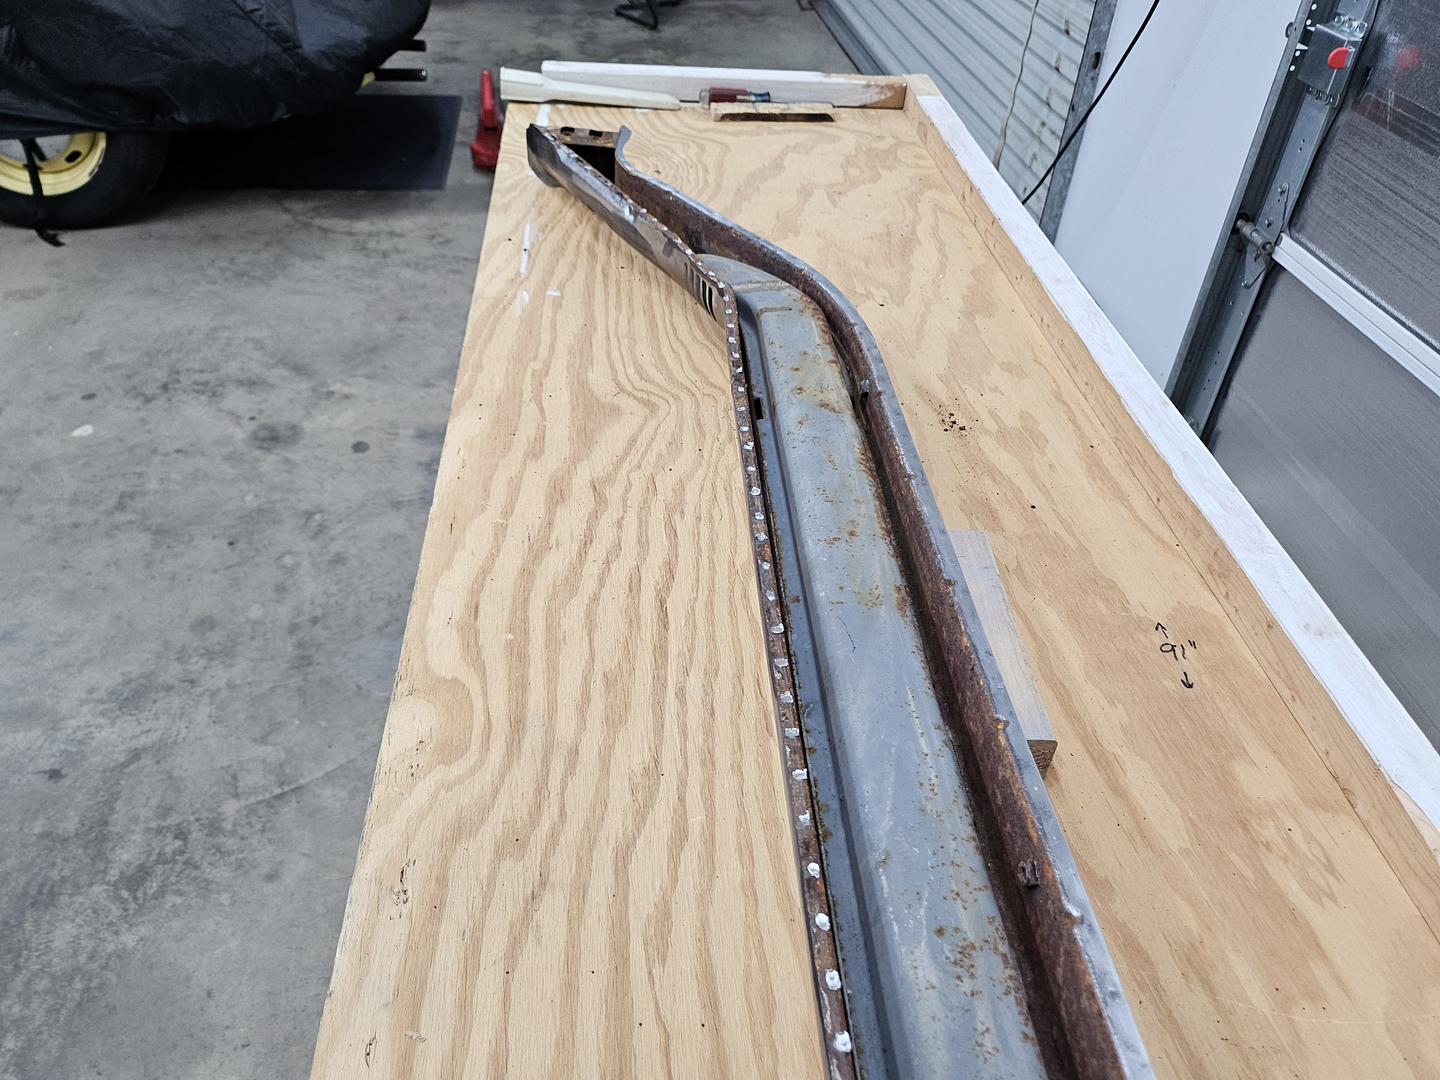
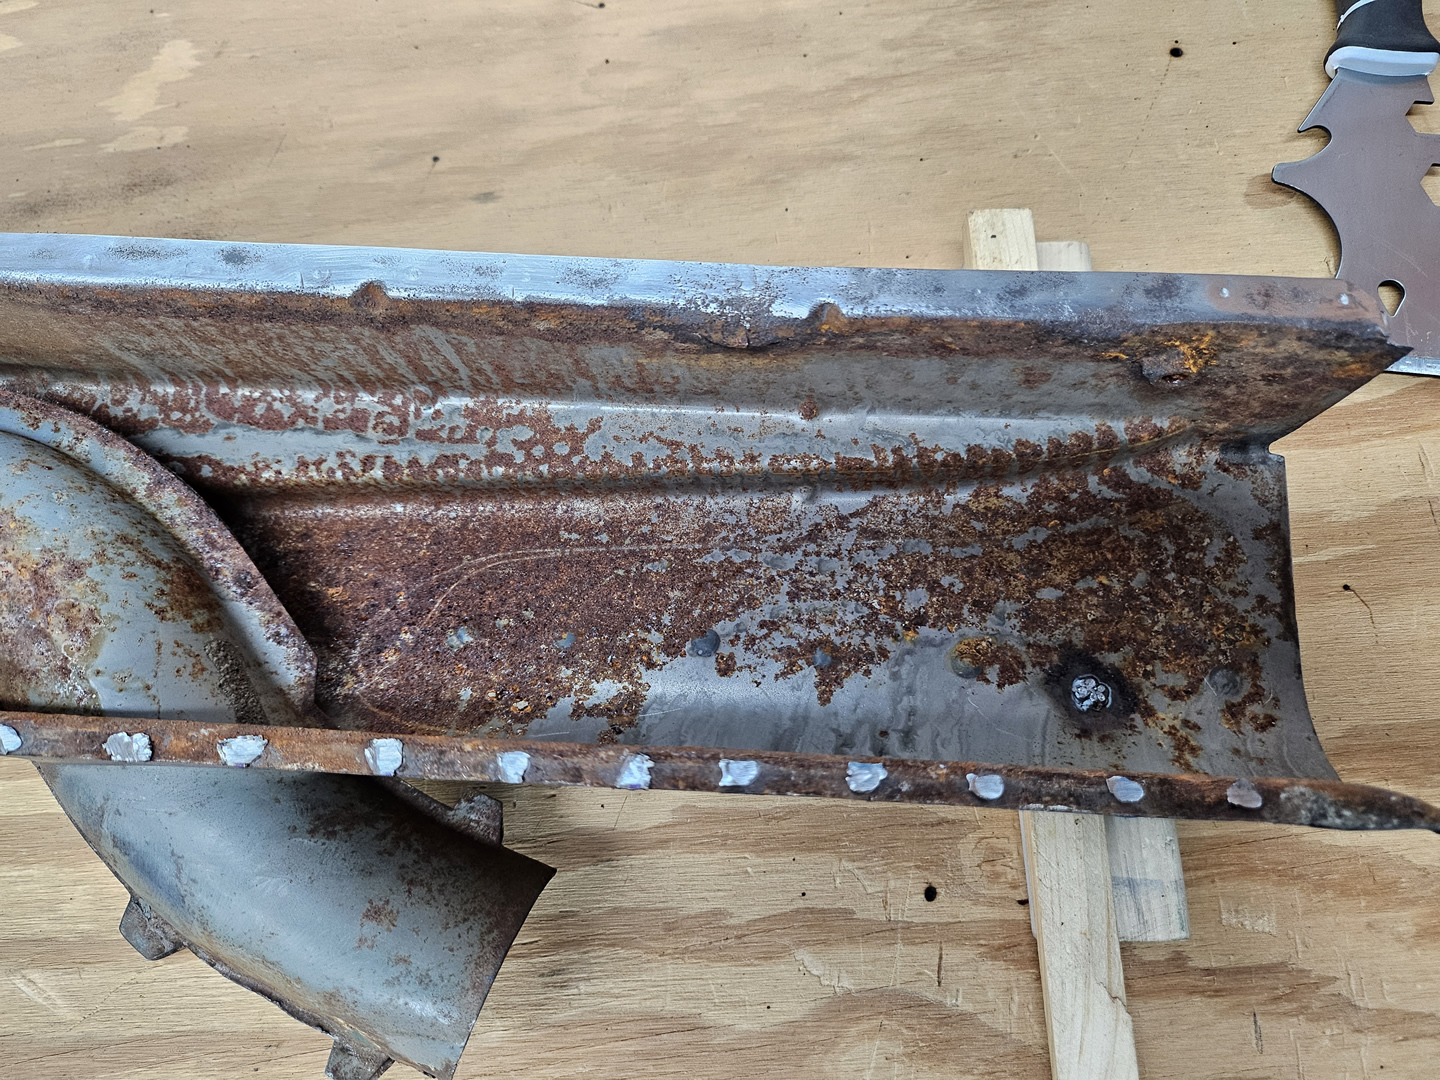
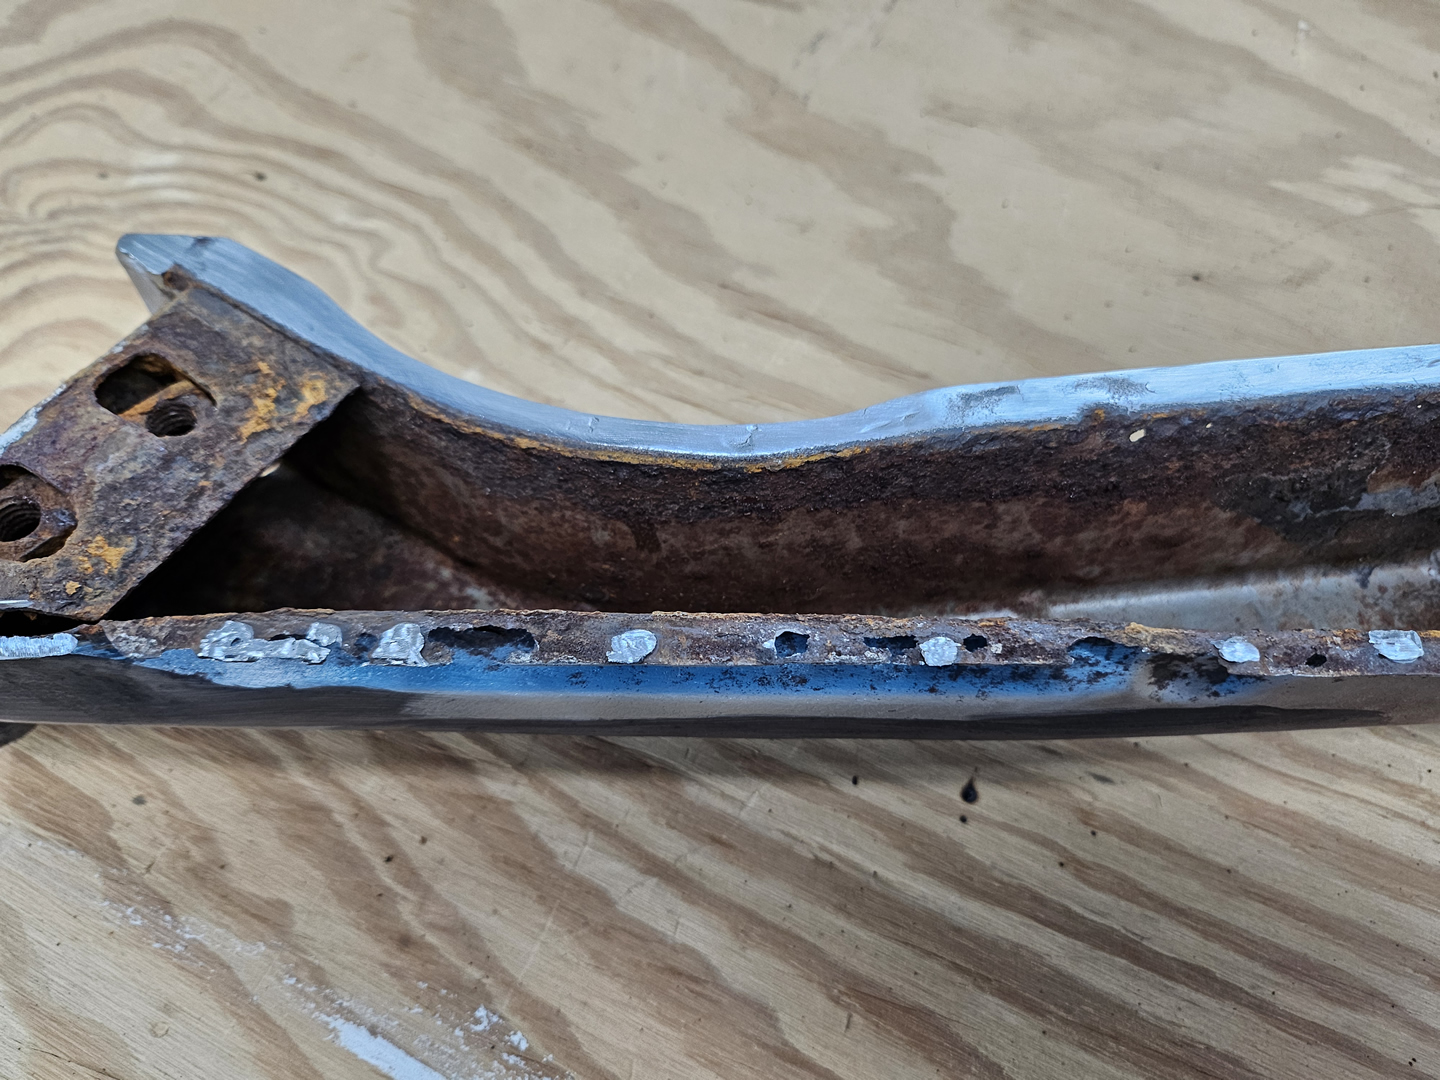
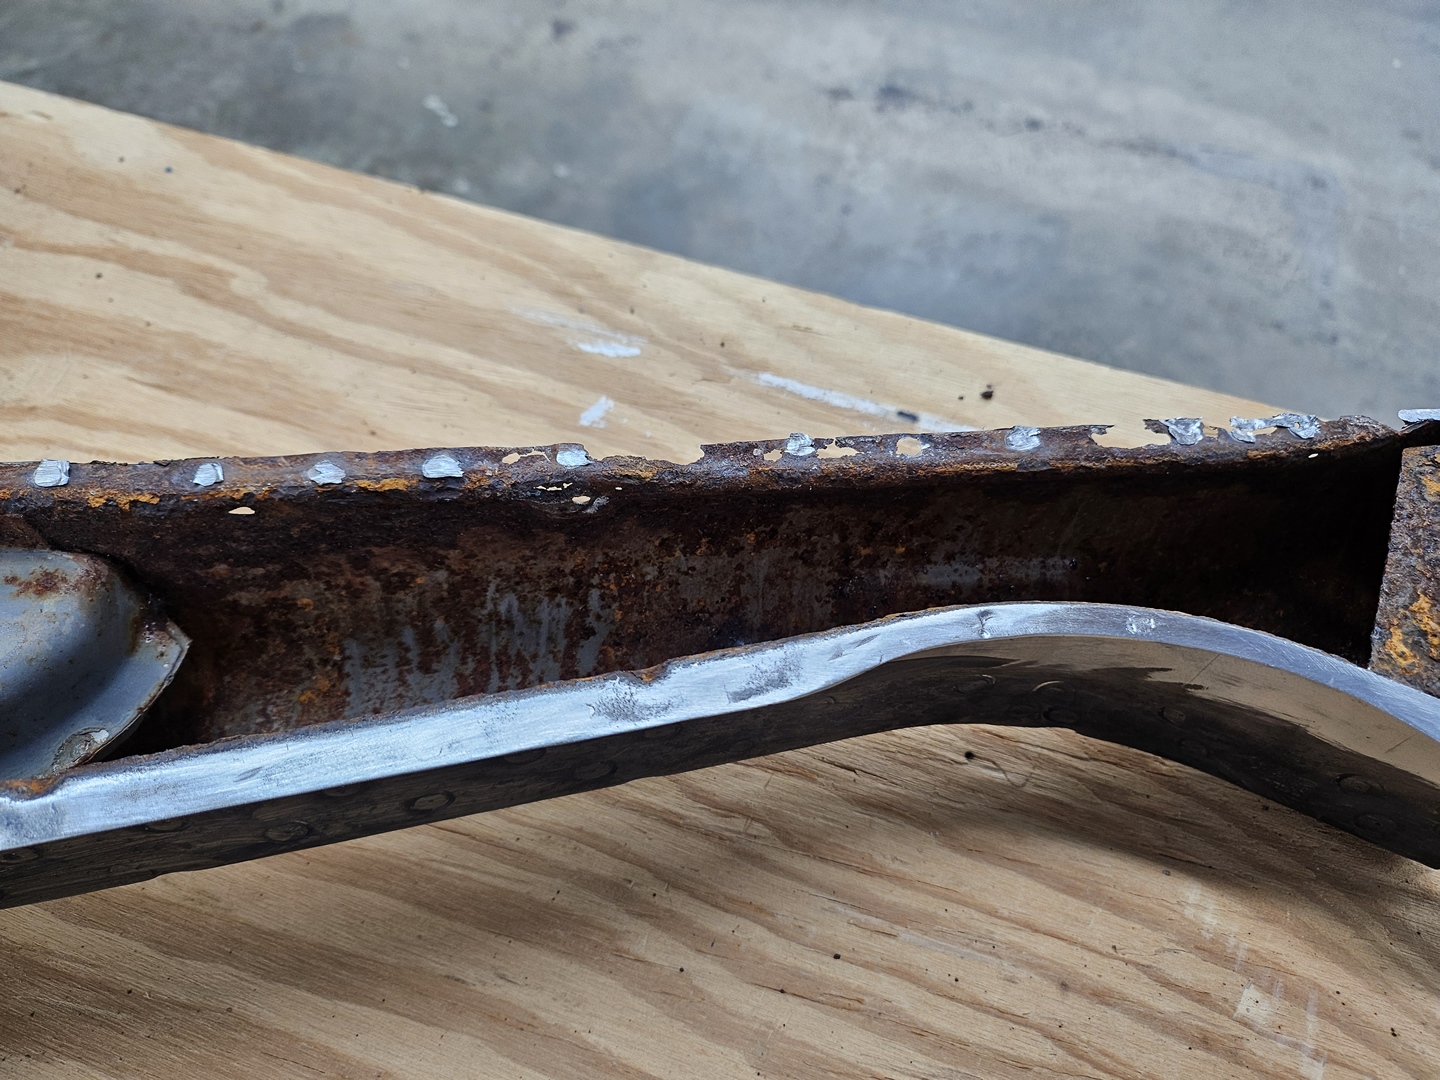
Now on to the driver side heater channel. I removed the bottom plate and again, it took several hours to grind out the spot welds and peel off the plate. This side has way more rust and quite a bit of rust damage on the front end. I will have to make and replace a few areas and will need to remove the front end cap and rebuild it. I welded up any scars from the spot weld cutter when I removed the remnants of the panels when I first got the channels, and also welded up any carpet nail holes. This channel also had many unneeded holes in it, and I filled them as well.

|
|
|
|
|

|

|
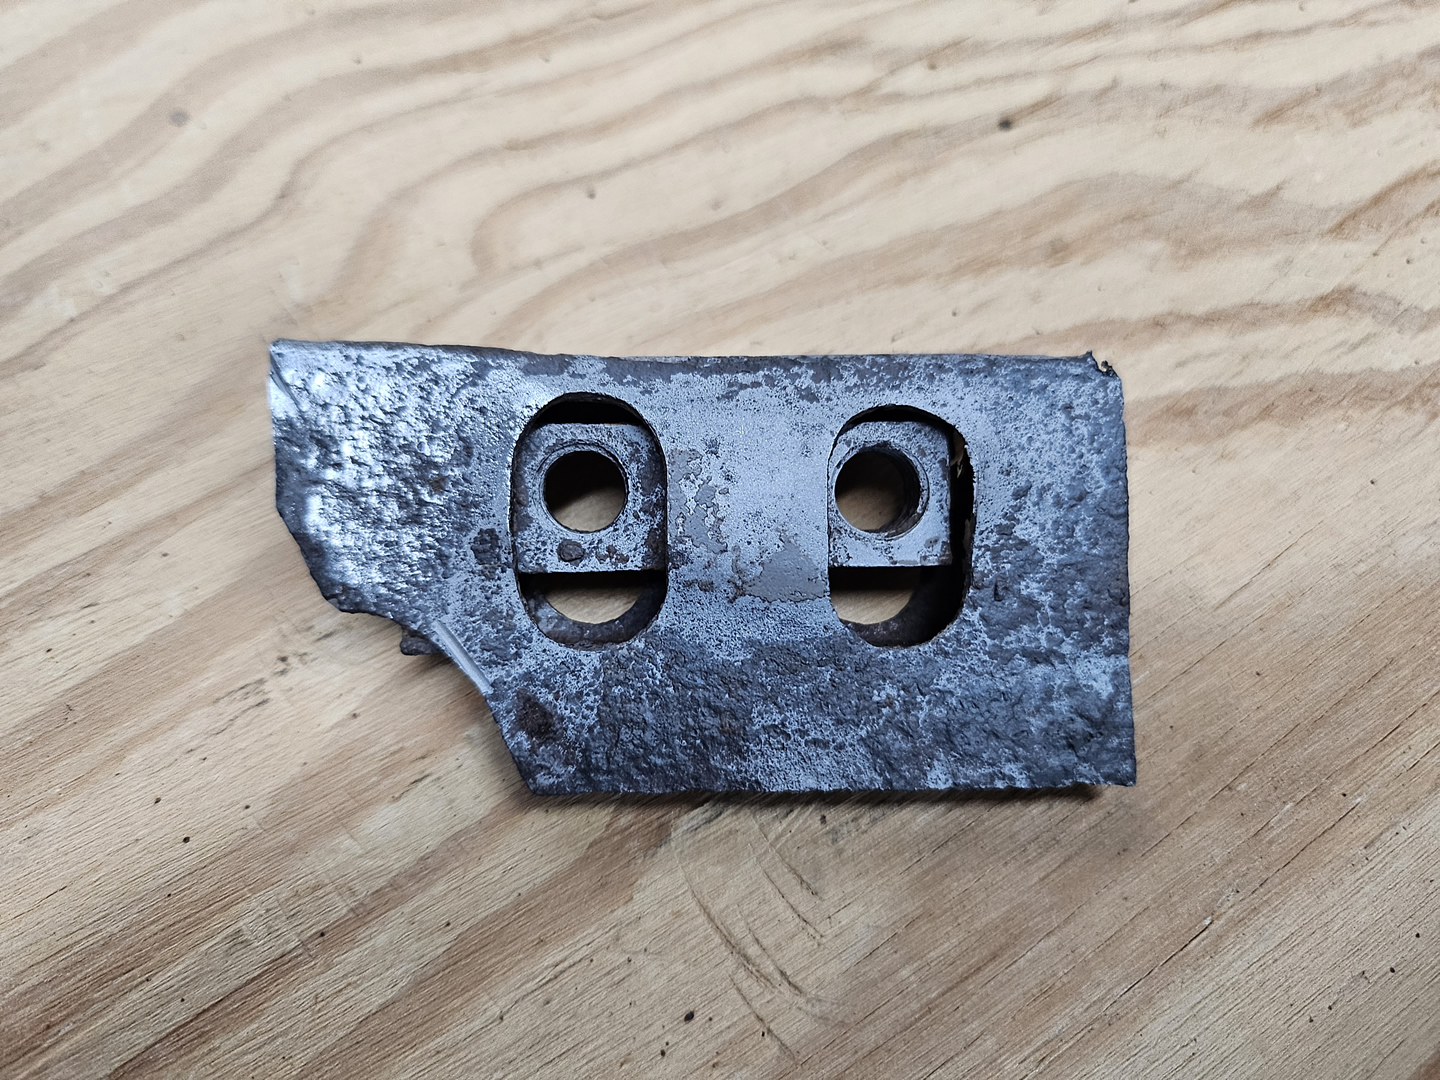
I removed the end cap and it is in very bad condition. I sandblasted it just so I could tell just how bad the rust damage is. I will definitely need to cut out a section of it where the threaded plate and its cage are attached, as well as replacing the cage and the threaded plate.

|

|

|

|

|

|

|

|
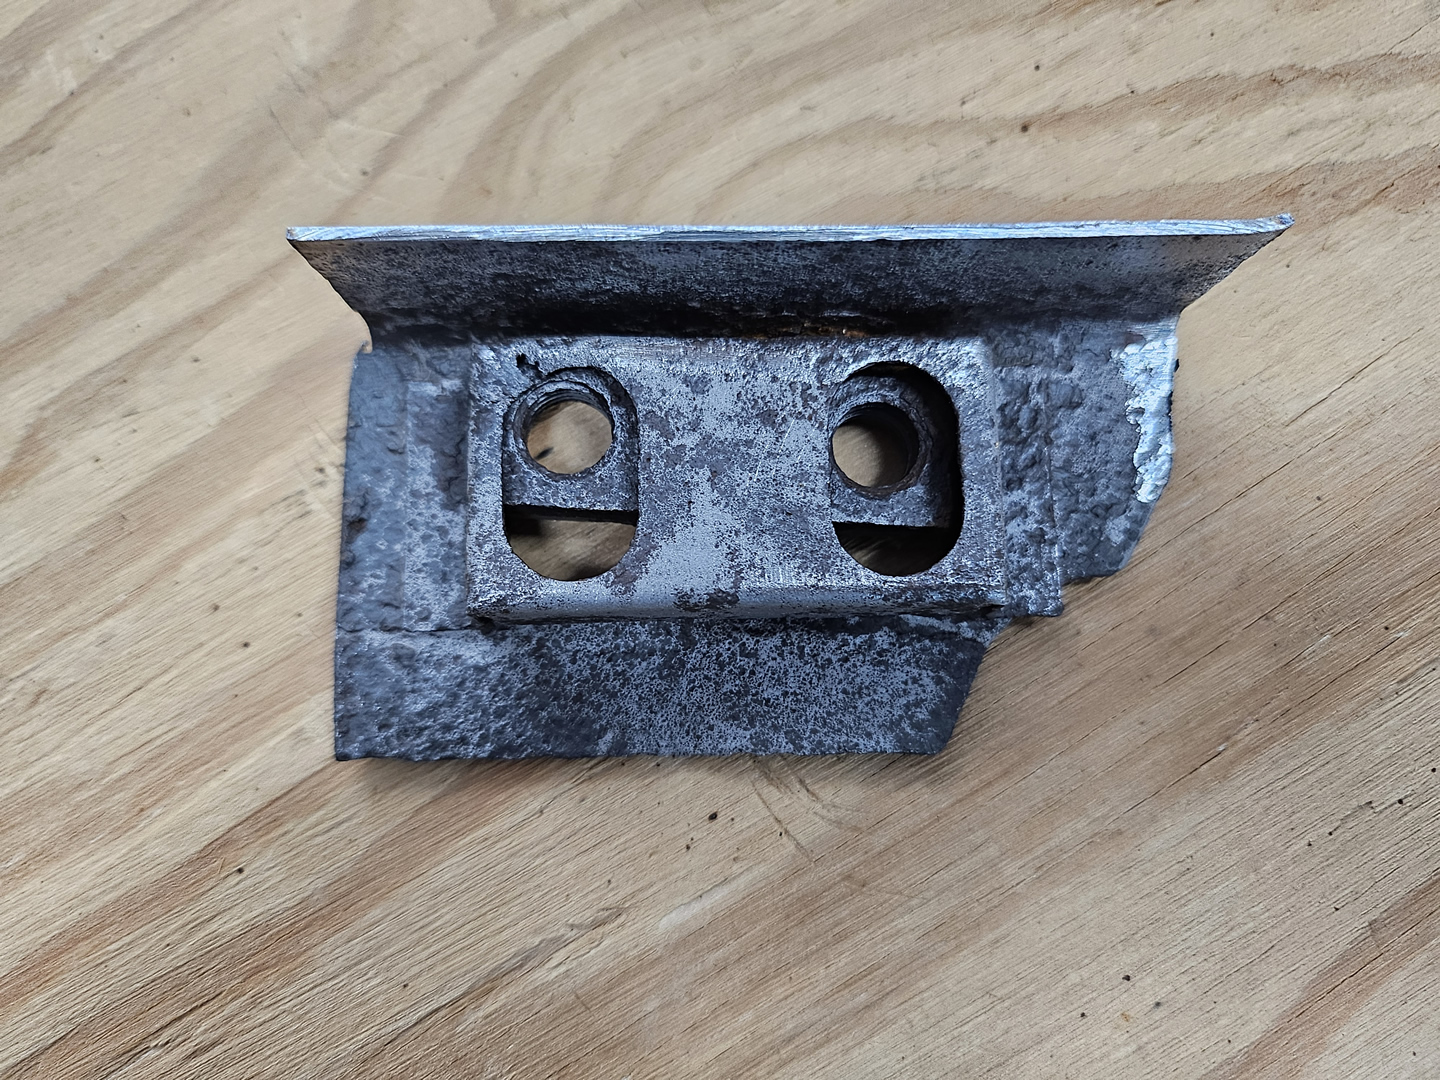
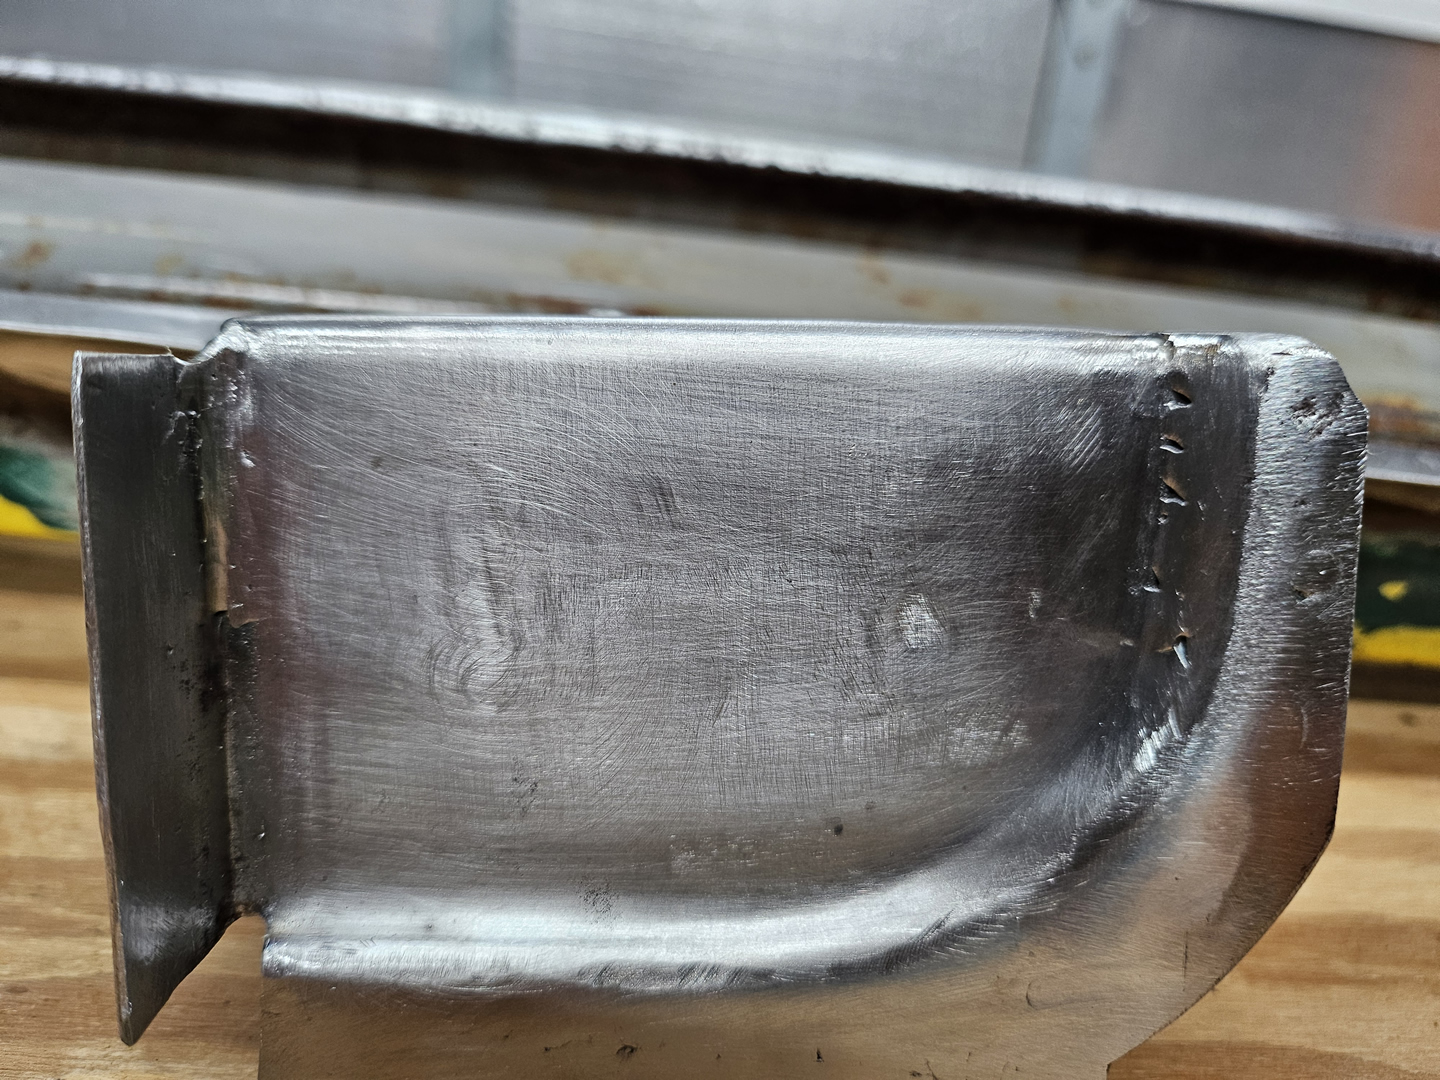
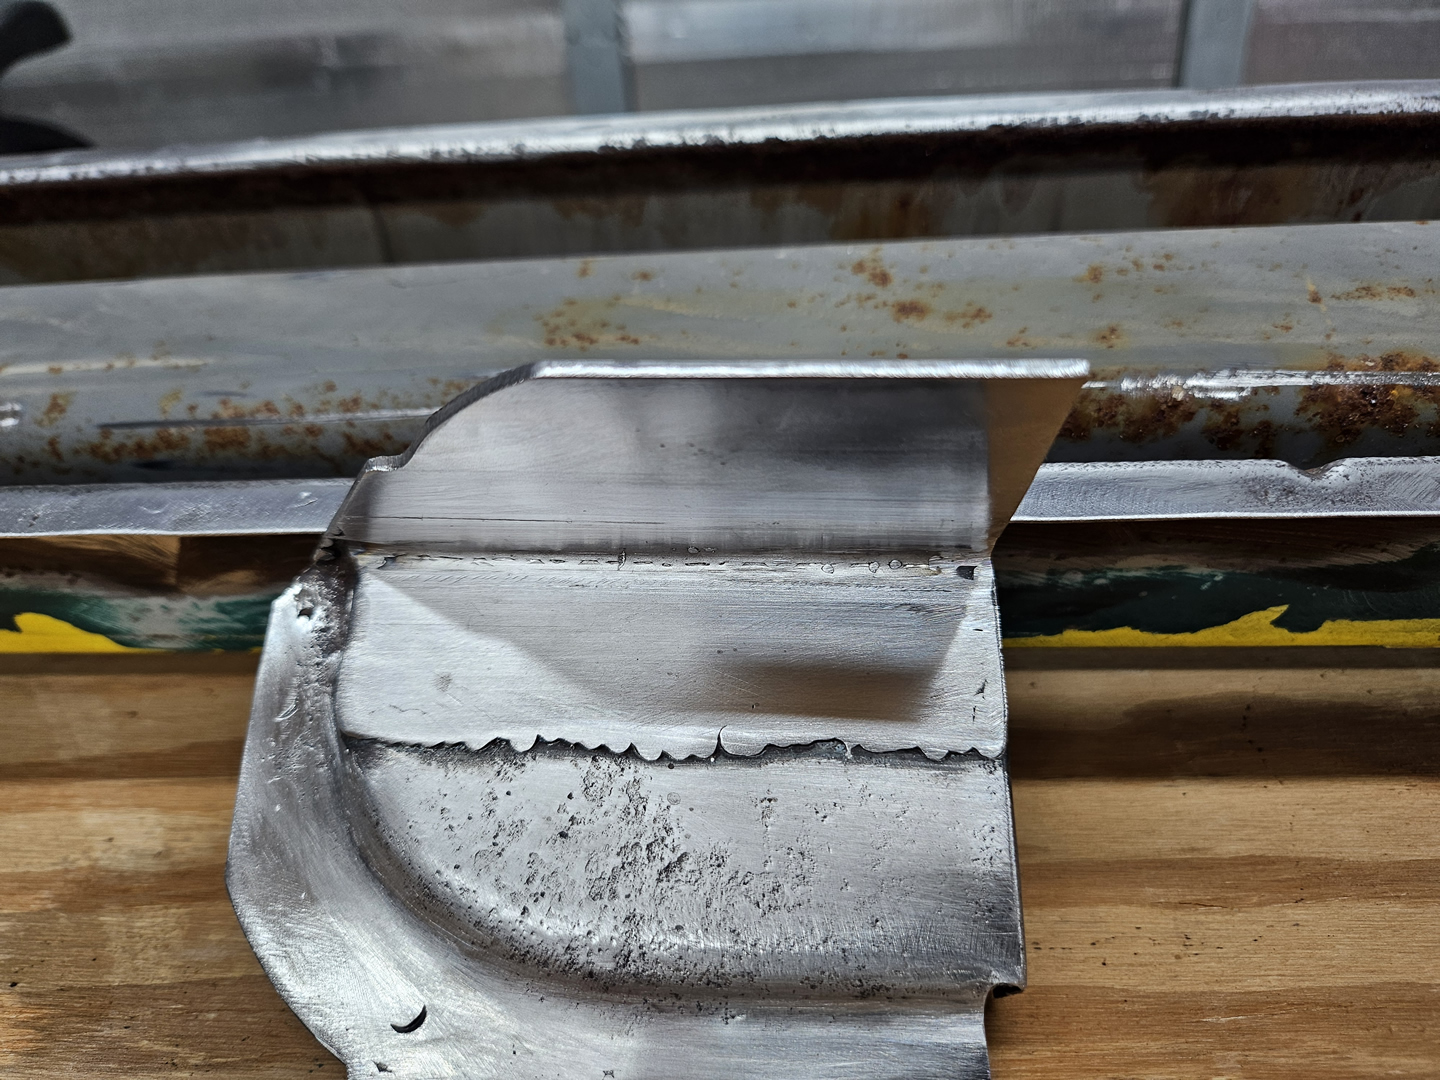
So I cut out a section of the worst damage and fabricated a new section. The original section was 18-gauge, but I used a piece of 14-gauge material just to make it a bit stronger. I also filled in the holes I made with the drill bits when removing it from the body of the channel.

|

|
|
|
|
|

|
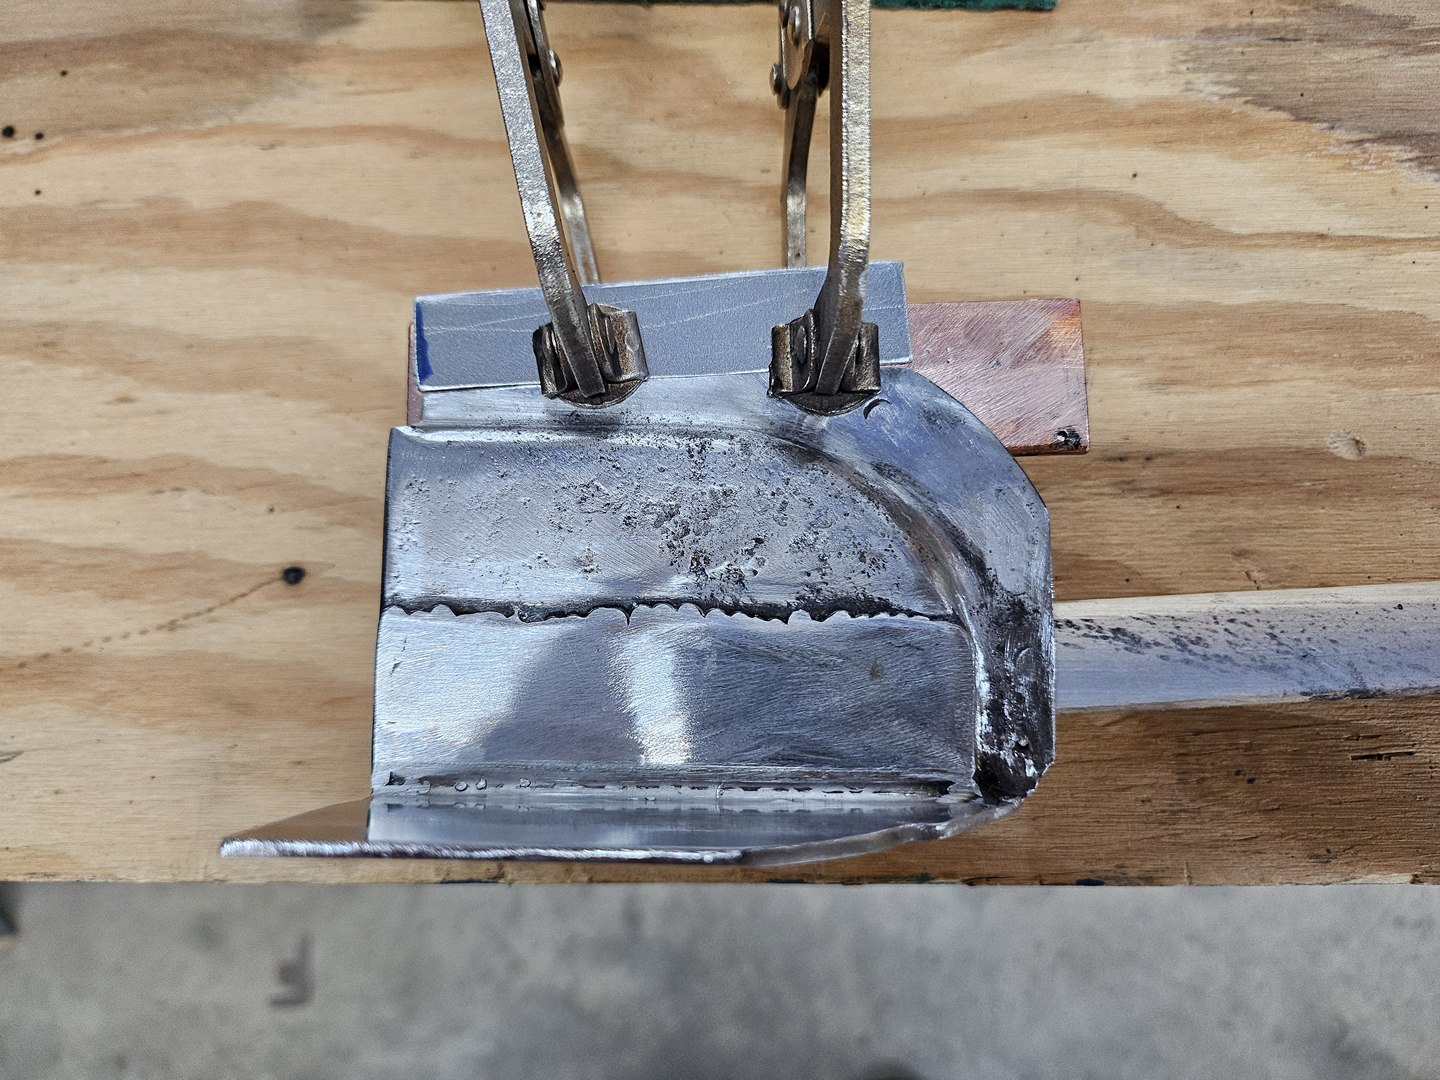
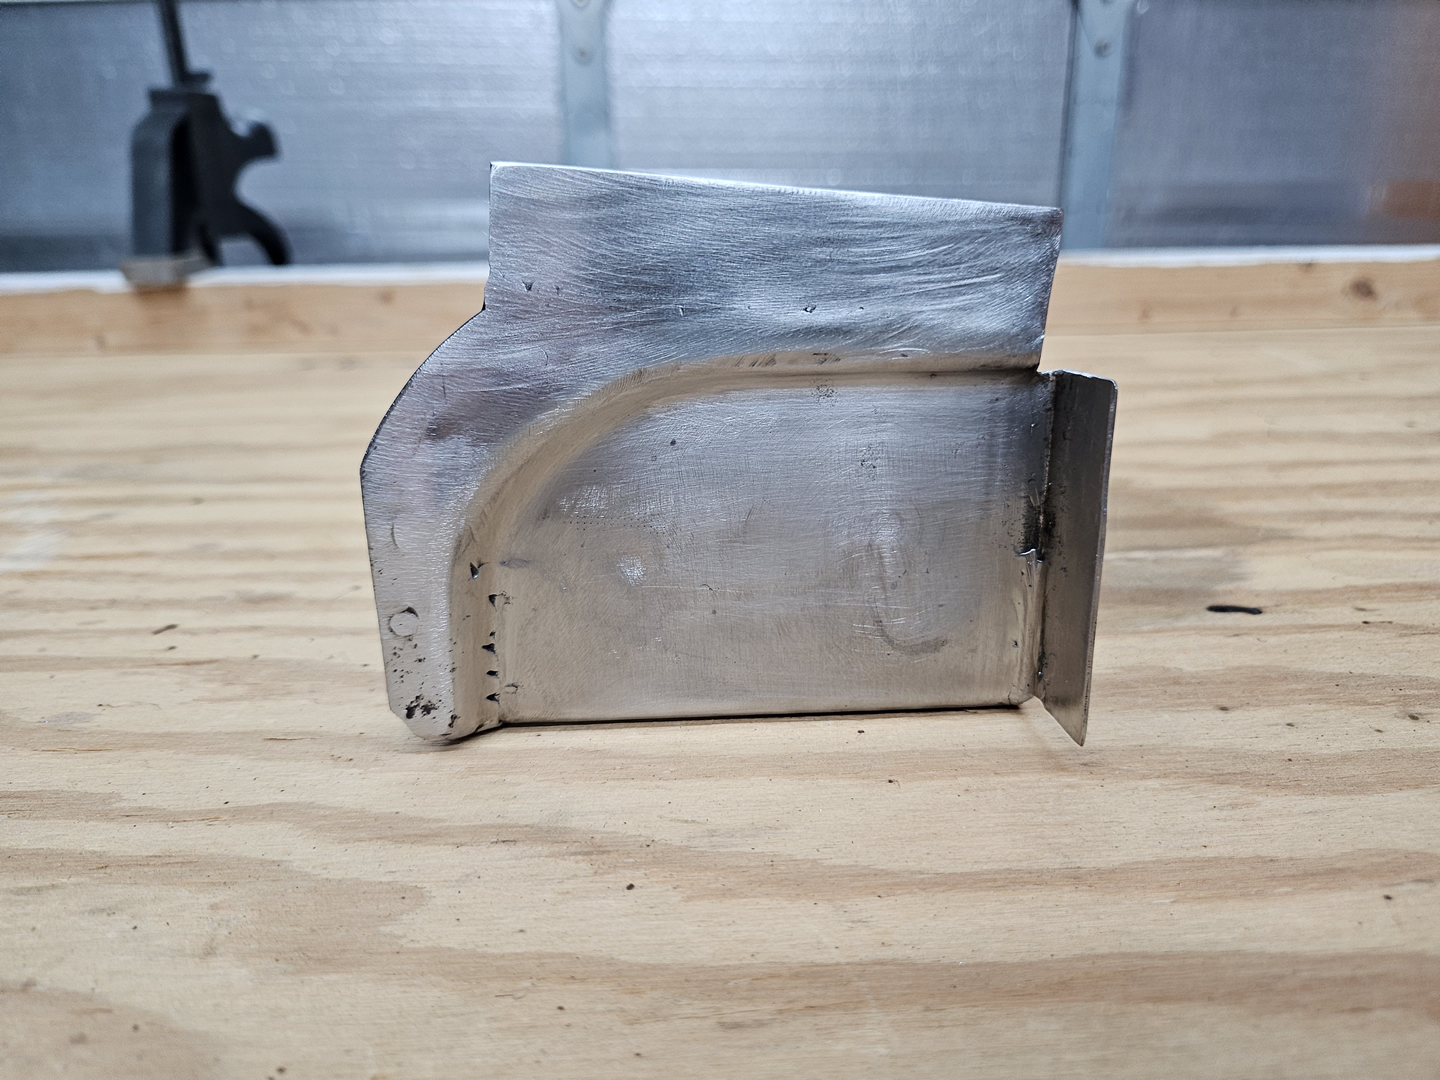
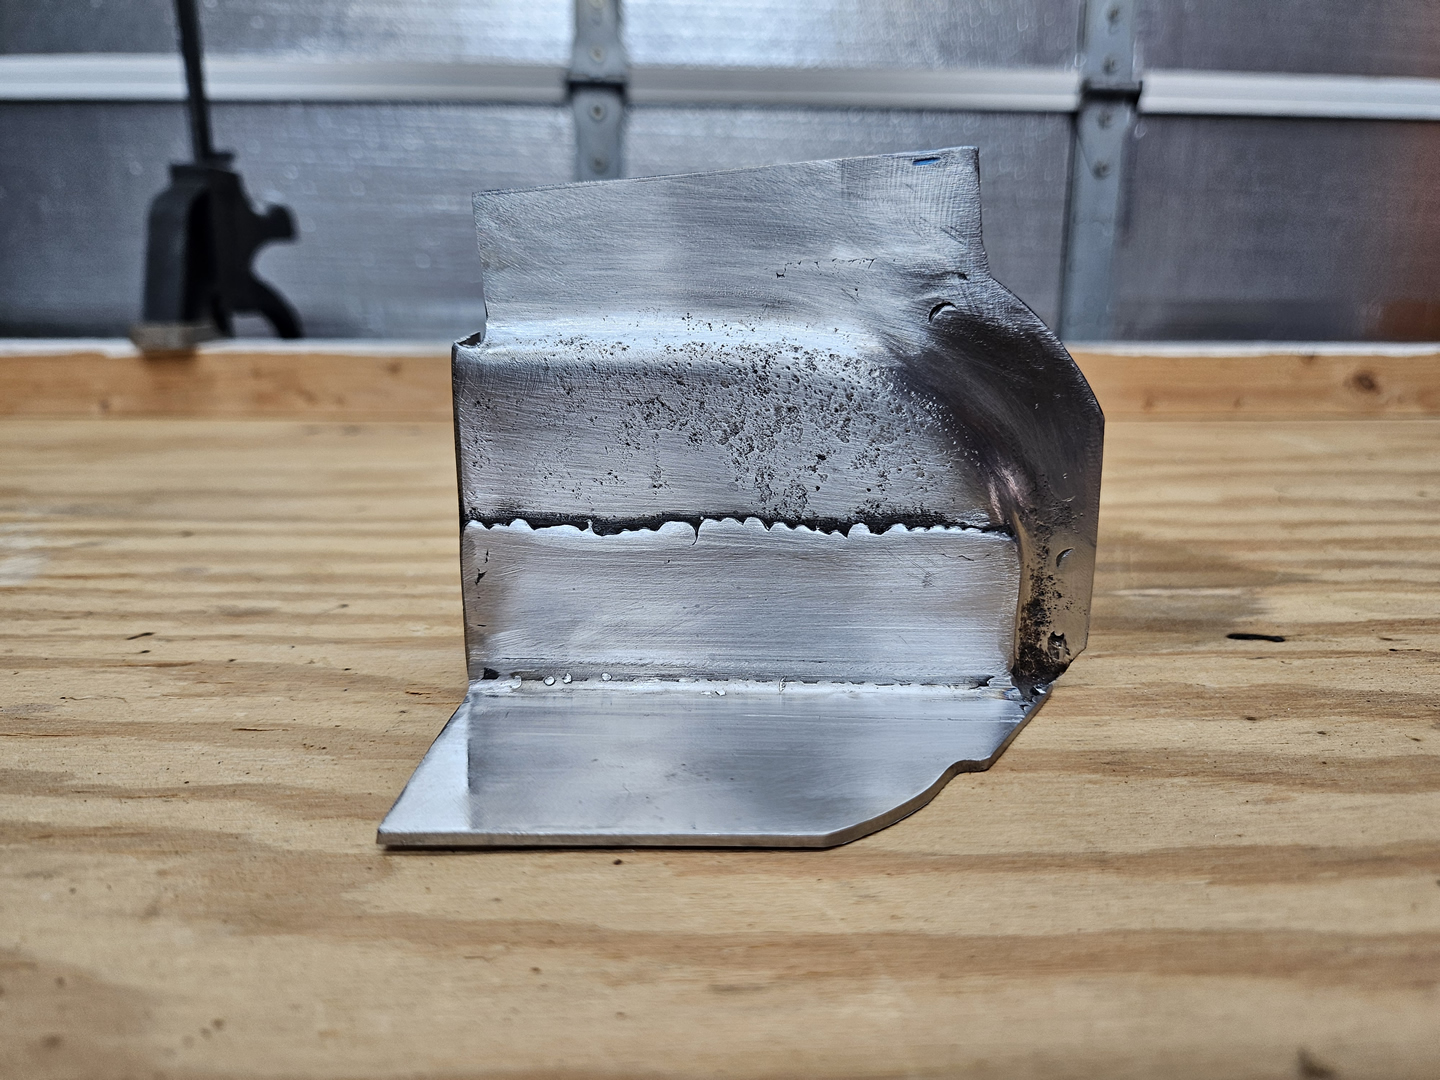
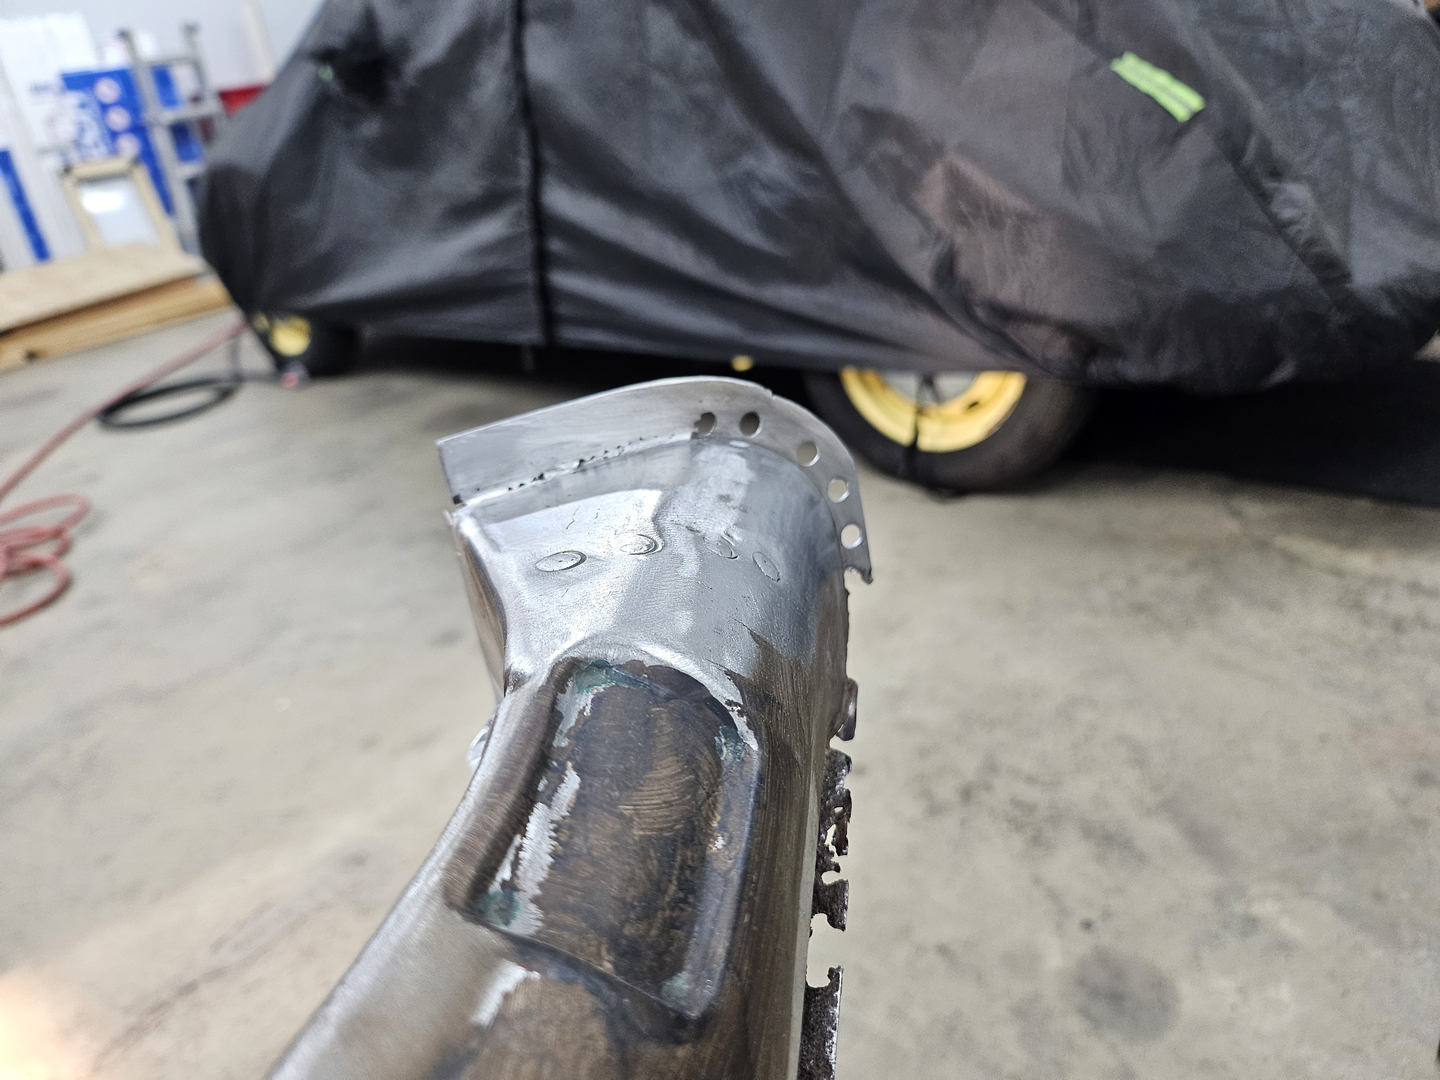
I also welded on a piece where the flange had been cut off when the channel was removed from the donor car. I will trim it once I weld it back on to the channel body.

|
|
|
|
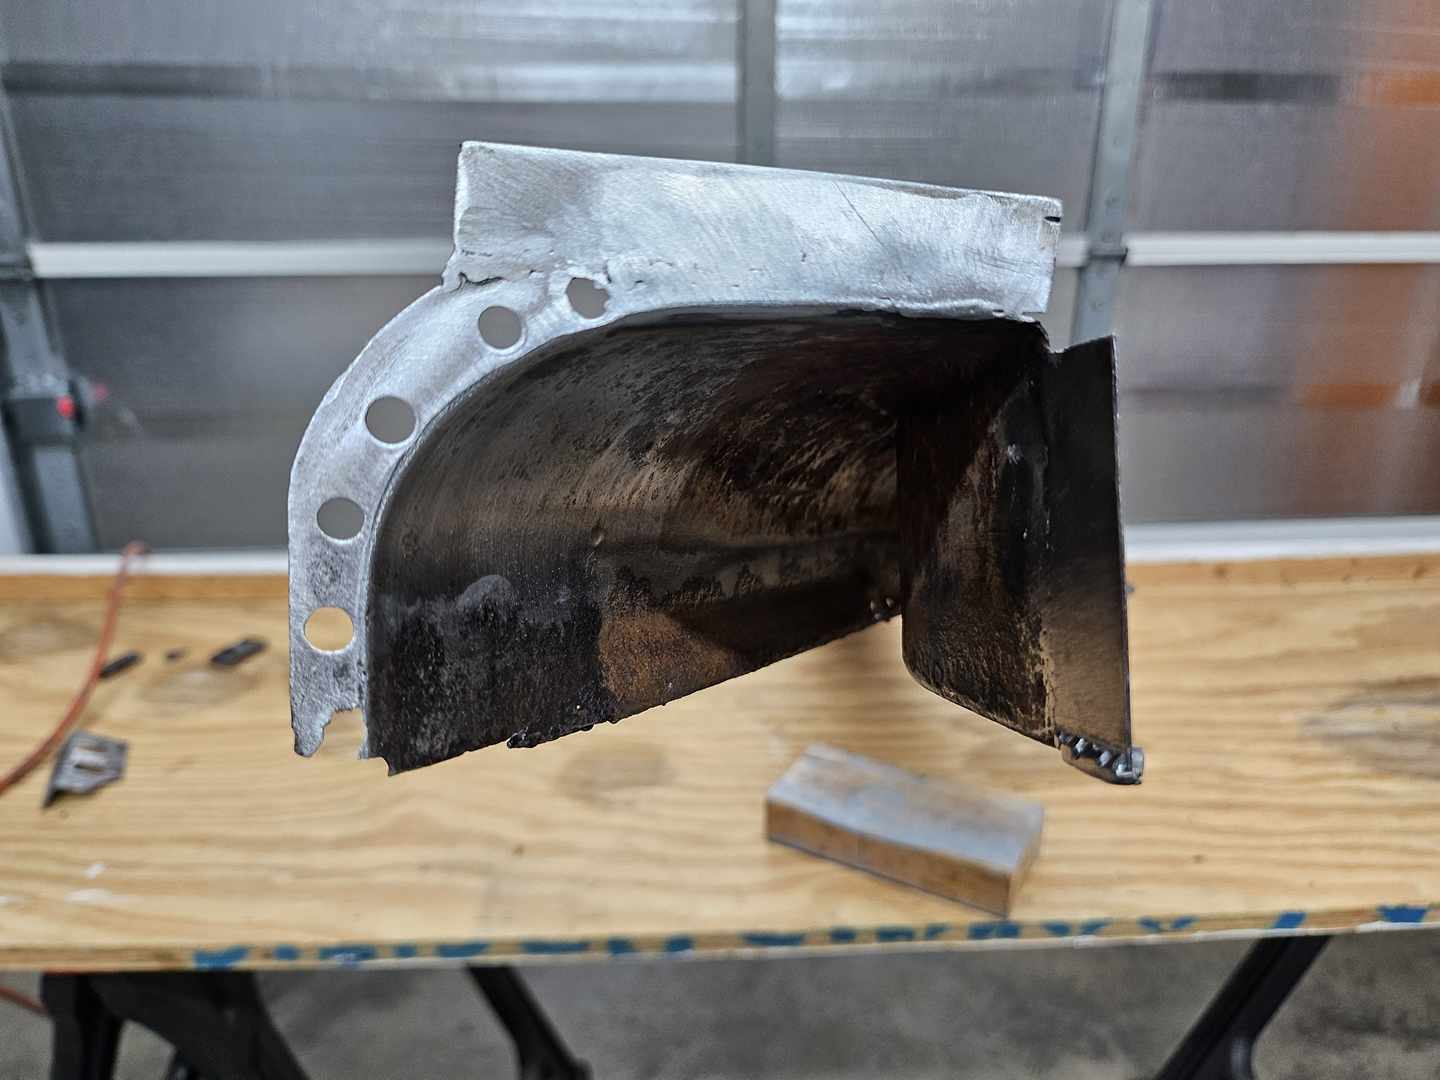
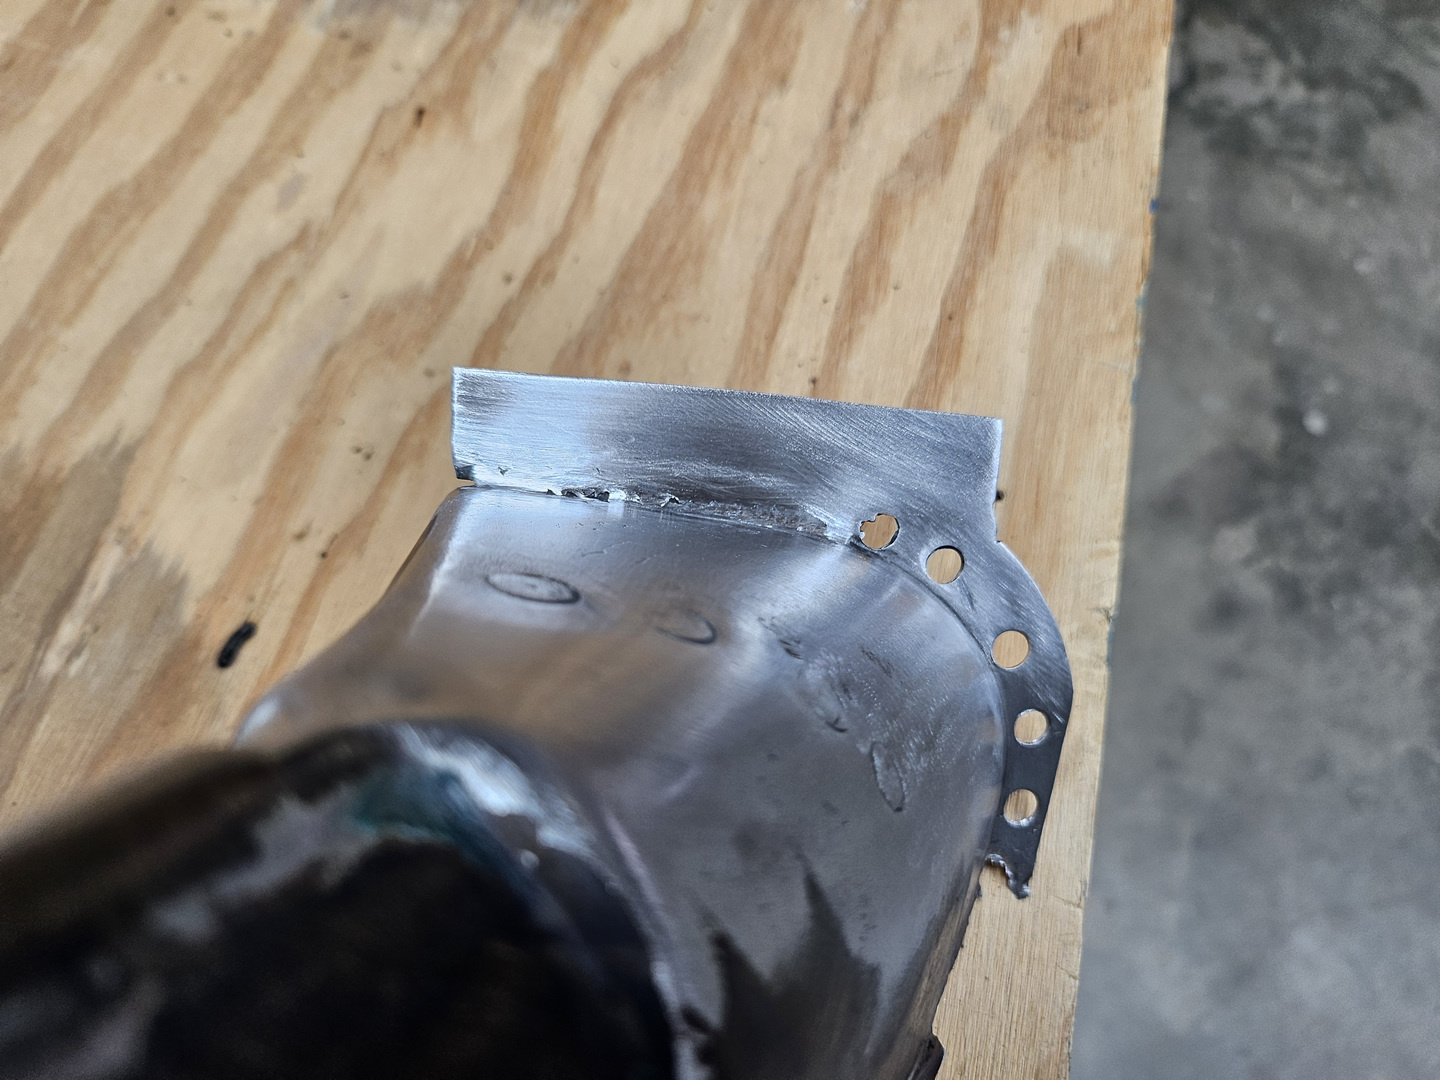
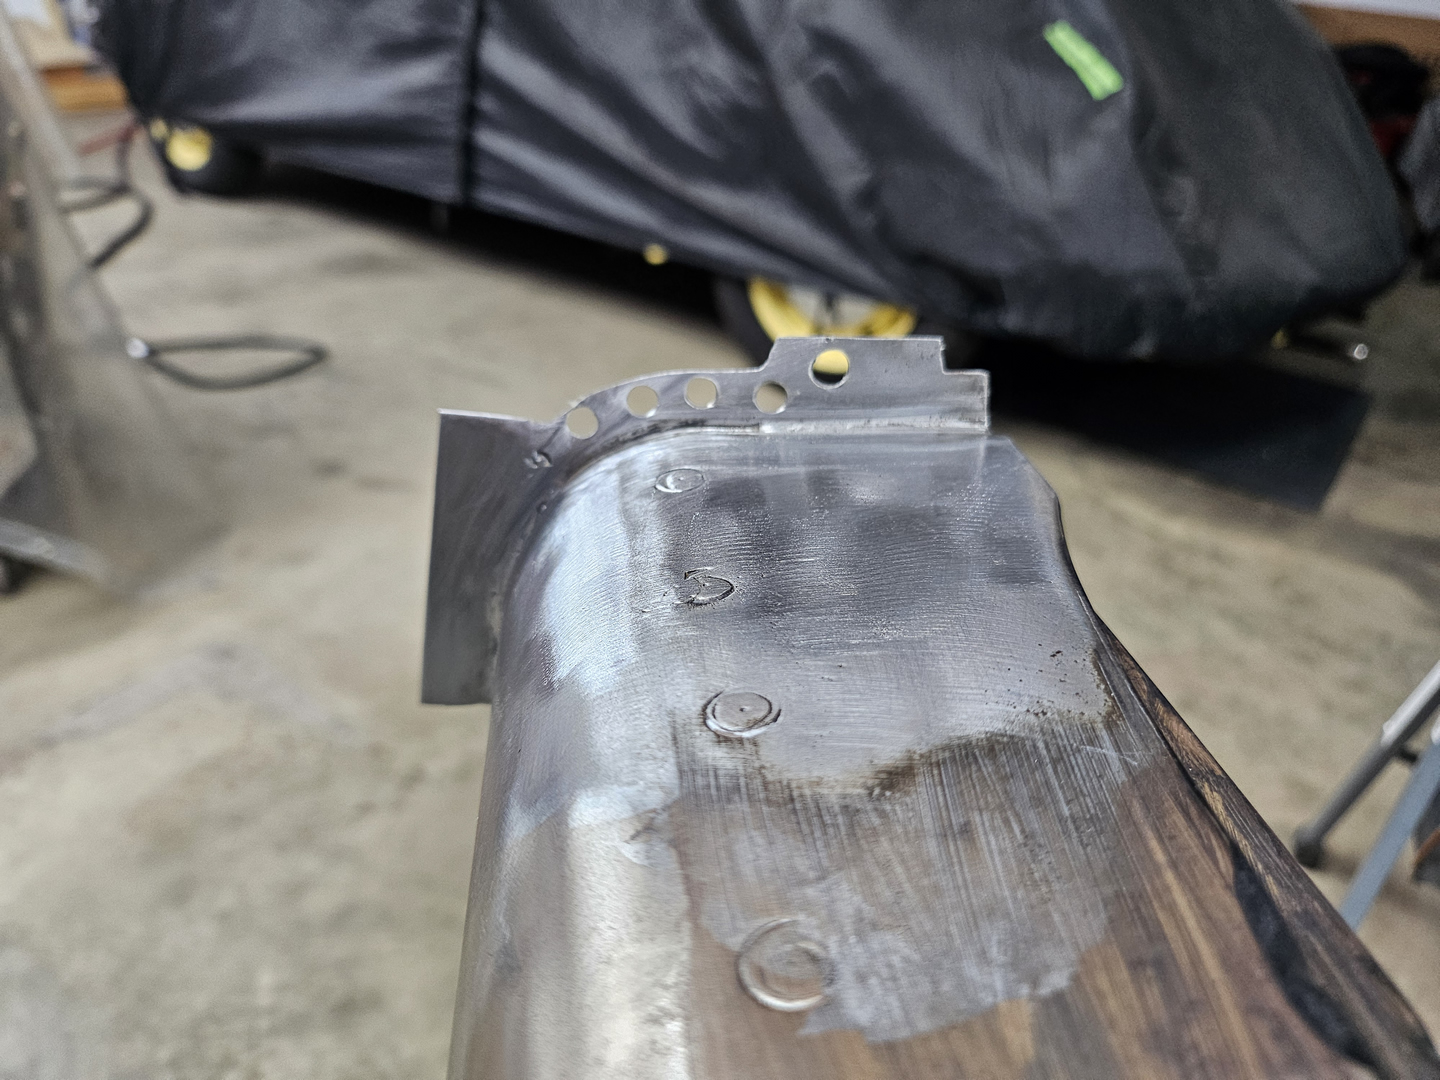
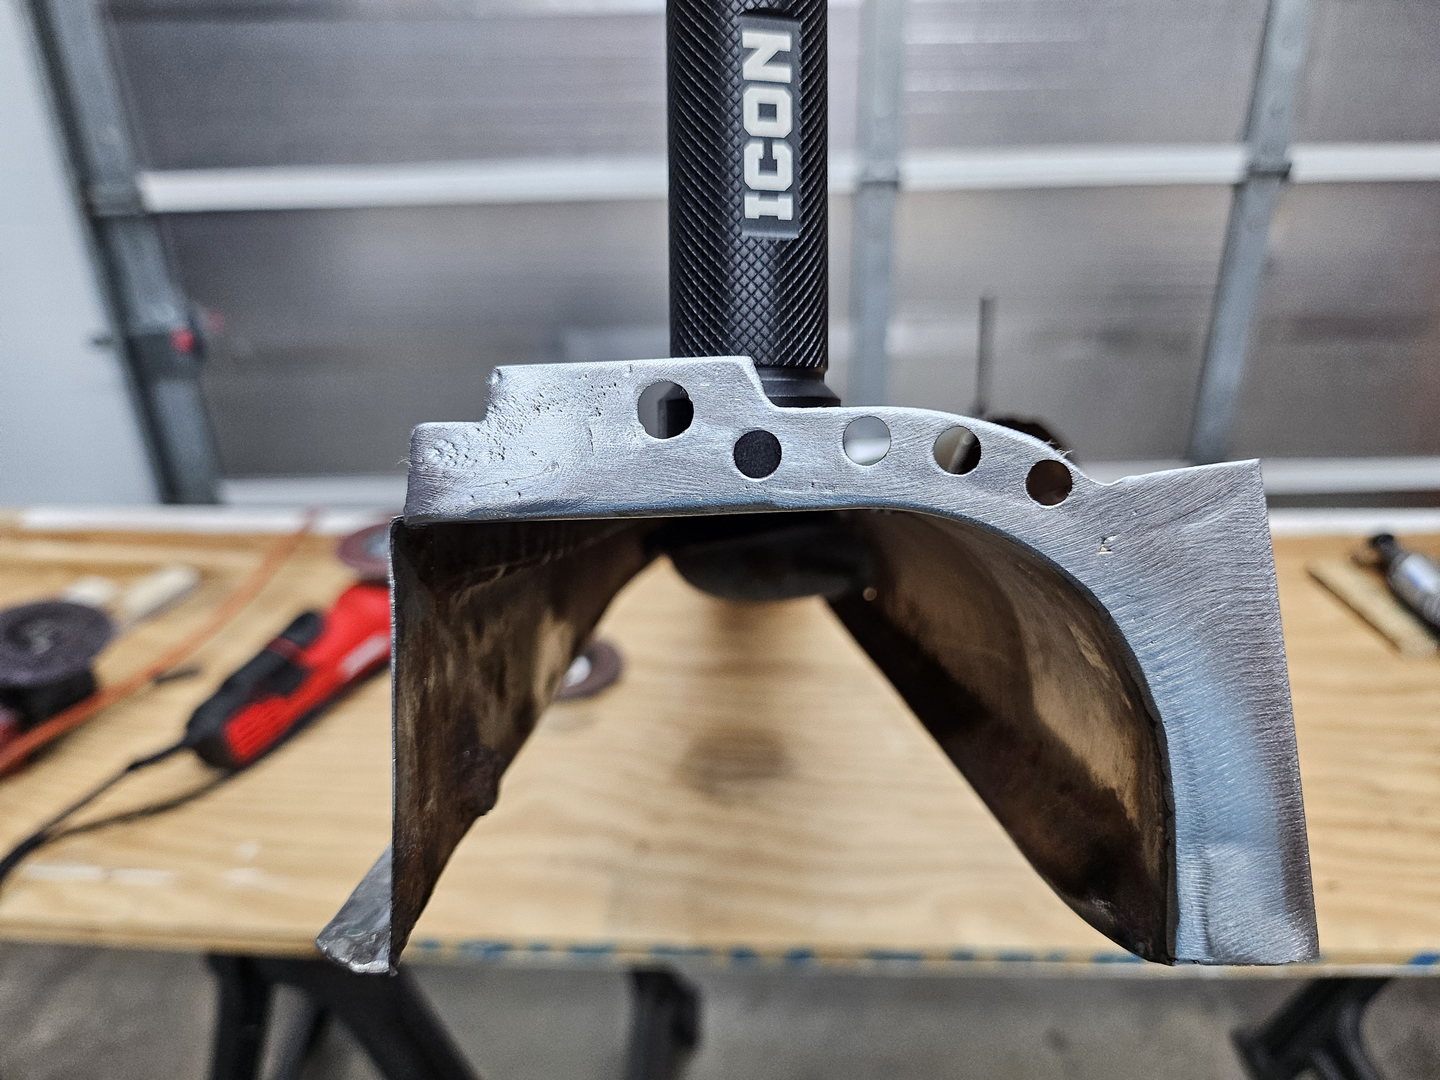
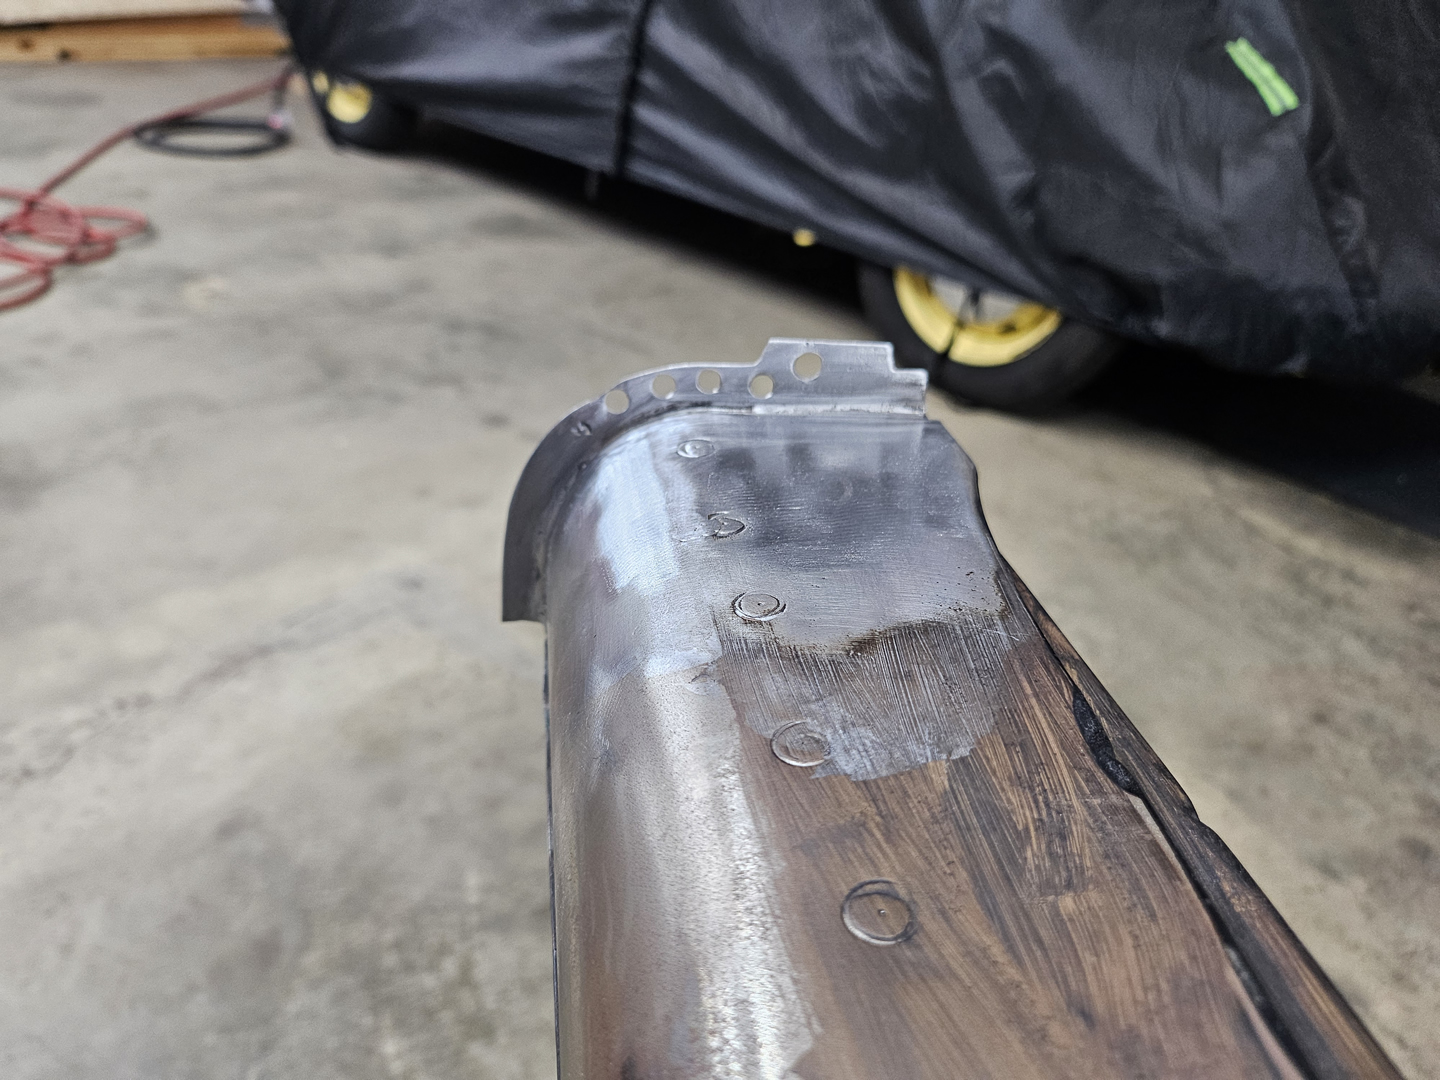
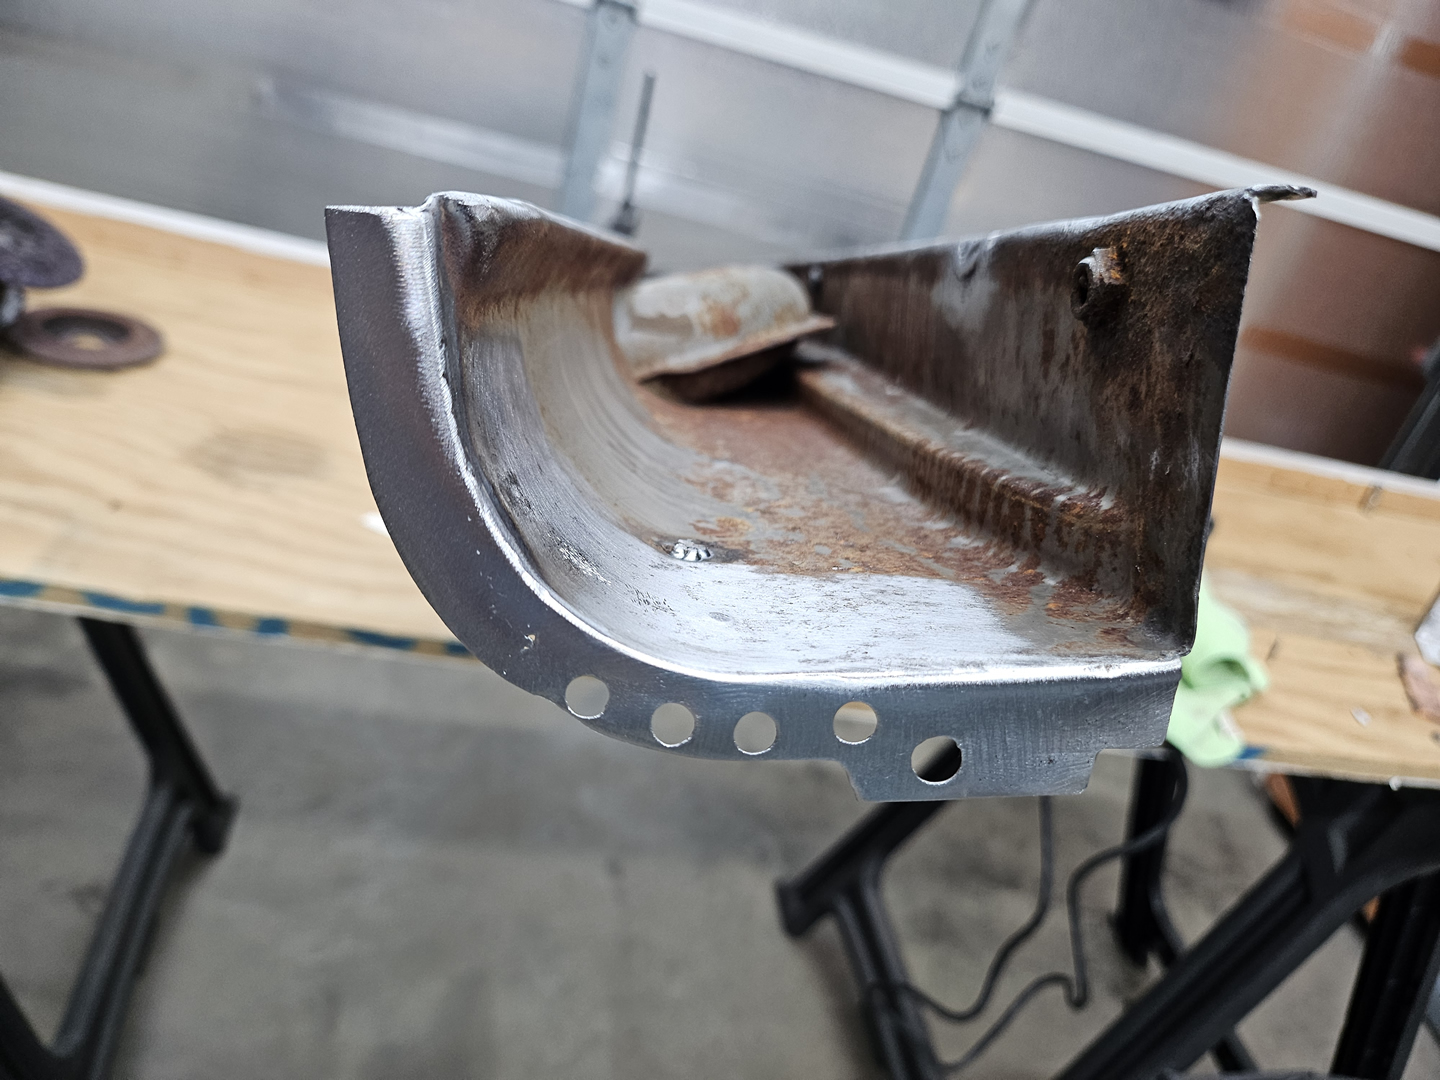
I did the same and repaired the front flange on the channel body.
|
|
|
|
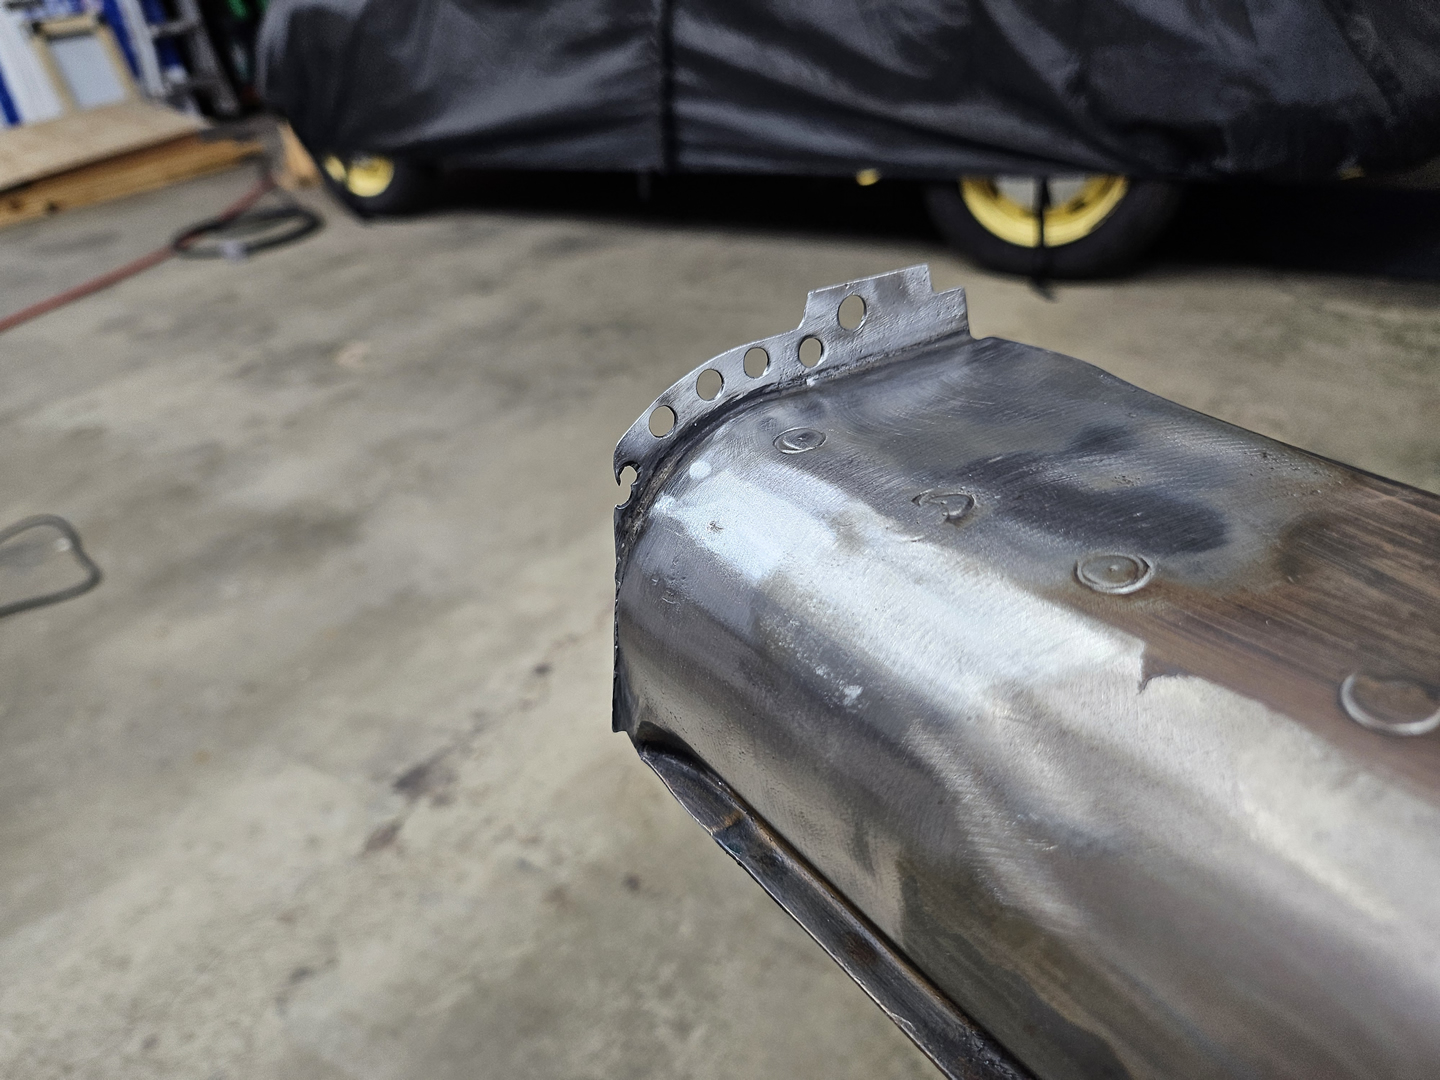
And I repaired the flange on the rear end of the body as well.
|
|
|
|
|
|
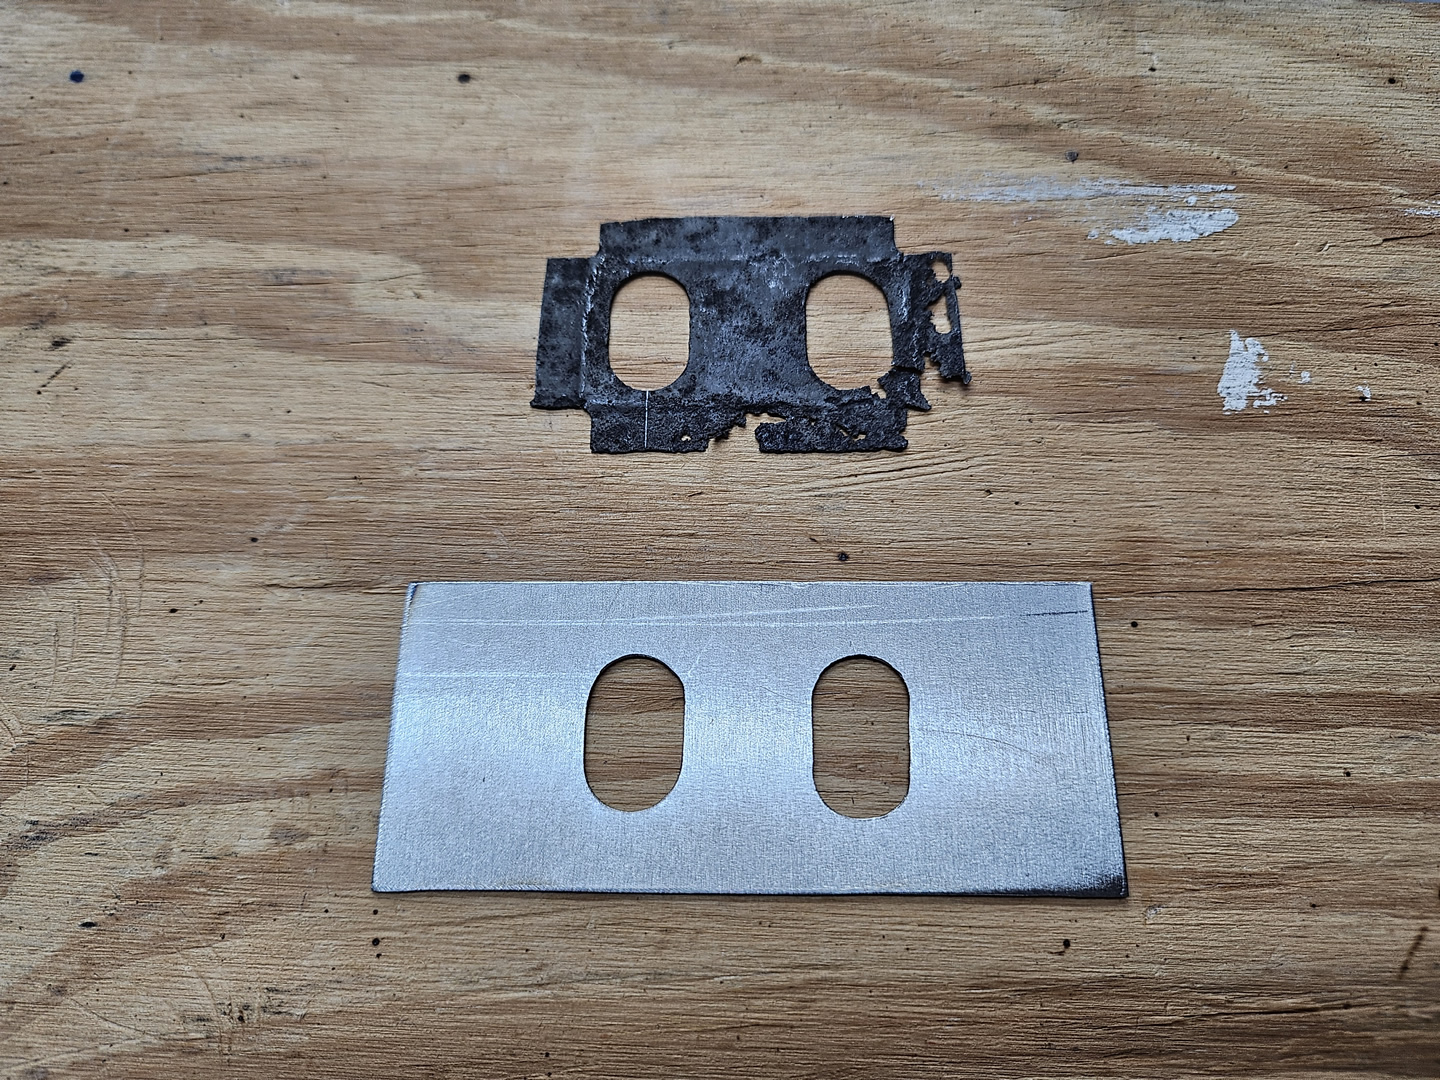
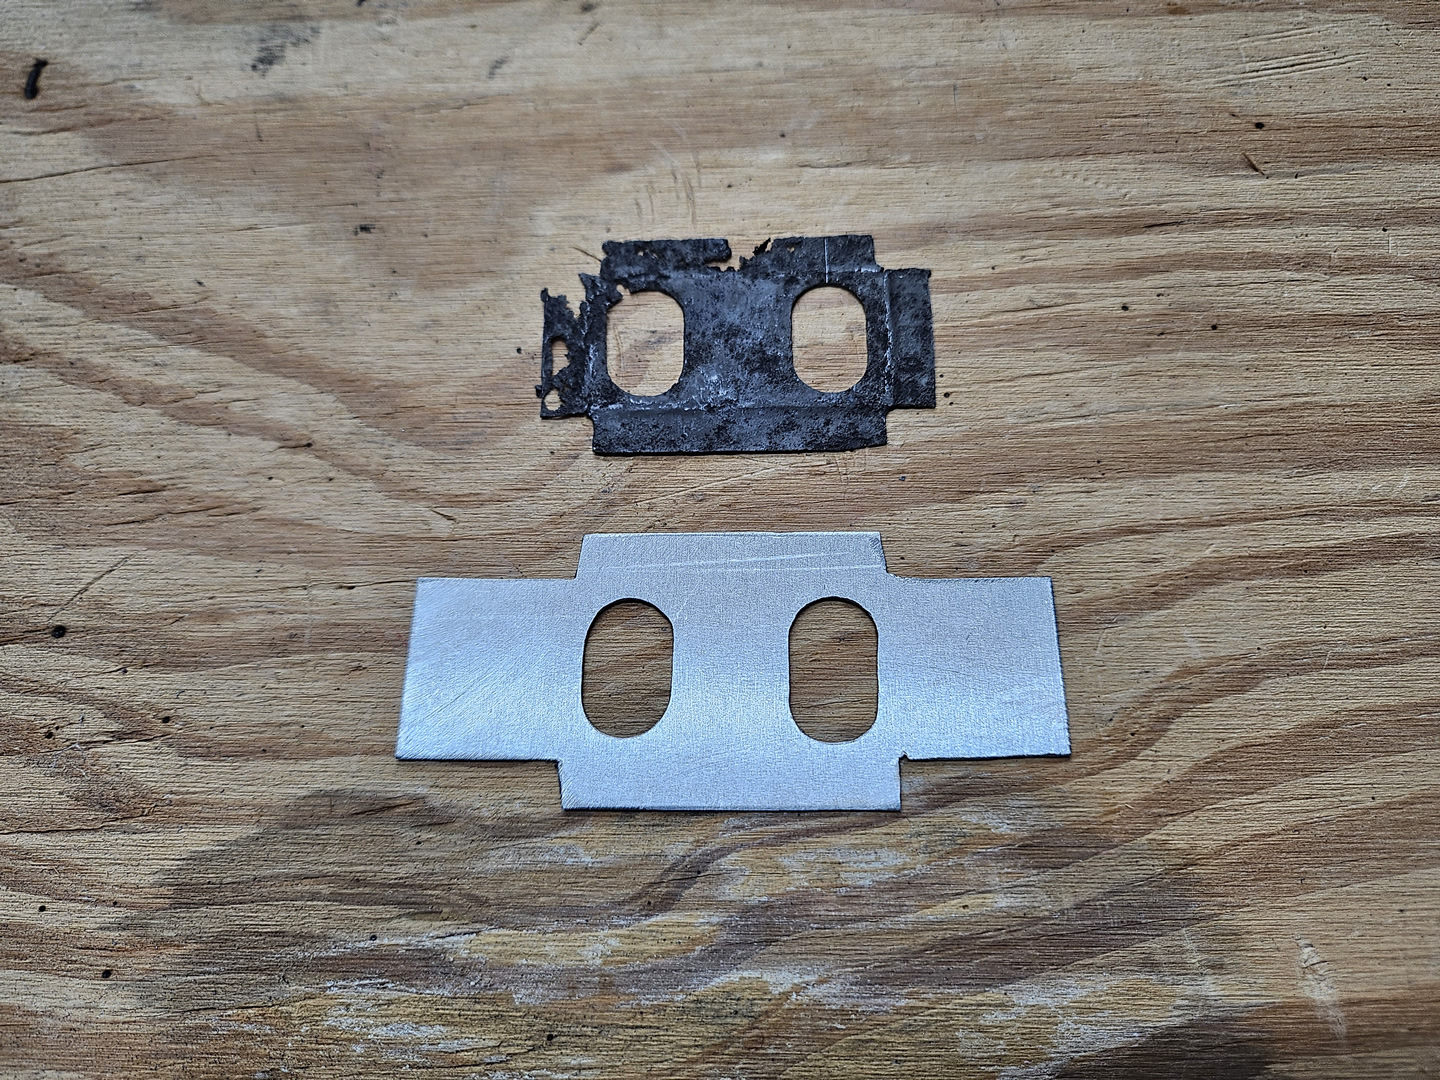
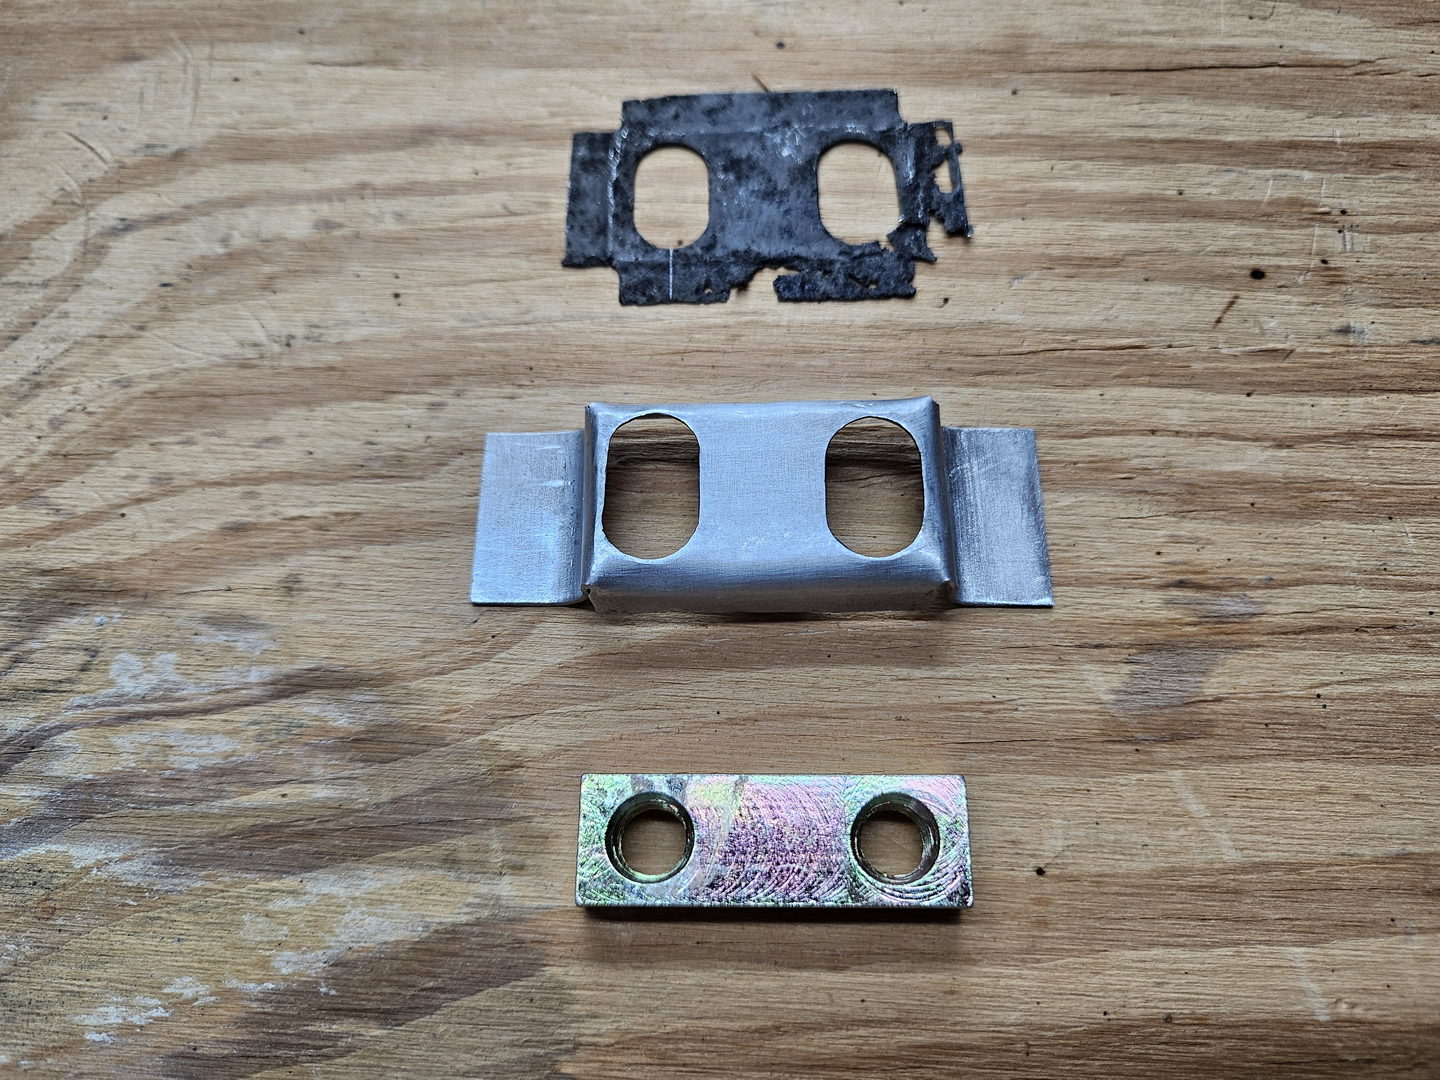
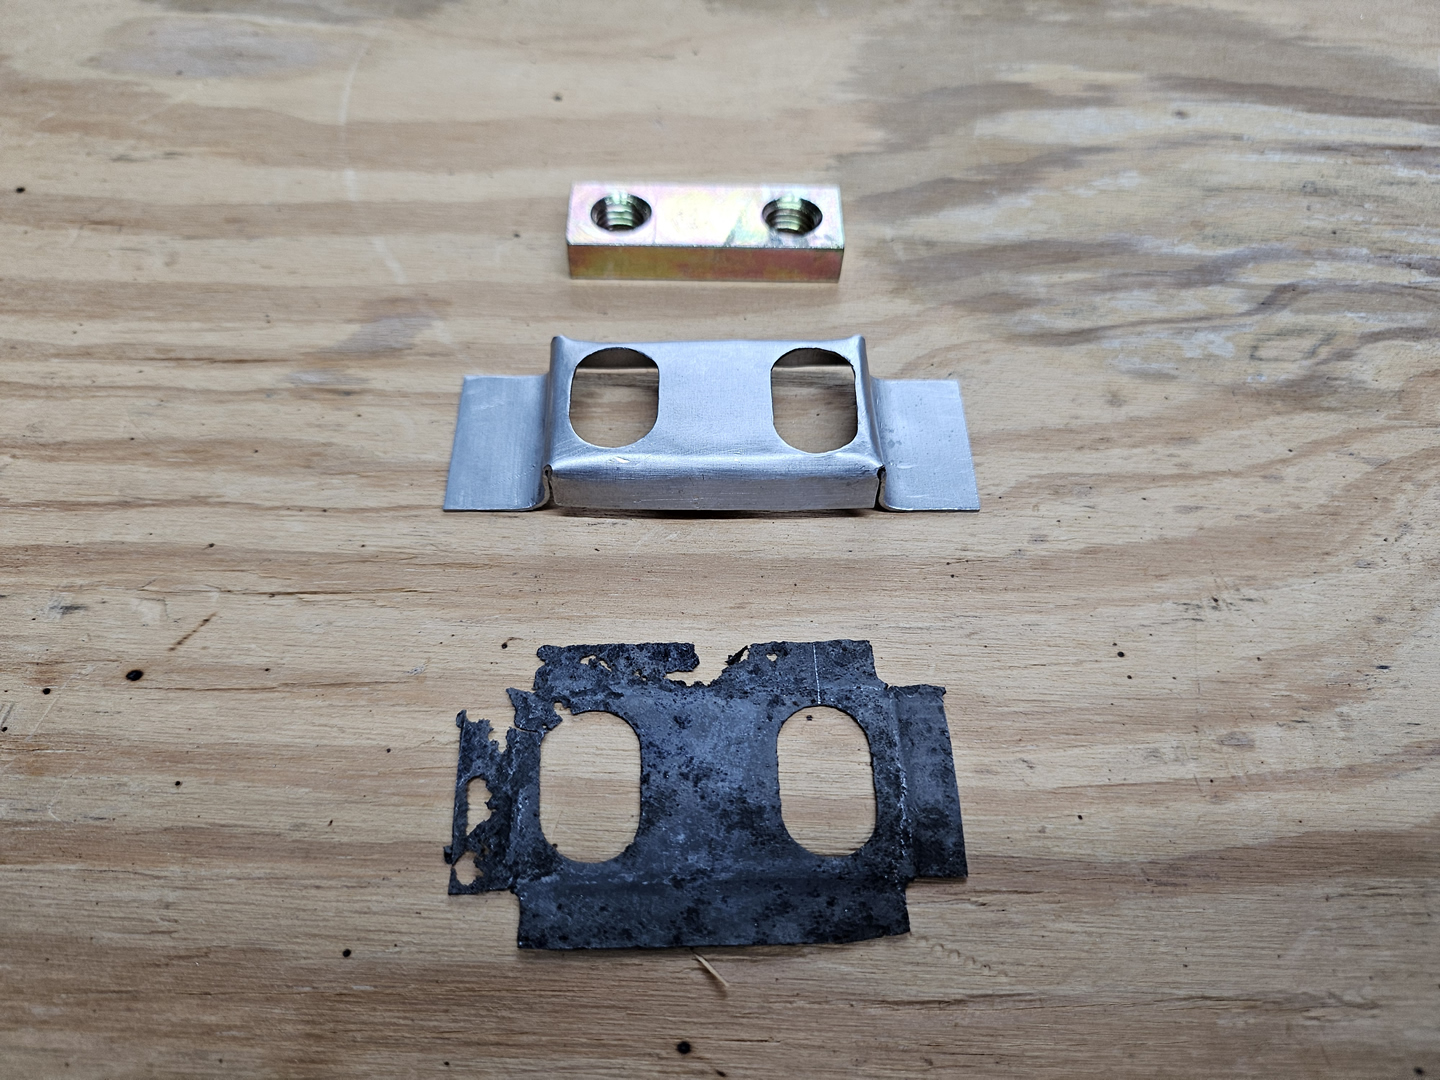
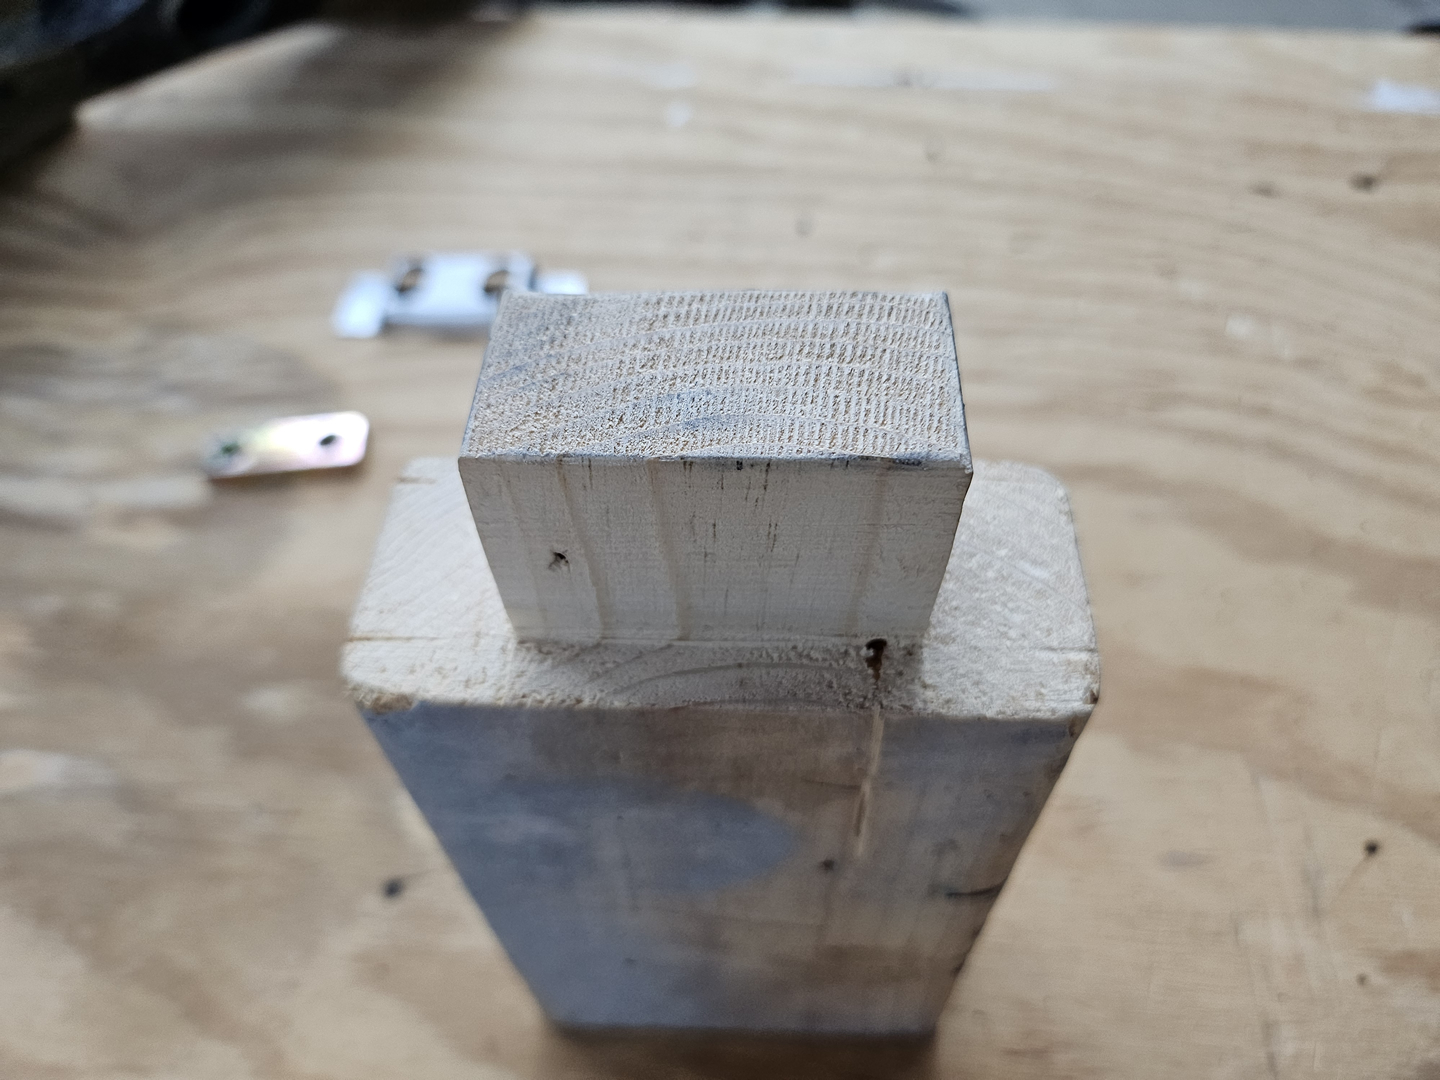
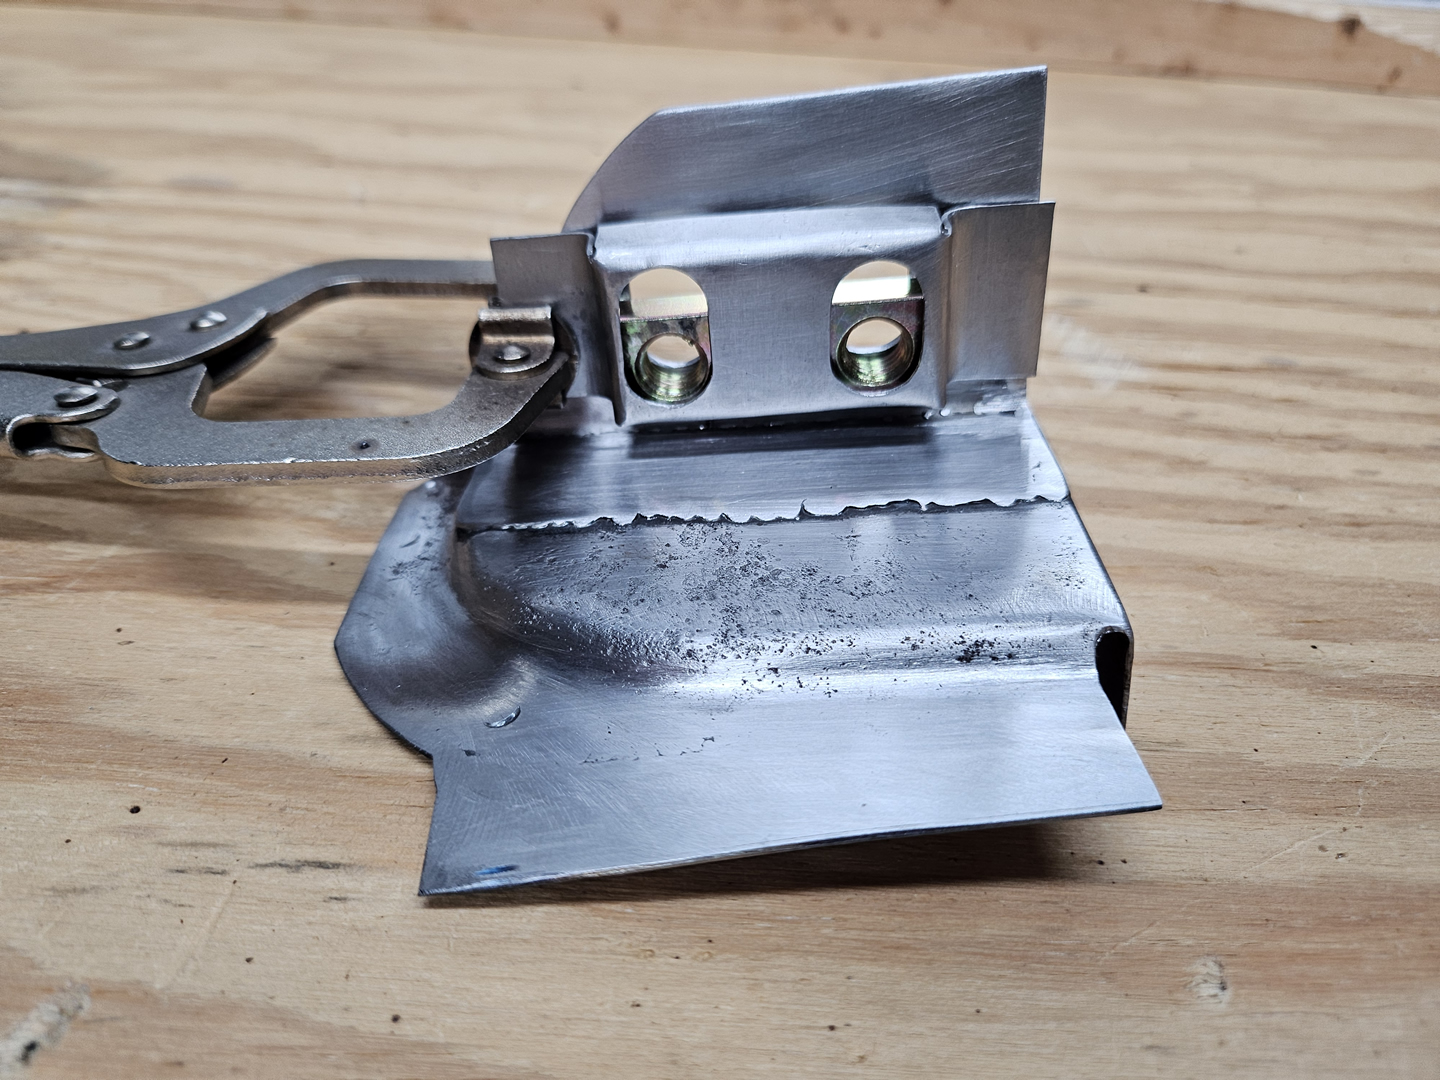
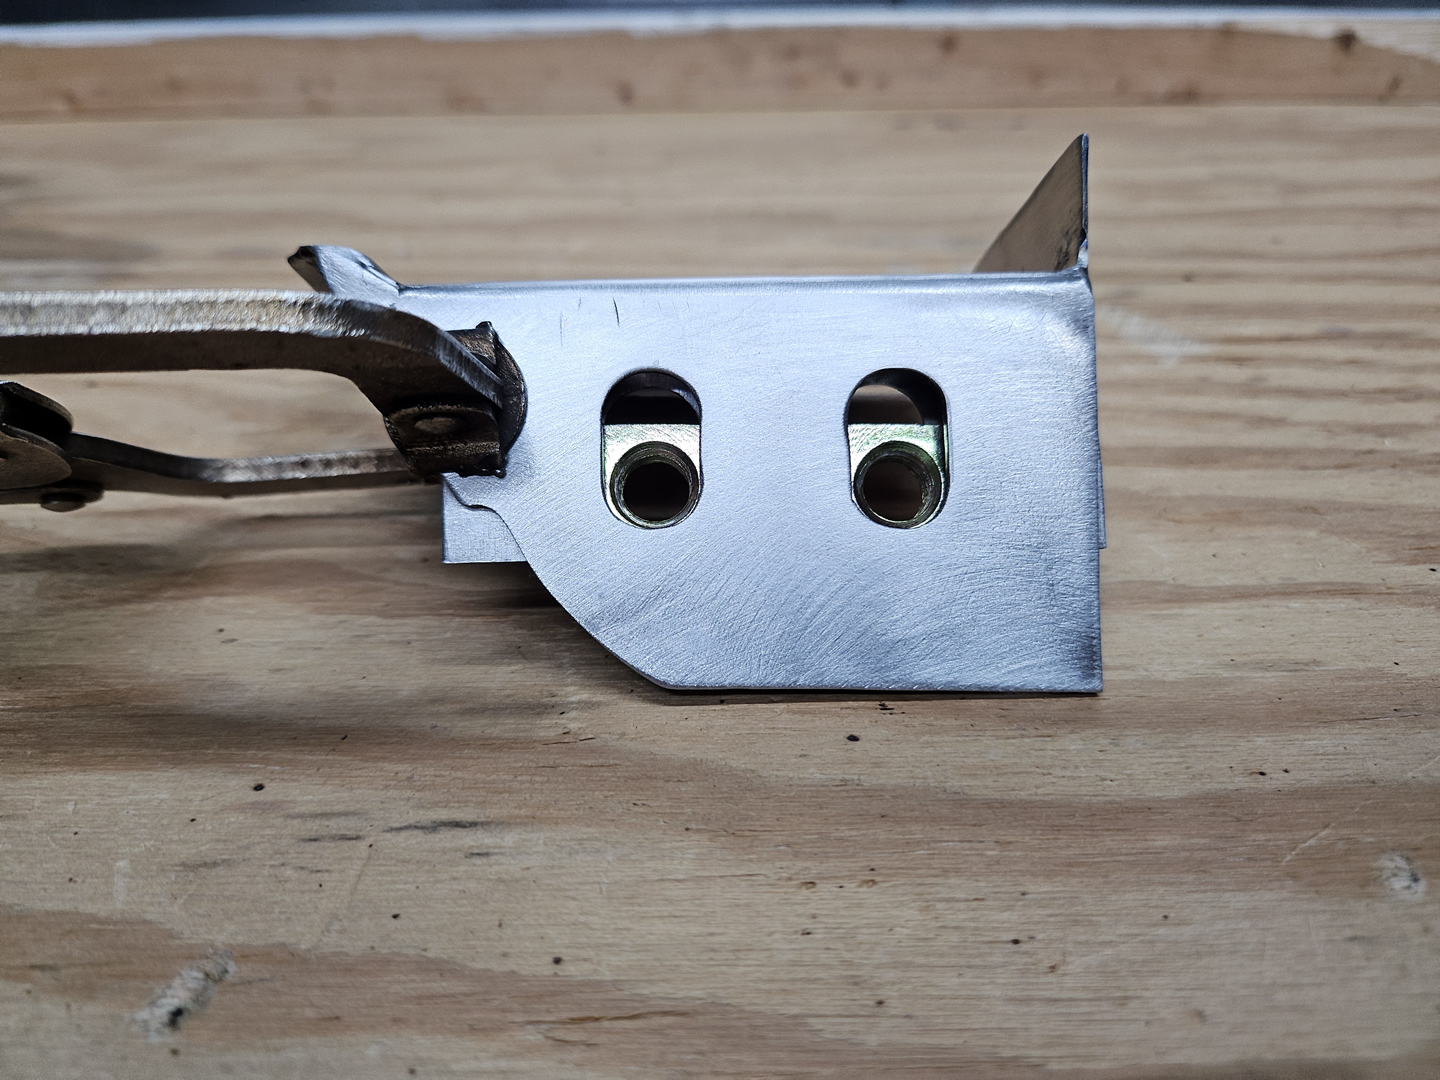
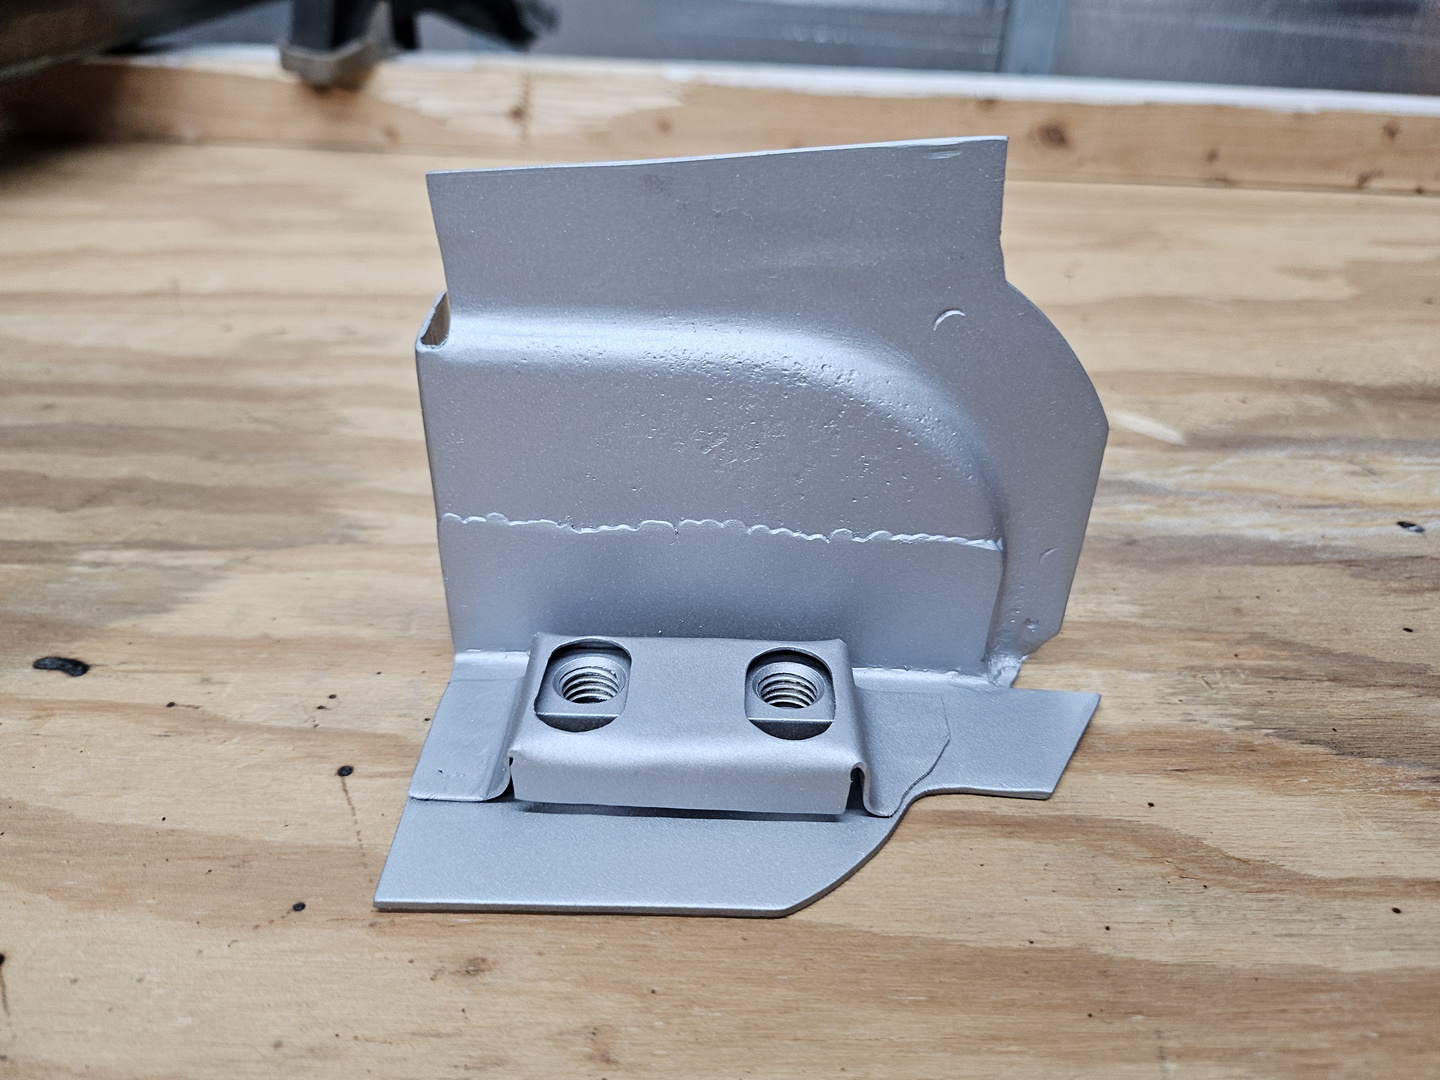
Since I couldn't find anyone in the US that was selling a replacement threaded plate cage, I decided to make one myself. I cut off the original one and flattened it out to help determine what pattern I would need to replicate it. I made a wood form or buck to help shape it, and it did help a little. I made the cage out of 20-gauge metal and it was a little too thick to bend over the form. I basically used pliers and a small hammer and was able to get it fairly close to the original. I made it the same dimensions as the original, but the replacement threaded plate was a little wider than the original plate. I had to take a little metal off of the ends of the plate and then it fit. It doesn't have the same amount of side-to-side play in it that the original one did and hopefully that will not be a problem. I will have to remember that when fitting the channels to the body. I sprayed the mating pieces with weld-through primer and welded the cage onto the end cap.
|
|
|
|
|

|

|

|
|
|

|
|
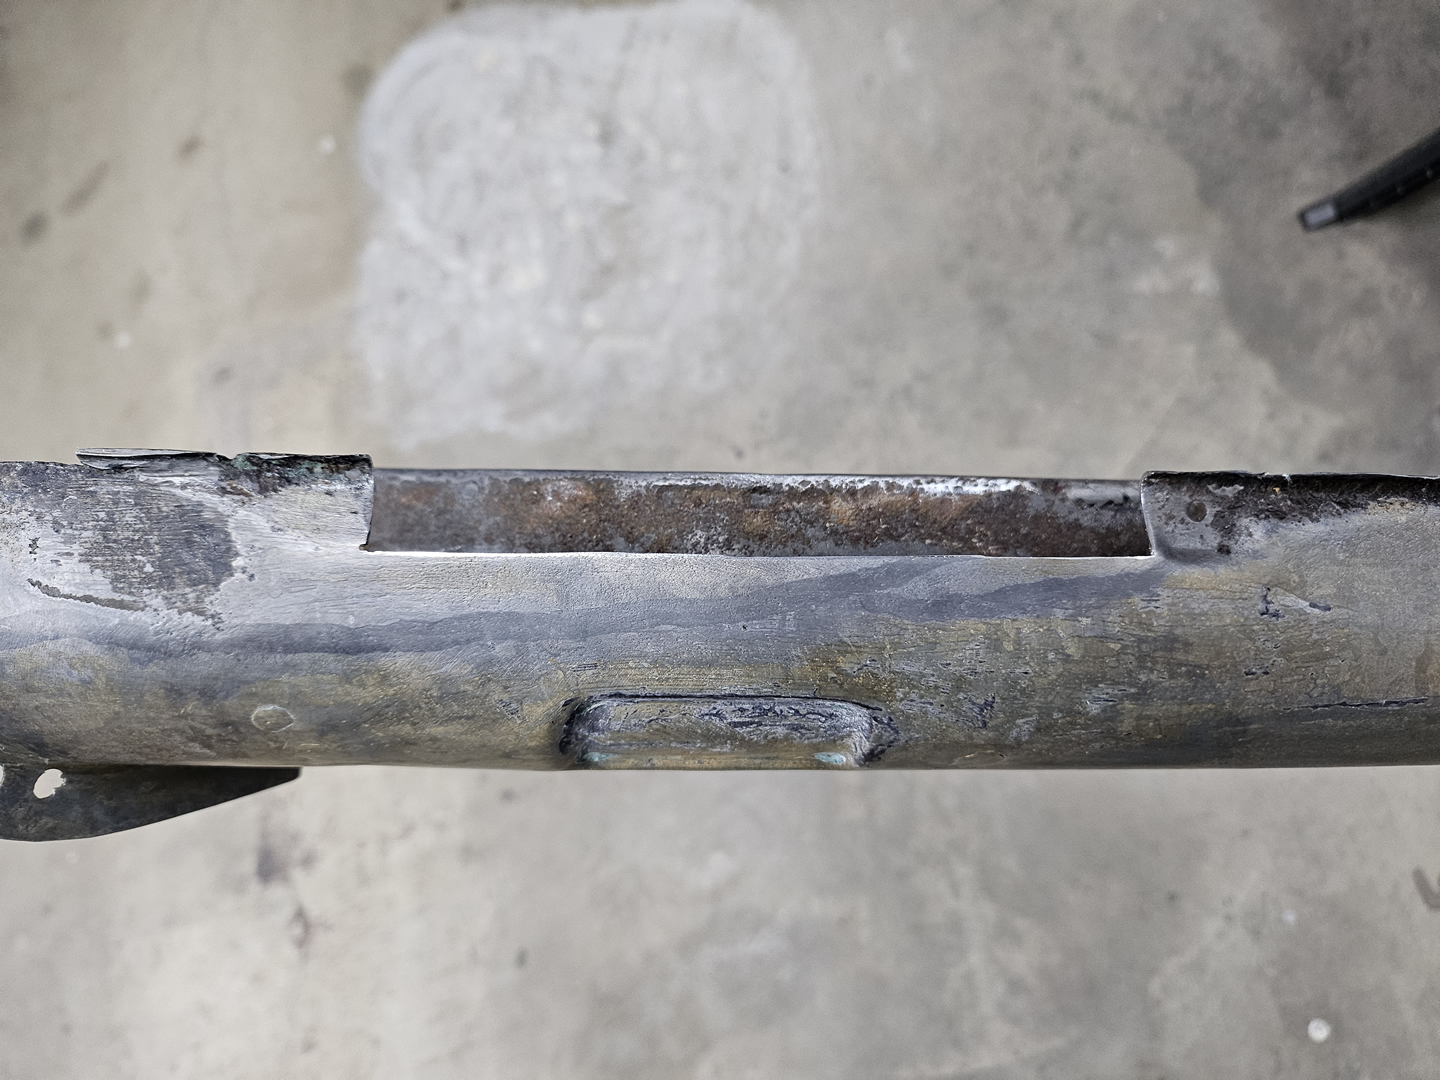
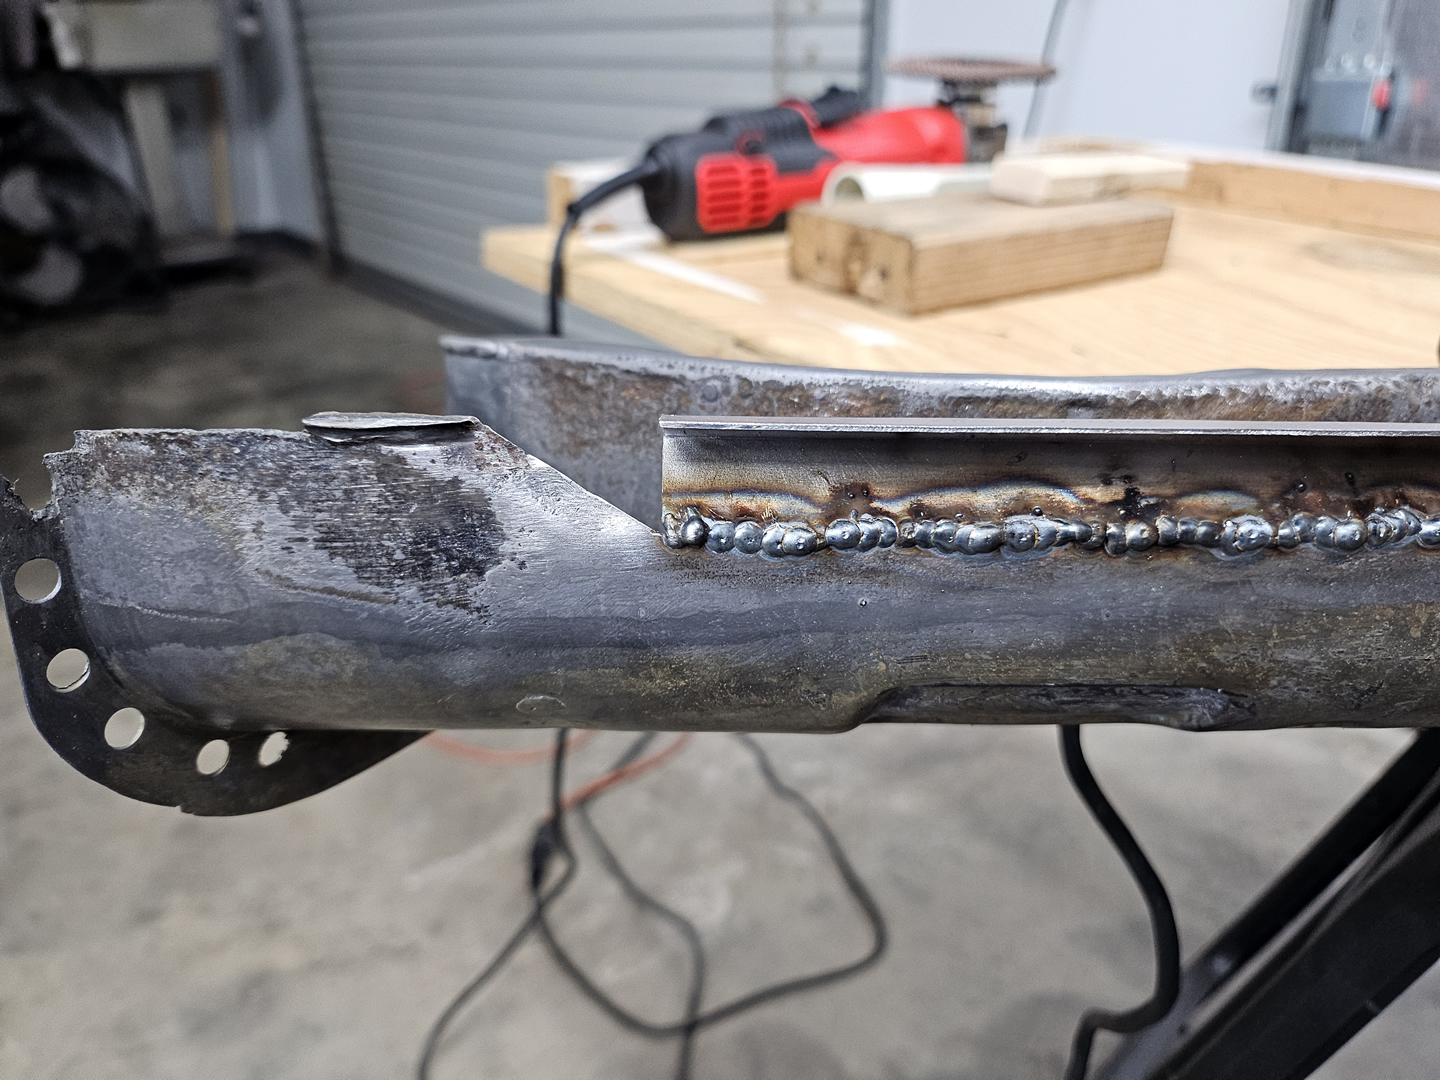
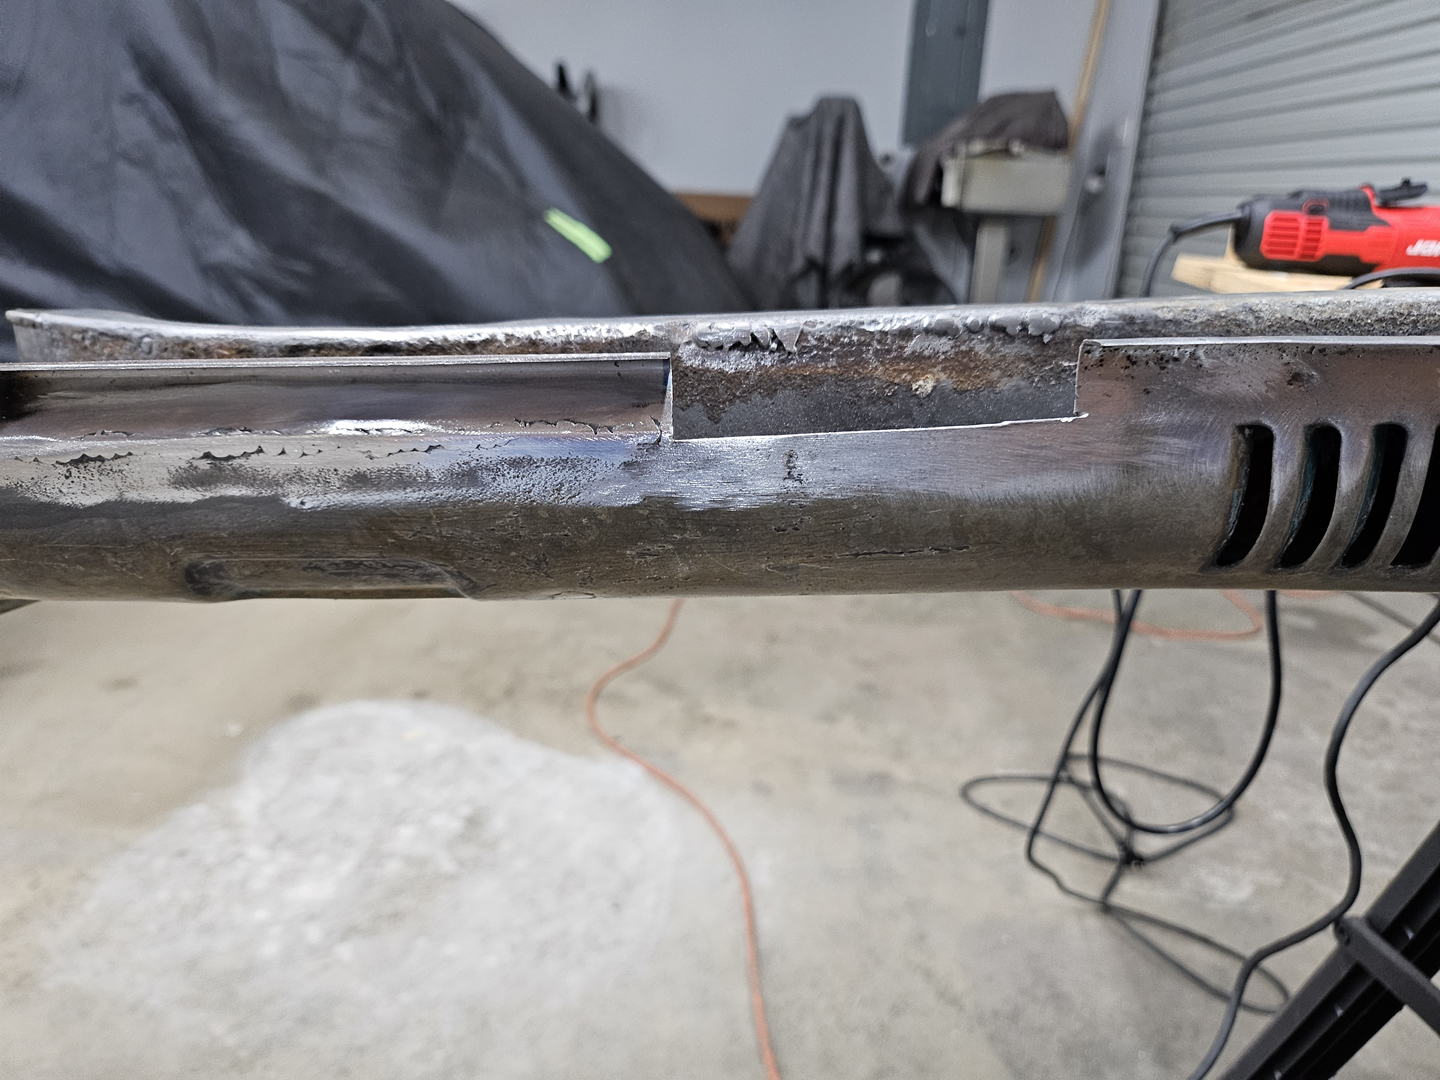
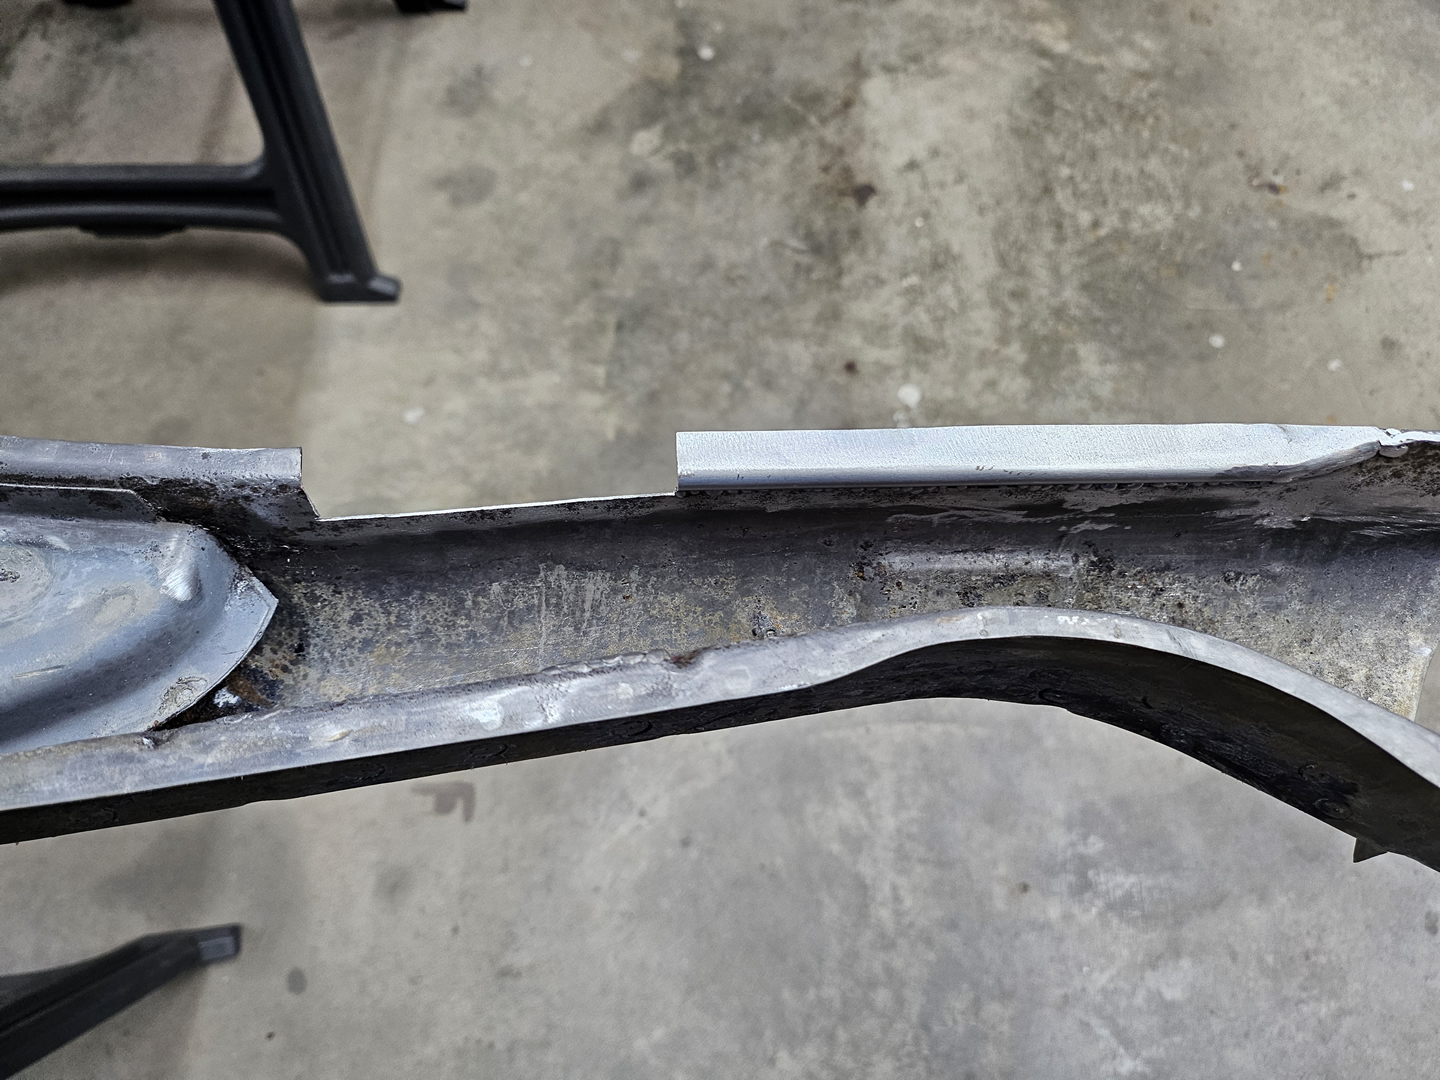
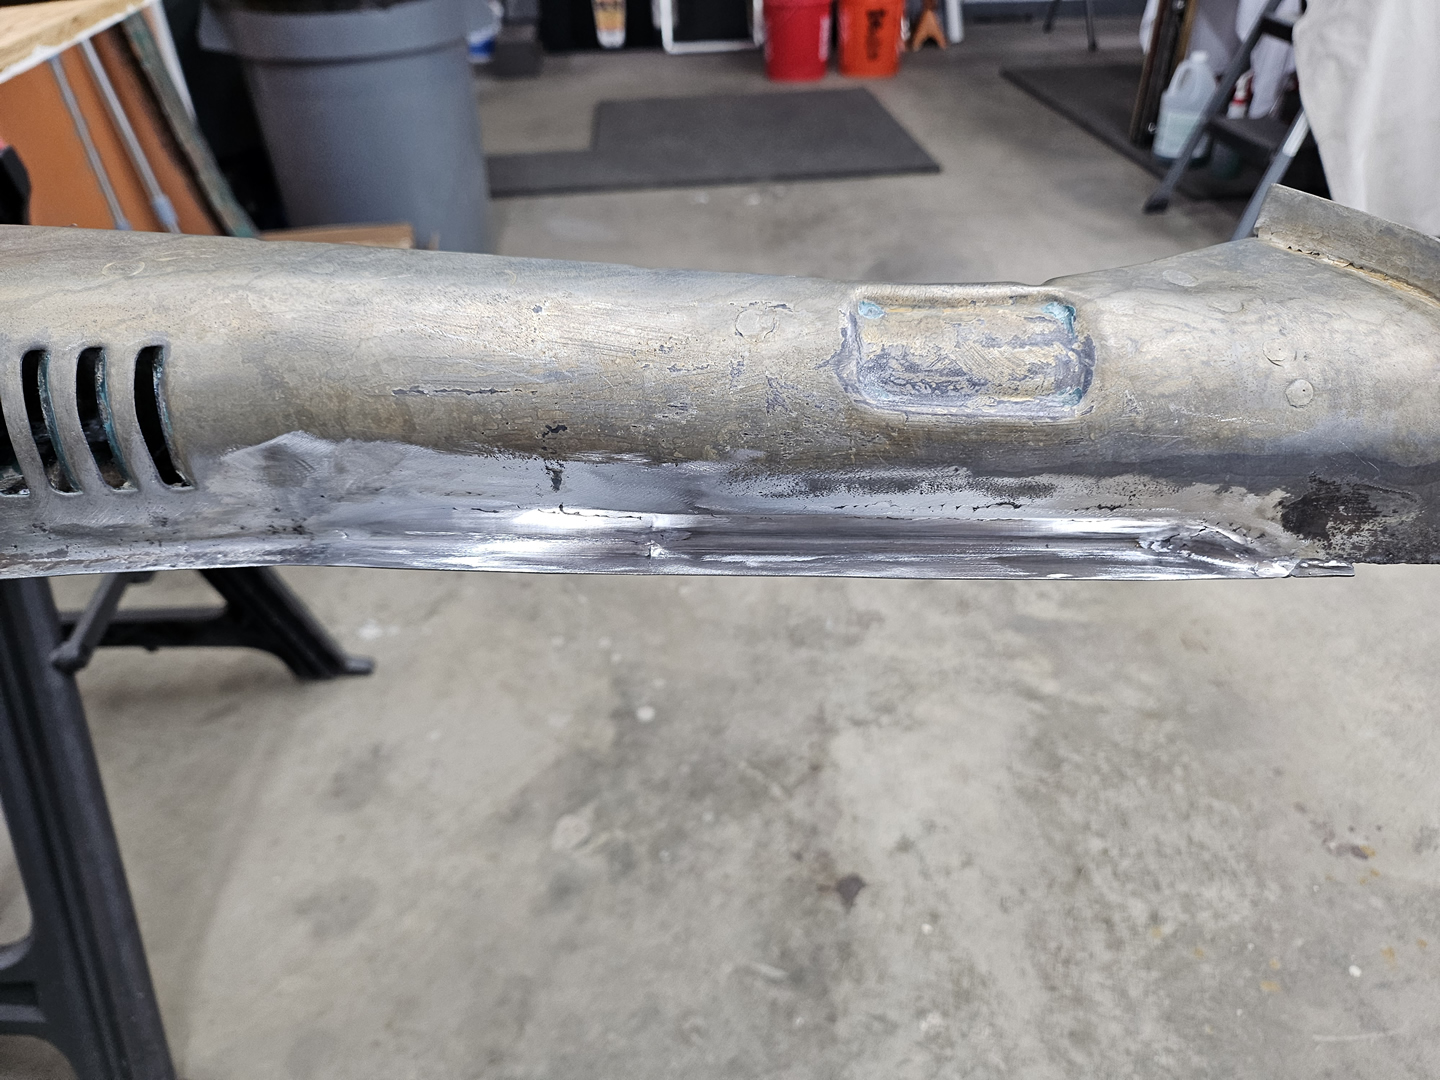
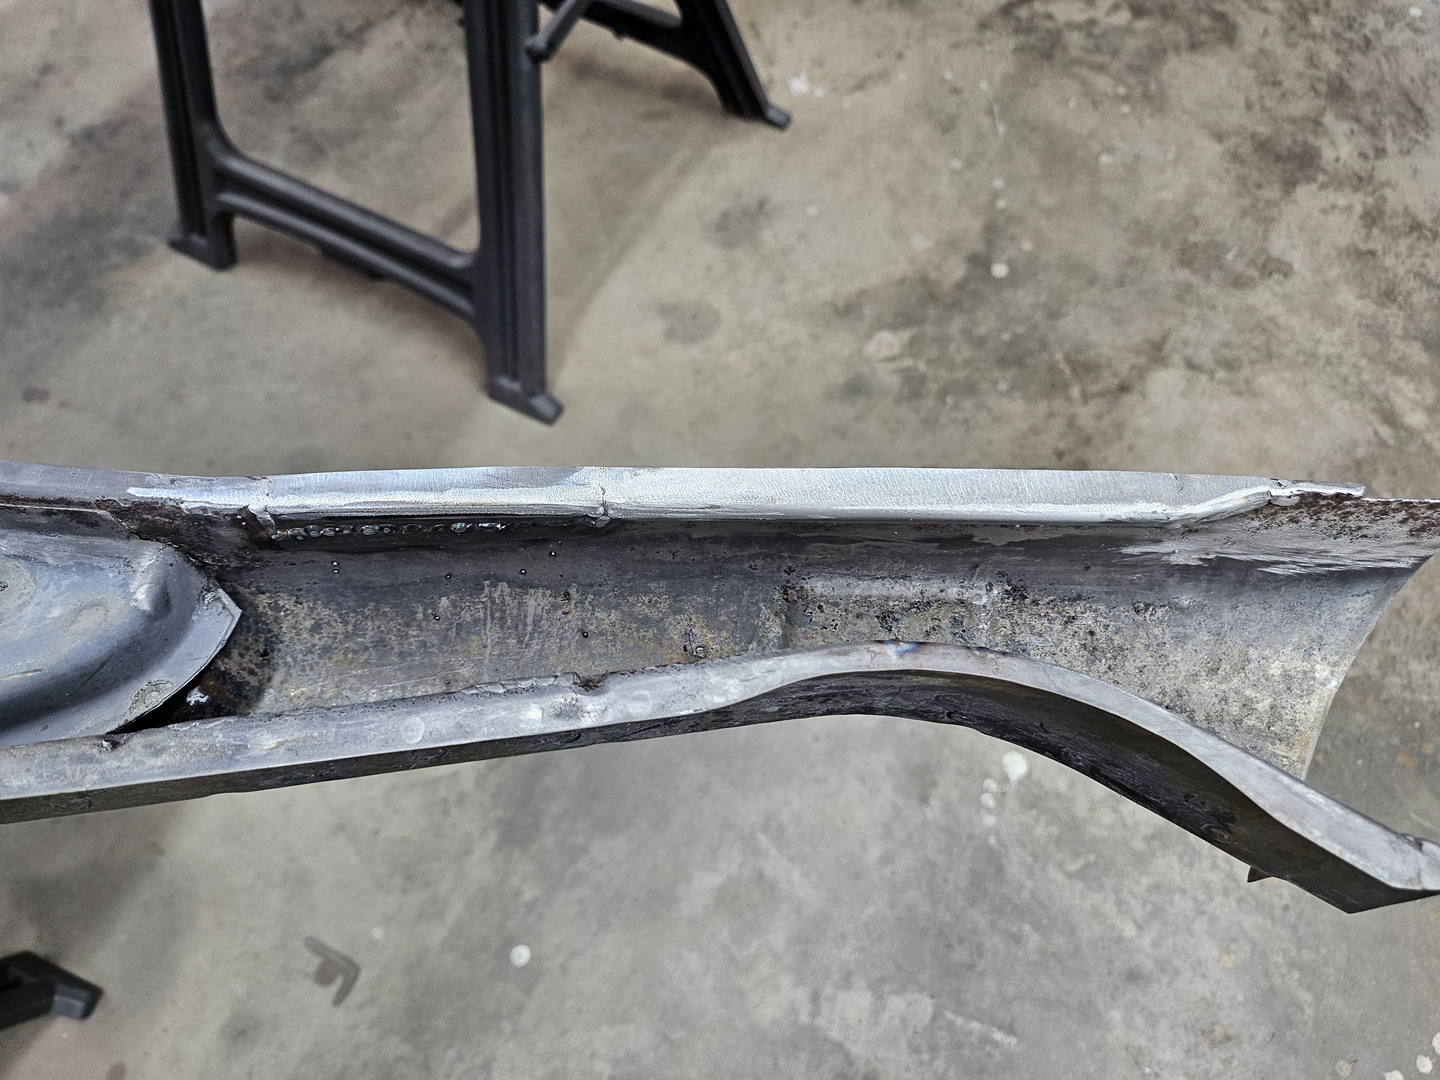
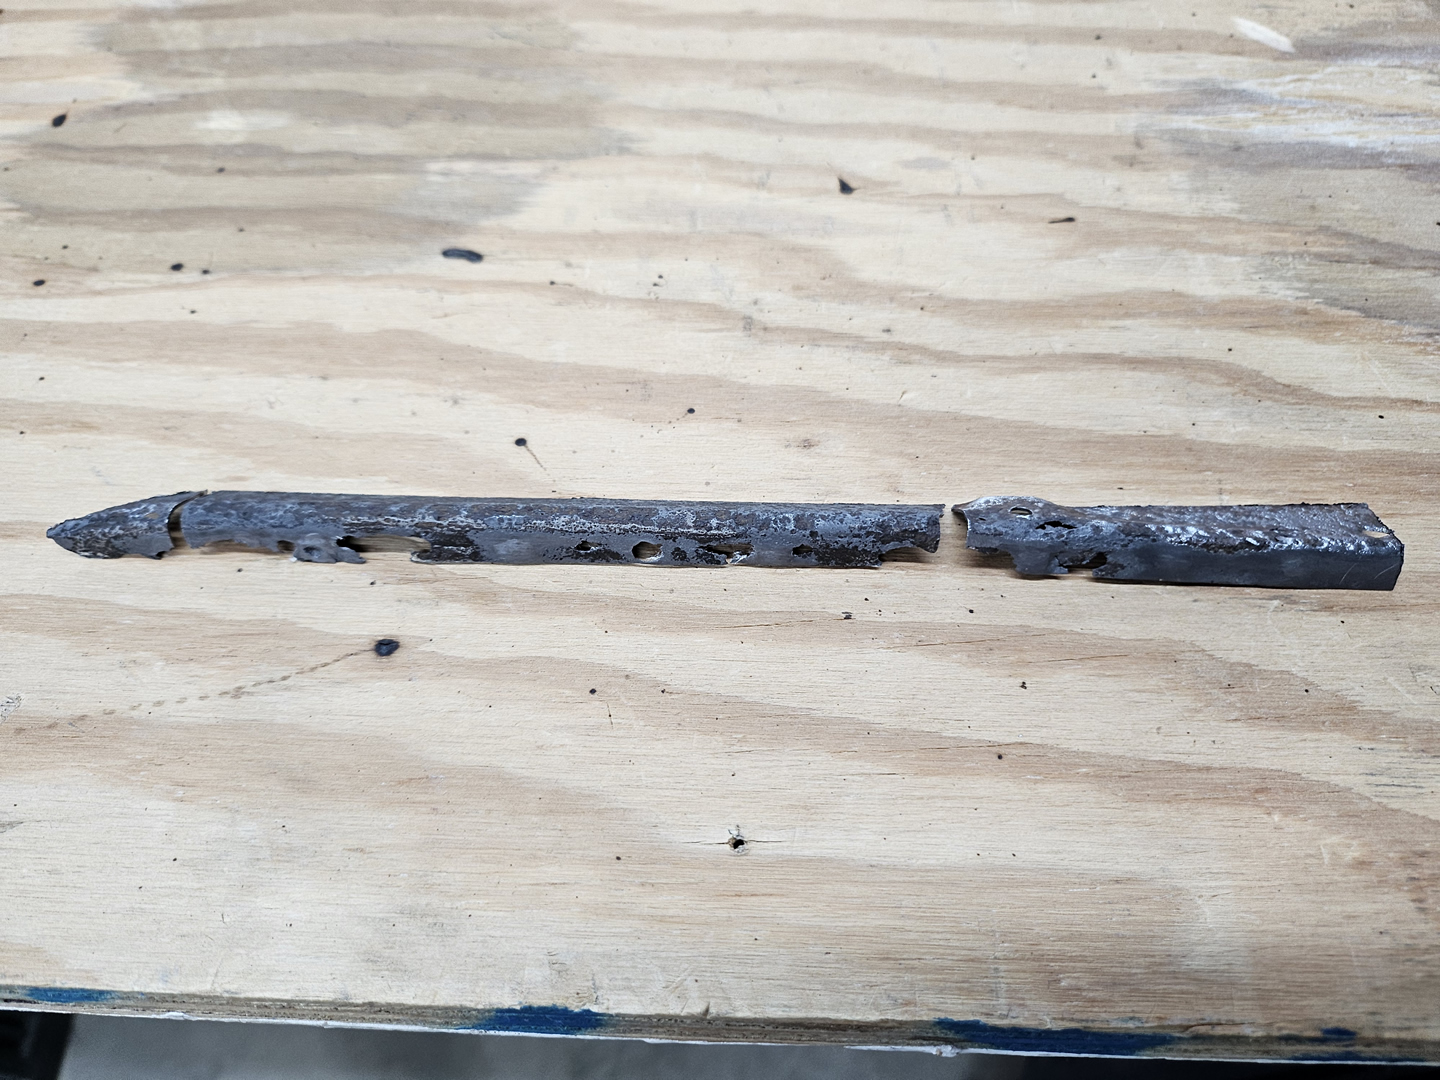
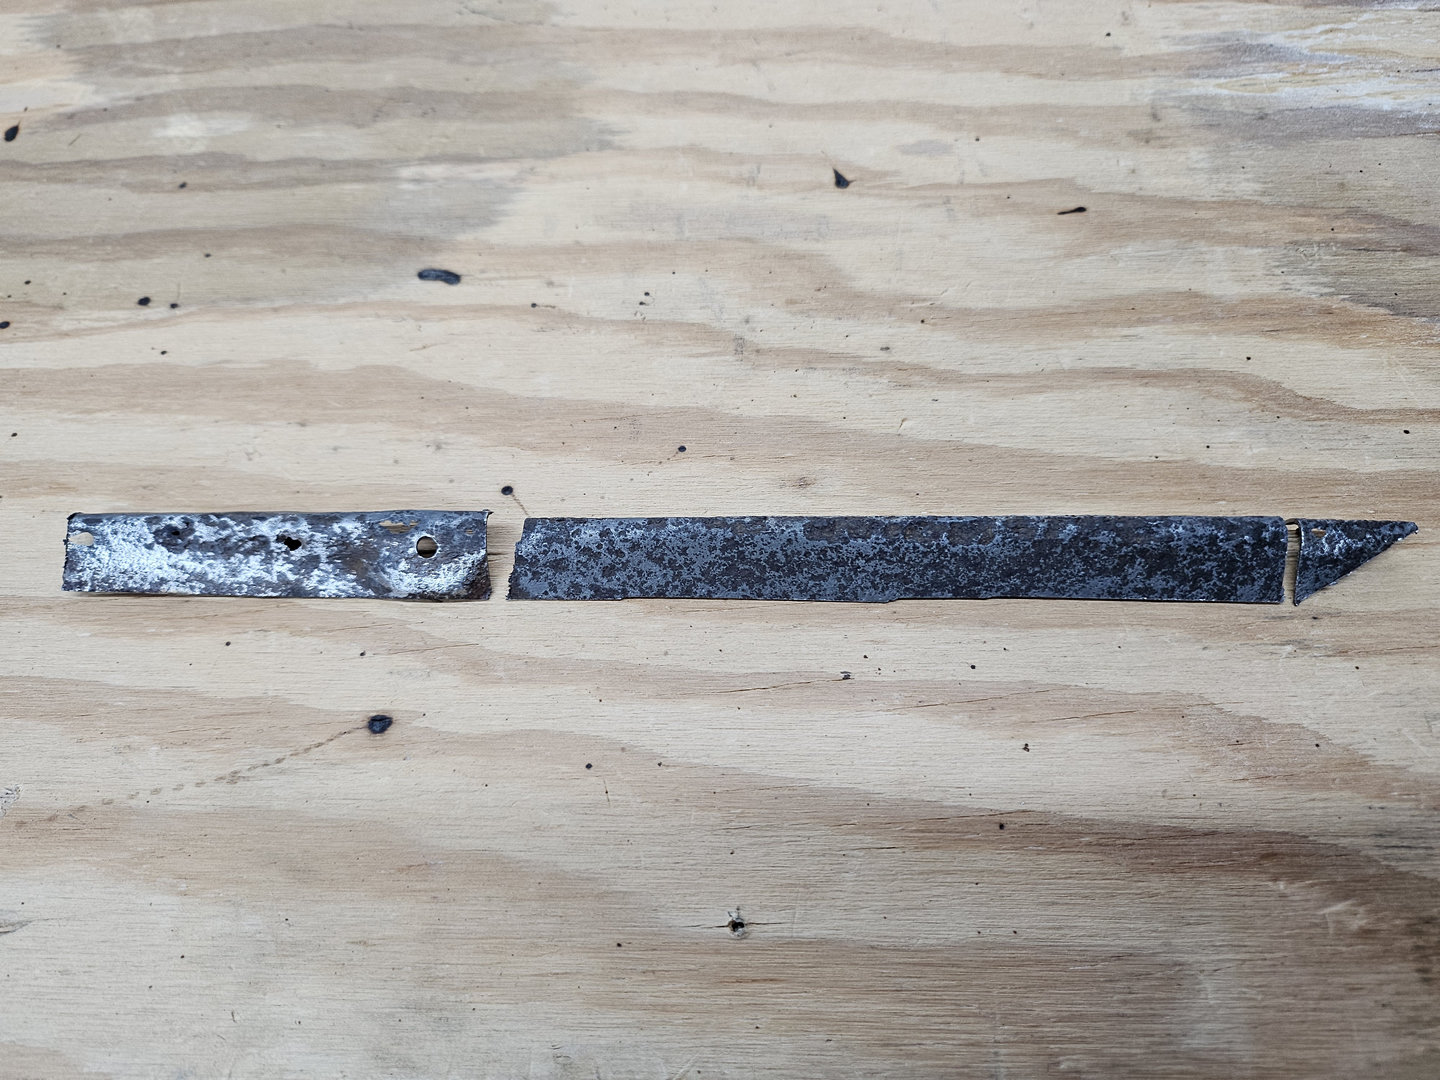
Next, I decided to tackle the rust damage on the channel body. There were a few areas on the front where the bottom plate is attached that had small holes, but there was good metal around it and the flange where the bottom plate is attached was undamaged. In those areas, I welded up the holes and any pits around them. However, on the inner side of the front section, there was whole area of the bottom plate flange was eaten through with rust as was an area 1/2" above it. This area had many different contours and shapes, and I decided it make it in three sections to simplify the process. It took some time, but I did get it done.
|

|
|
|
|
|

|
|
|
|
Now I can put the end cap back on. I sprayed the mating surfaces with weld-through primer and welded it back on. It has been a lot of work repairing the rust damage on the driver side channel, but it was definitely better than spending $500 for a suitable replacement.

|

|

|

|
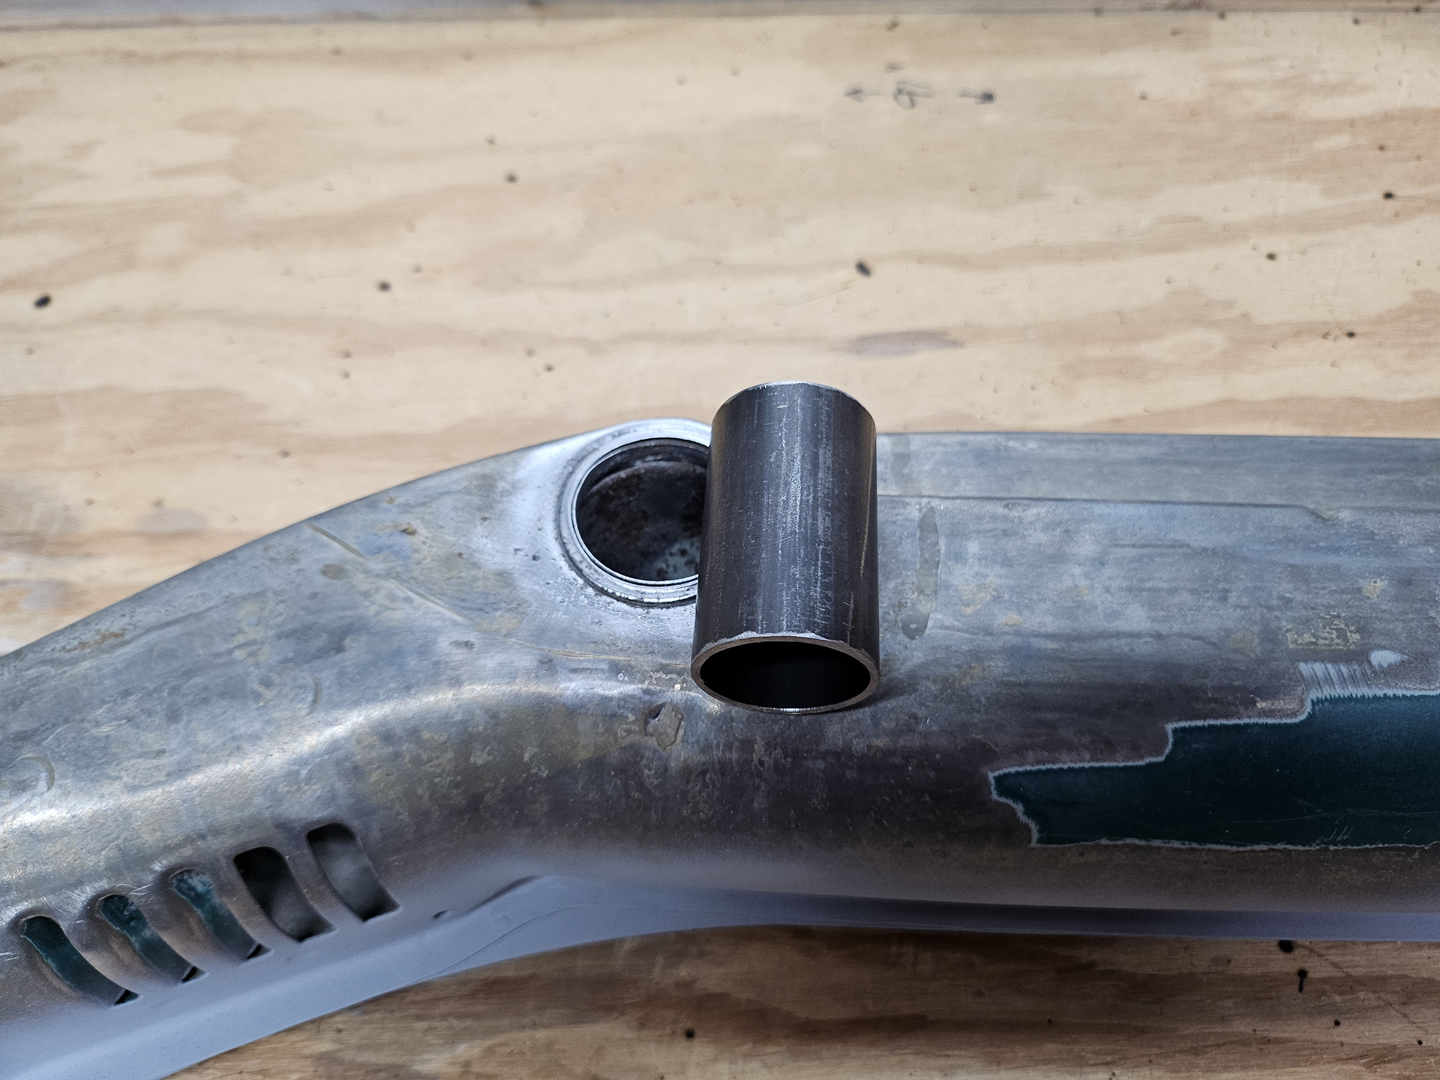
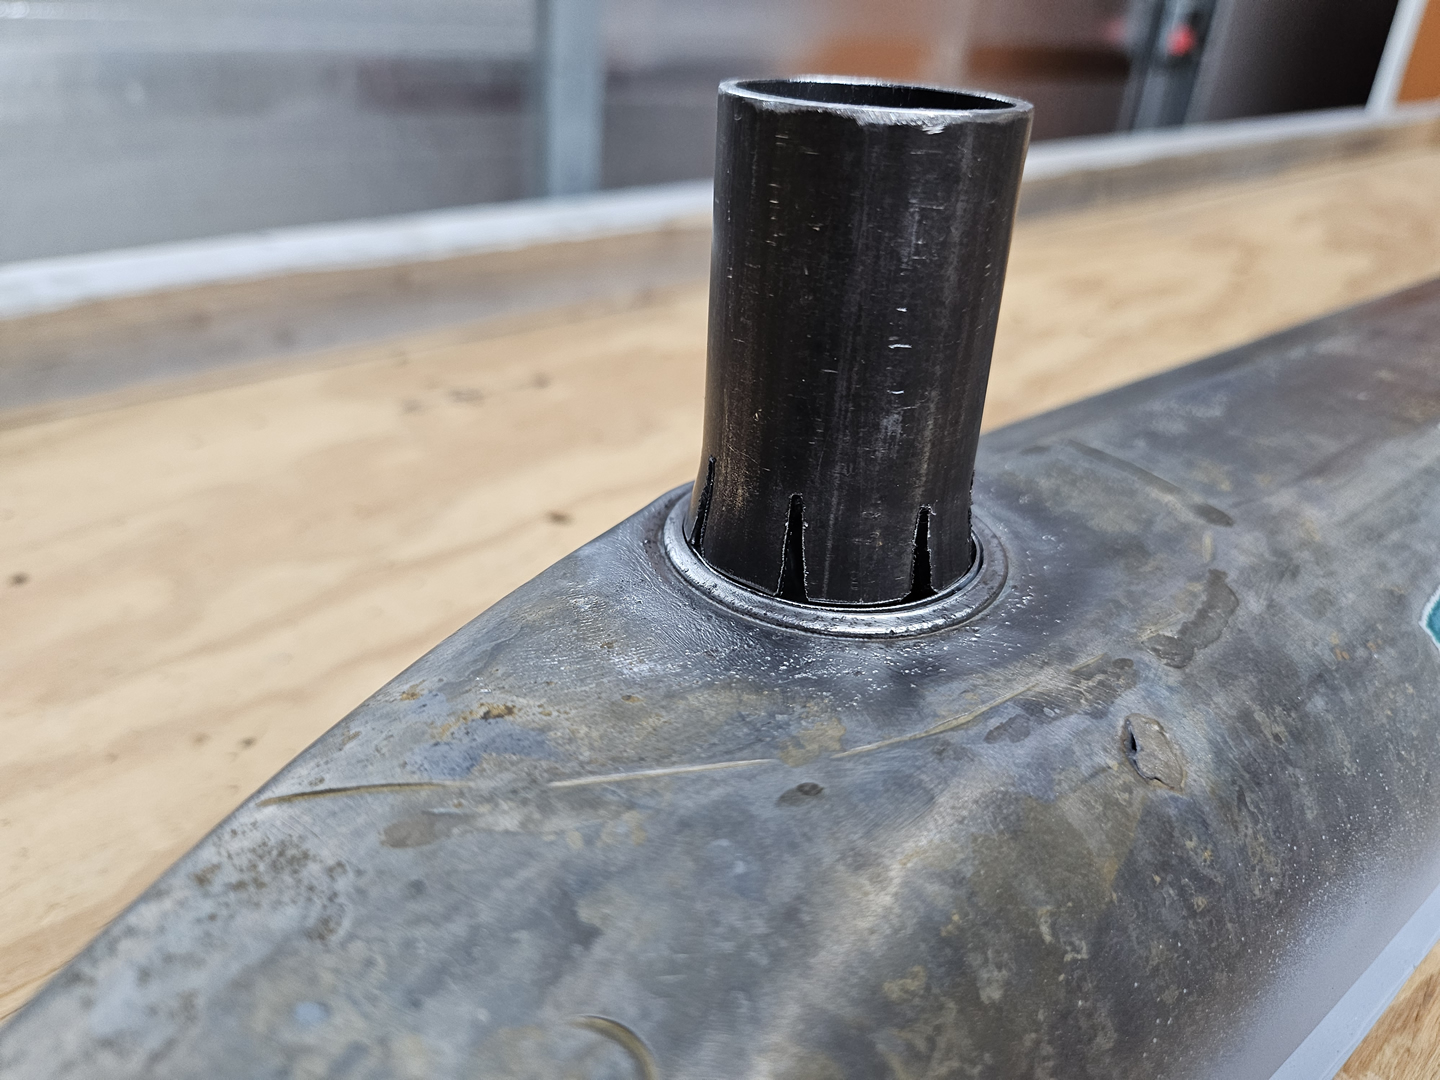
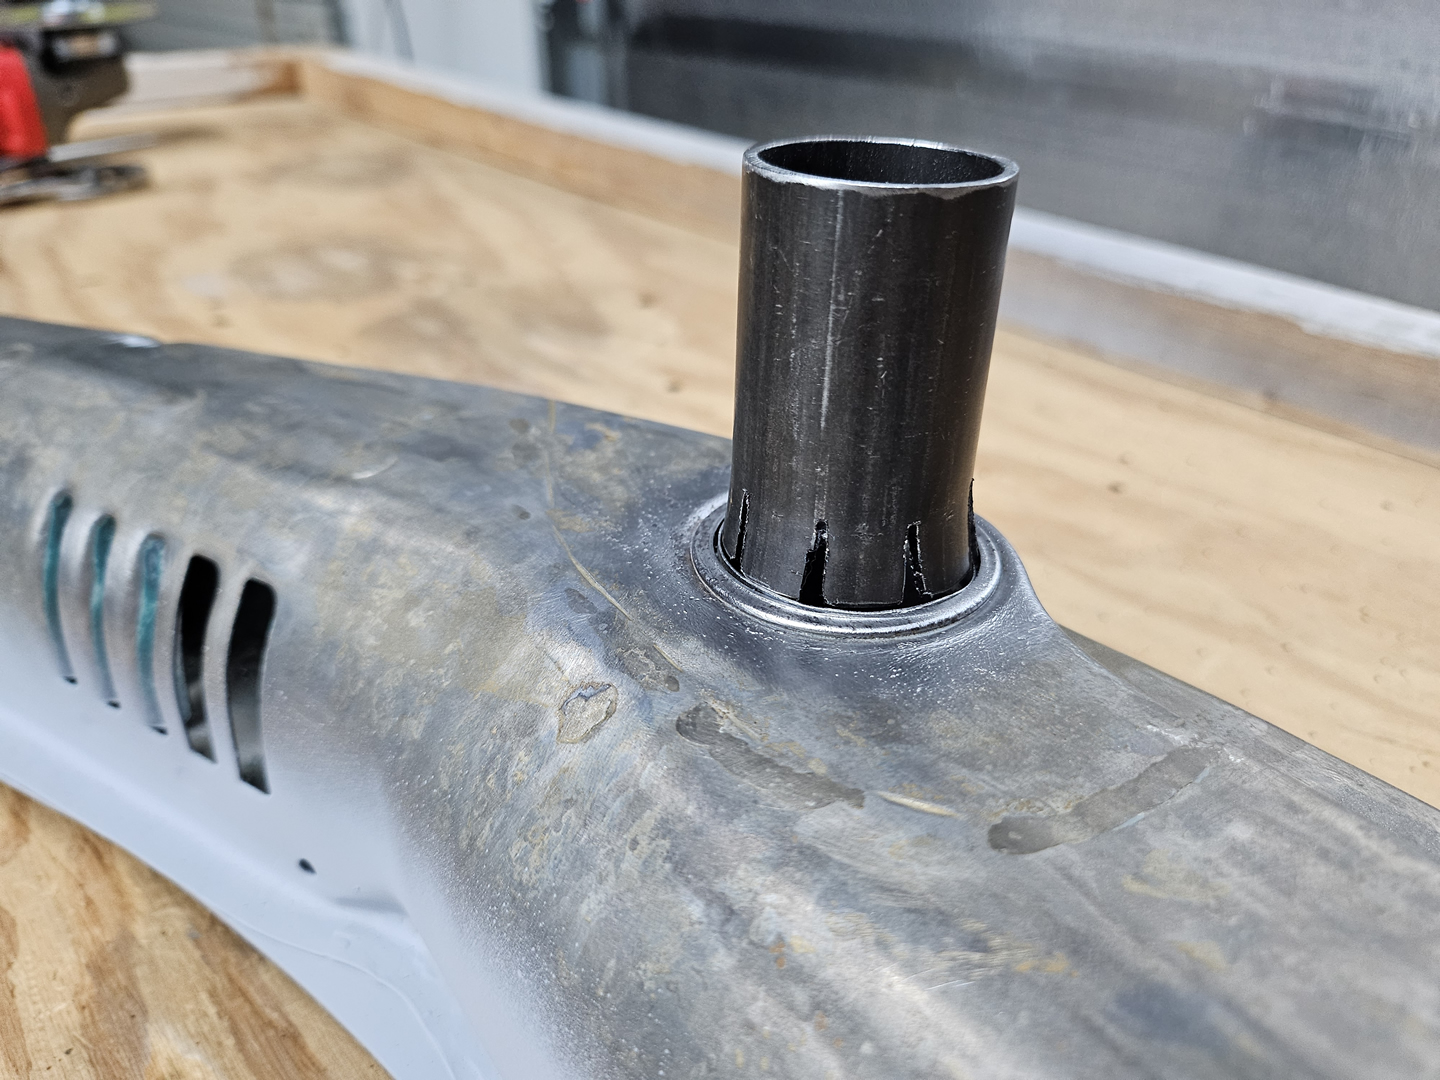
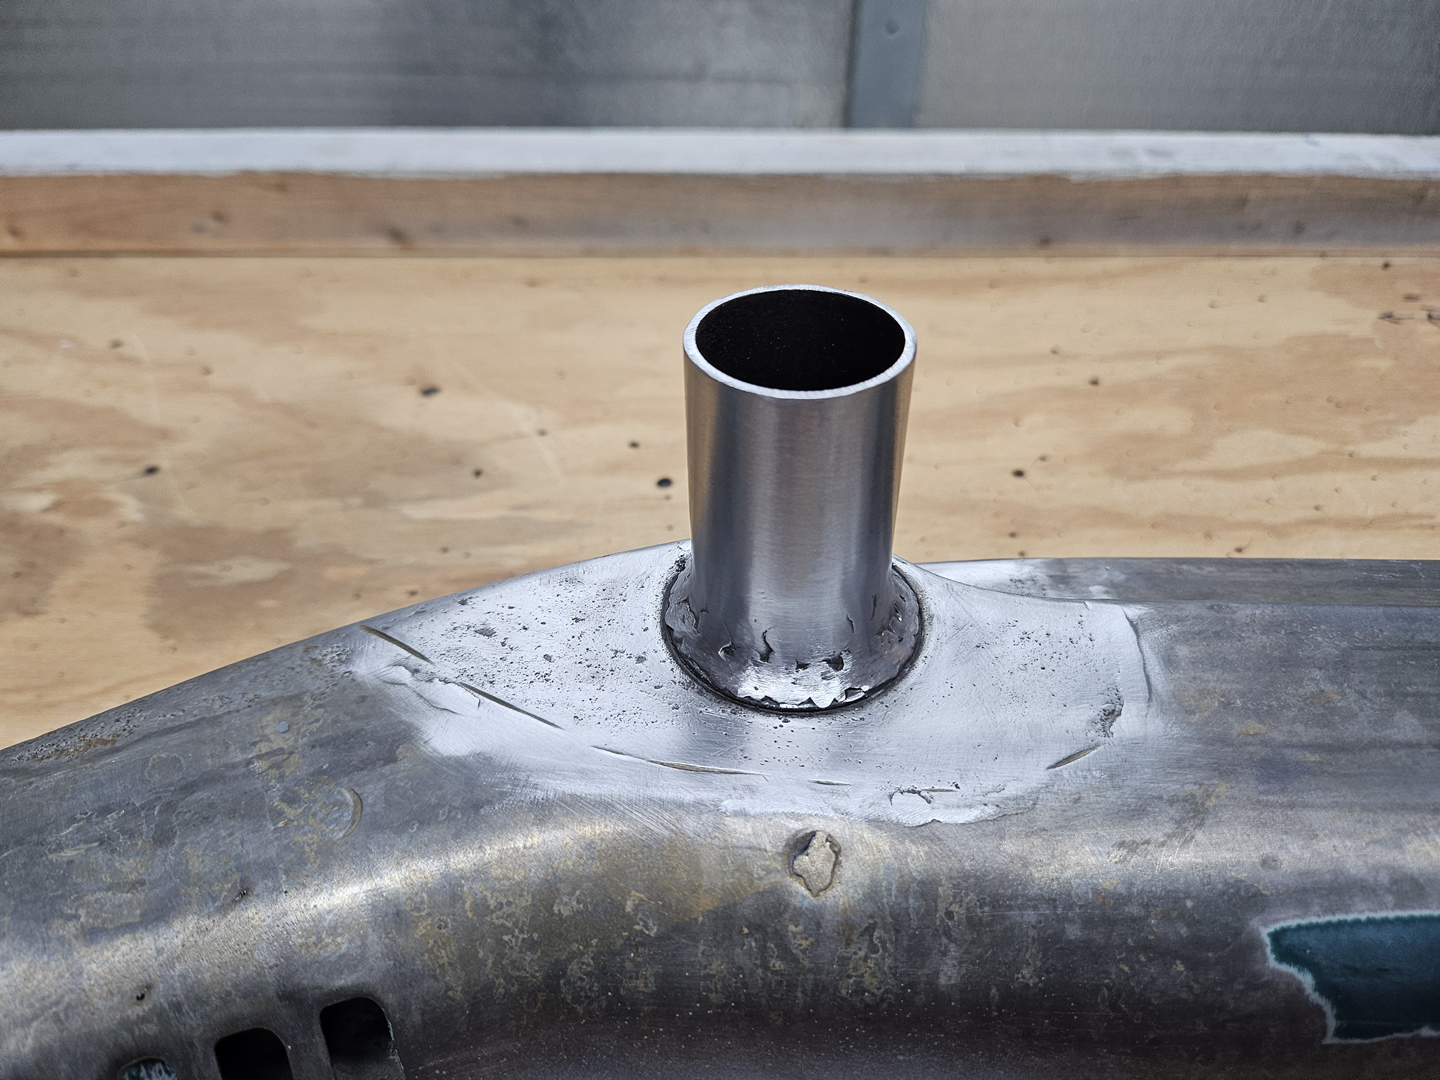
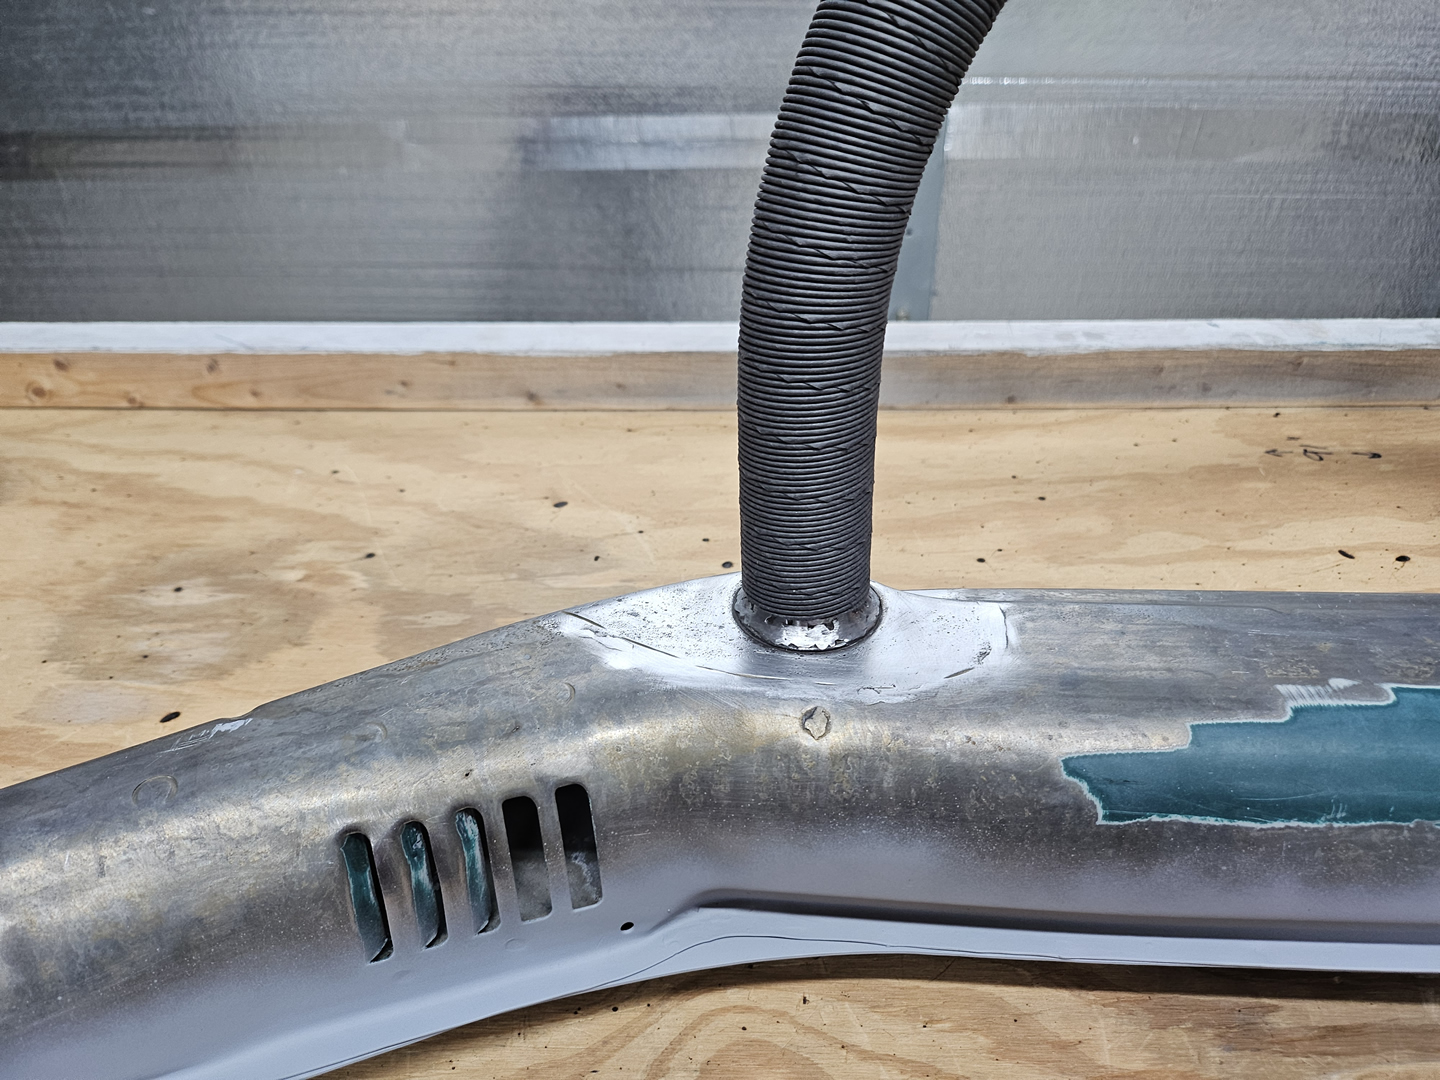
This leaves one last difficult repair task on the driver side channel. Whoever had the car that this channel was removed from at some point welded up the holes and captive nut for the running board bolts. I was able to locate the centers of the nuts and drill out and tap all four of them. If I could have accessed them from the inside of the channel, it would have made this an easier task. But the heater pipe is in front of three of the four nuts and I was not going to remove the pipe just for that. That would be much more work than drilling and taping the nuts from the outside, or even rewelding the holes and re-tapping them again if the first attempts were unsuccessful.
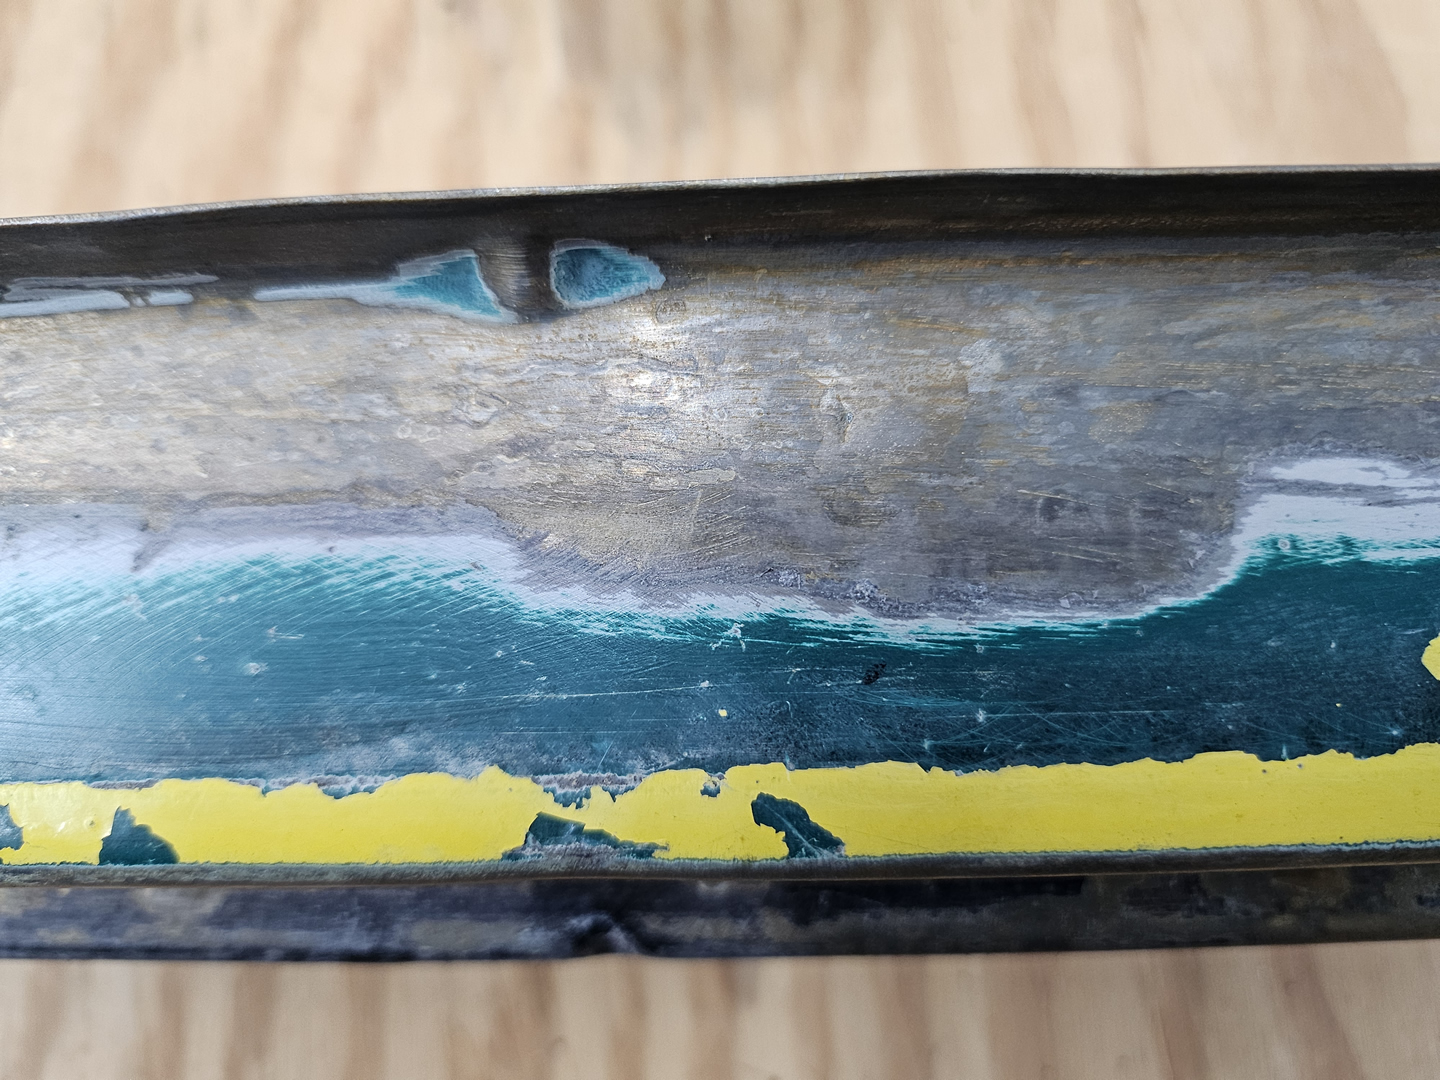
|
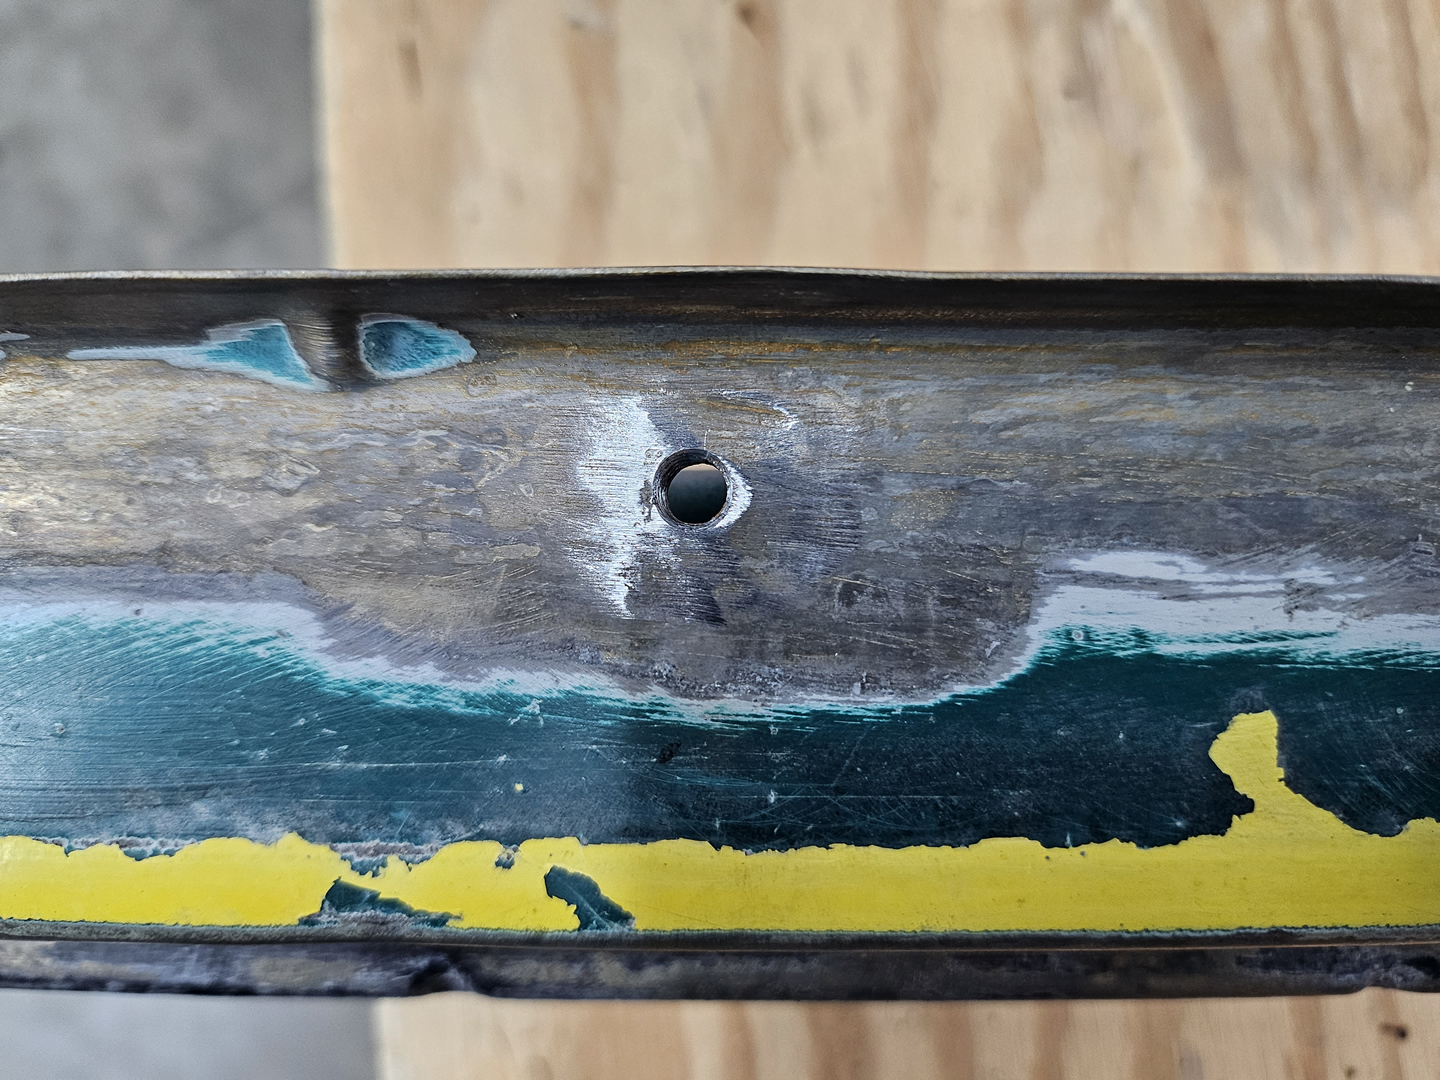
|
And before I can prepare the driver side bottom plate for welding, I need to add a piece on the inner side of the plate like I did on the passenger side plate to widen it to match where it will attach to the front firewall.
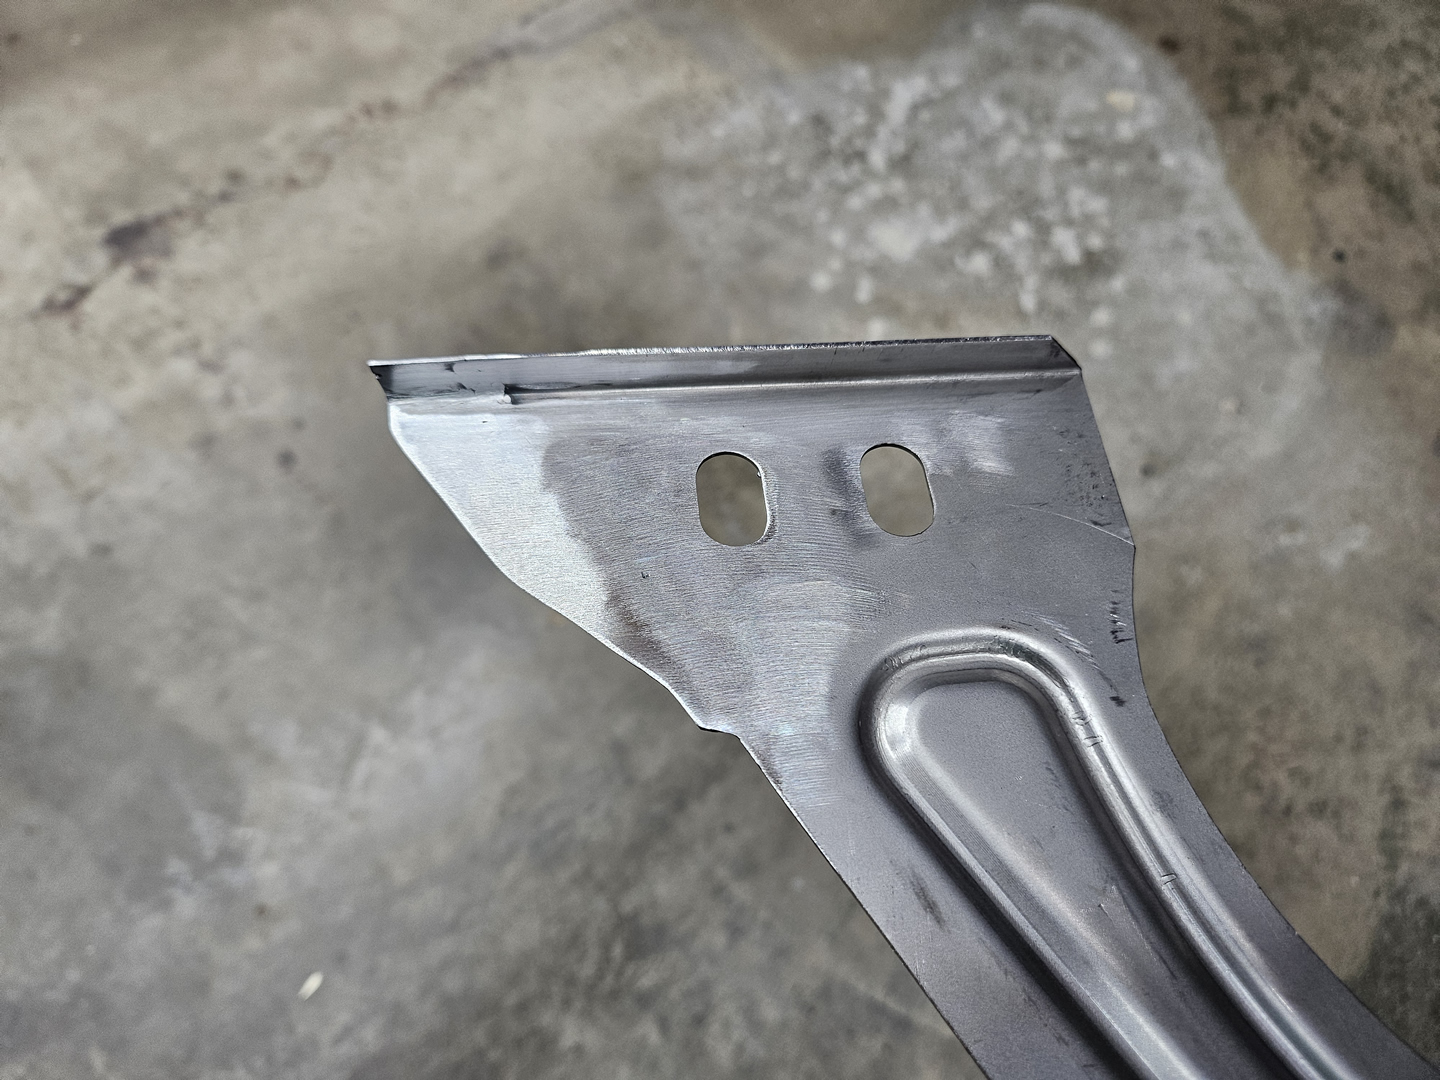
|
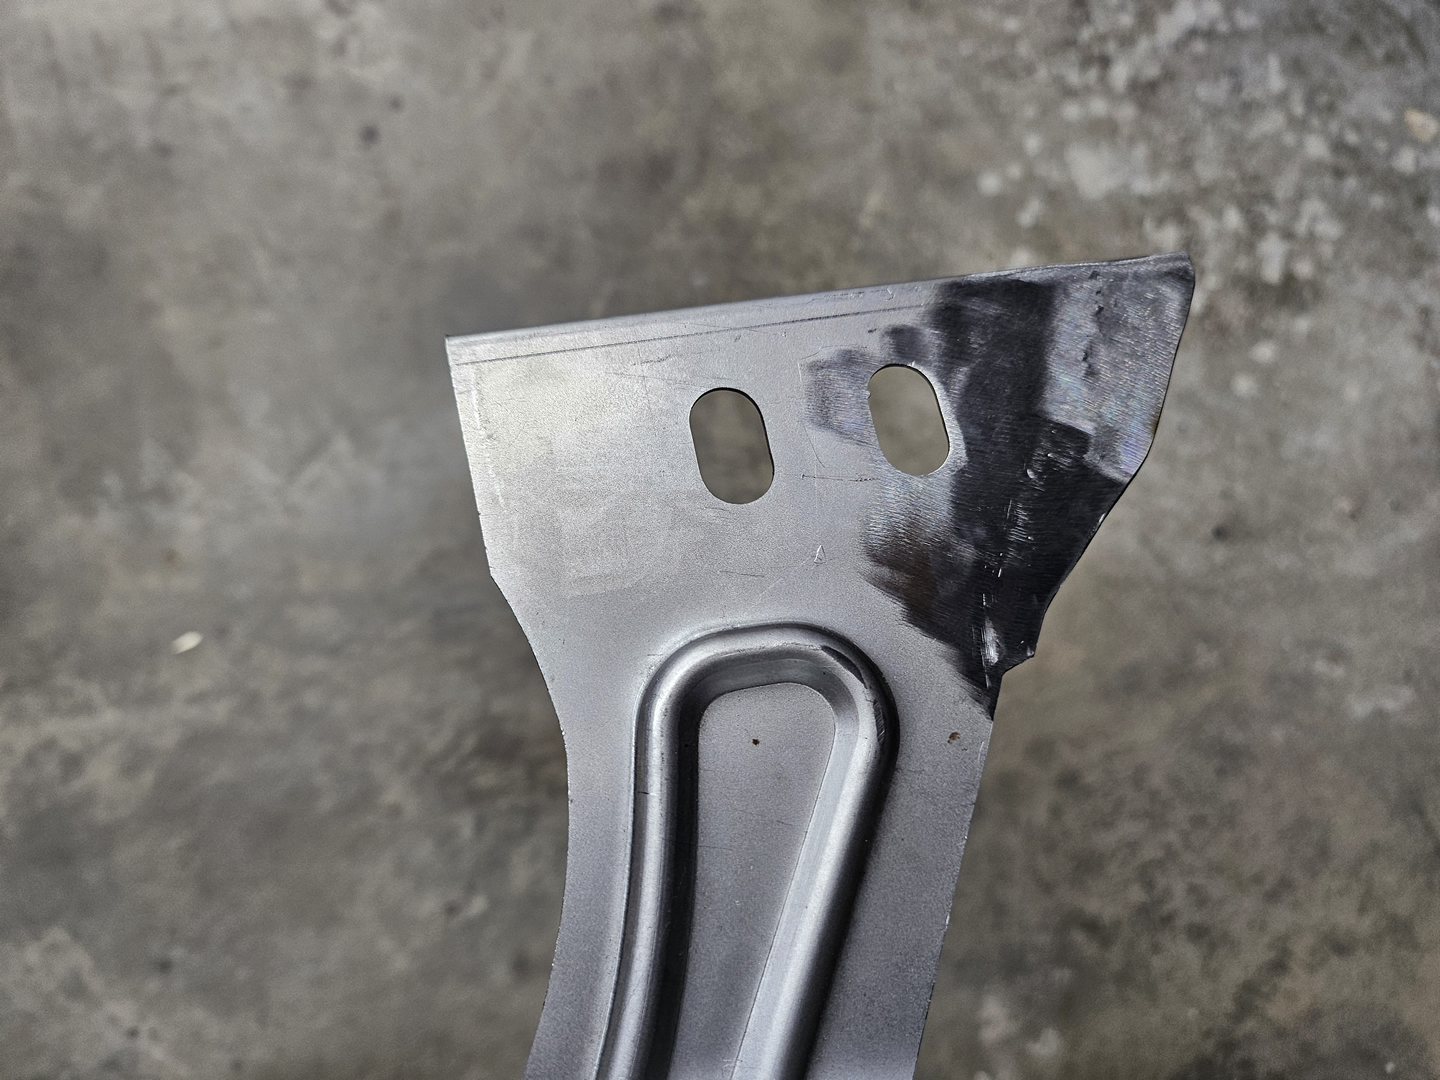
|
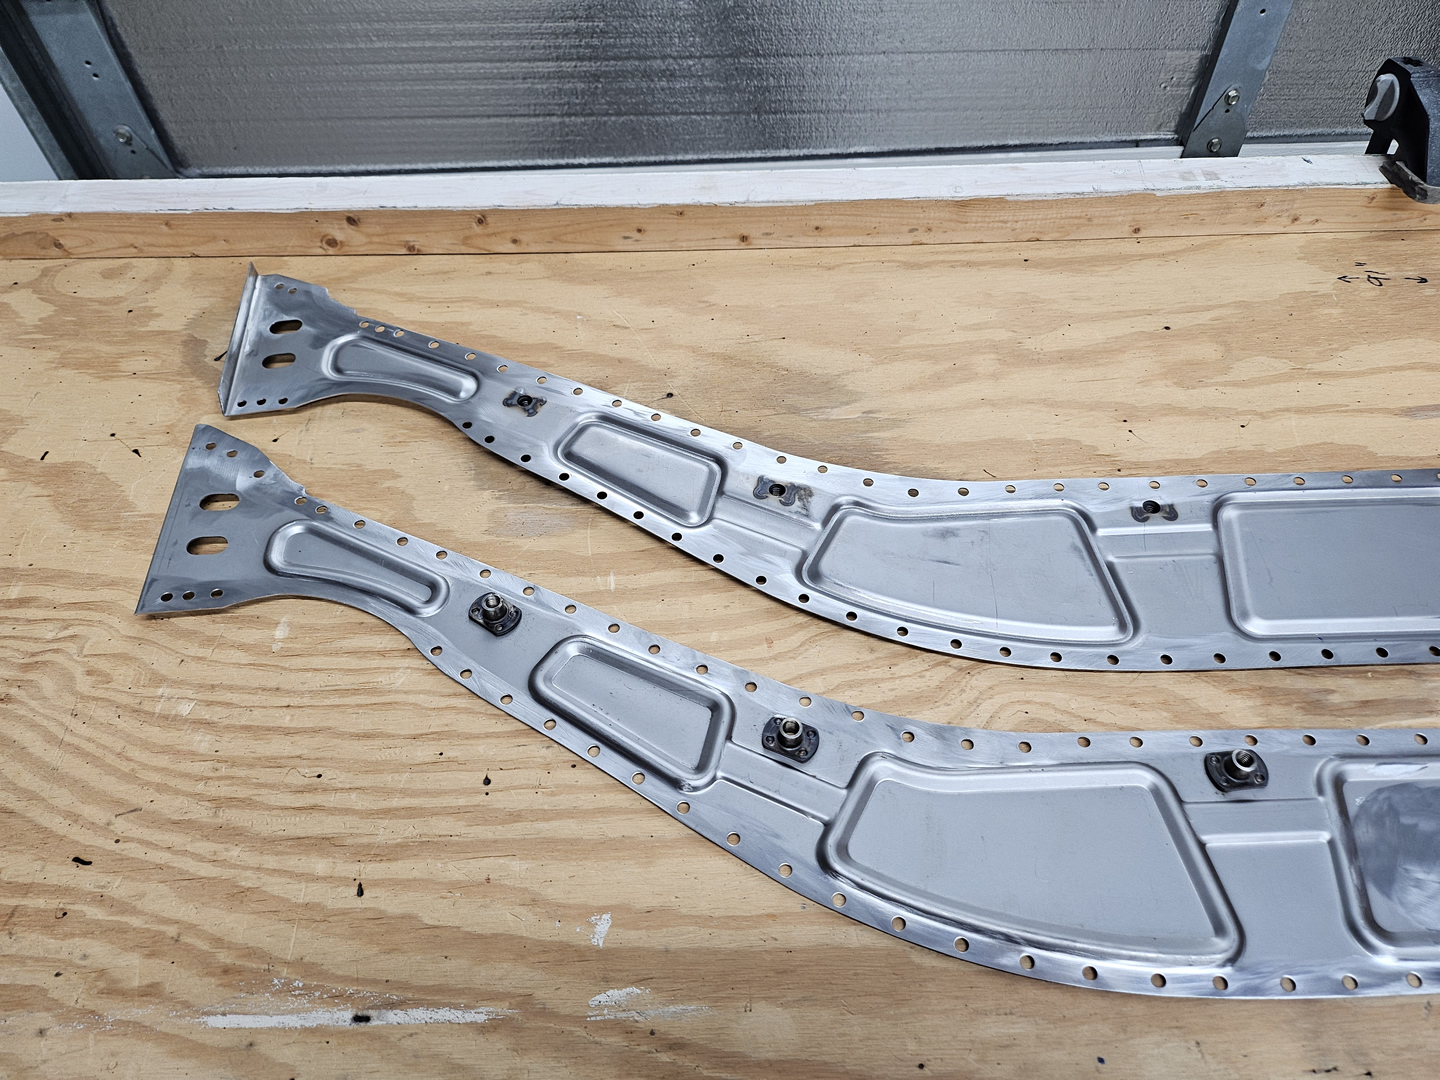
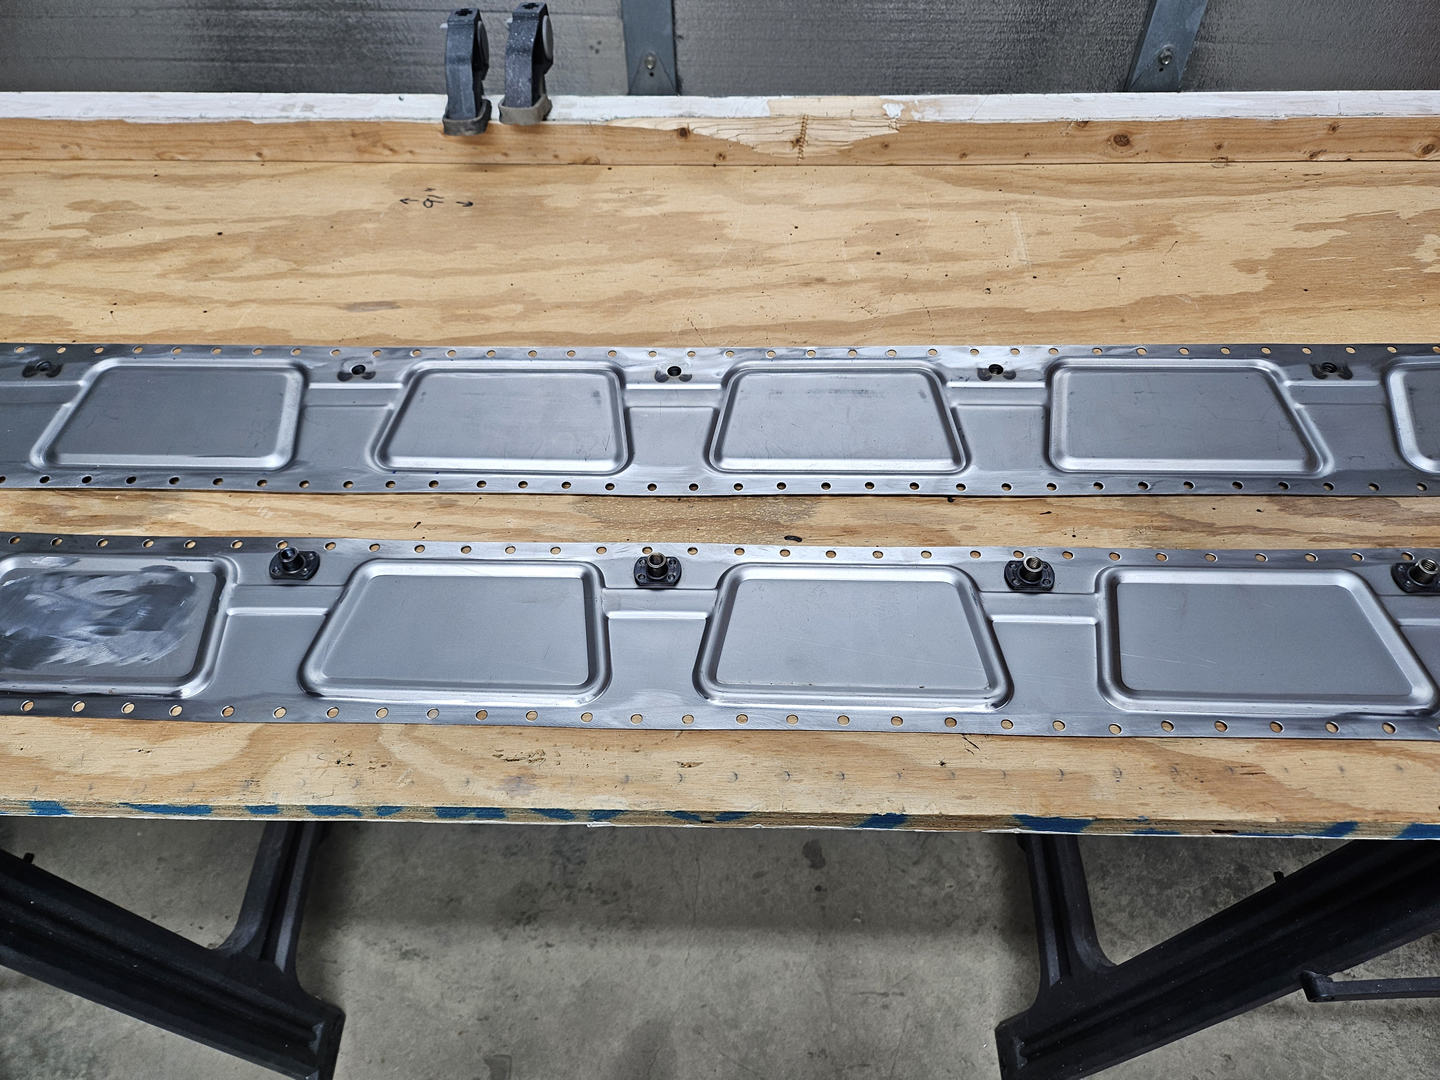
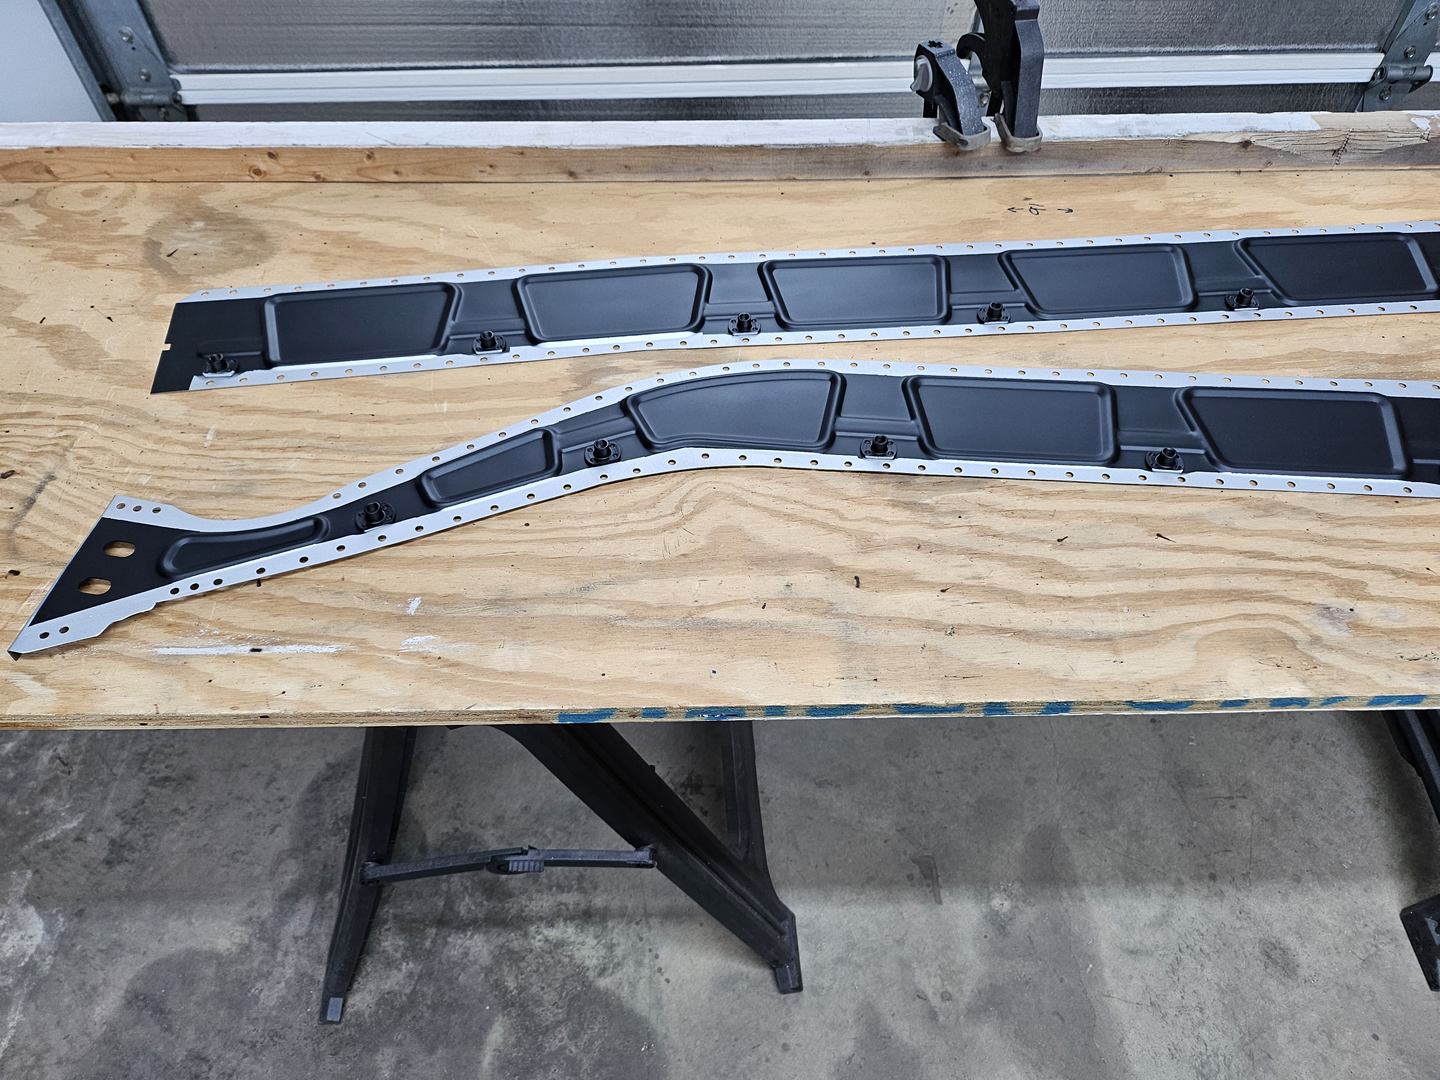
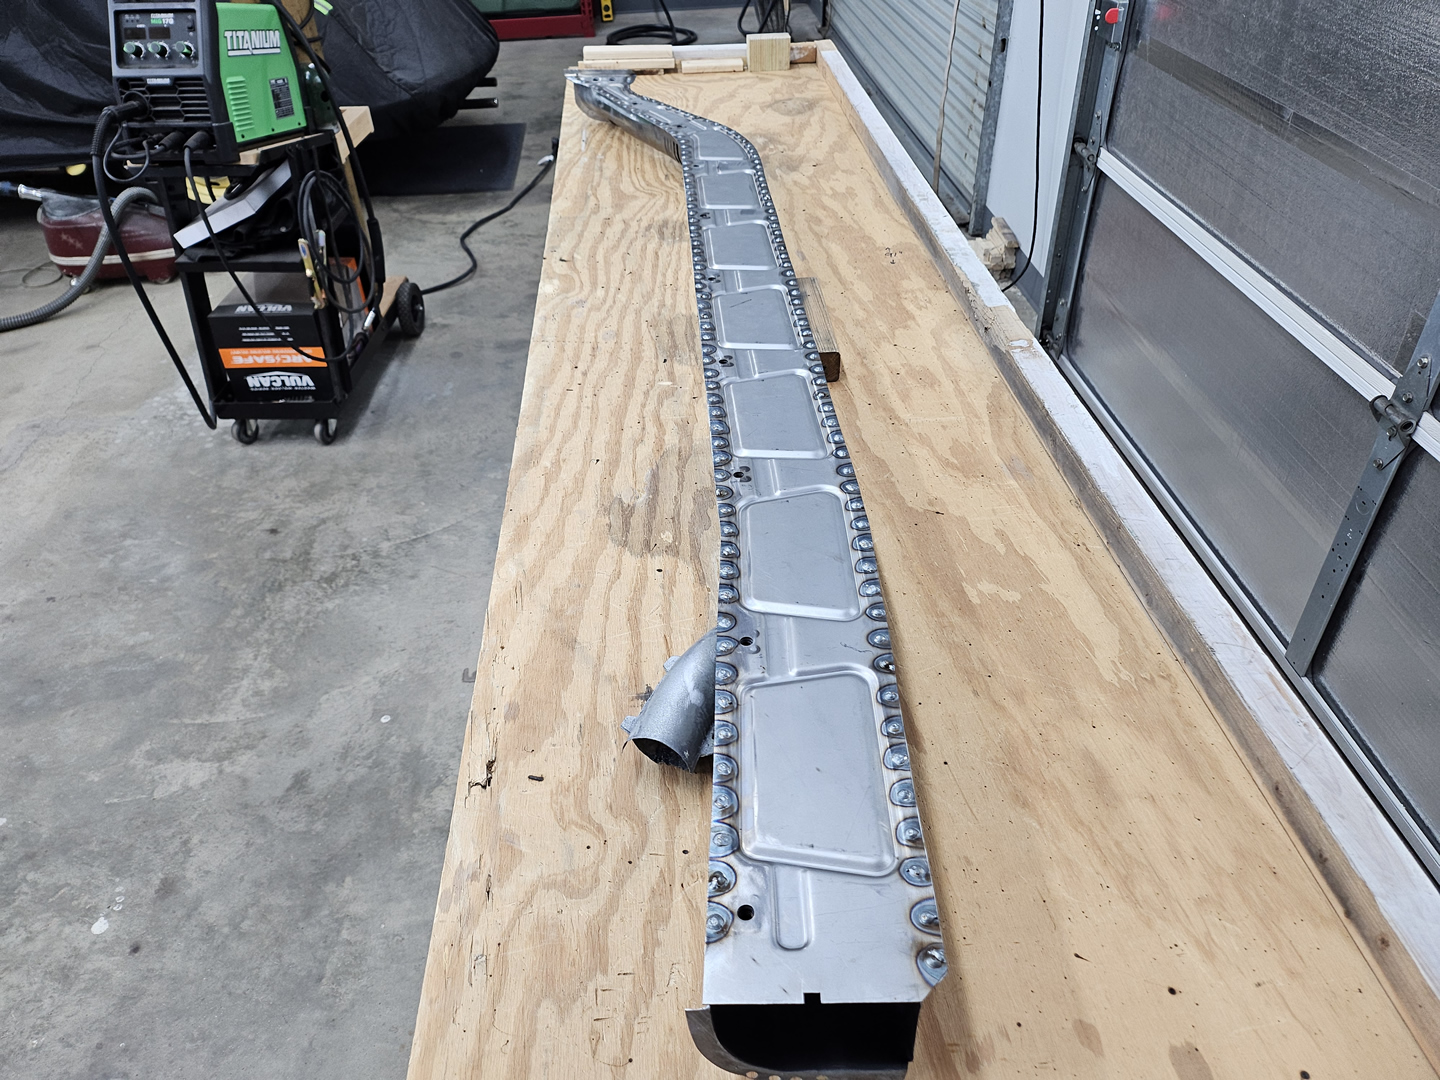
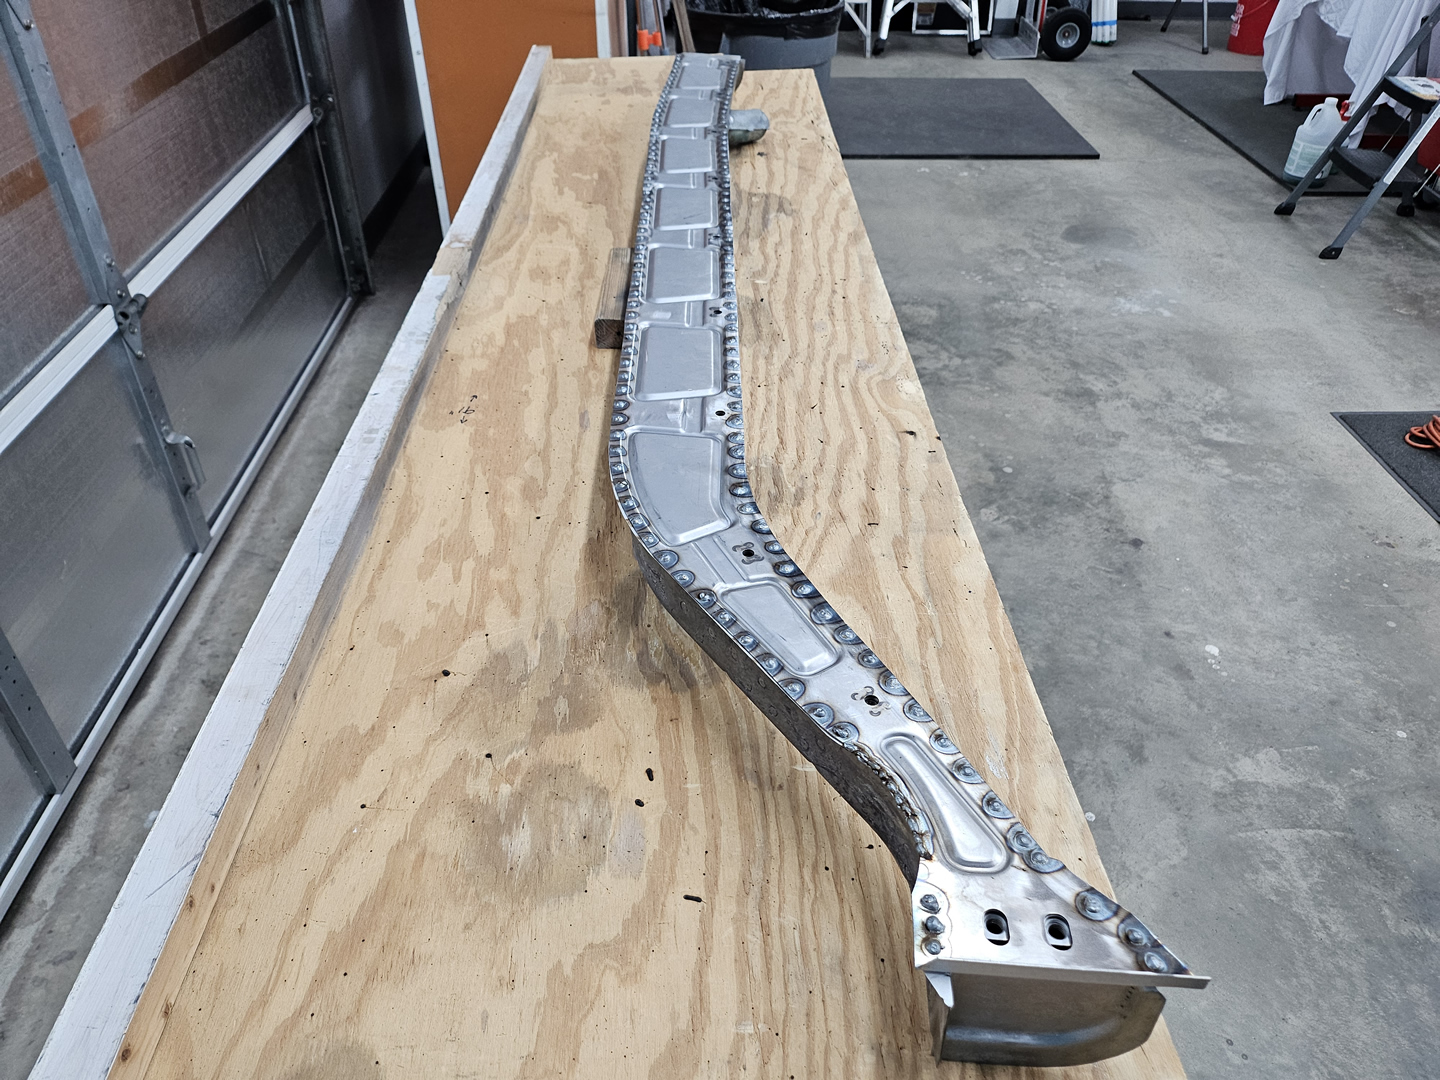
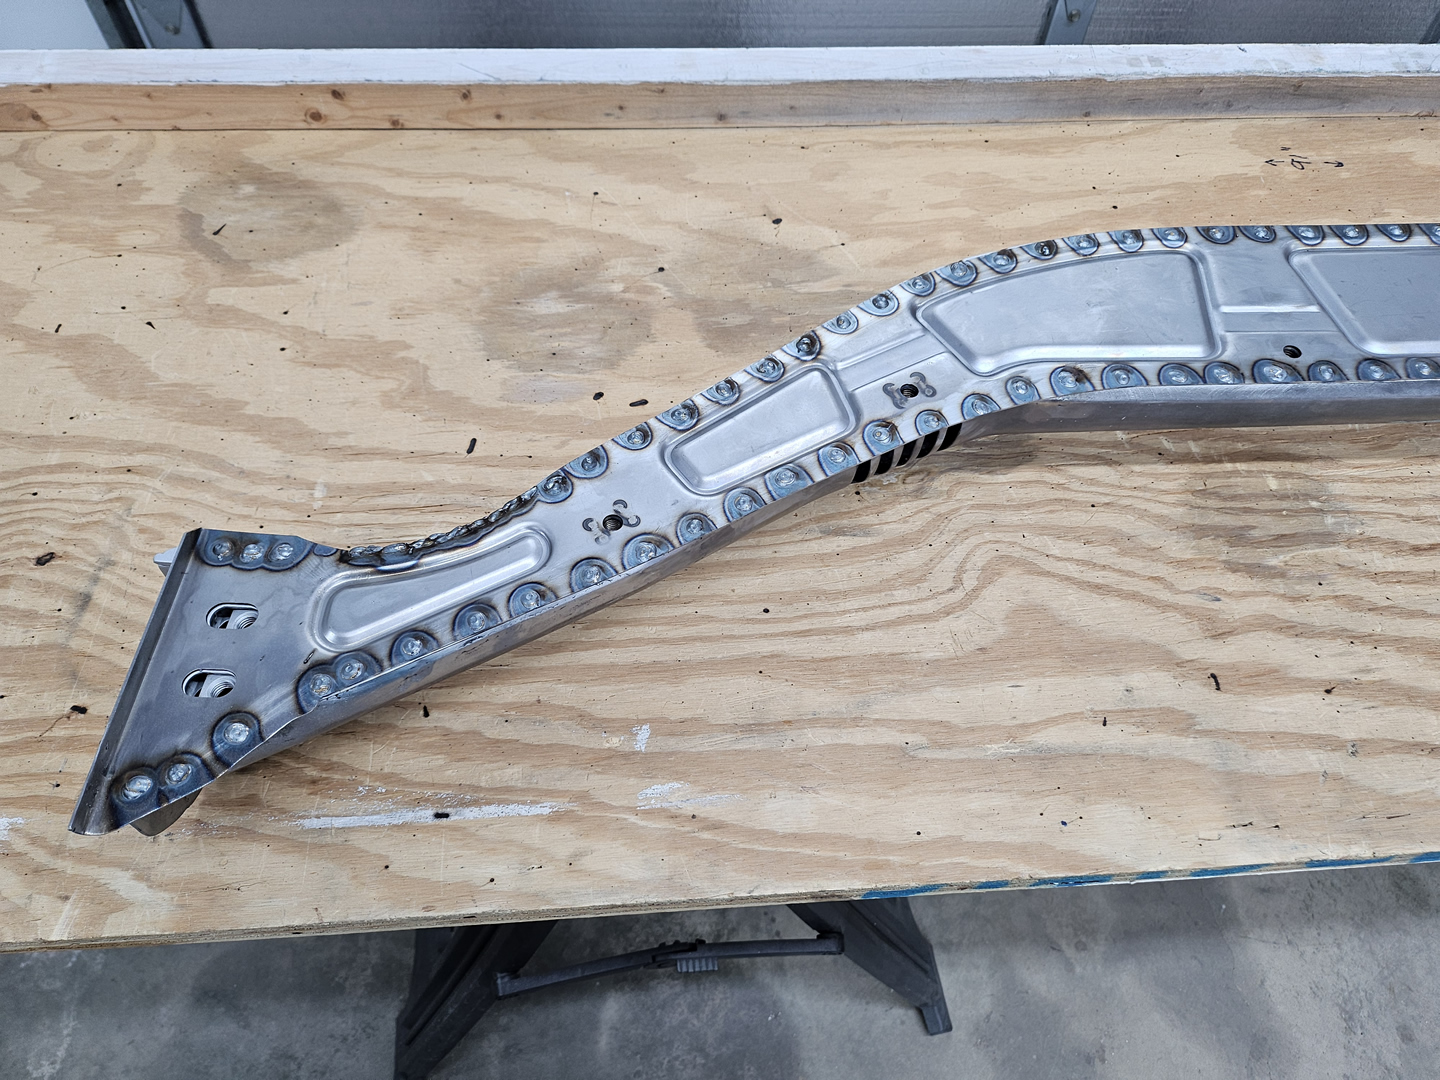
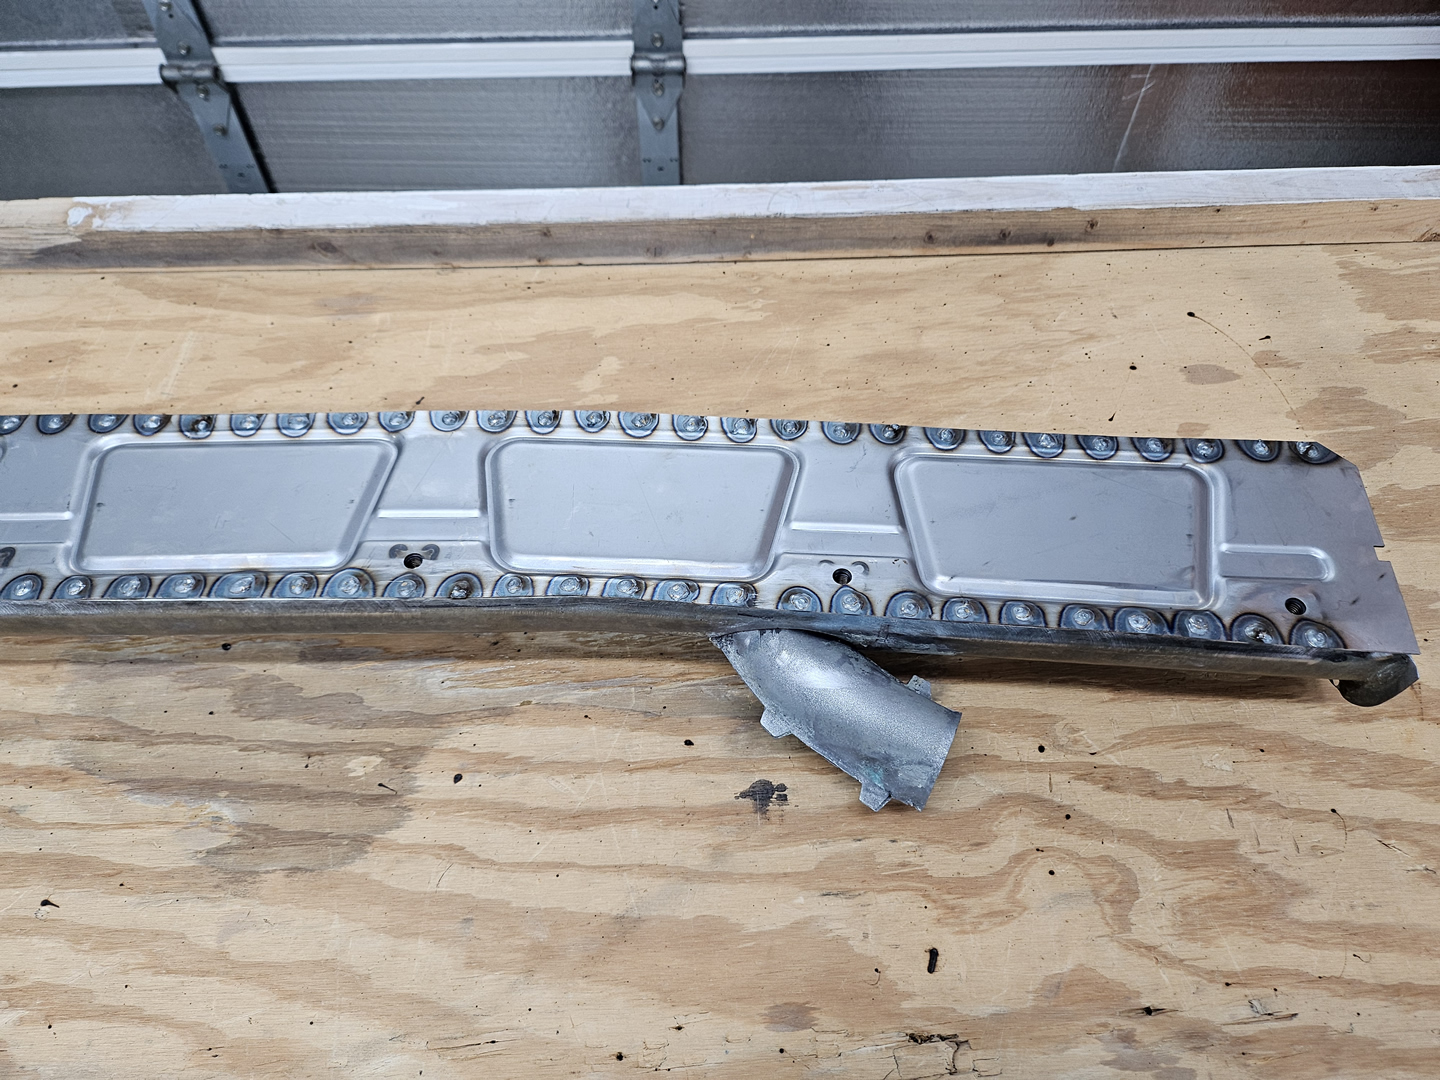
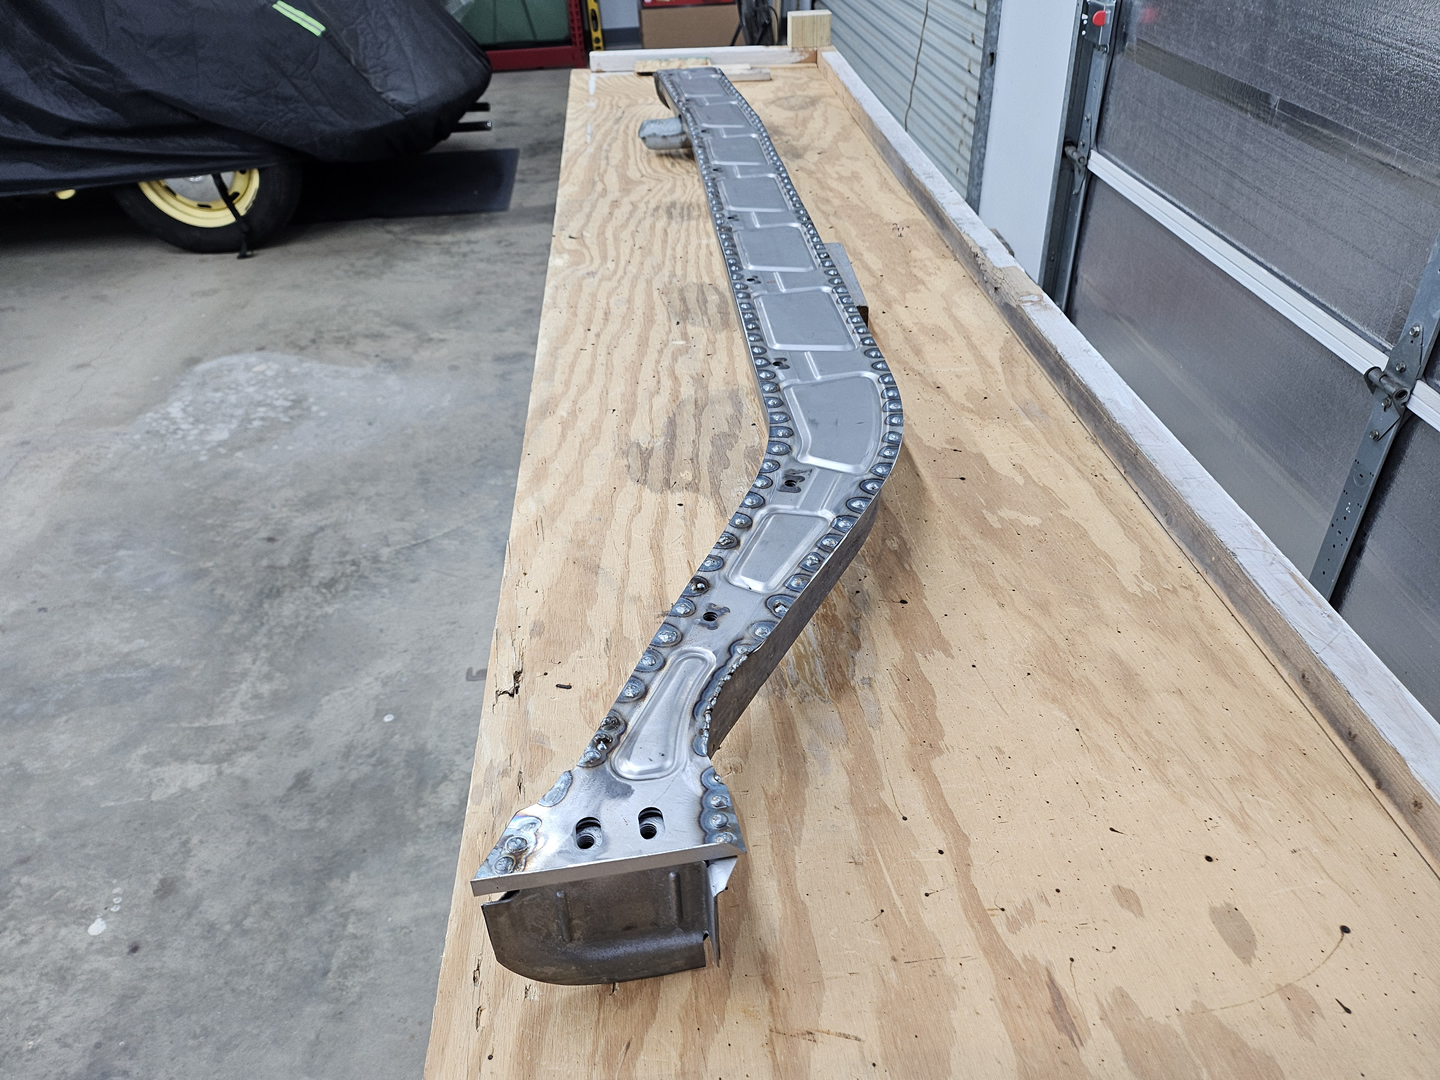
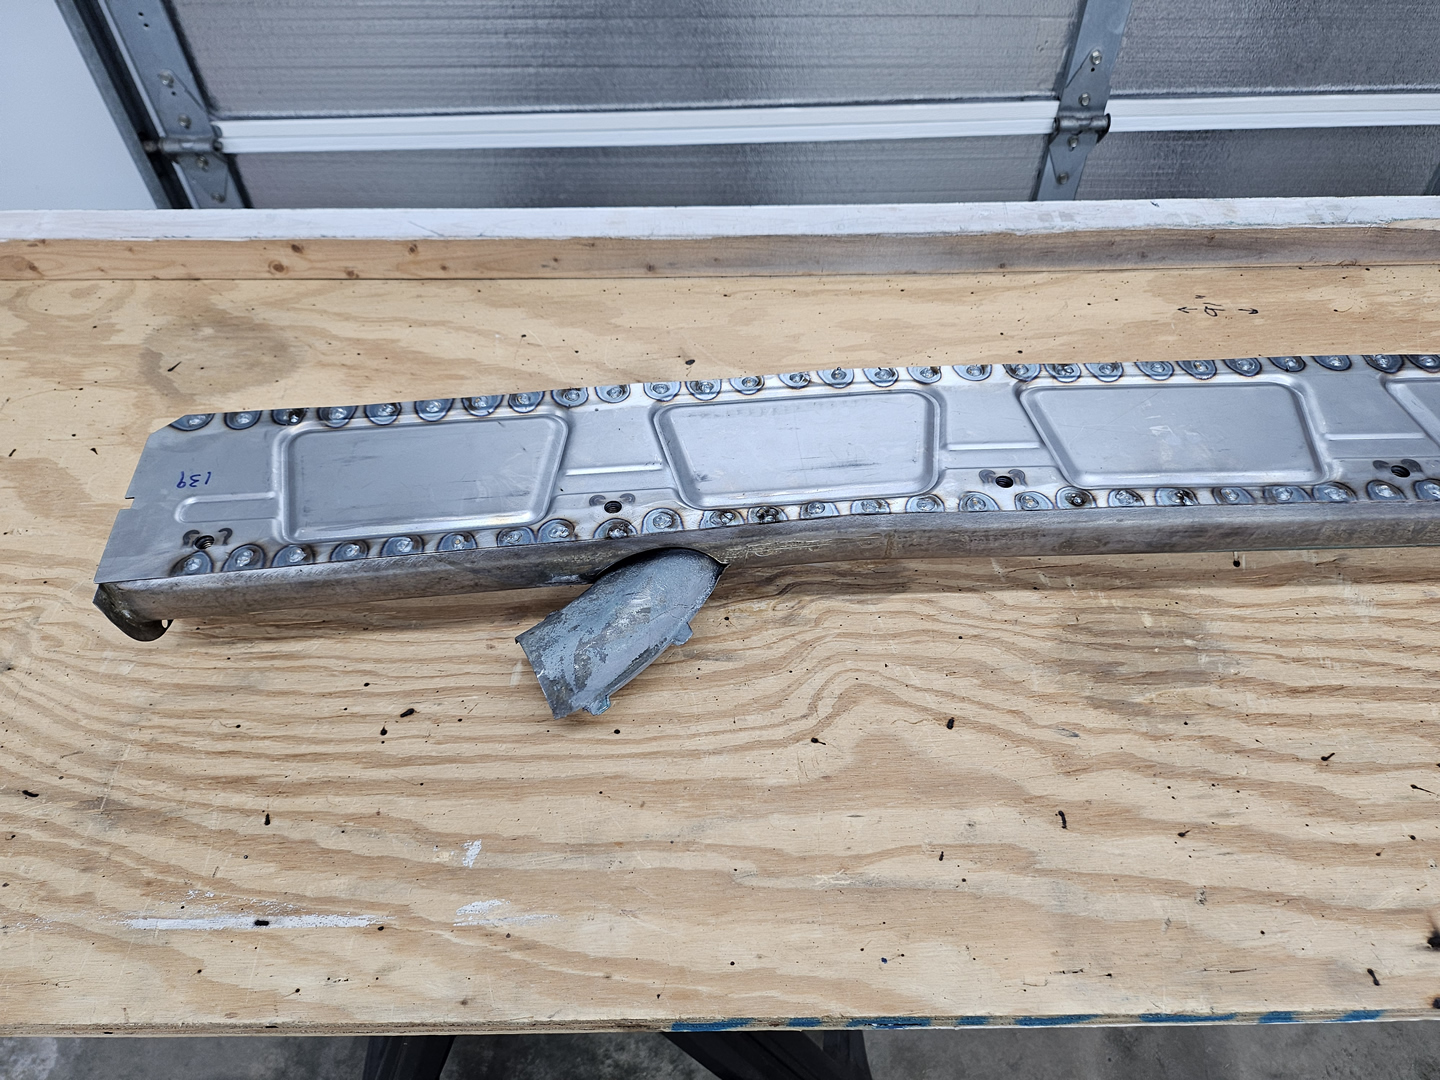
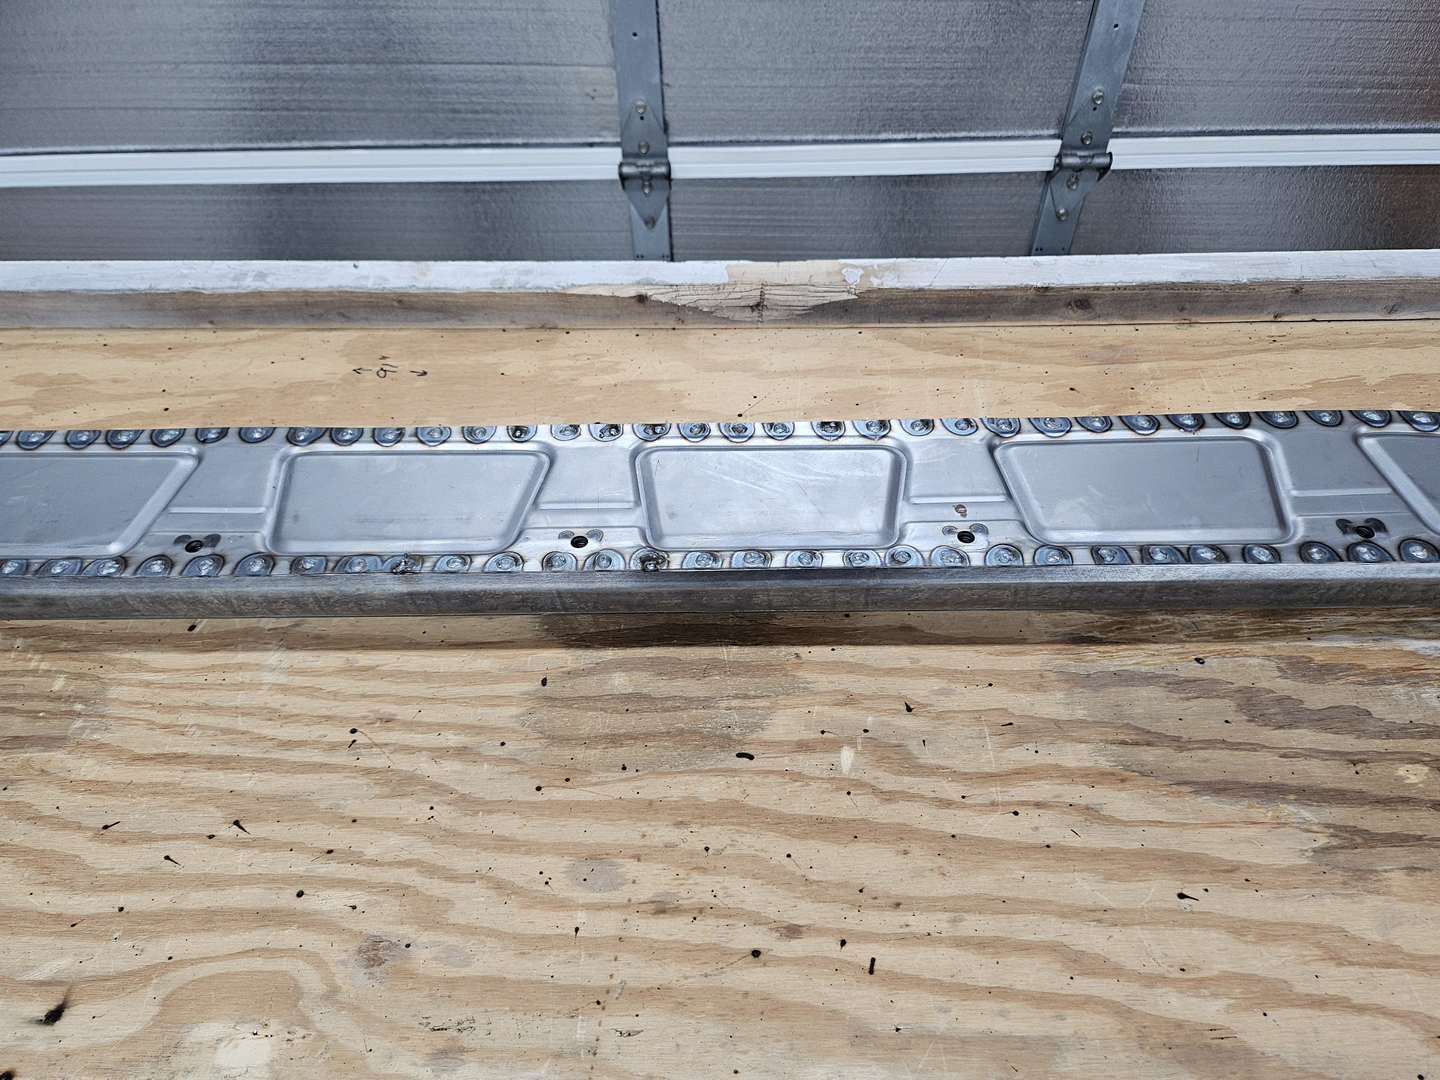
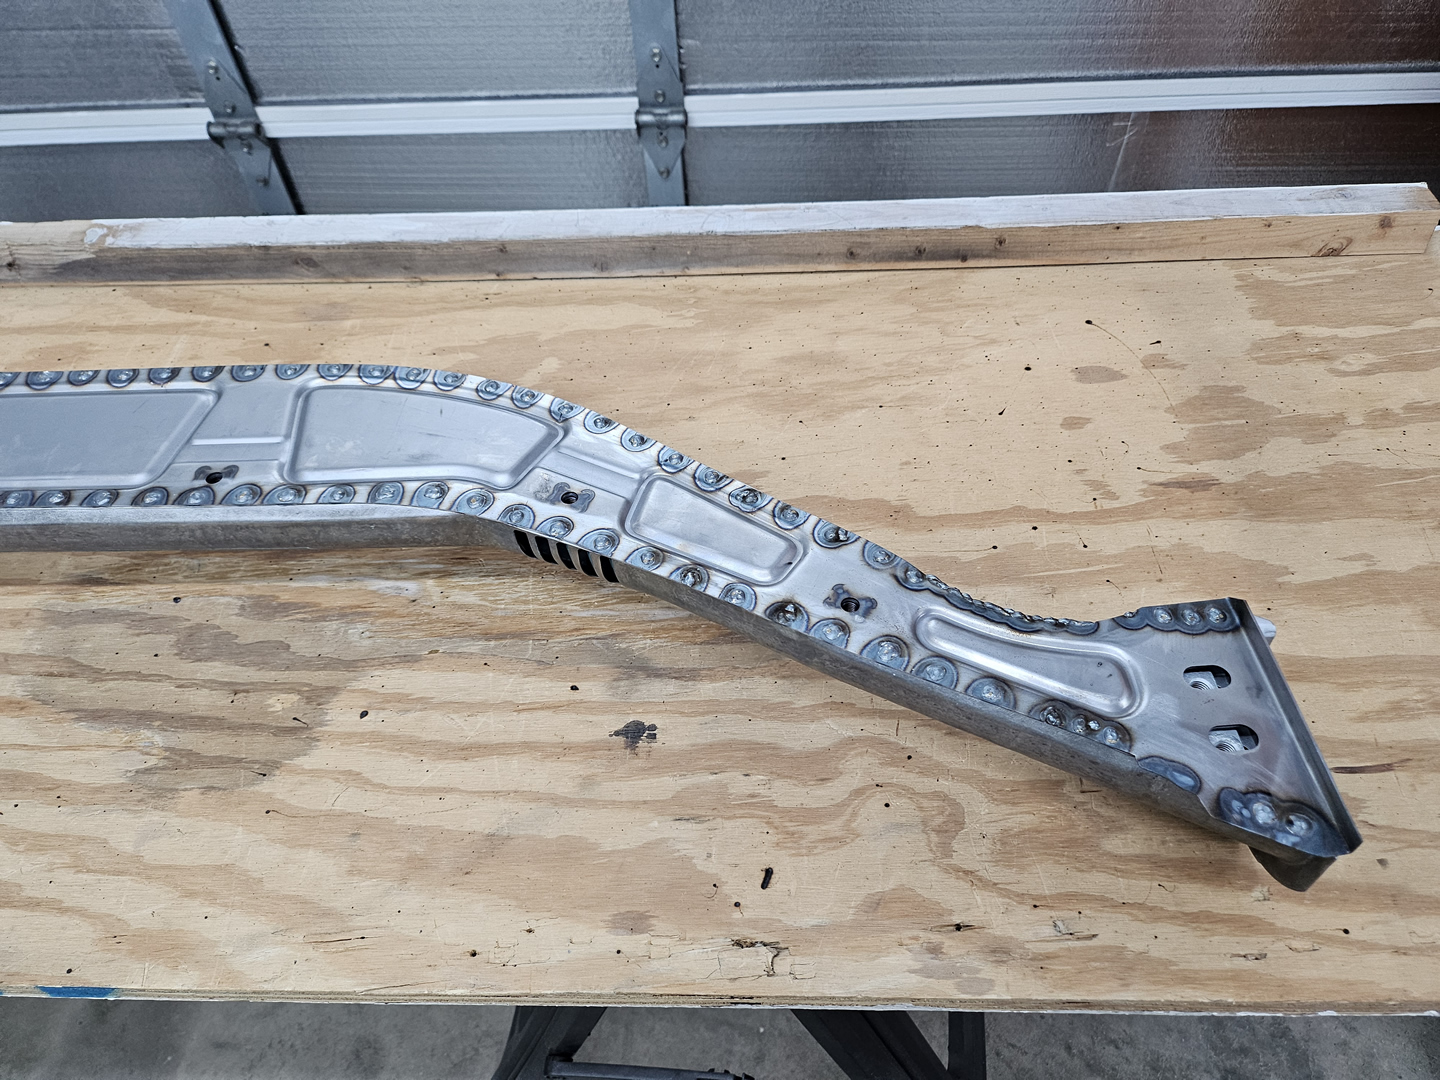
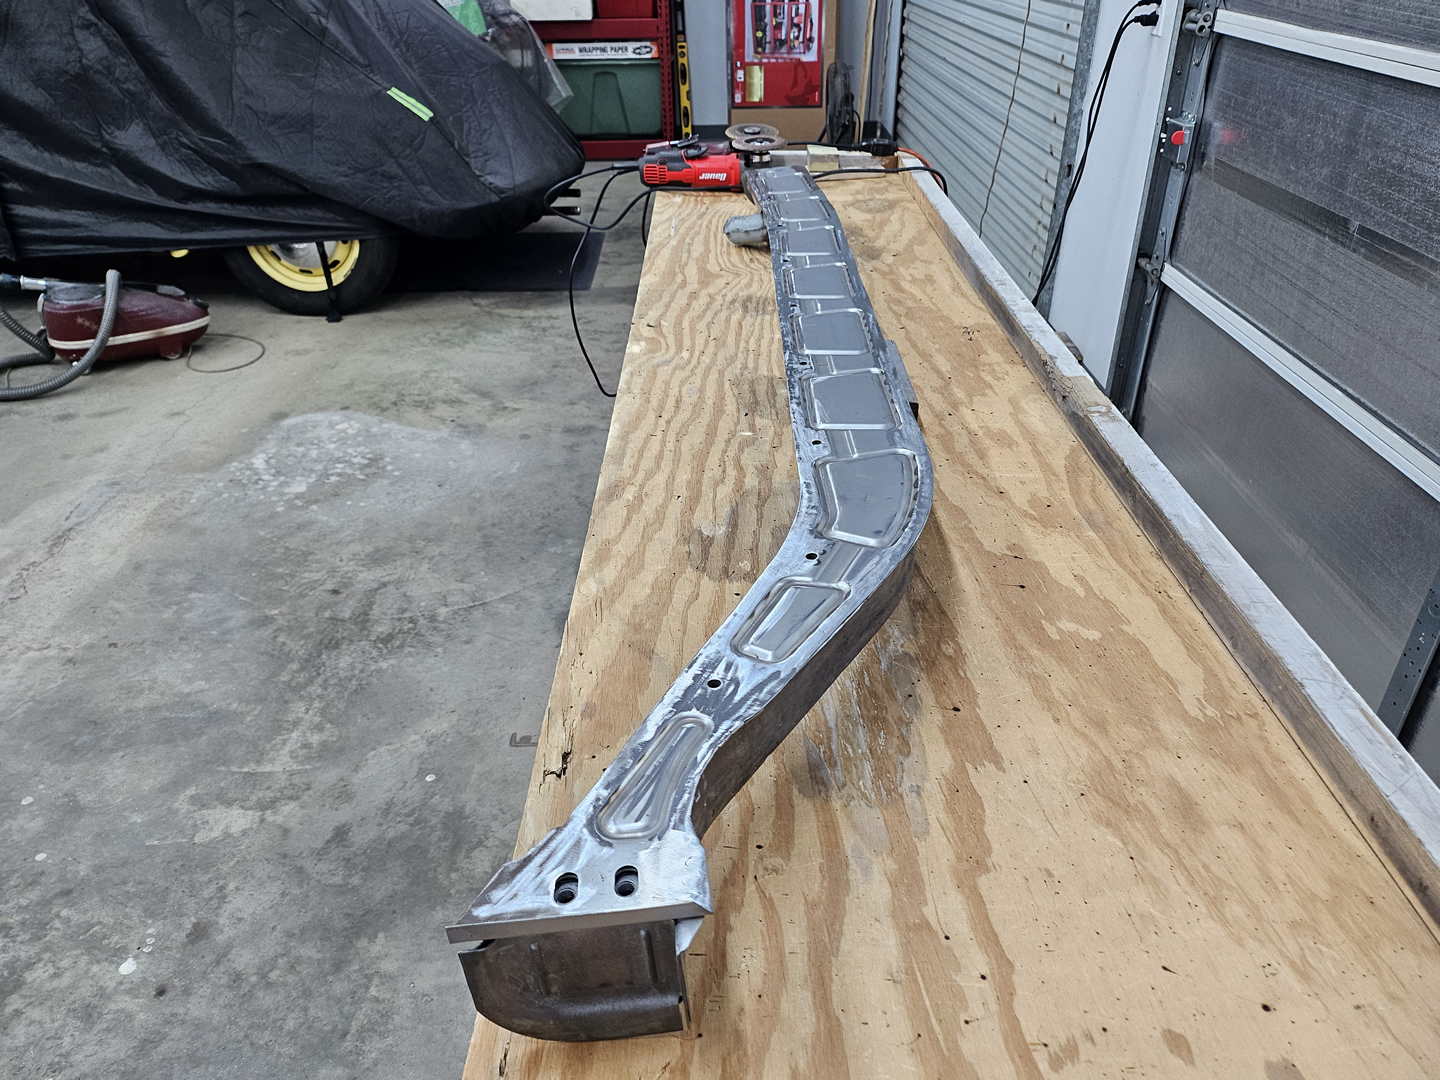
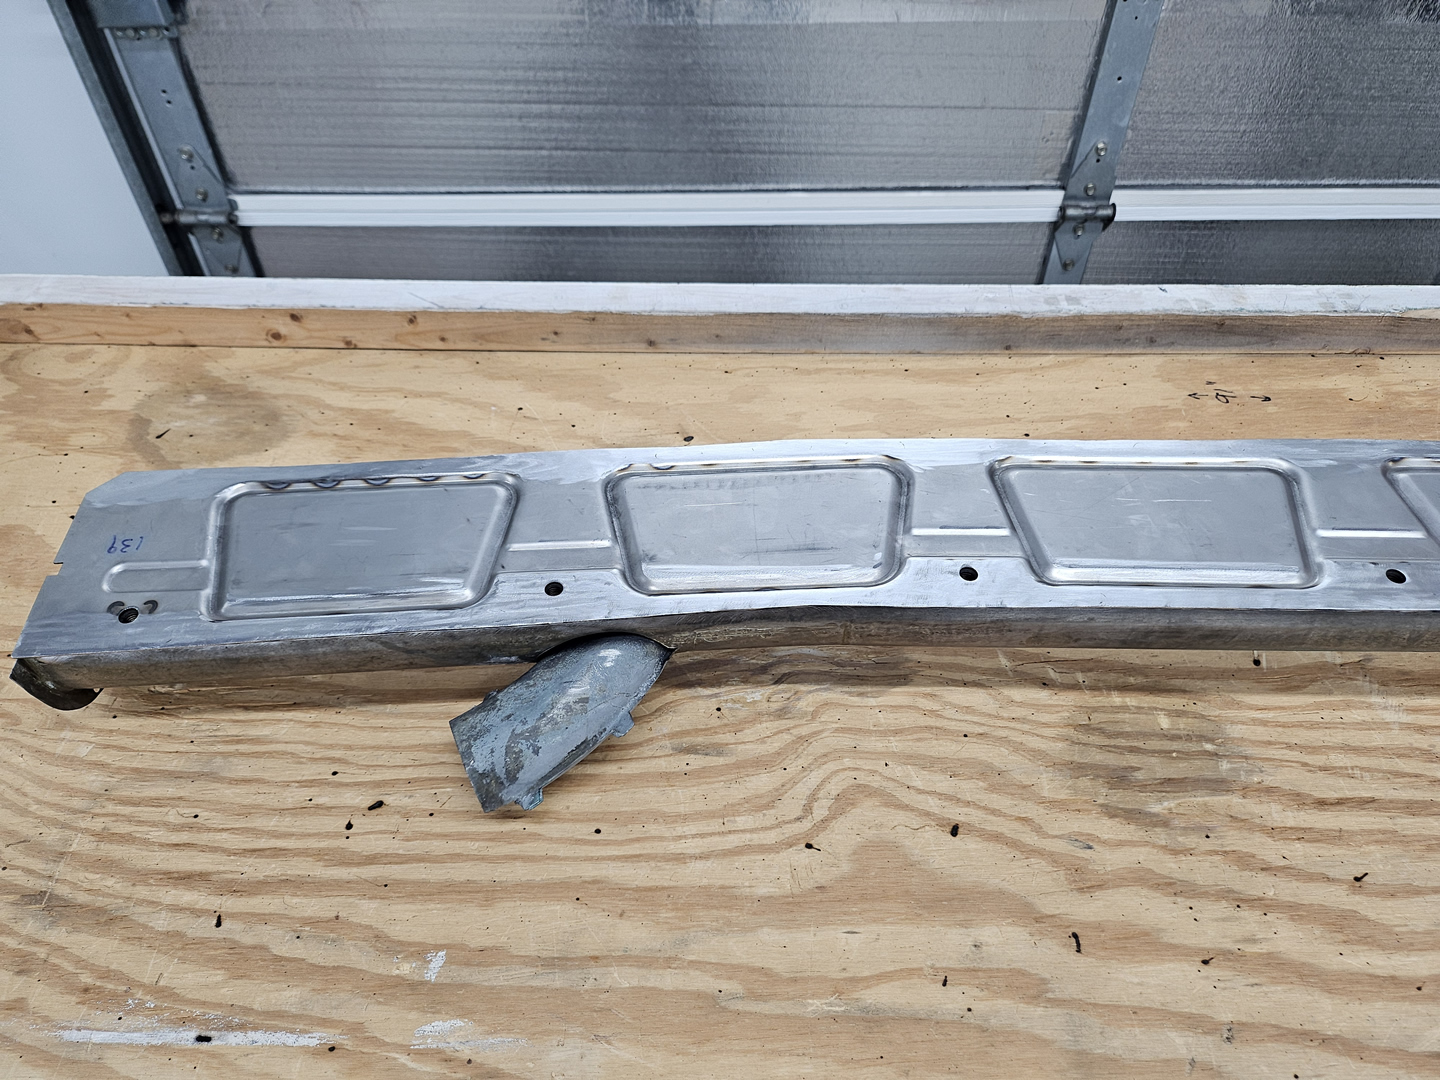
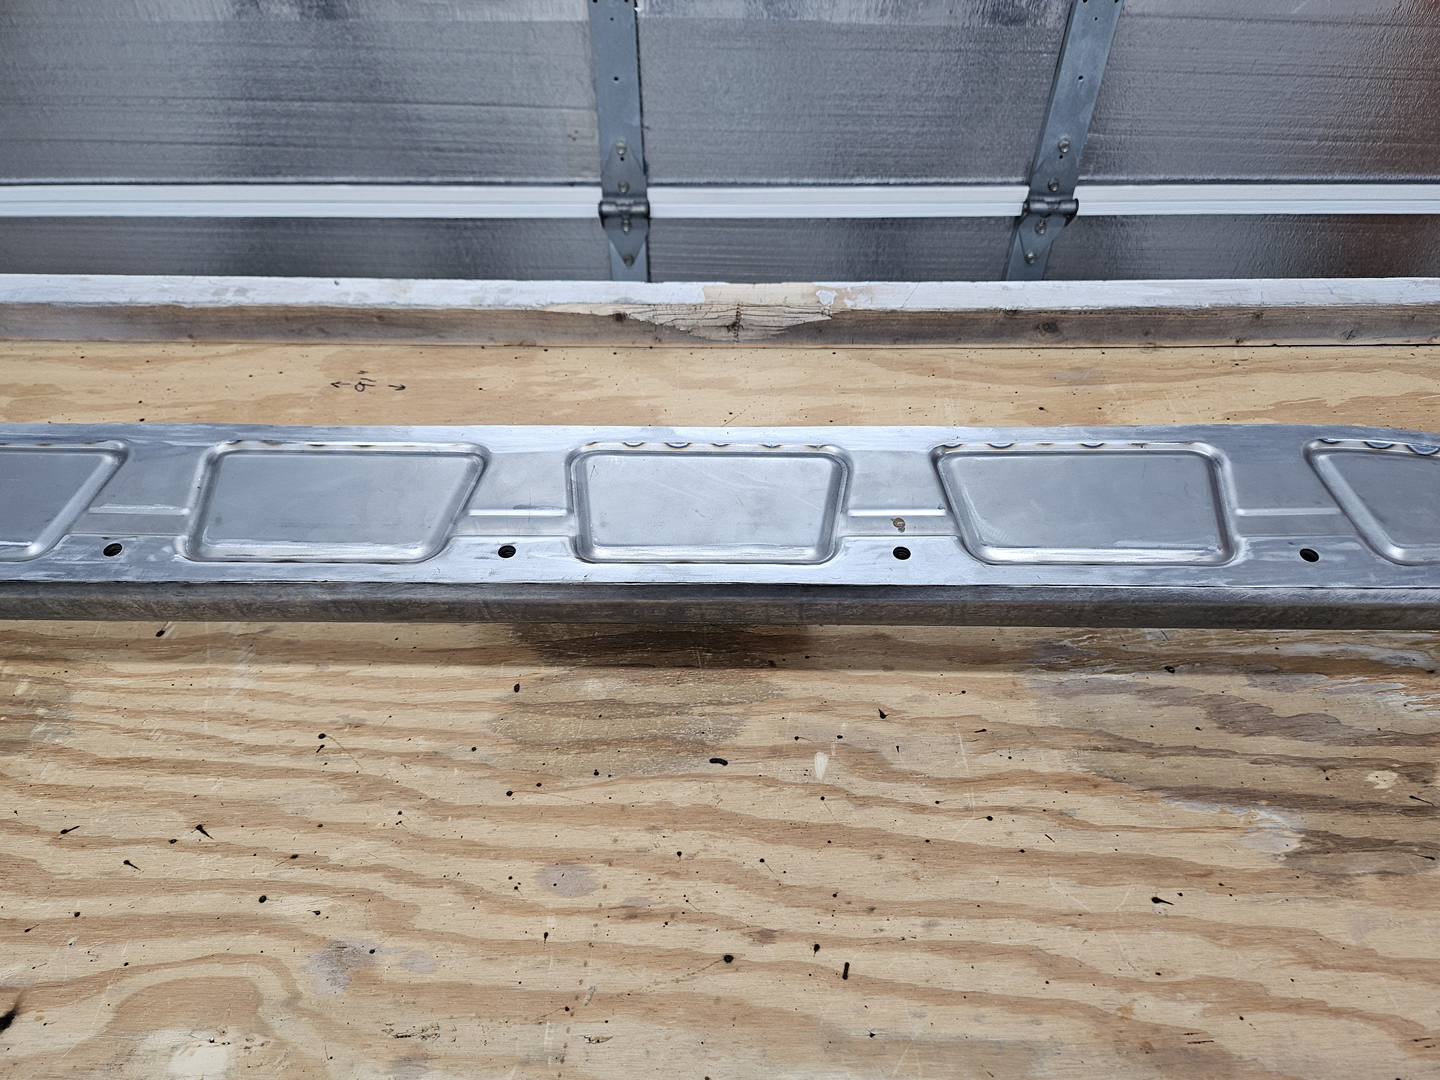
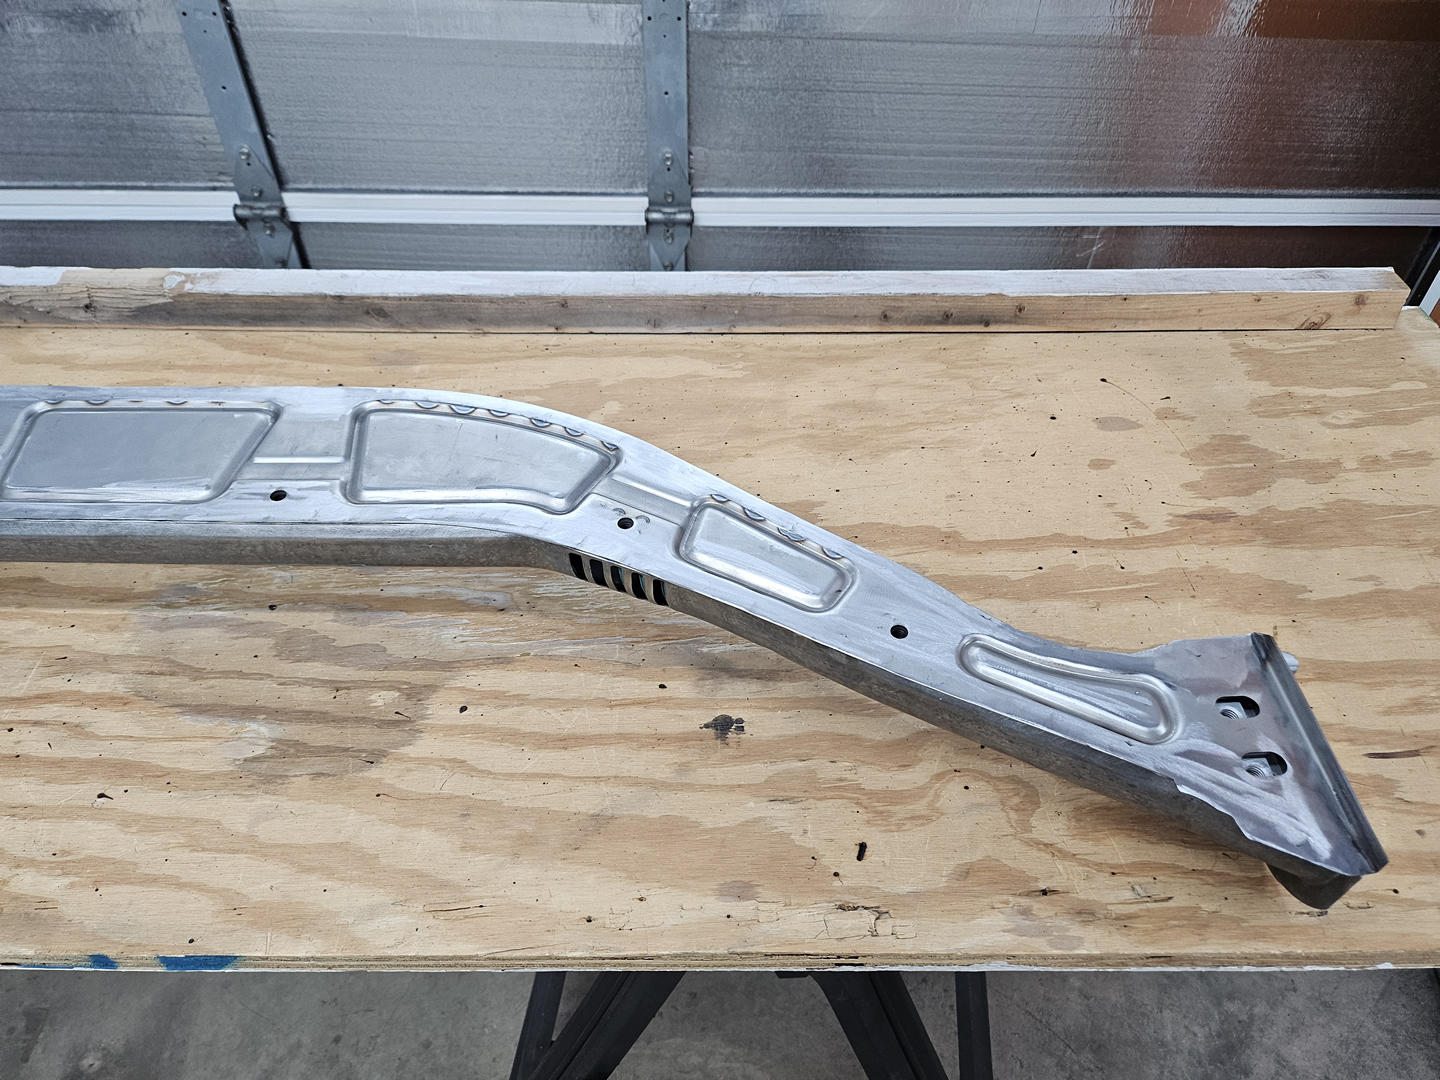
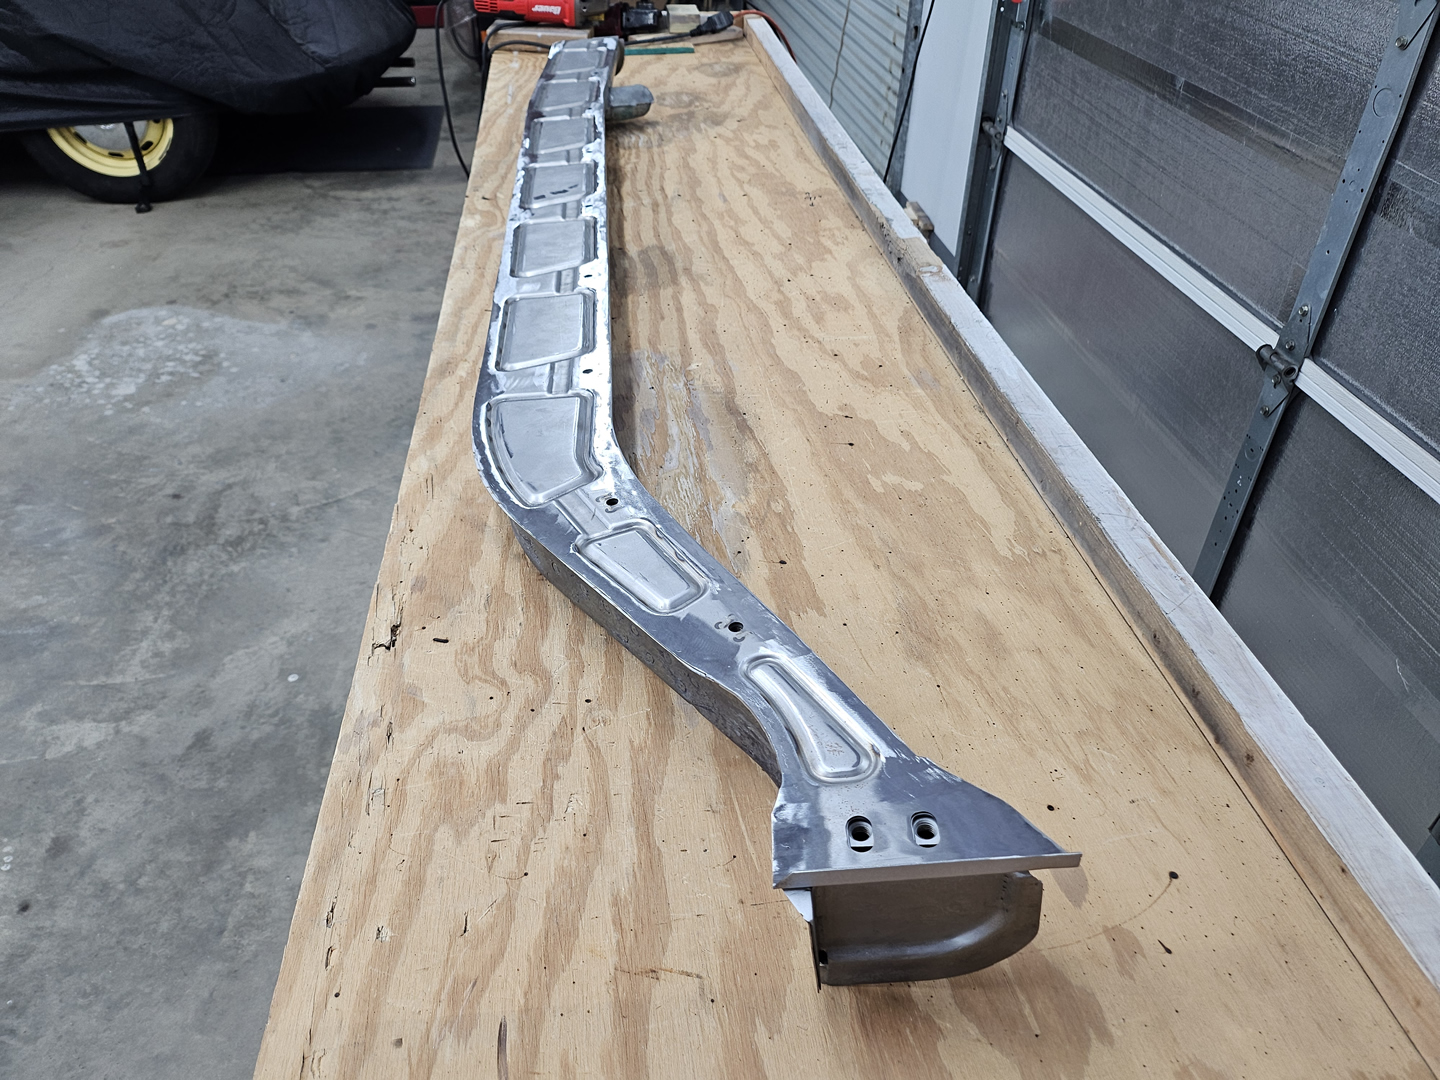
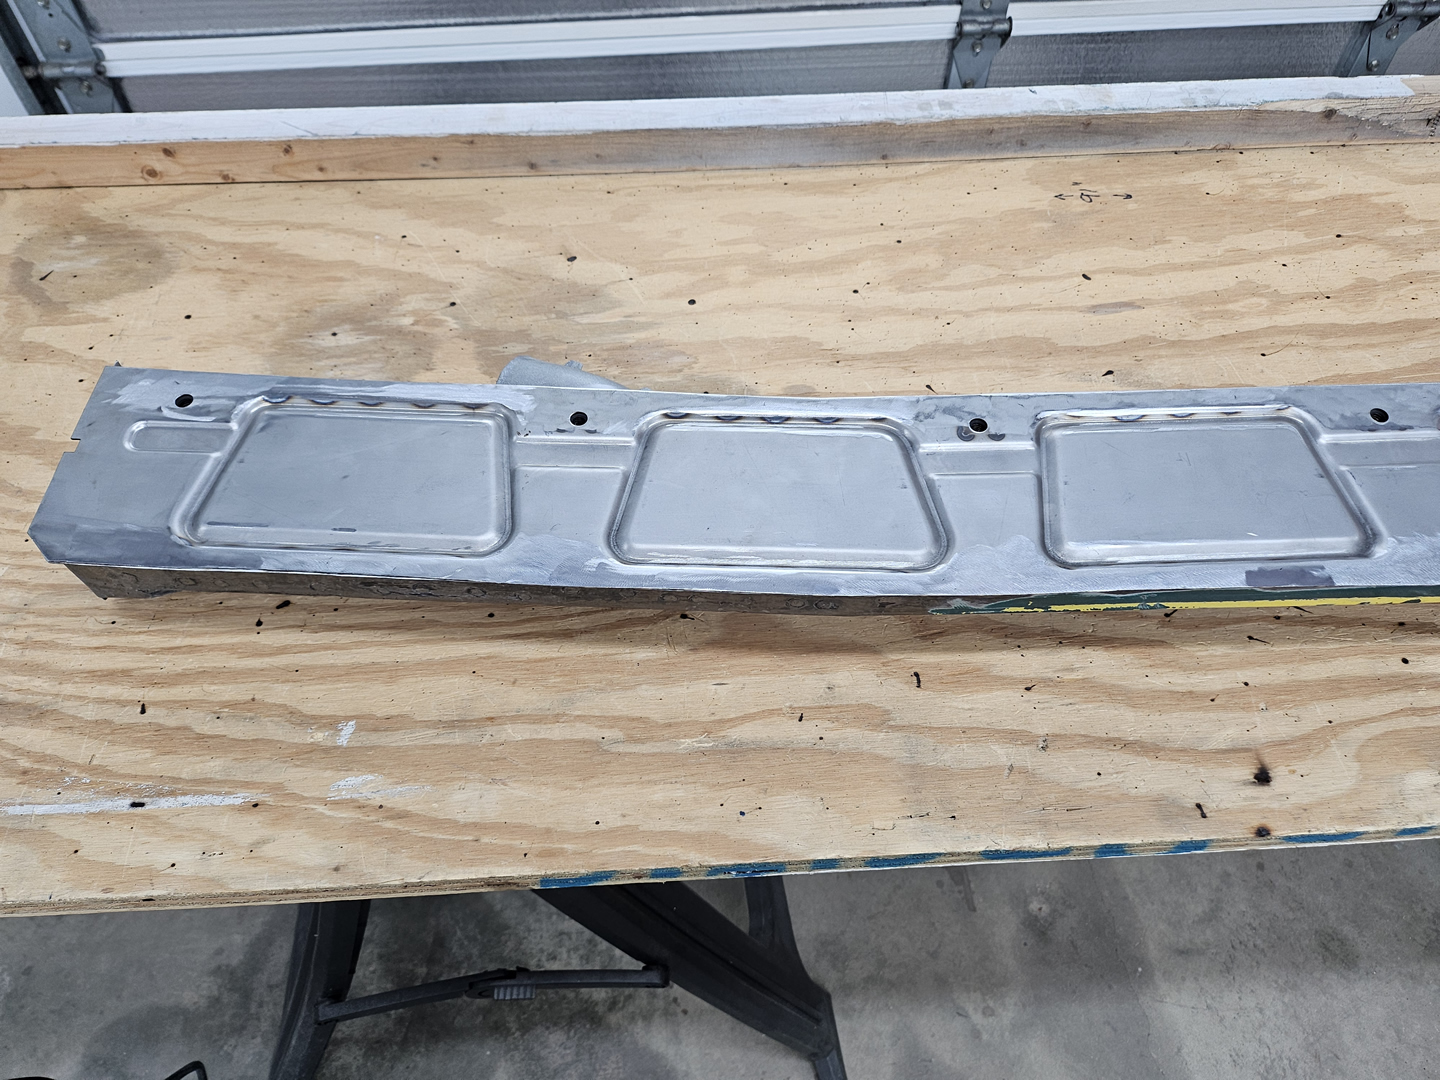
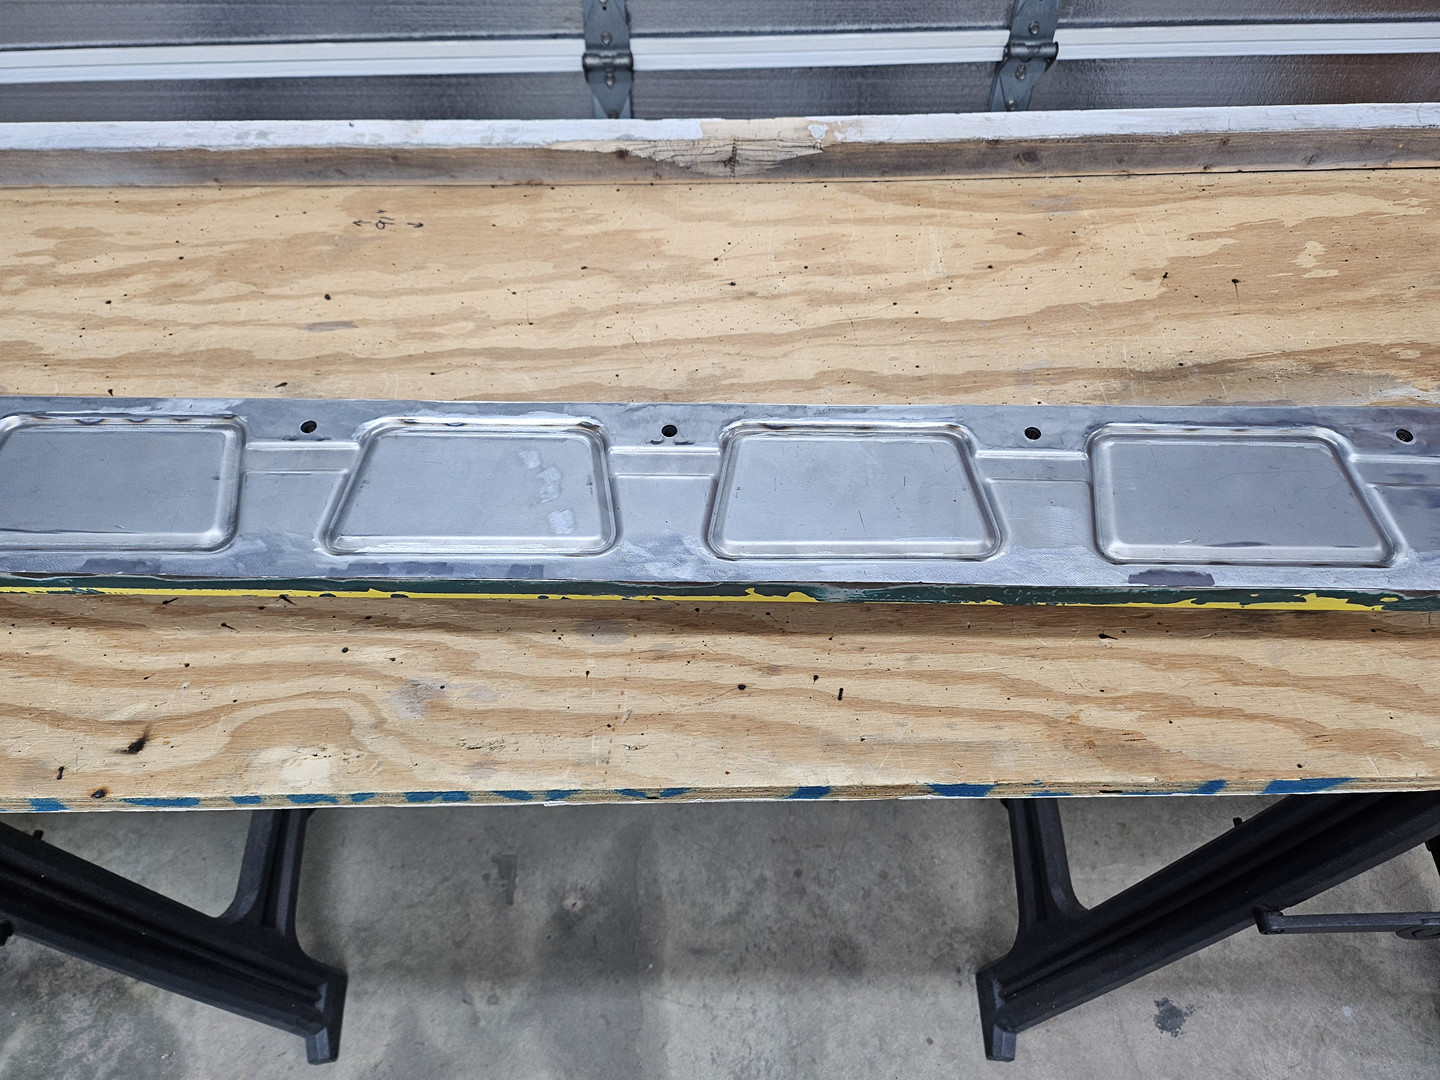
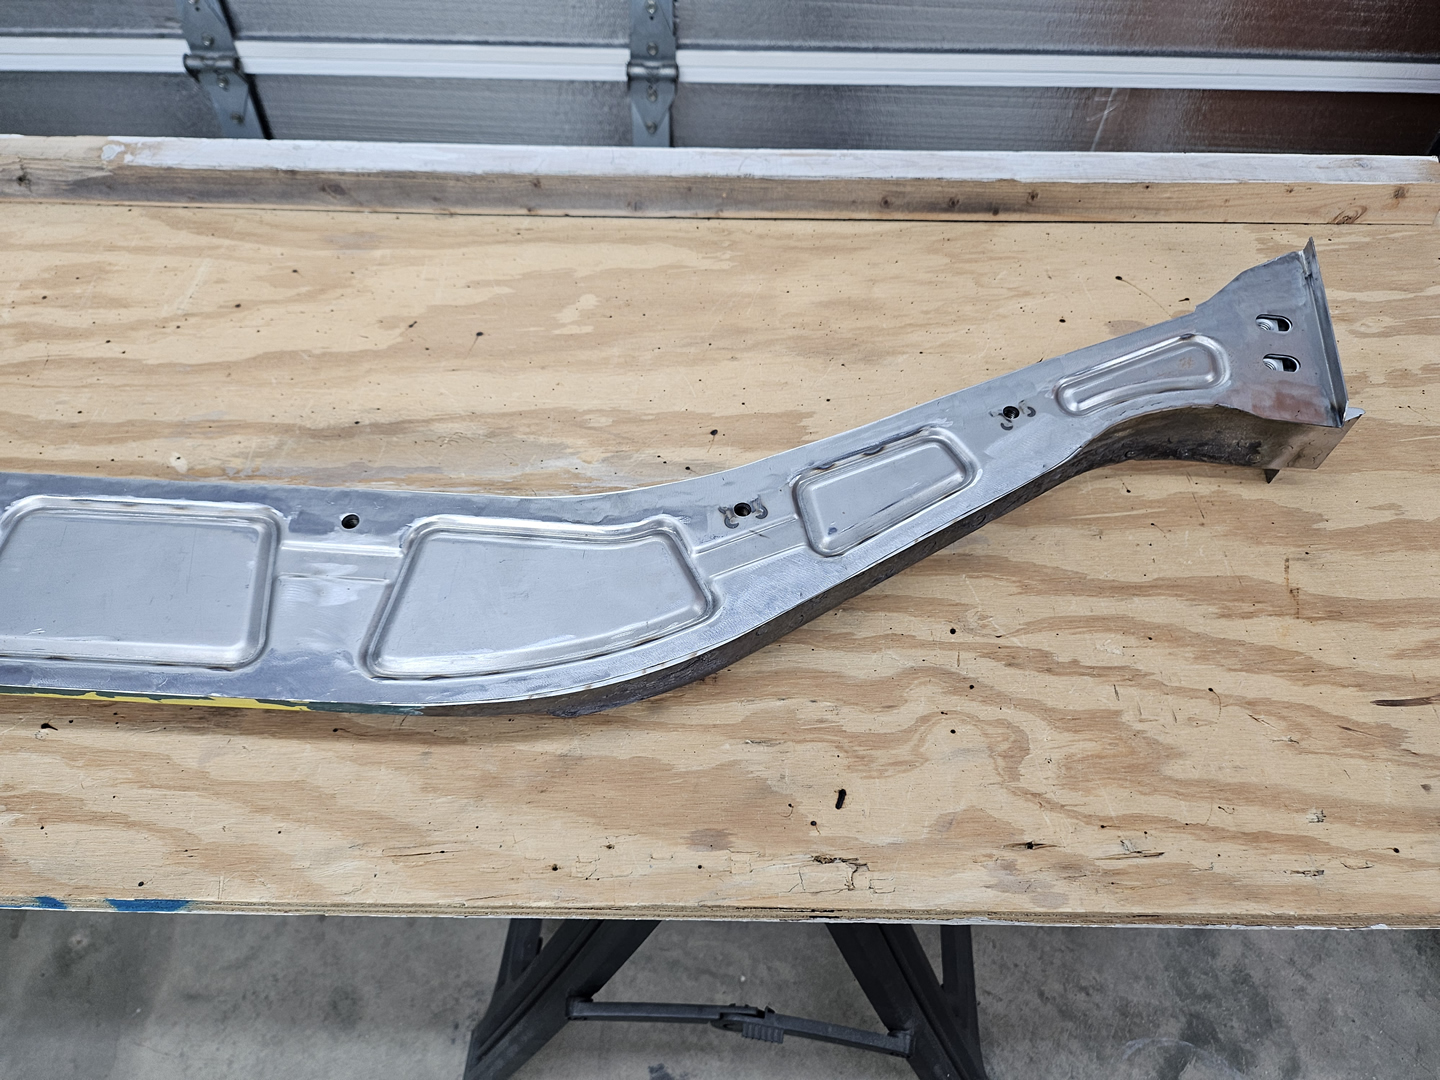
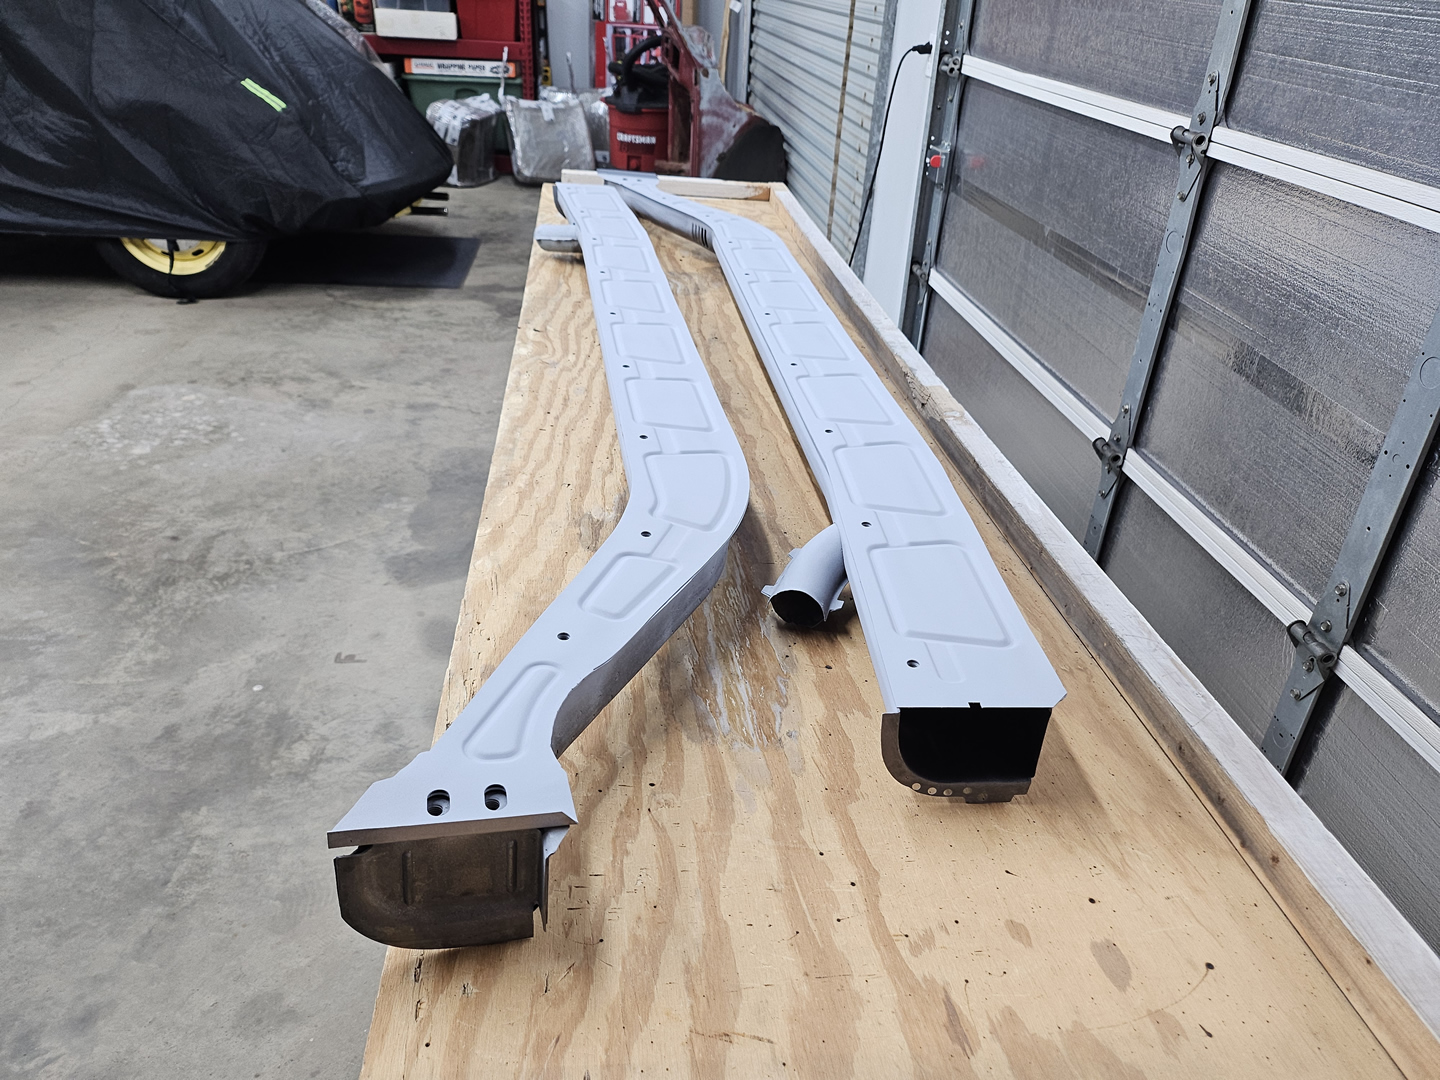
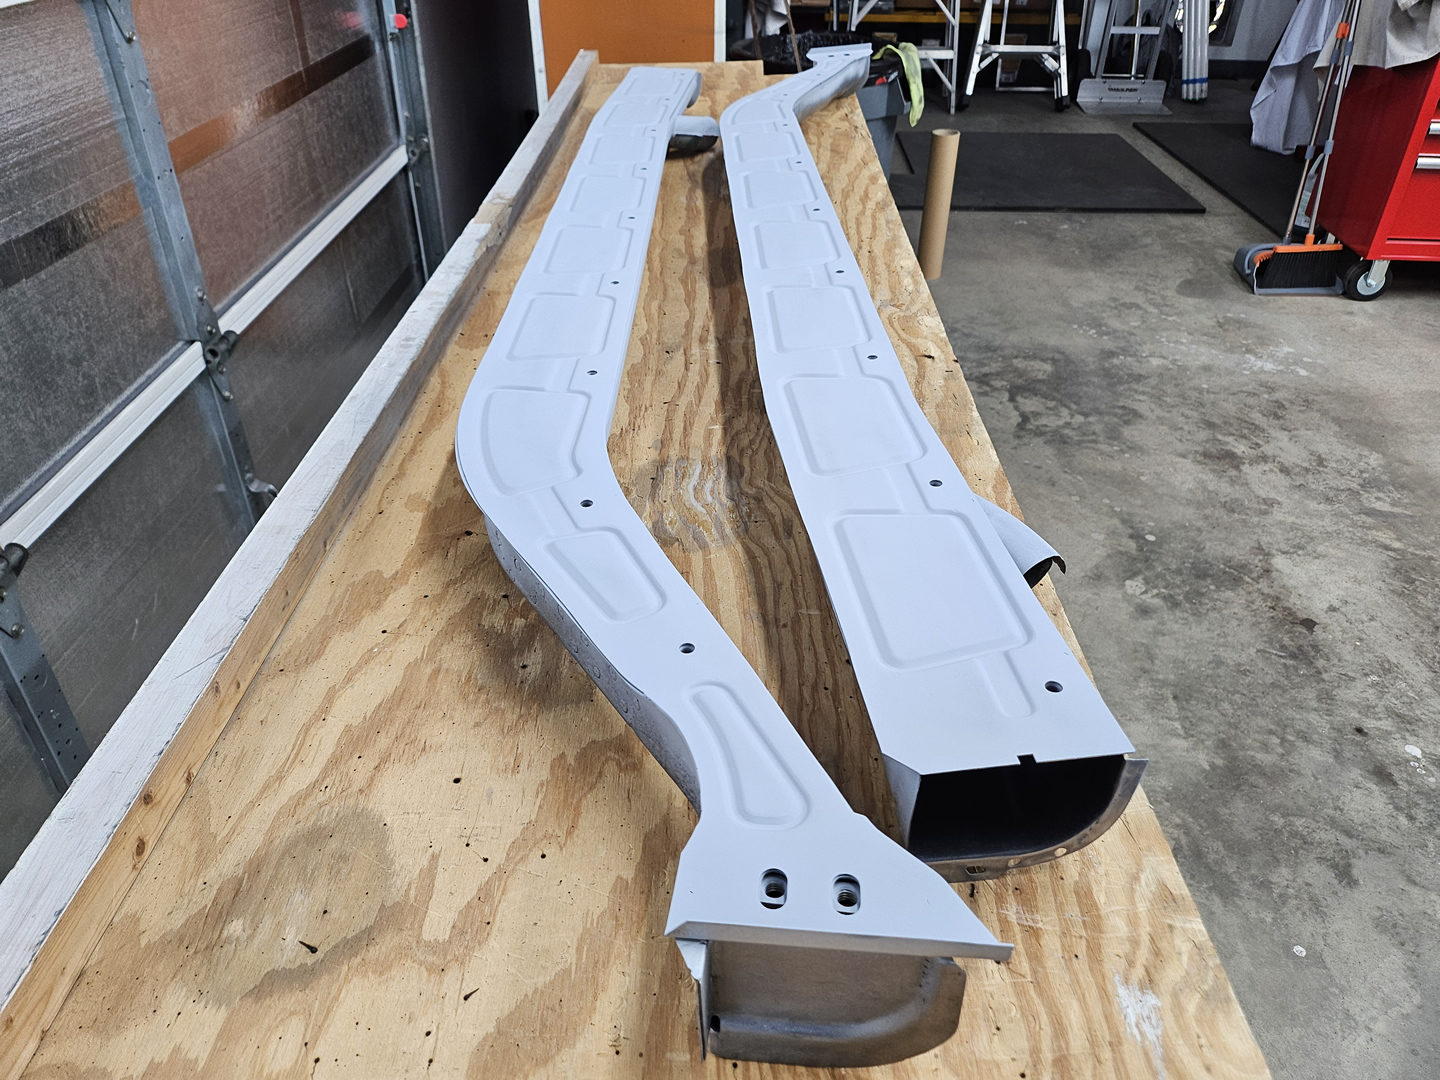
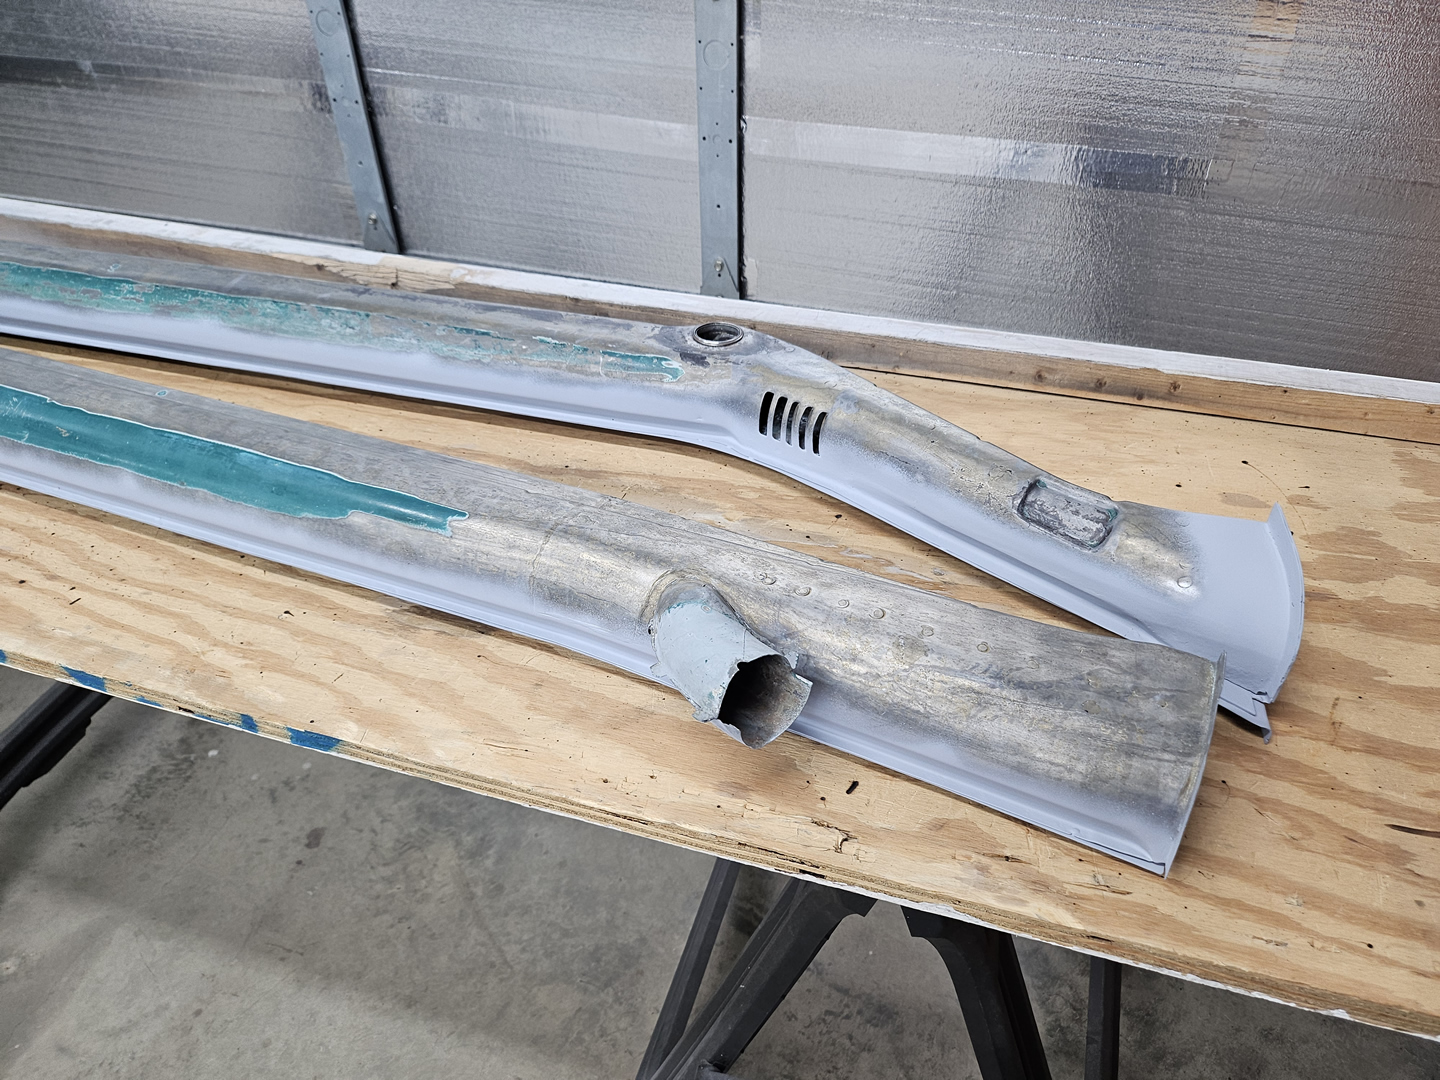
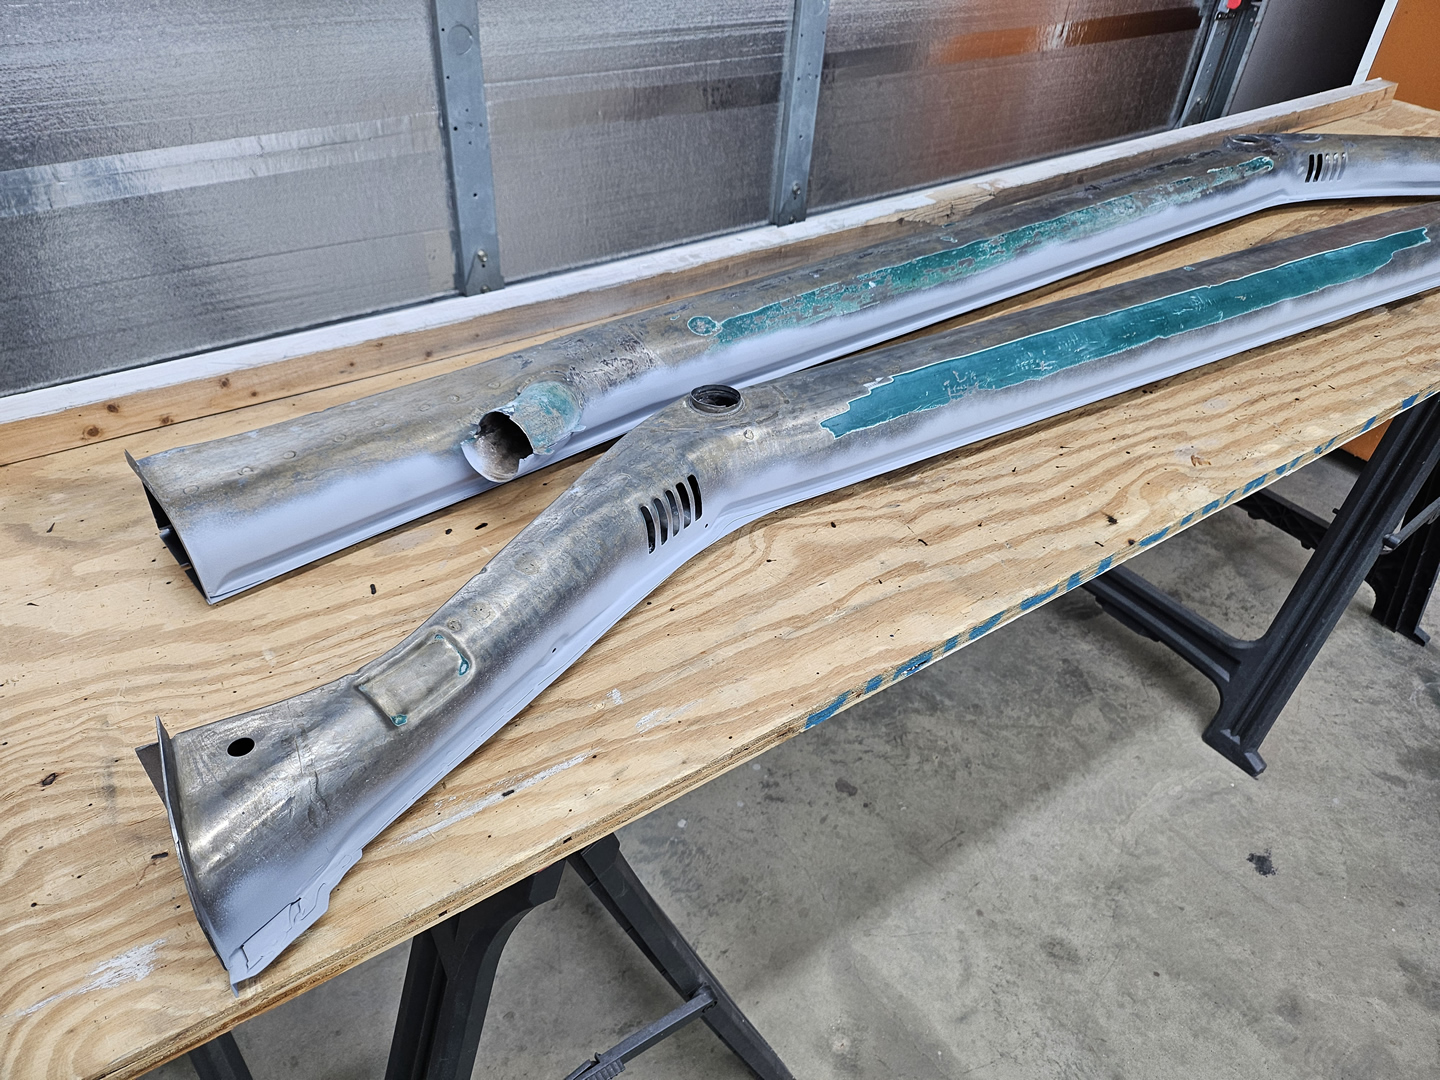
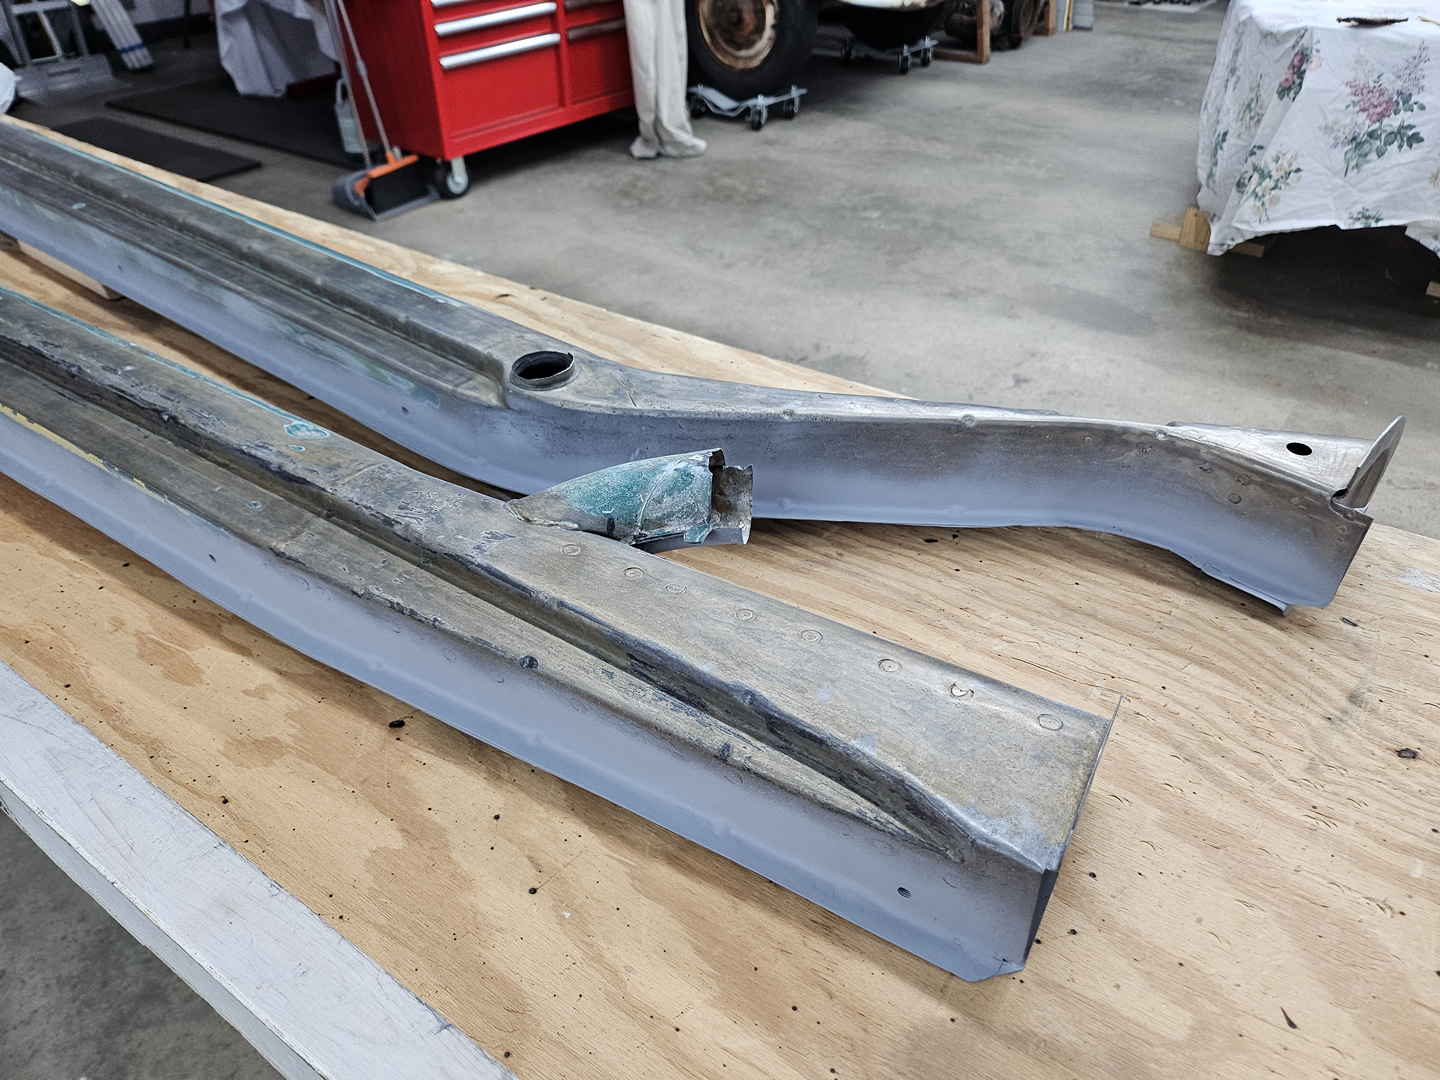
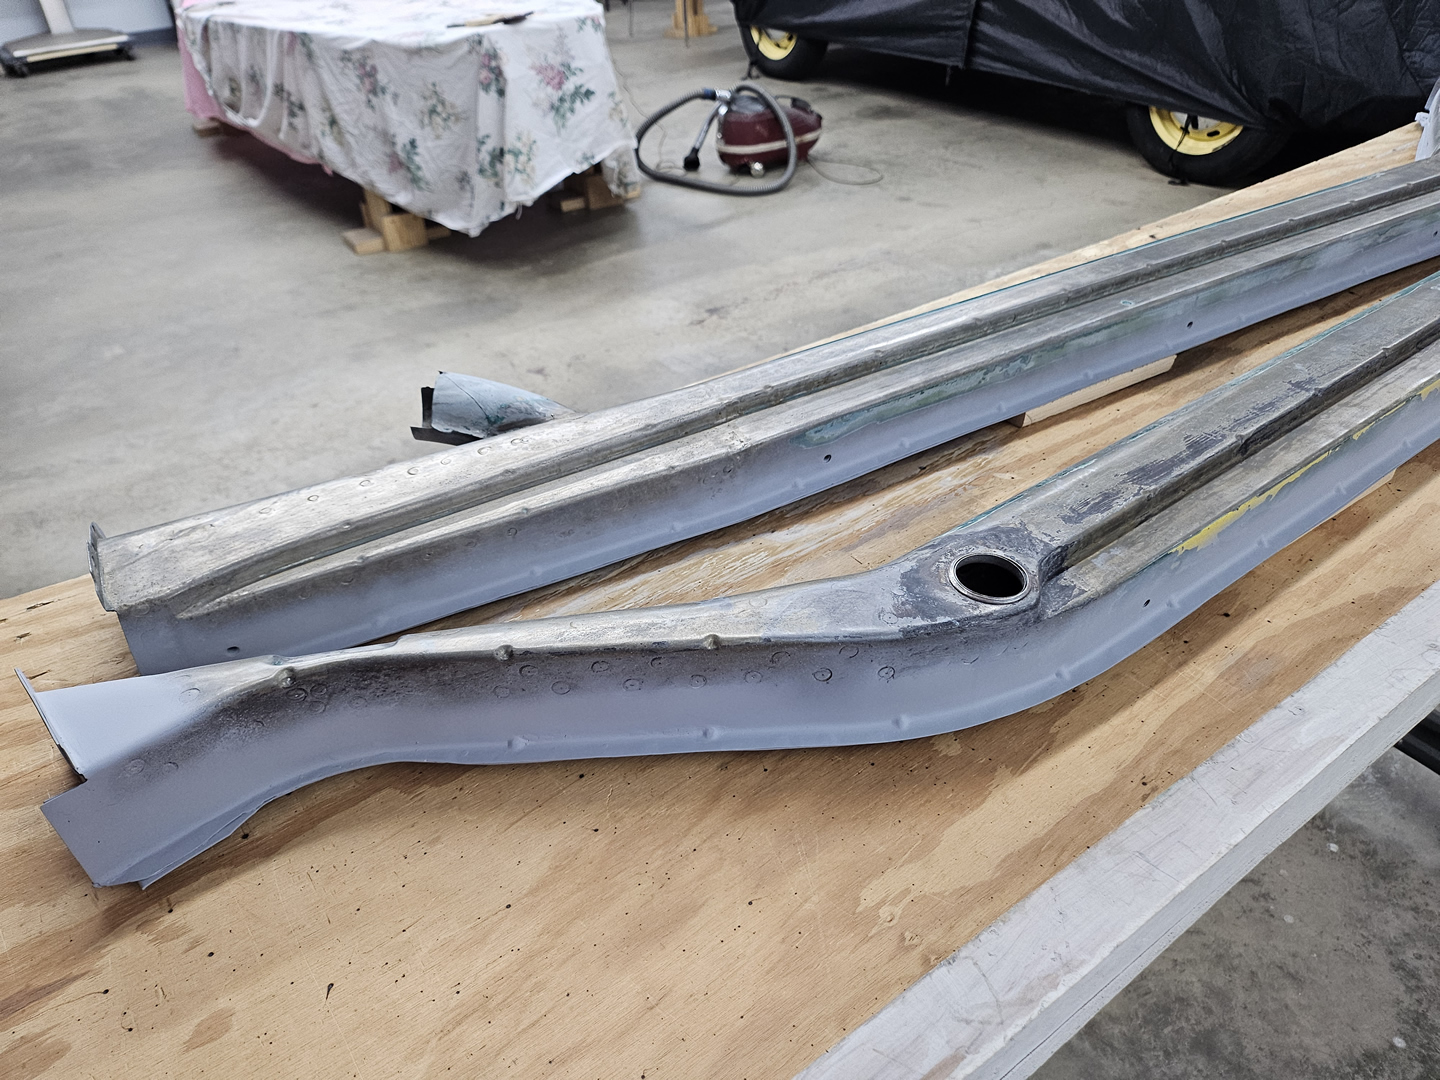
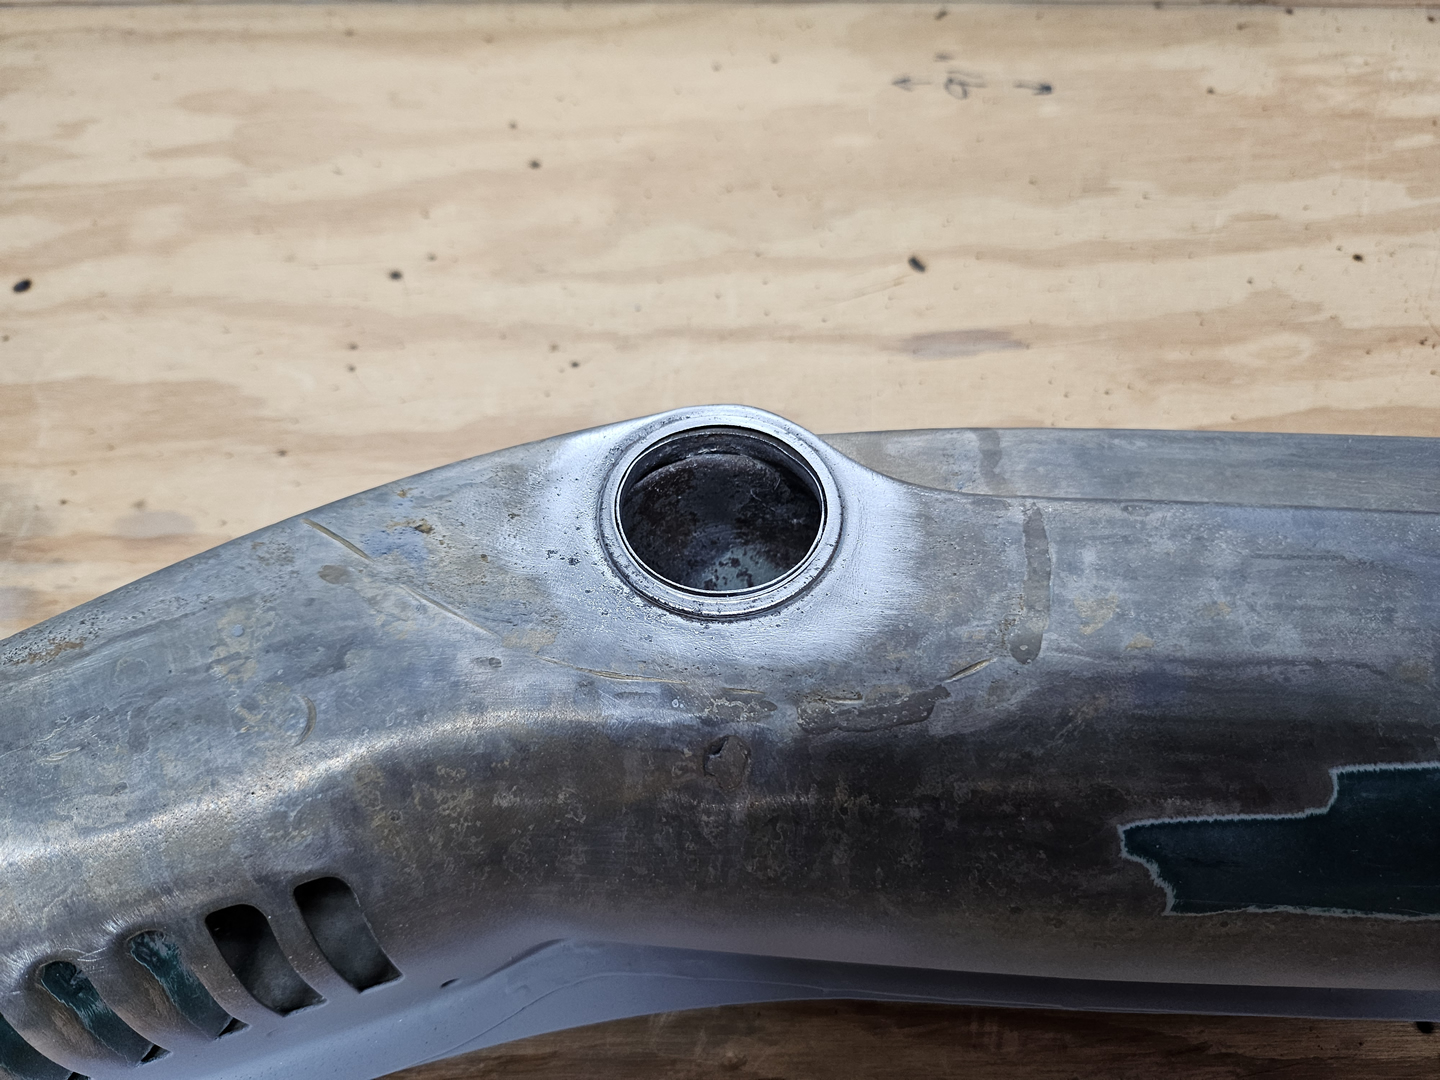
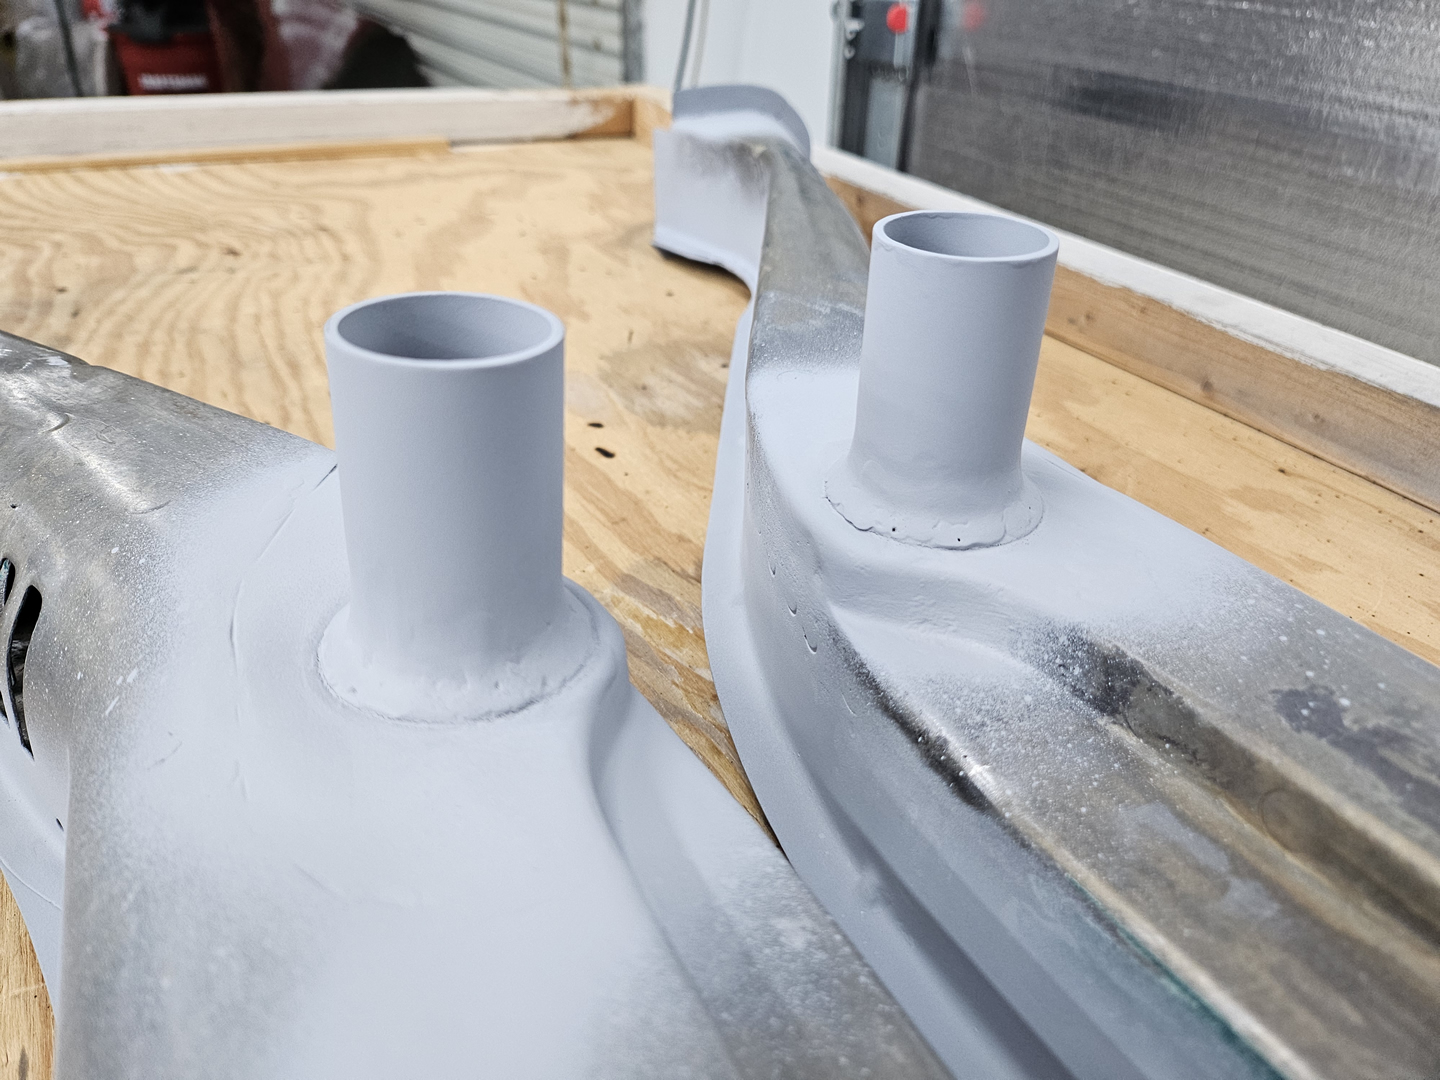
Finally I can prepare the bottom plates for welding. First, I punched and drilled holes for spot welds. Then I sprayed the areas to be welded with U-POL Weld #2 Zinc Weld Through Primer, and sprayed the areas on the inside of the bottom plates with Eastwood Matte Black Rust Encapsulator. I did the same thing with the heater channel bodies and sprayed U-POL Weld #2 Zinc Weld Through Primer on the areas to be welded, and sprayed the areas inside of the heater channel bodies with Eastwood Matte Black Rust Encapsulator.
|
|

|
|

|

|

|
|
|
|

|
|
|
|
|
|
|
|
|
|
|
|
|
|
|
|
|
|
|
|
|
|
|
|
|
|
|

|
|

|
|

