Tag: Naploeon hat
July 2012 Update, Donor Front Firewall & Napoleon Hat
by Garage Weasel on Jul.07, 2012, under Body Work
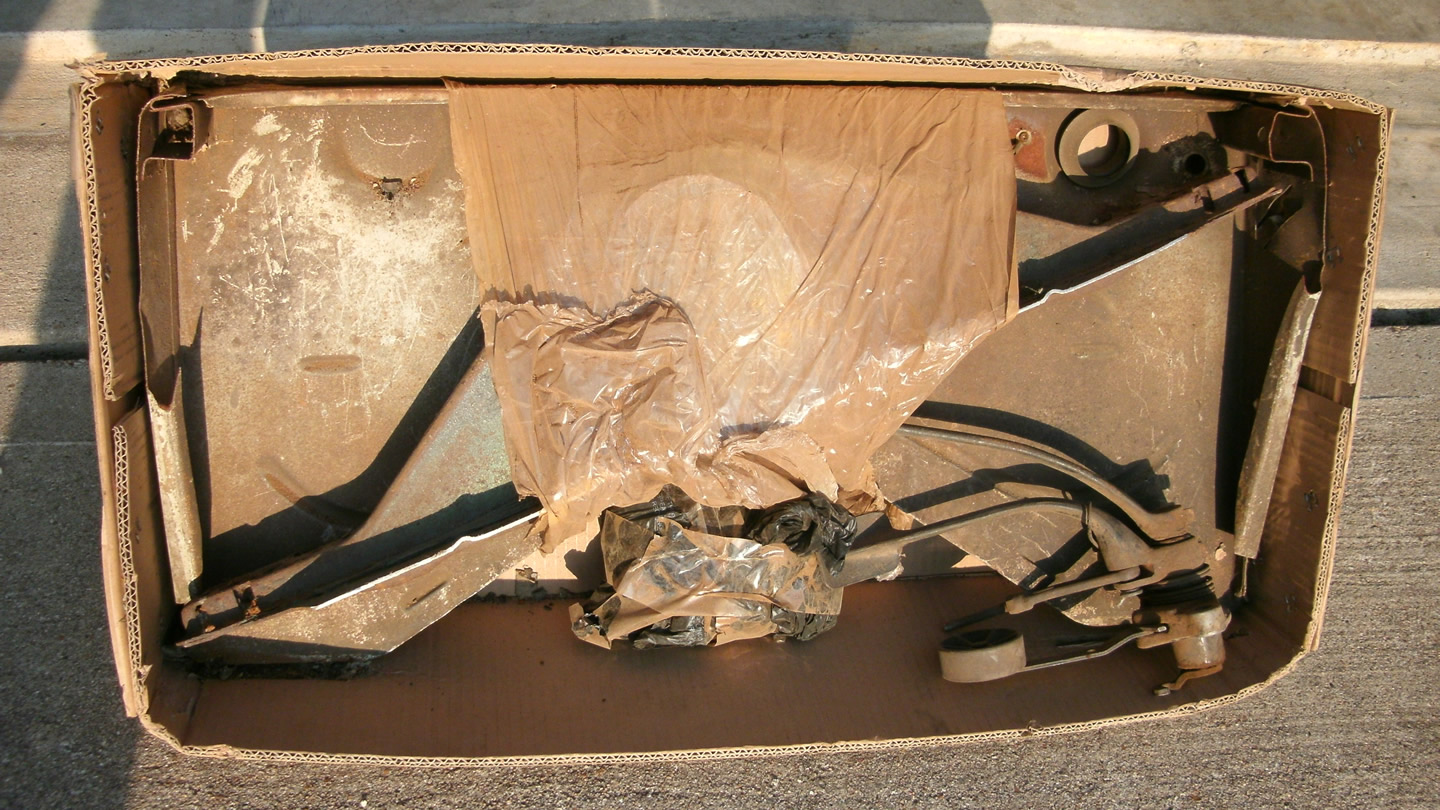
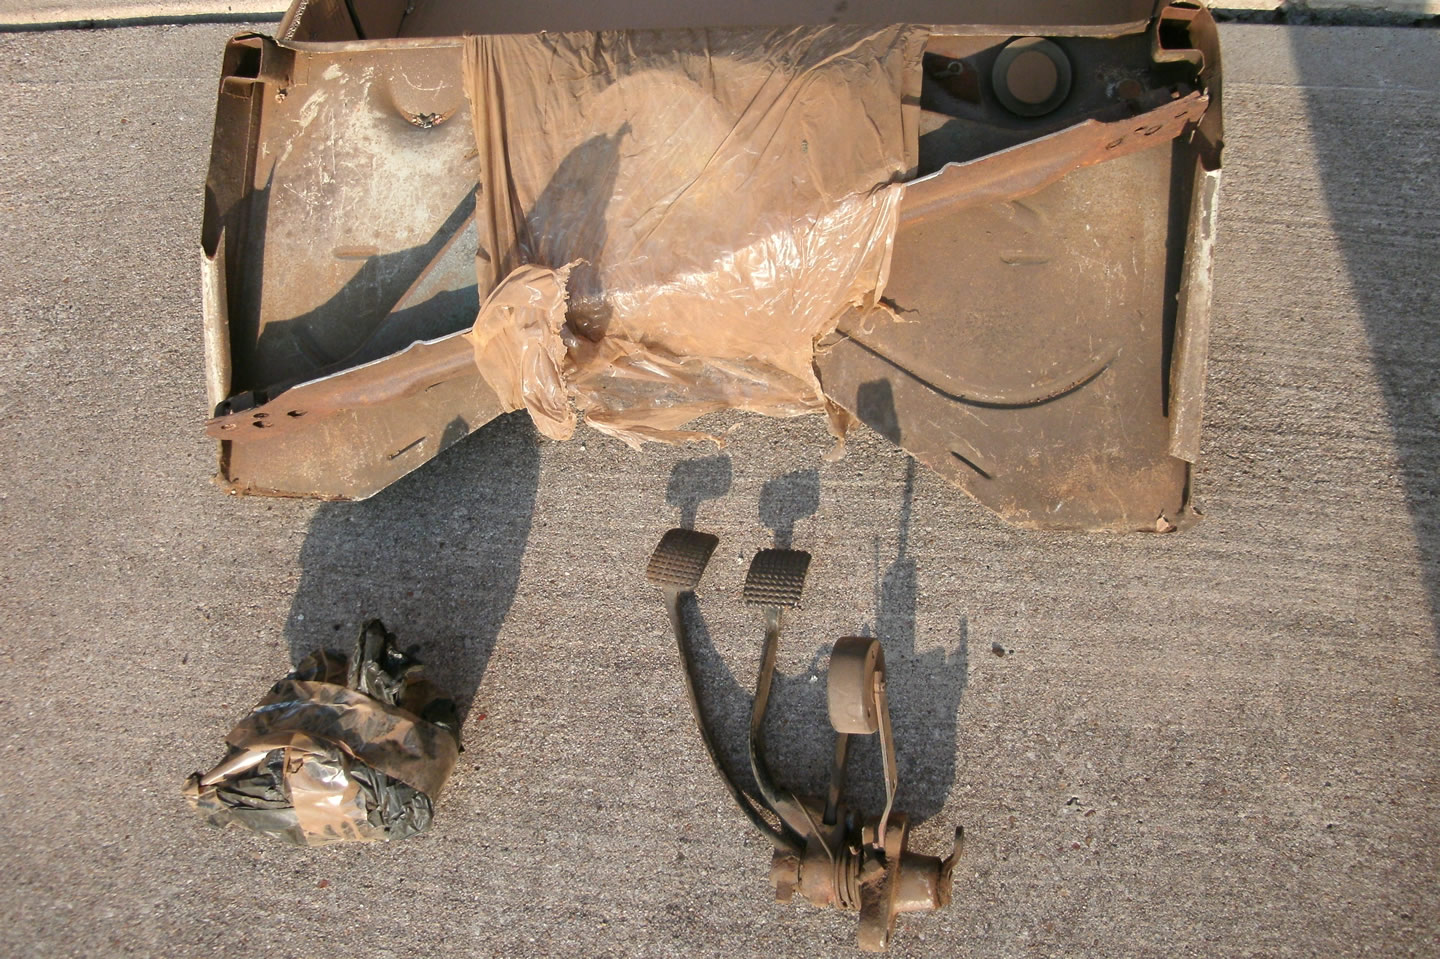
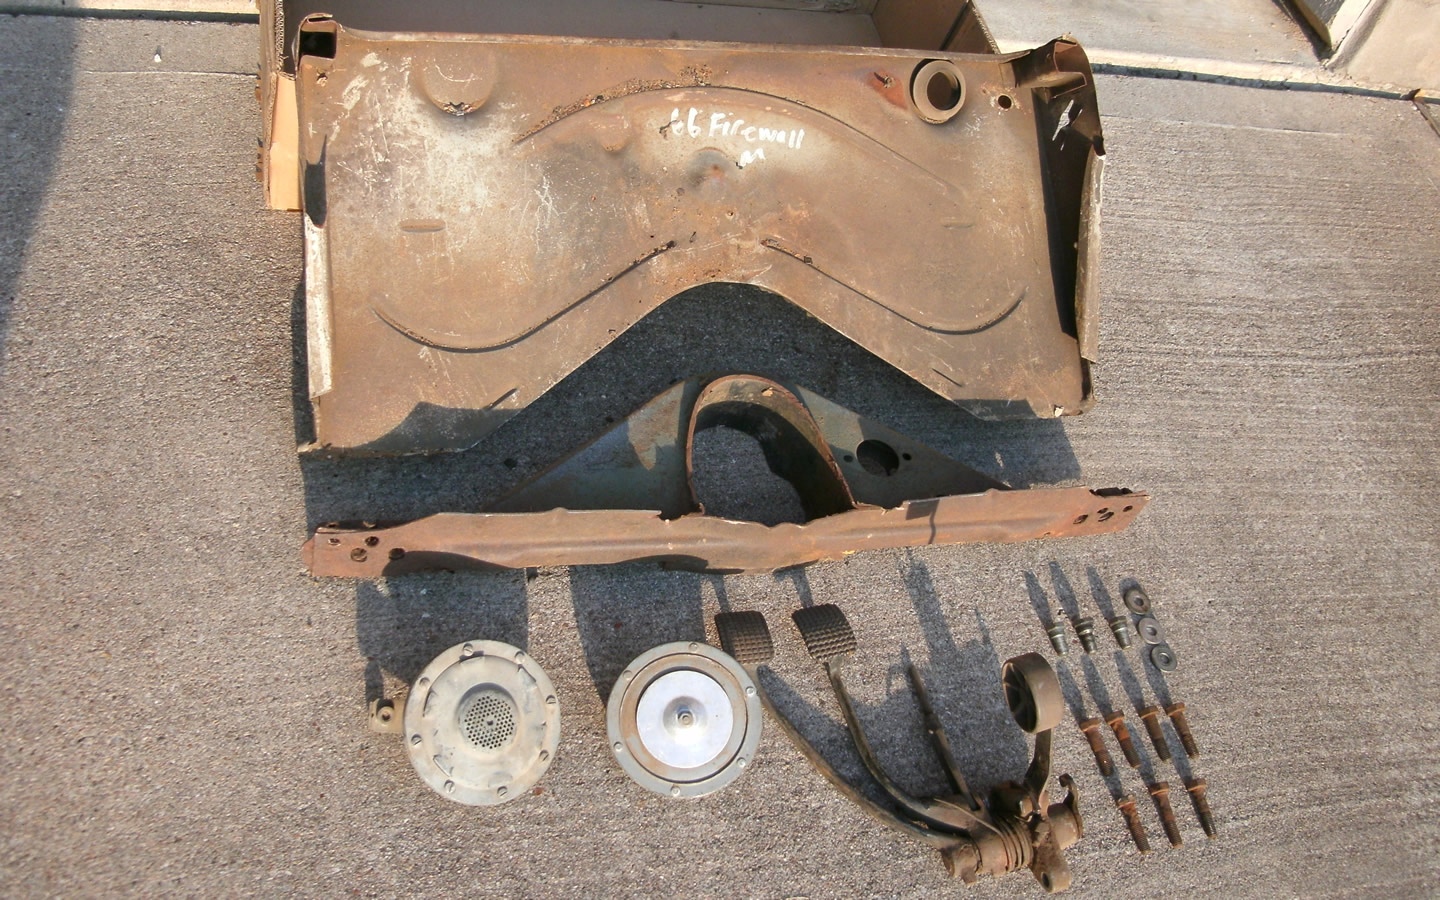
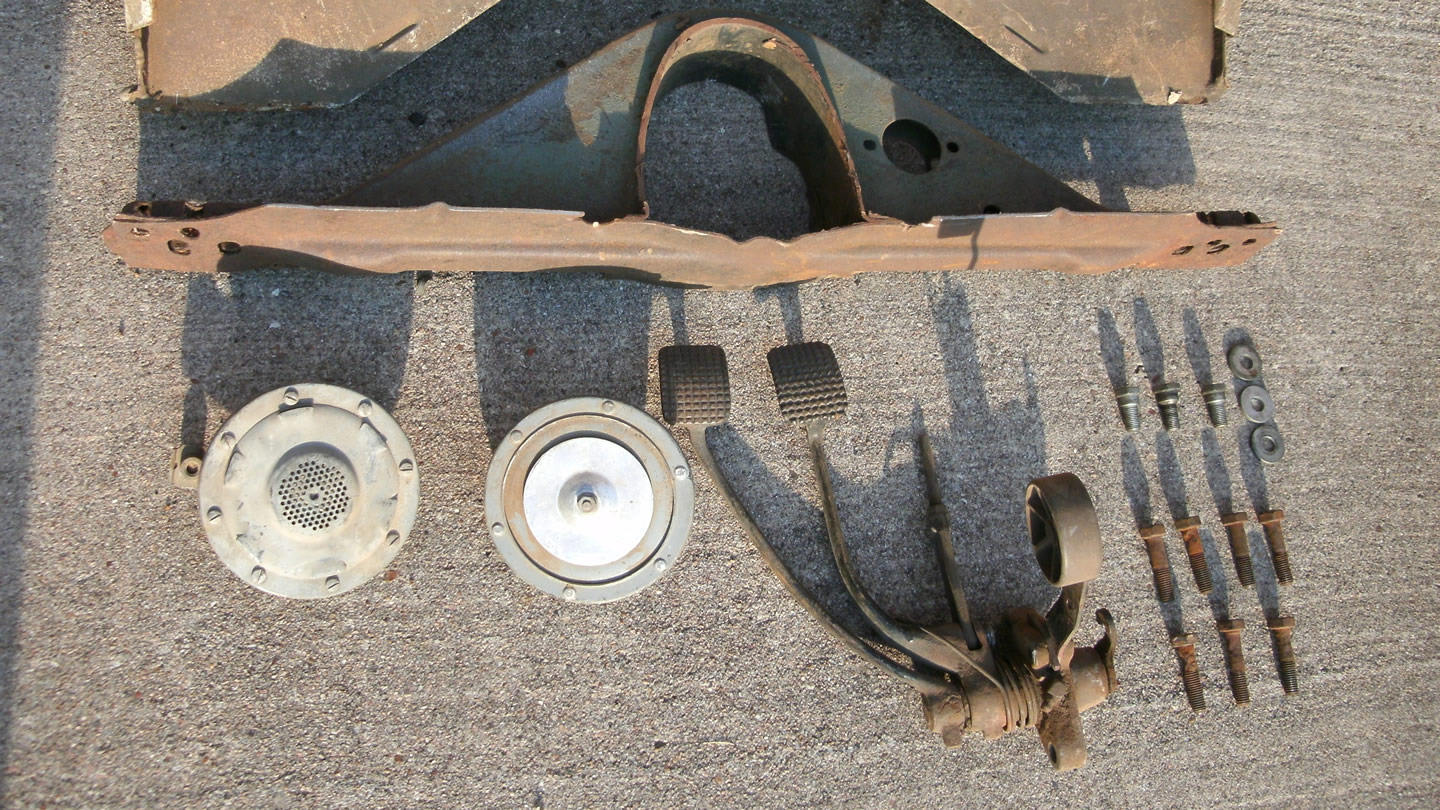
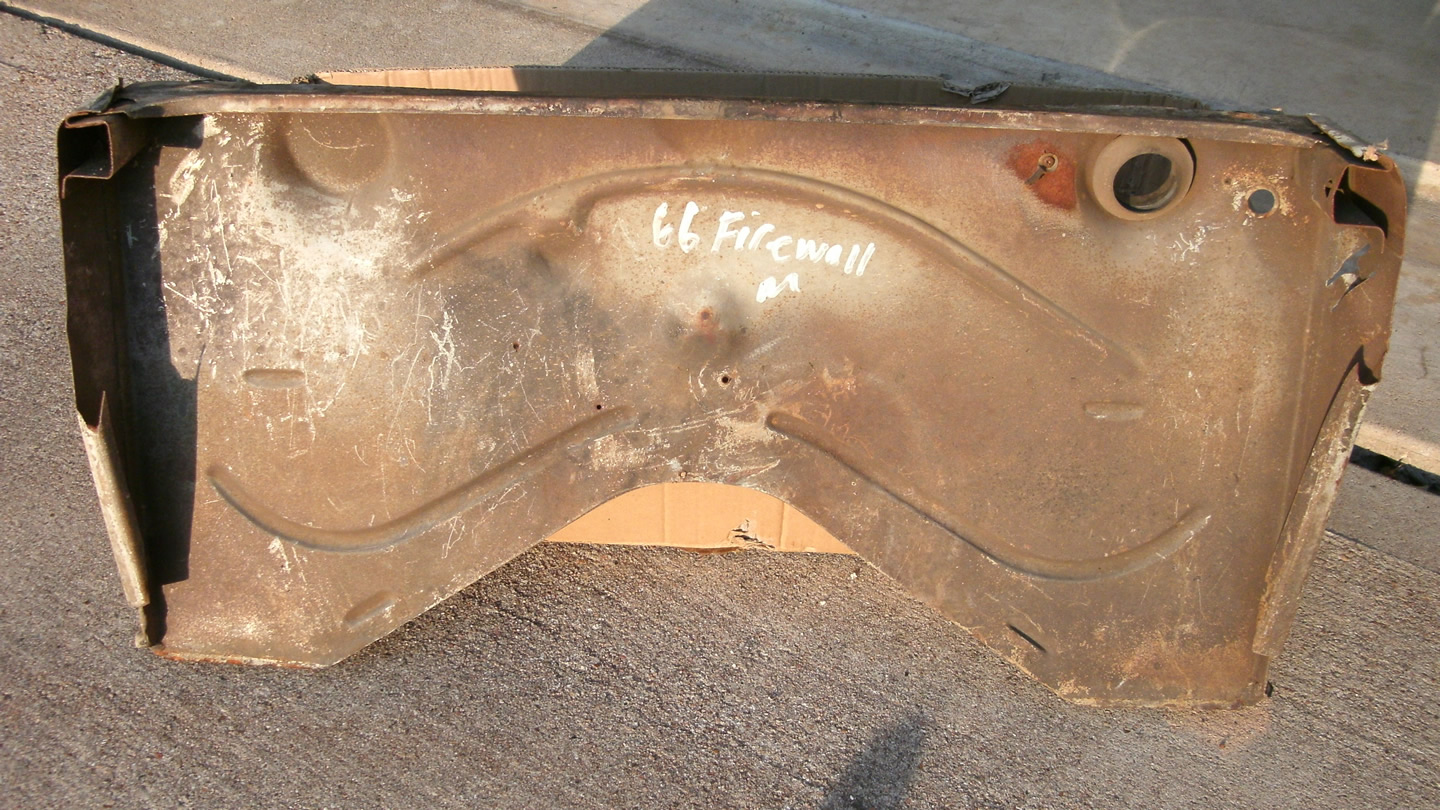
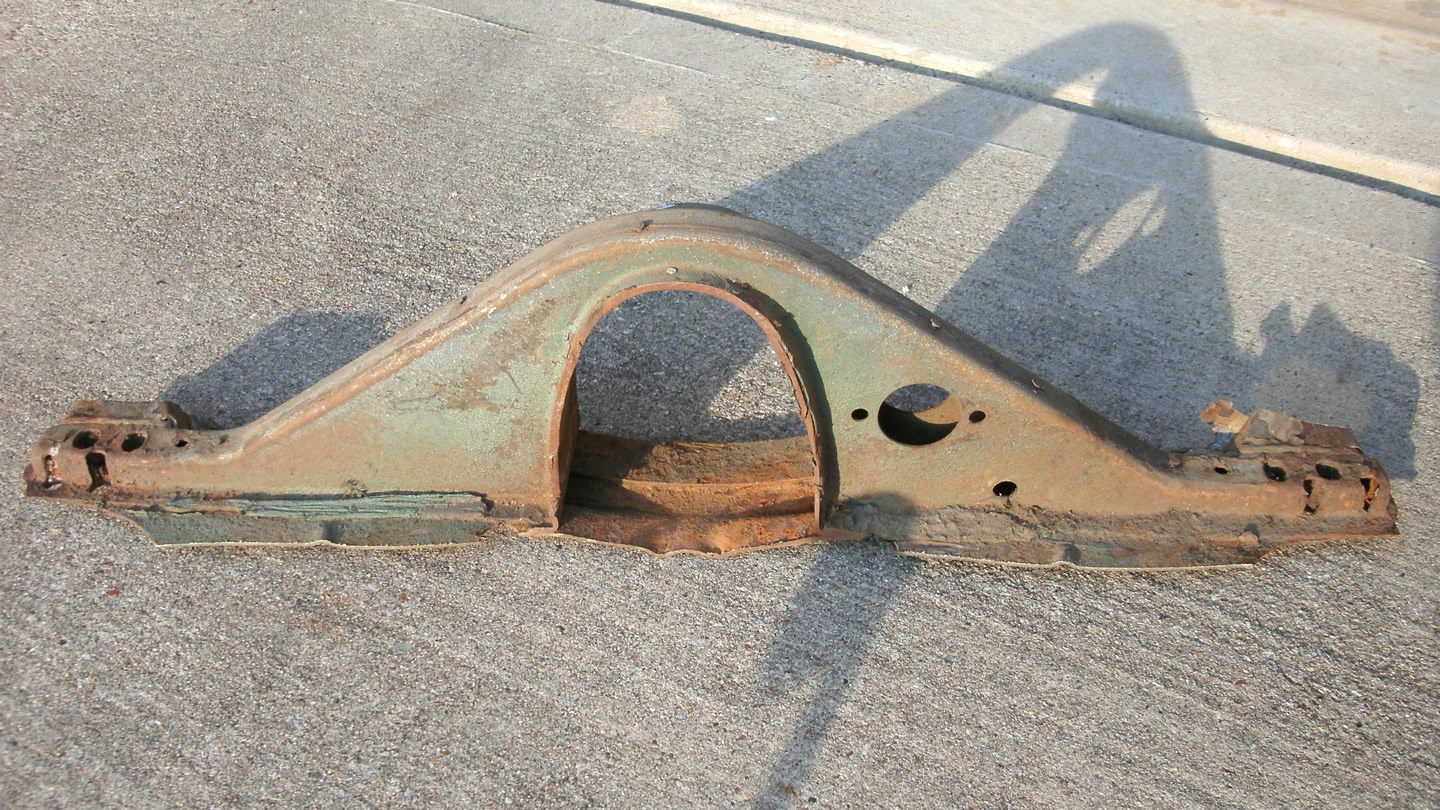
I just purchased a couple of key replacement parts for my Beetle. I purchased a donor front firewall and a donor Napoleon Hat (sometimes called a front chassis support panel). Fortunately, or unfortunately depending on how you look at it, there are people in California that cut up perfectly good cars for parts. In my case, it’s a good thing as it makes it possible to replace some hard-to-find parts and panels that either 3rd party suppliers don’t supply at all or the parts they do supply are for newer models that neither look the same nor fit the same as the originals. As far as I can tell with an initial inspection, these two parts are very close to the original parts on my car. The front firewall is labeled as being from a 1966 model which appears to be correct. It doesn’t have the holes in it for the choke cable or fuel tap lever, but has the stampings in it where the holes used to be punched out. I can just drill these out to the proper size and it should match the original panel. All the other stampings and dimensions appear to be the same as the original. The Napoleon hat appears to be a very close match to the original as well and a trial fit to the donor front firewall showed a very close fit. I won’t know for sure just how close a match they are until the extraneous pieces and panel remnants are removed and I can put them up next to the originals and also until I can take some comparative measurements.
Note: These donor parts do cost a little more than the currently available replacement panels, but are, in my opinion, superior in design, fit, and quality. A new Napoleon hat is available for around $30 and the donor part cost me $75. Likewise, a new front firewall is available for around $50 and the donor part was $100. I think the extra cost will be easily justified once they are in place. These two parts are important to the mating of the body and chassis and will provide a good reference point for the heater channels on the front end of the car. Currently, these parts on my car are rusted away on their outer ends and provide no reference points with panels mating to them like the heater channels.
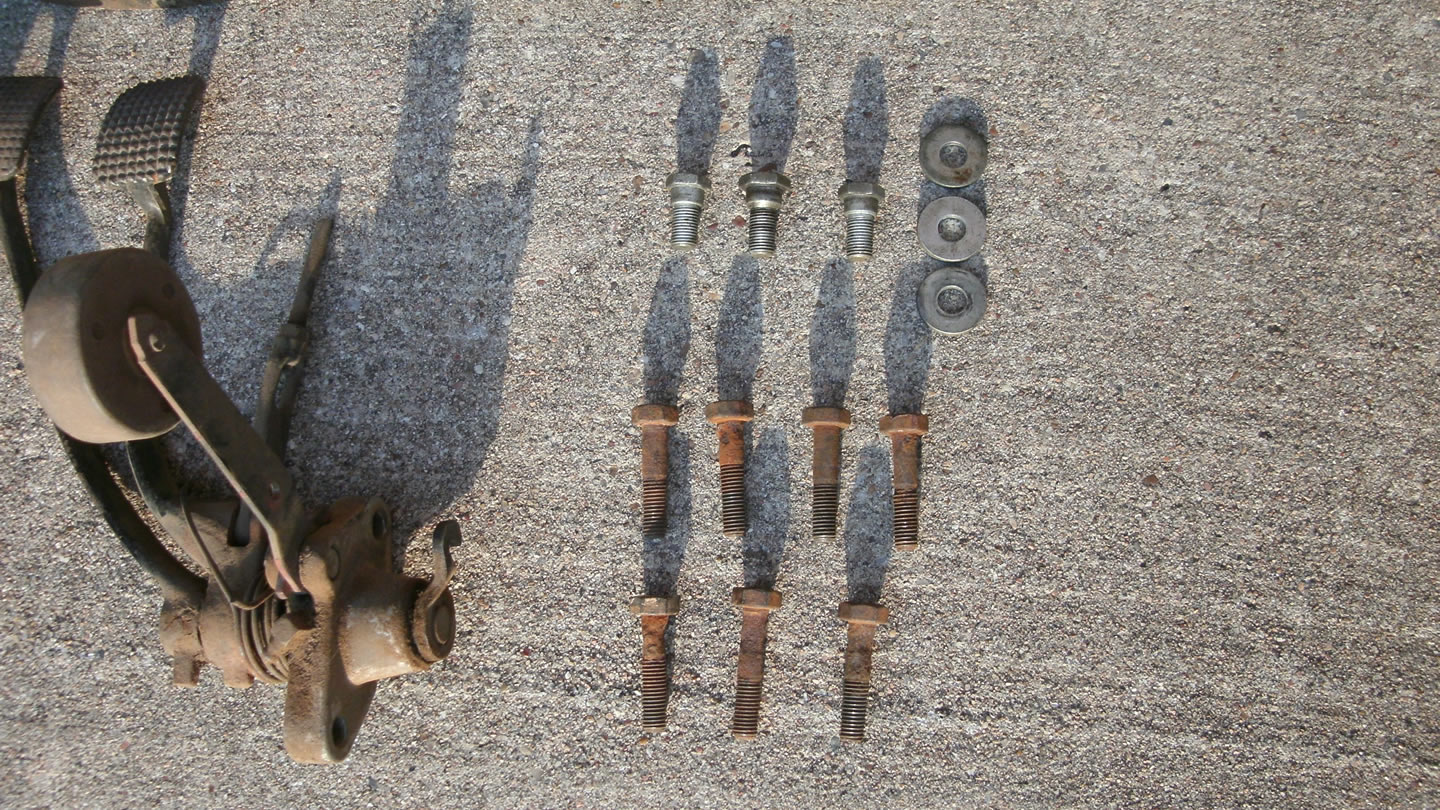
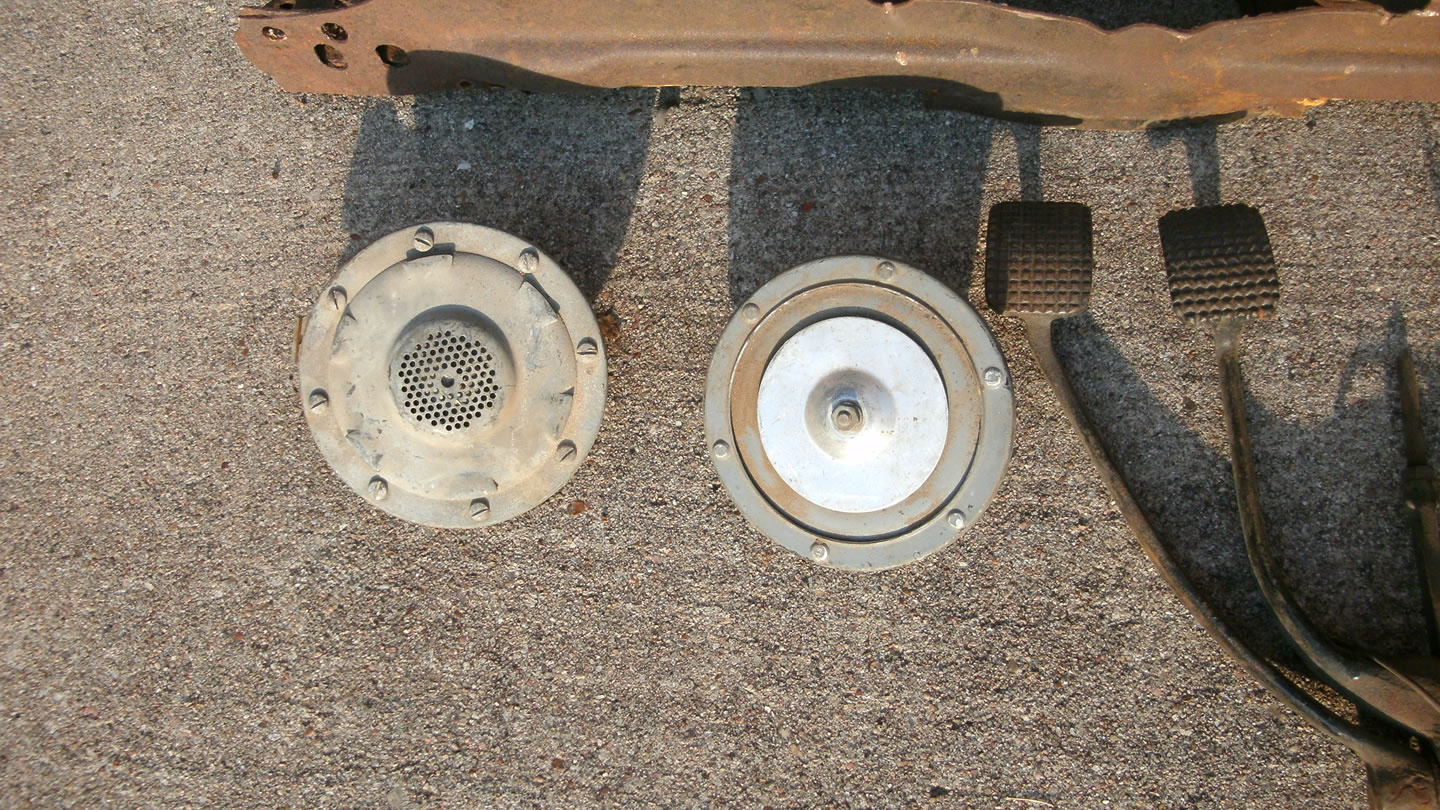
Along with the front firewall and Napoleon hat, I purchased a pedal cluster, 1 horn (he threw in an extra), 3 back seat bolts with washers, and 7 long 17mm bolts. All of the items together cost me $200 including shipping via Greyhound Package Express. As you can see, protective packaging is not my supplier’s forté. However, providing hard-to-find original parts with very little rust is. He wrapped the firewall and Napoleon hat together with stretch wrap as well as wrapping the horns together. They were all placed in a floor jack box with the pedal cluster and the bag of bolts. They seemed to make the journey here with little or no damage. Thanks Mike!
 |
 |
 |
 |
 |
 |
 |
 |
 |
 |
 |
 |
 |
 |
I’ve recently become very motivated to get started working on the restoration again, even if it is just little things here and there. I did some website work for one of the absolute best, if not the absolute best, classic VW restoration shops in the country and after looking at many years’ worth of their fantastic, top-notch work, it reminded me that I need to make progress, no matter how little it may be — every day, week, month, and year. I may not have the funds to buy all the replacement panels I need right away, but I can do something productive on it on a regular basis until I can. I’ve made a commitment to myself to get going and keep going.
Disassembling the Donor Napoleon Hat
by Garage Weasel on Jul.30, 2014, under Body Work
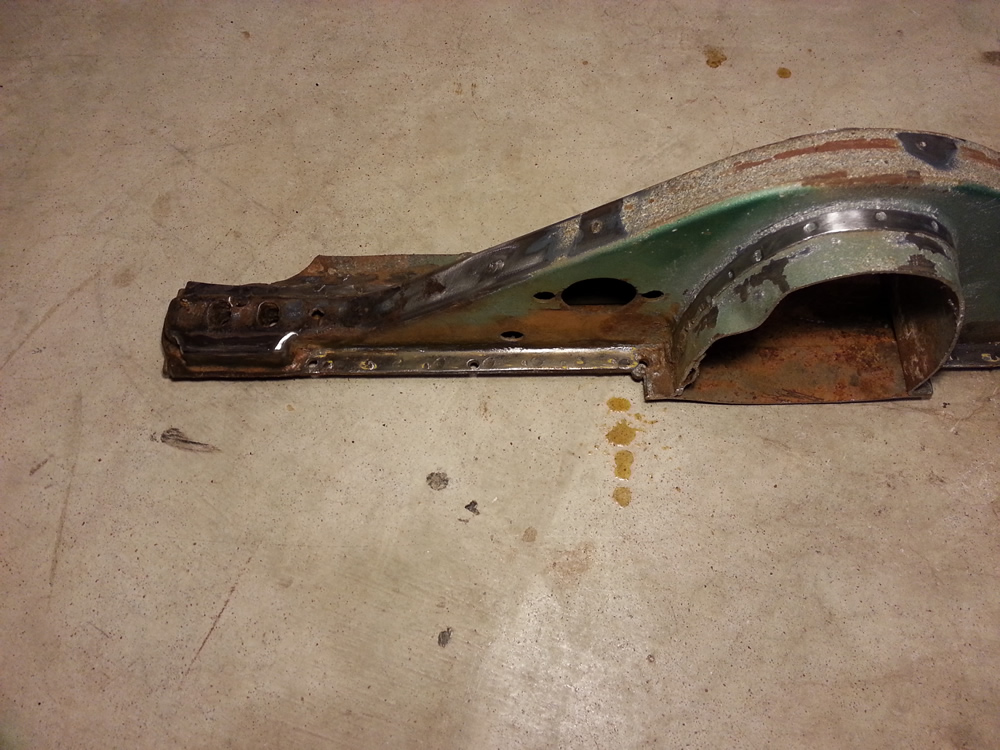
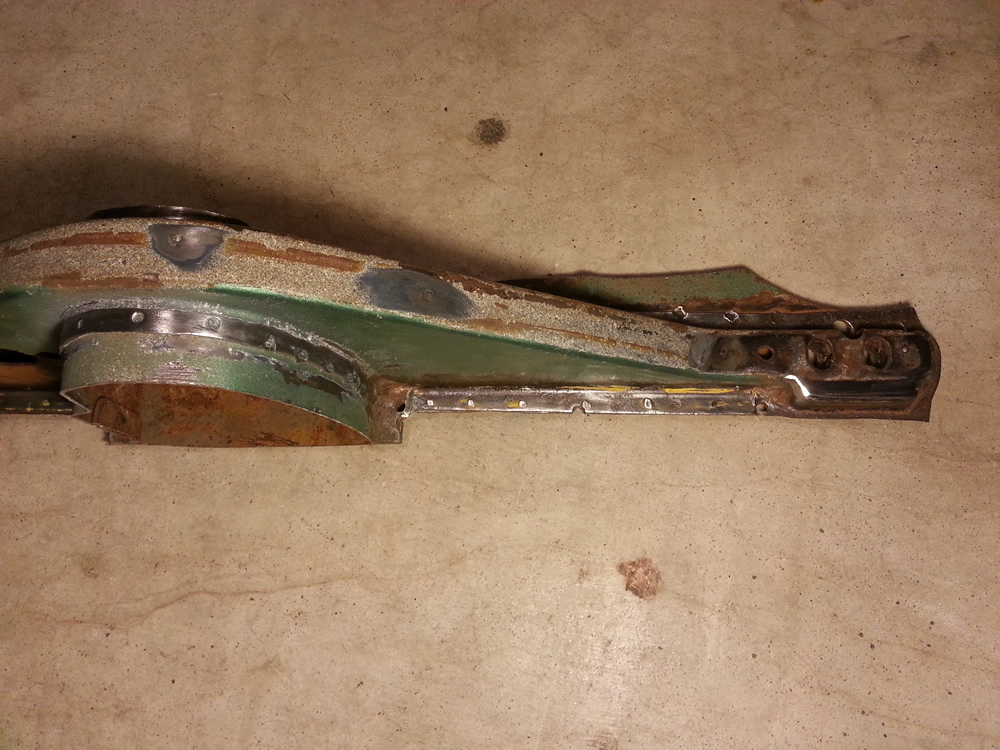
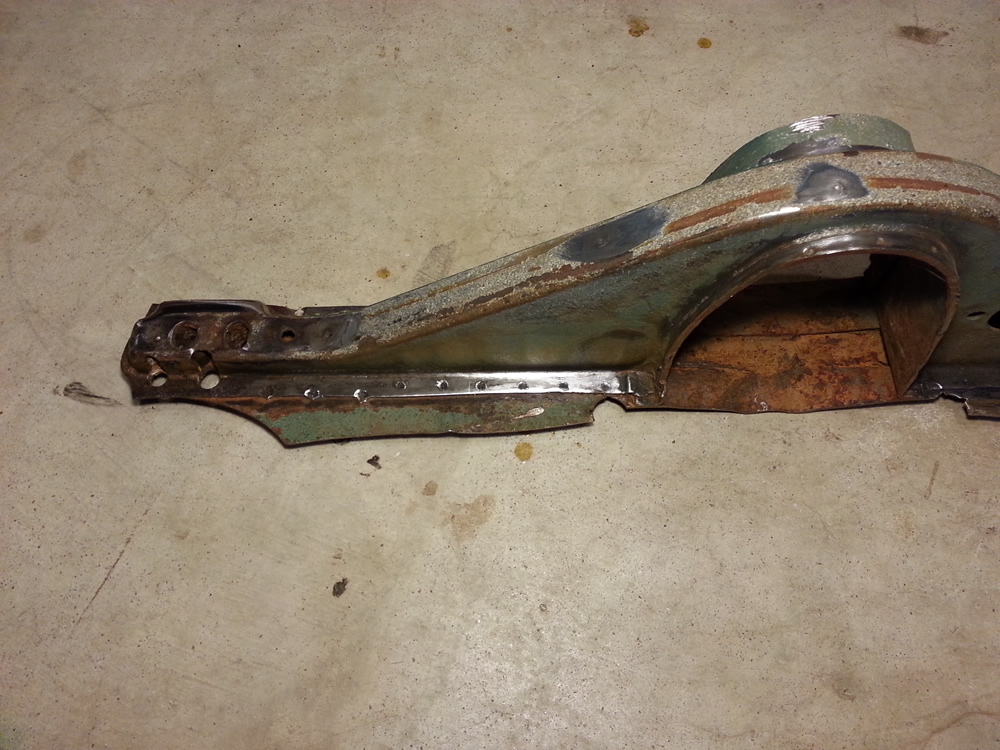
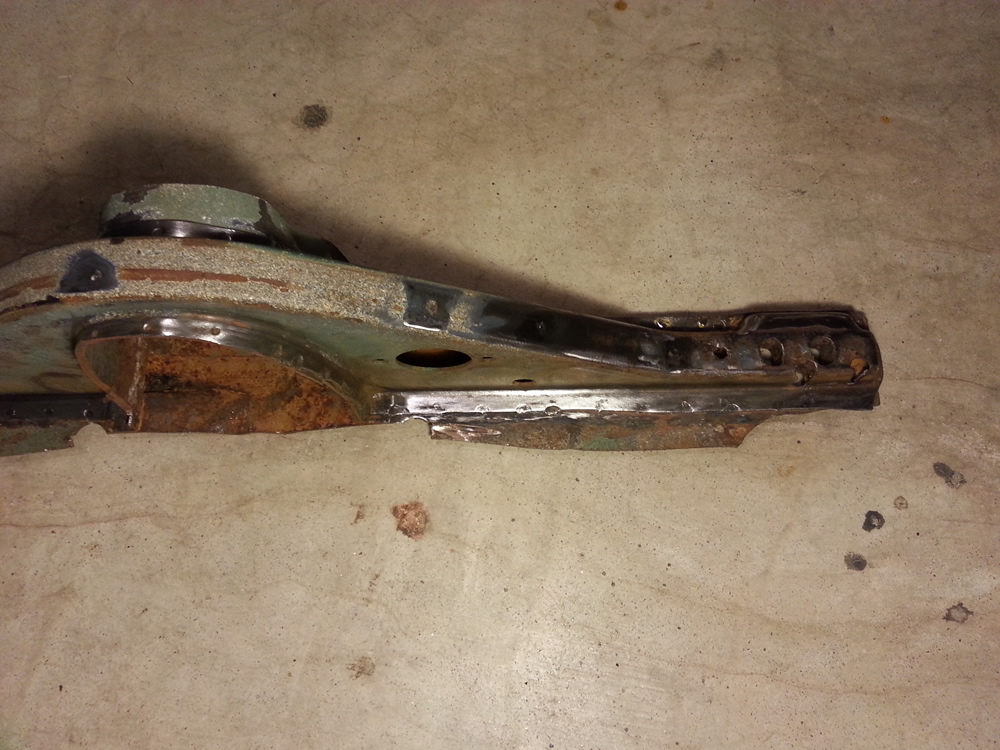
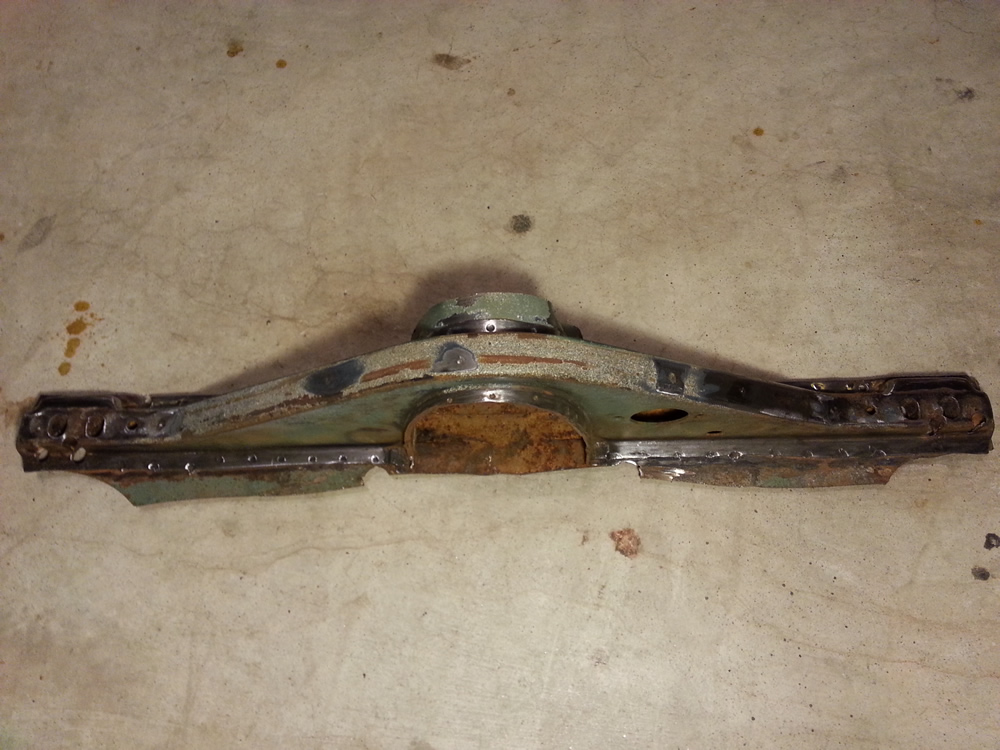
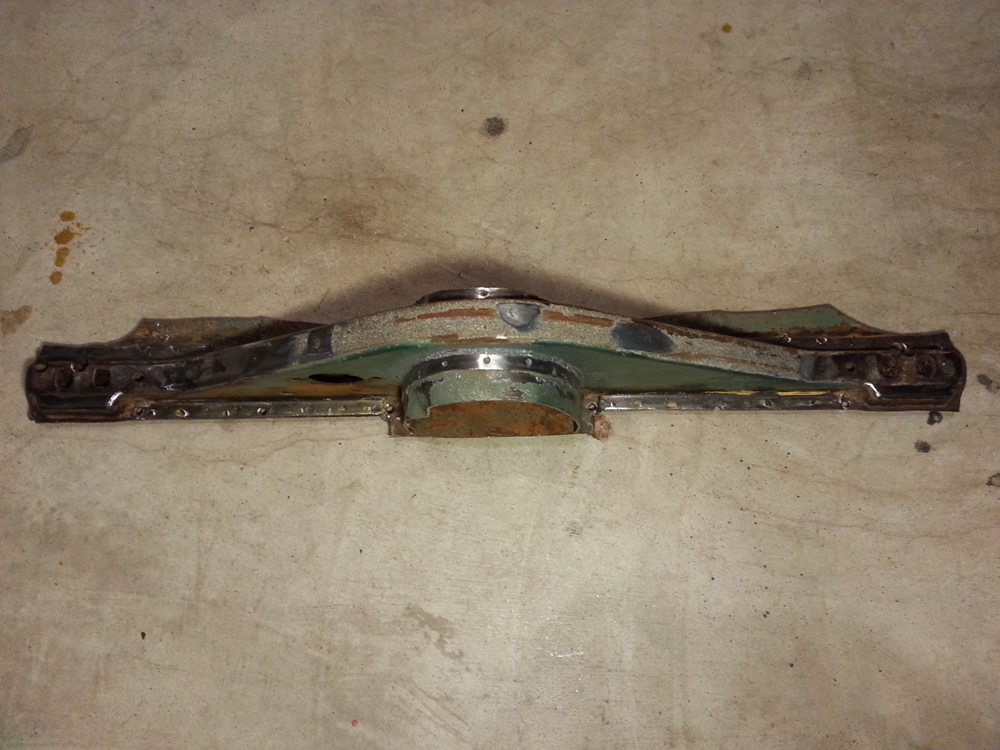
Since the Napoleon Hat on my car isn't worth saving or repairing, I decided to find a donor part. I contacted the guy that I purchsed my donor heater channels from an he said he had a chassis that he would be willing to cut up and remove the Napoleon Hat for me. He did a good job cutting through the tunnel on the floor pan side and left about an inch of the tunnel from the flange where they are welded together. However, on the frame head side, he cut most of the flange away on half of it. I'm sure it was more difficult cutting through with tunnel on that side with the frame head bottom plate in the way. I don't think it will be much of an issue just cutting that section of the flange out and welding in a patch. My intention is to do just that.
|
|
|
|
|
|
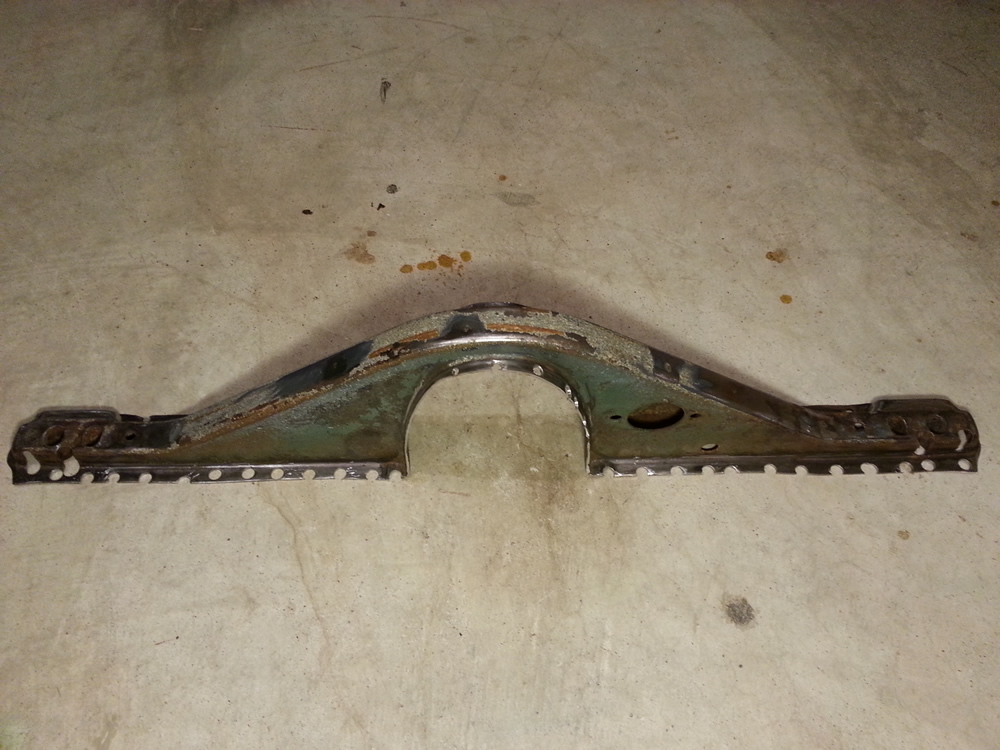
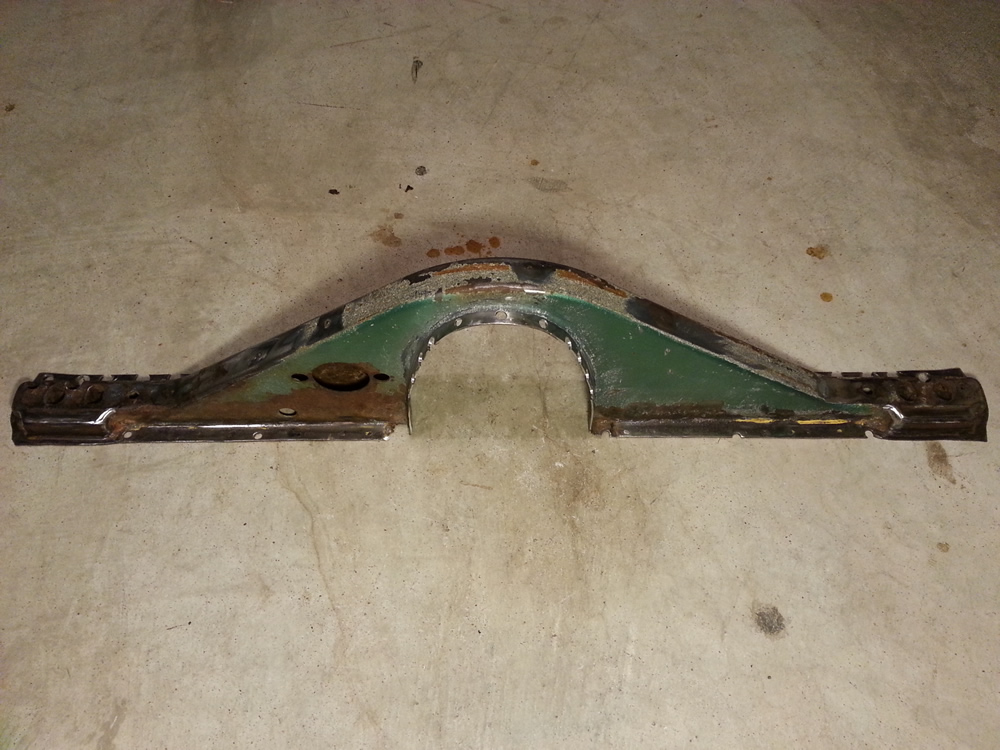
As far as drilling out the spot welds and removing the tunnel and bottom plate of the frame head, it was very difficult. On the tunnel flange, the spot welds were hard to find in some areas. The flange and tunnel are of thick metal and the welds didn't make much of an indentation into the metal, but the welds penetrated all the way through the metal and held fast. Also, with the metal being so thick, it was difficult to pull the pieces apart or get them to move at all until all of the welds were cut or ground through. I had to cut and remove pieces of the tunnel to make it easier. Still, it was a difficult task. Several welds on the bottom of the Napoleon Hat where it was welded to the bottom plate of the frame head were so close together that the weld penetration formed one large weld. It was difficult to get the weld separated without taking a big chunk of the bottom flange out with it.
|
|
|
|

|
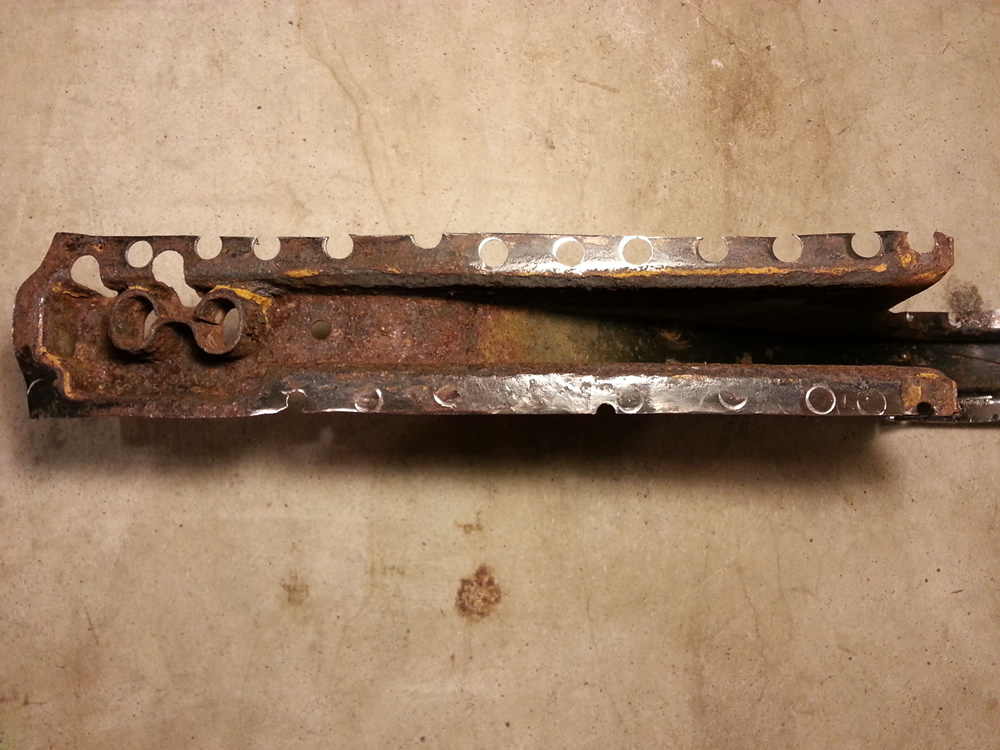
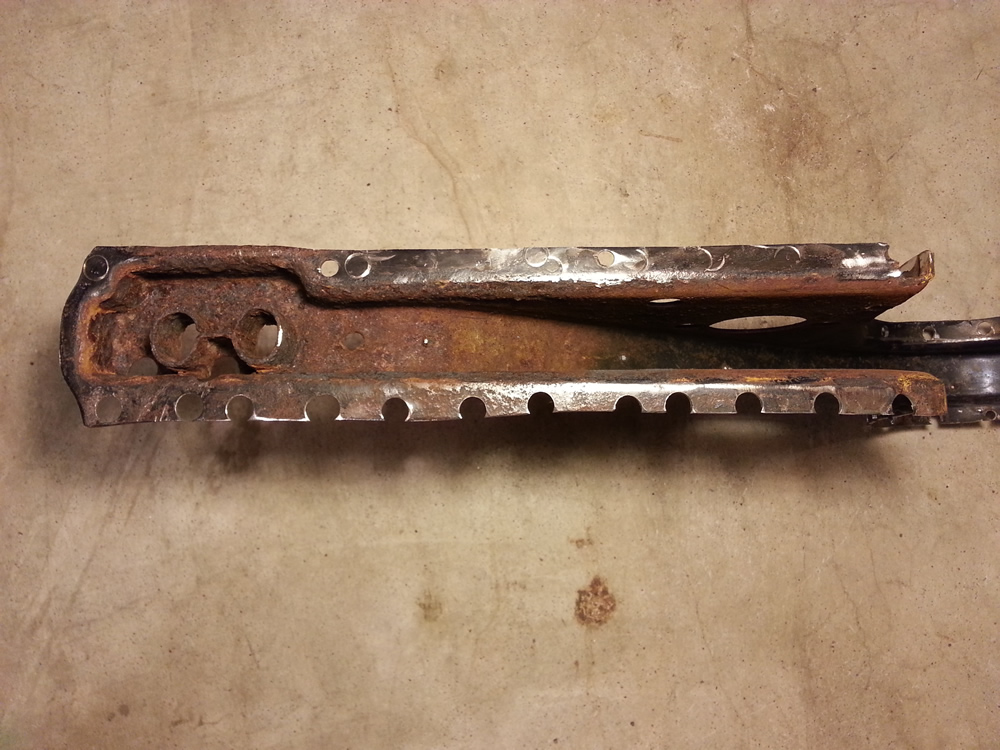
I'm not overly happy with this panel, to be honest. I think it is better than using a new reproduction panel as they don't fit well at all and have to be cut up and re-shaped, especially where it fits around the tunnel. But on the outer ends of the panel, someone drilled quite a few extra holes on both ends. I'm not quite sure why the extra holes were drilled through them or what that accomplished. They can be patched and filled, but there is also quite a bit of rust on the inside of them. I'll have to clean the whole panel up and see just how deep the rusts goes and if the structural integrity is compromised. It may be worth buying a new panel and chopping off the ends and grafting them on my donor panel. The shape and fit are still quite a bit different on the new panels, but I will try to repair the donor panel first and keep as much of the original metal as possible.
Disassembling The Donor Frame Head
by Garage Weasel on May.22, 2018, under Chassis
Well, to start, nothing about disassembling this frame head was easy. Especially if you are trying to preserve the parts to reuse them. It was constructed for structural strength and was not meant to be easy to take apart. Removing the spot welds isn't difficult, but just take a lot of work. The seam welds are another story. Separating the parts that are seam-welded almost always requires sacrificing one of the panels to cut them apart. I started out trying to preserve all the pieces, but finally decided to choose the pieces I wanted the most and do whatever I needed to do to make that as easy as possible. In this case, I really wanted the two lower sections on the sides of the frame head body where the bottom plate is mounted, the Napoleon hat, and as much of the tunnel as I could preserve. I really wanted to save the bottom plate as well, but it was just too difficult to separate it from everything else with all of the seam welds. And although it looked in really good condition from the outside, the bottom plate had deep pits in it where it was covered by the Napoleon hat, the tunnel, and frame head body. I think that the aftermarket bottom plate I purchased will be just as strong as this one considering all of the rust damage. Anyway, I didn't really have a choice in the end and made the sacrifice. Overall, I am really happy with the condition of the parts that were saved. The Napoleon hat is in better shape than the other donor one I purchased and I plan to use some parts of the tunnel section and the lower frame head body sections as well.
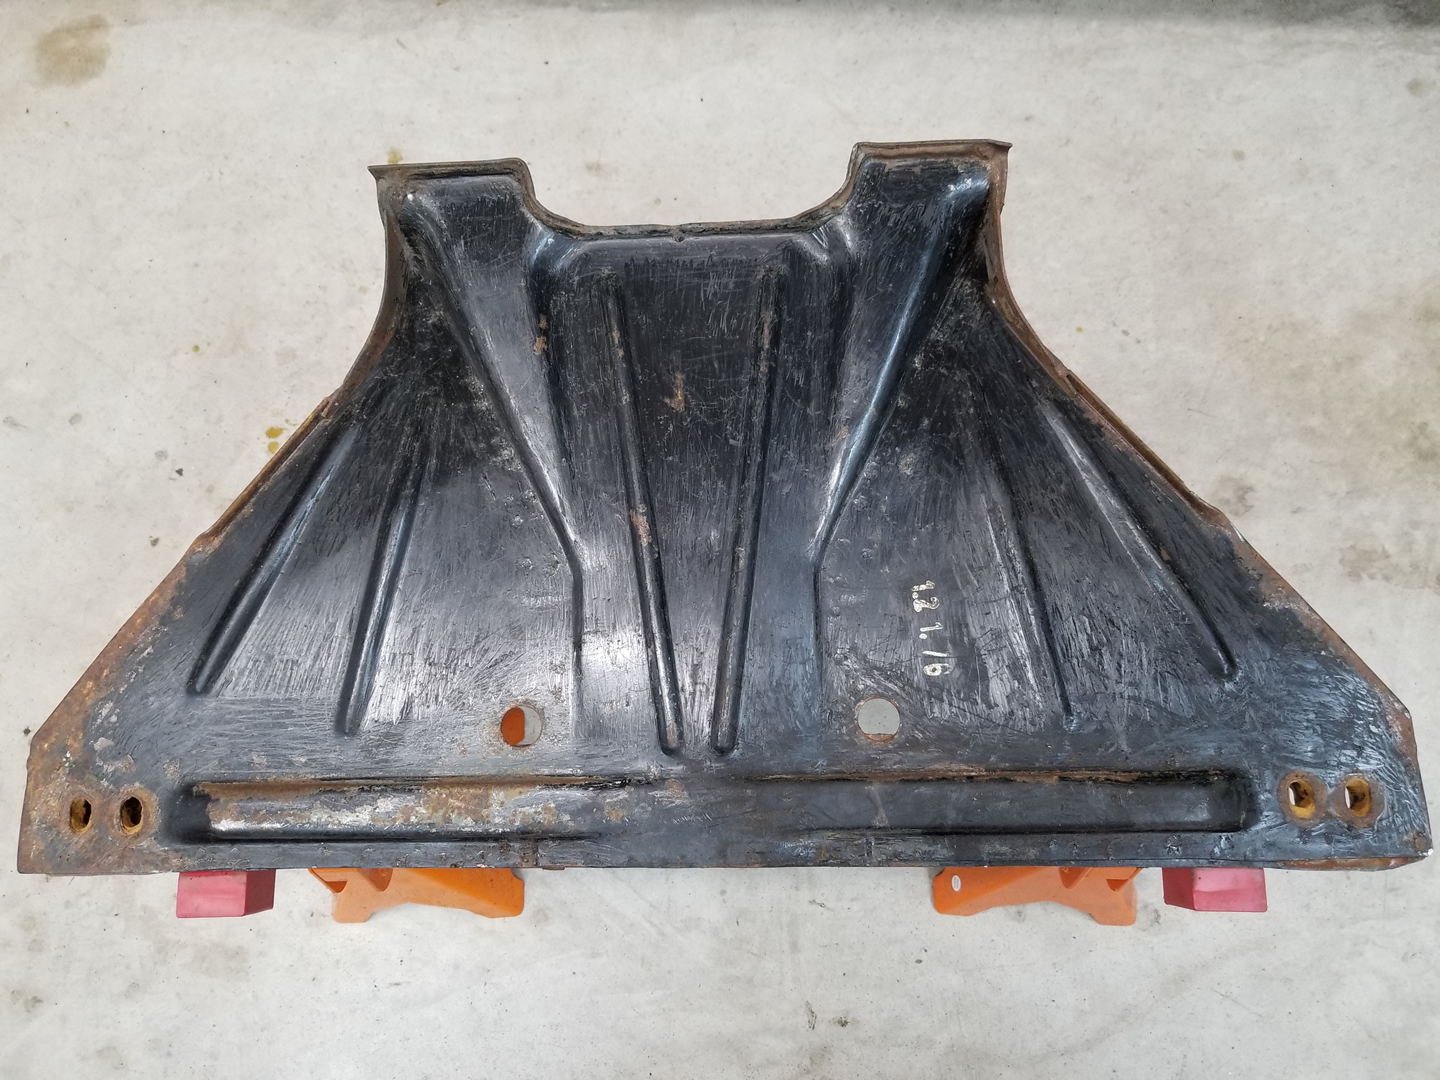
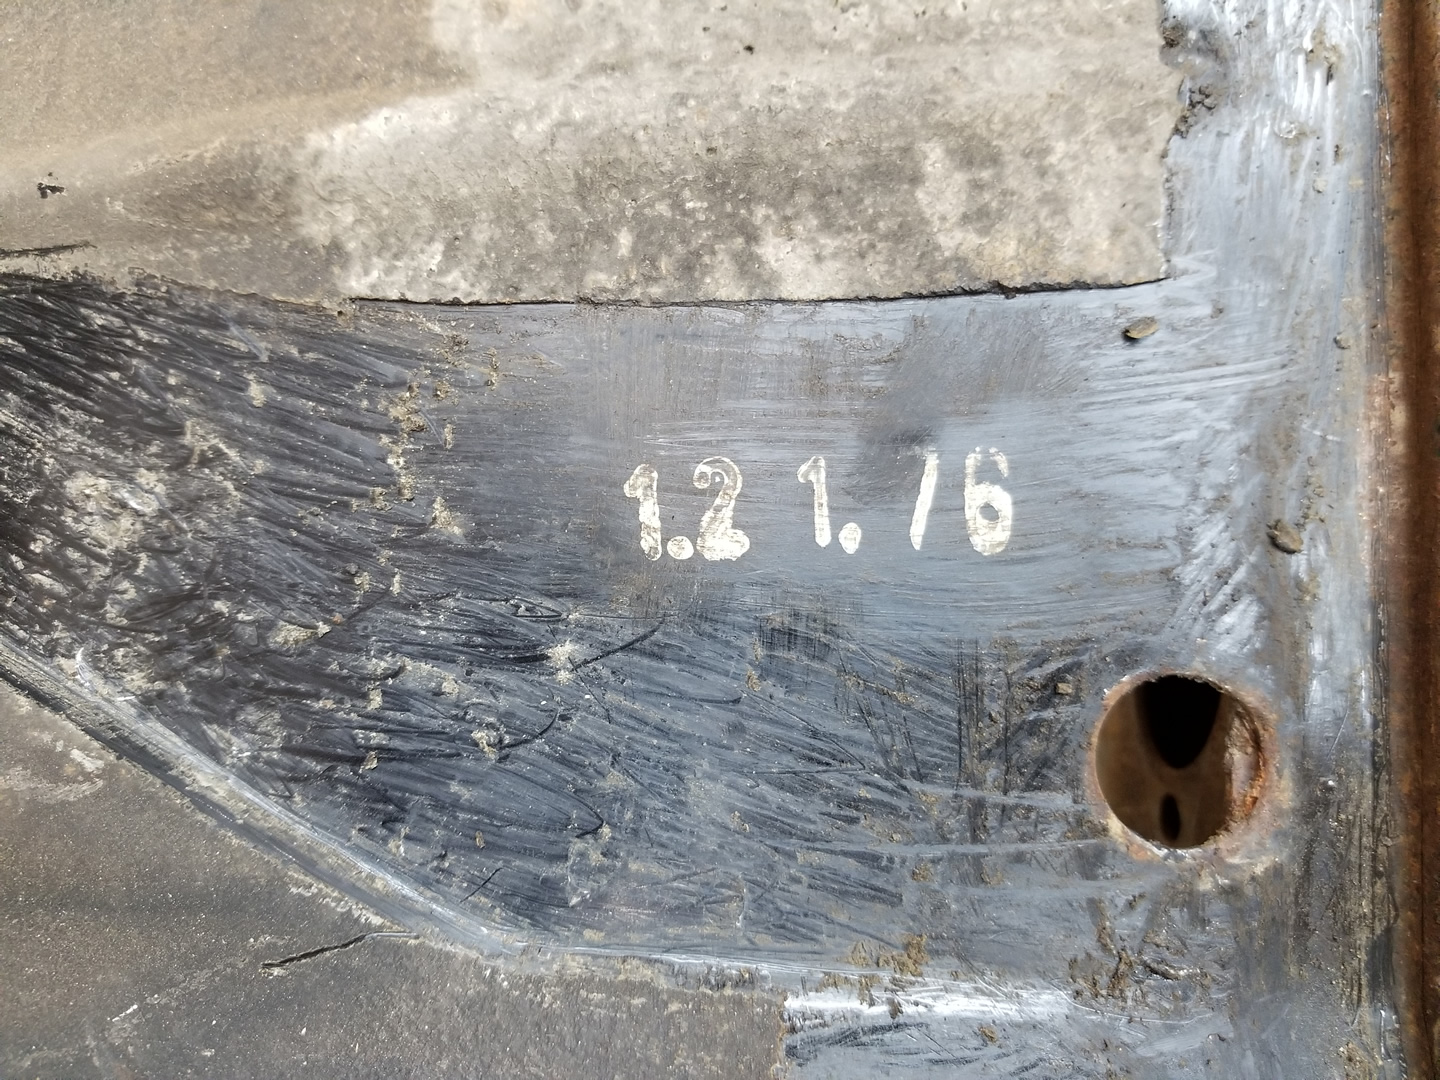
First, I carefully removed the undercoating on the bottom plate. Like I said, it appeared to be in really good condition from this side of the plate. I was really hopeful at that point that it would be the same on the other side, even though I could see some pitting through the tunnel opening. I uncovered what I think is a date printed on it of 1.21.76. I'm not sure that is the case here as the frame head was reported to be from a 1965 model.
|
|
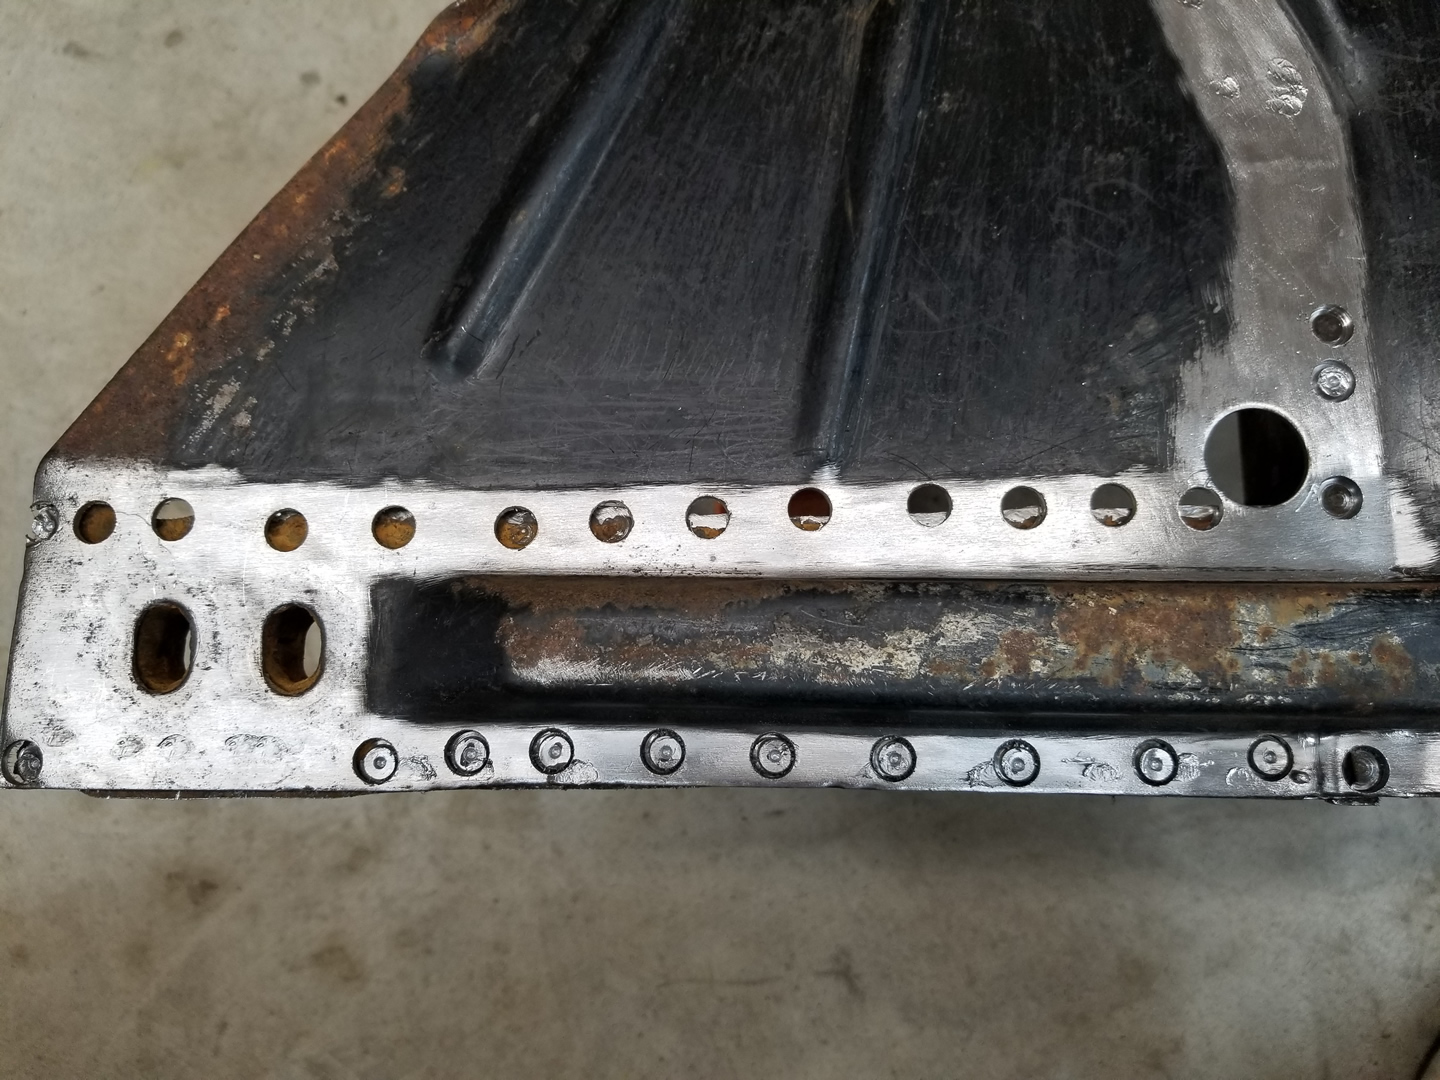
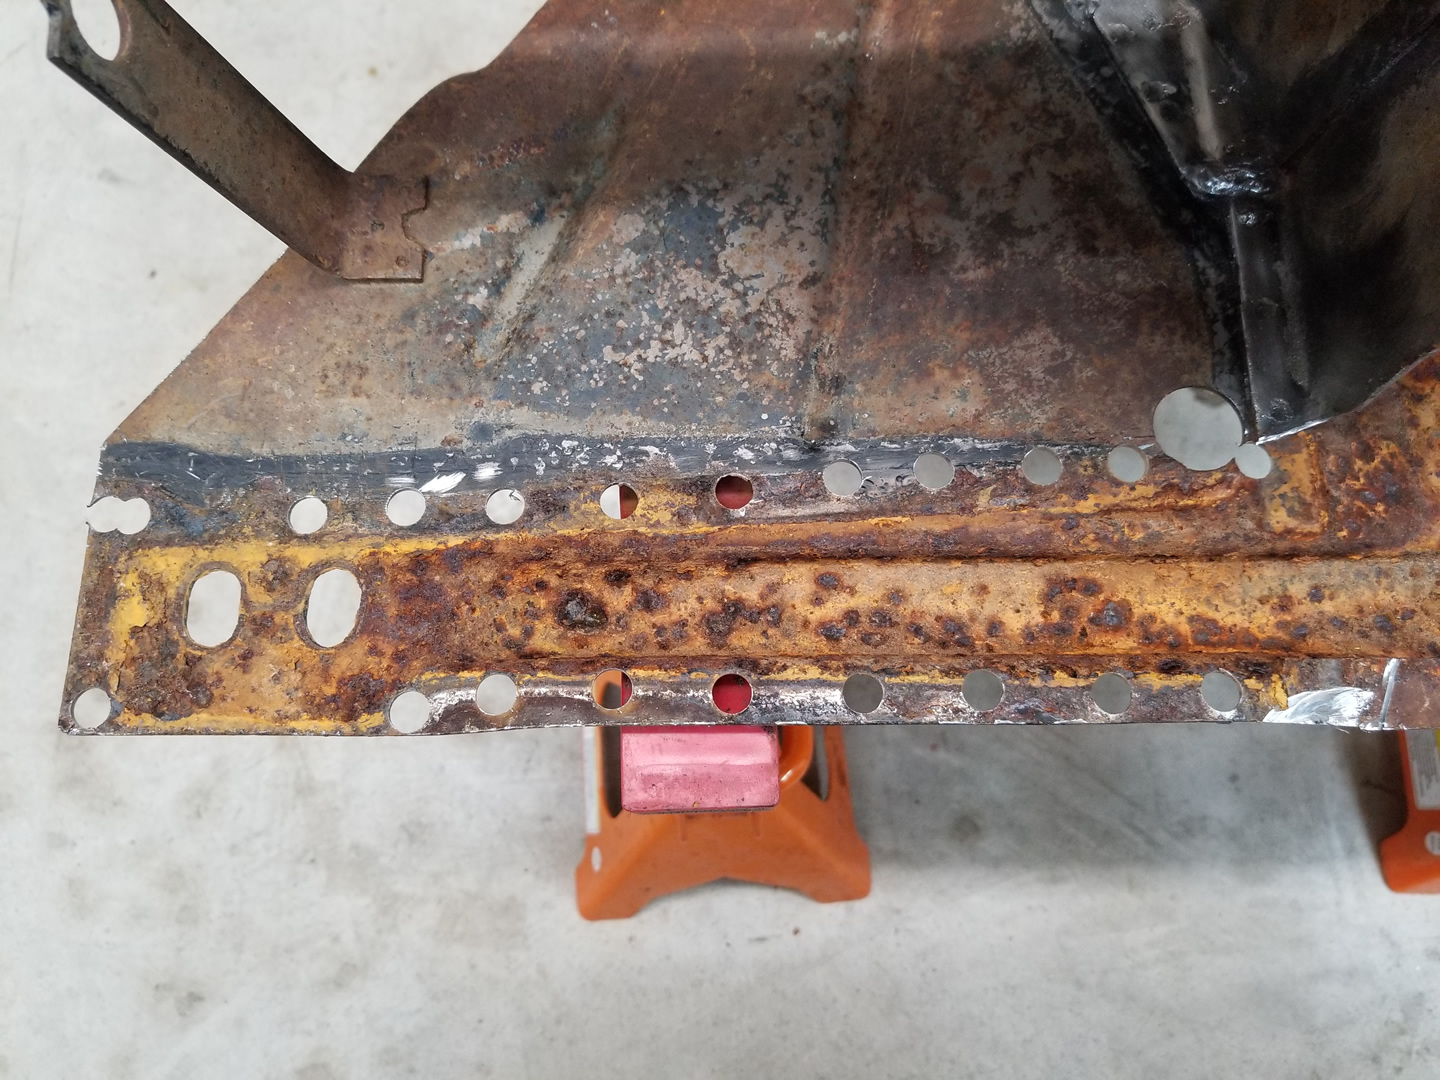
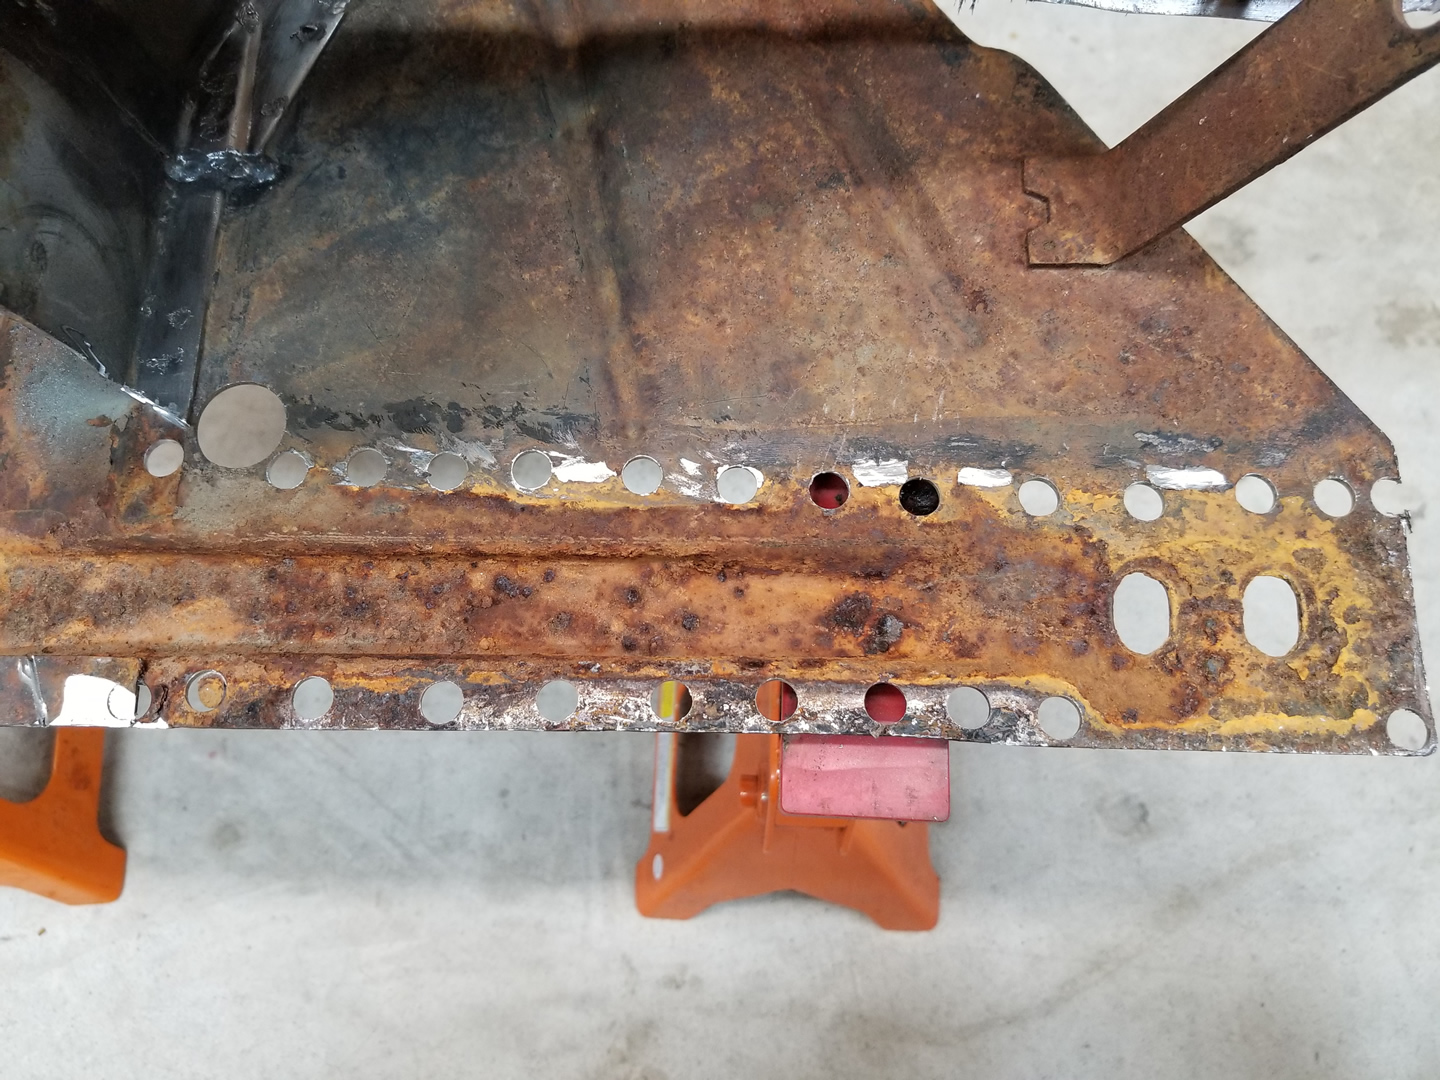
Next, I used a wire wheel to remove the paint and expose the spot welds. I also marked the ones that I wanted to drill out with a marker. Just like on the tunnel, there are two different types of spot welds on the area where the floor pans were attached. The smooth, even welds are the ones that actually penetrated and bonded the Napoleon hat to the bottom plate and the raised, uneven welds were done at a lower voltage and only bond the floor pans to the upper side of the Napoleon hat. Again, I learned that the hard way.
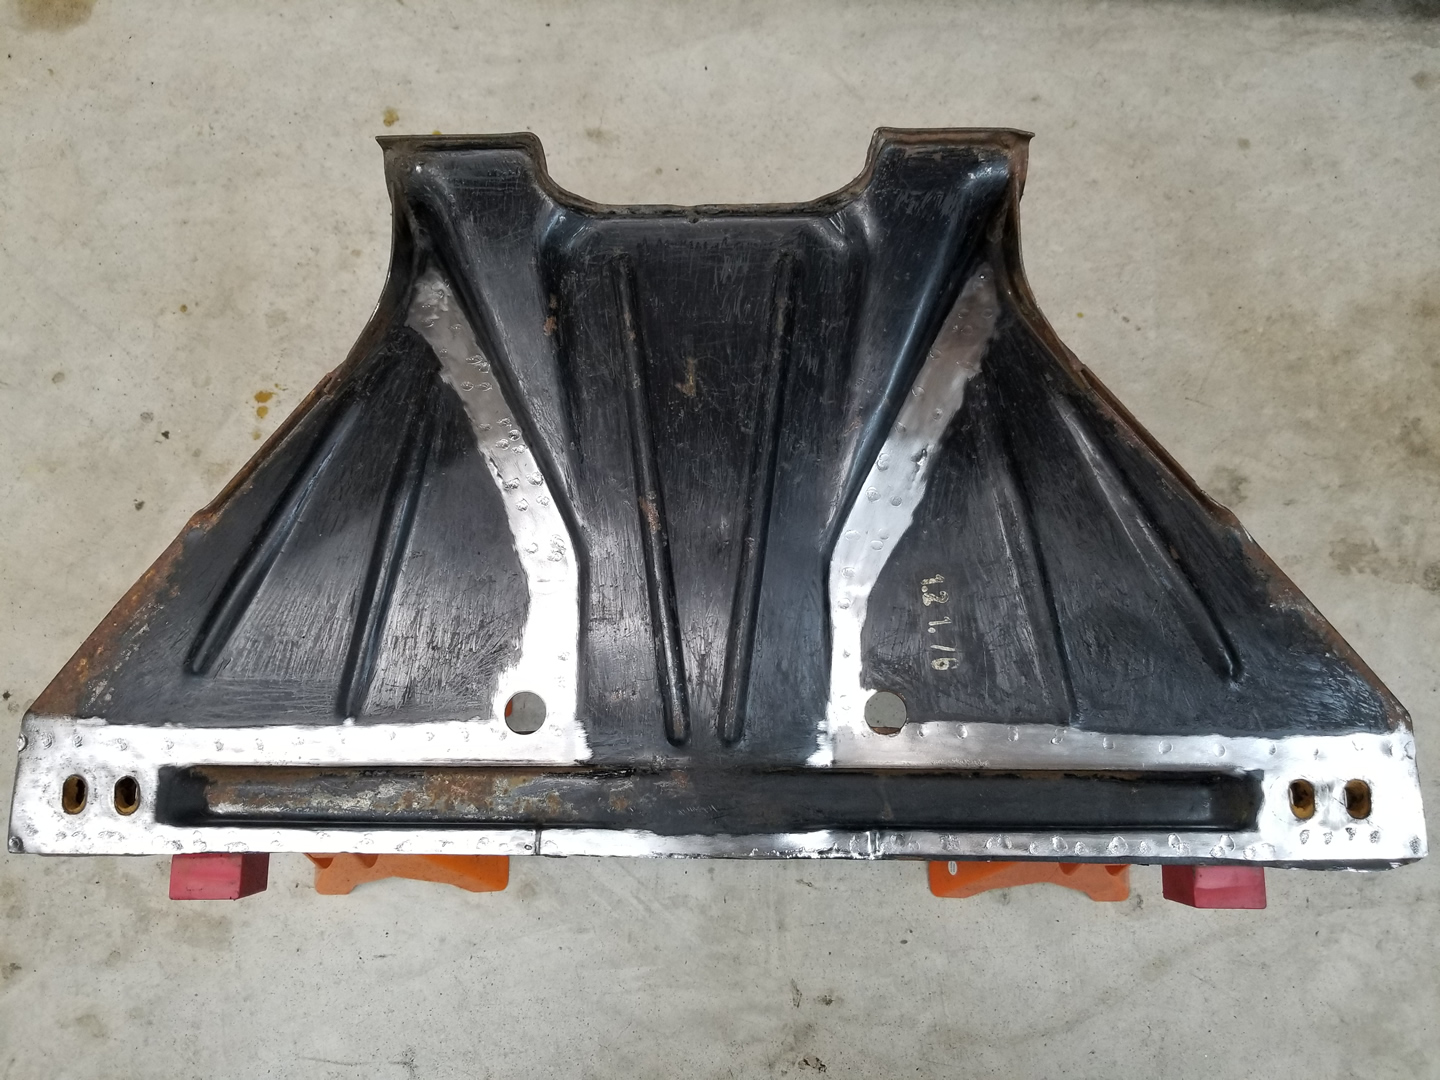
|
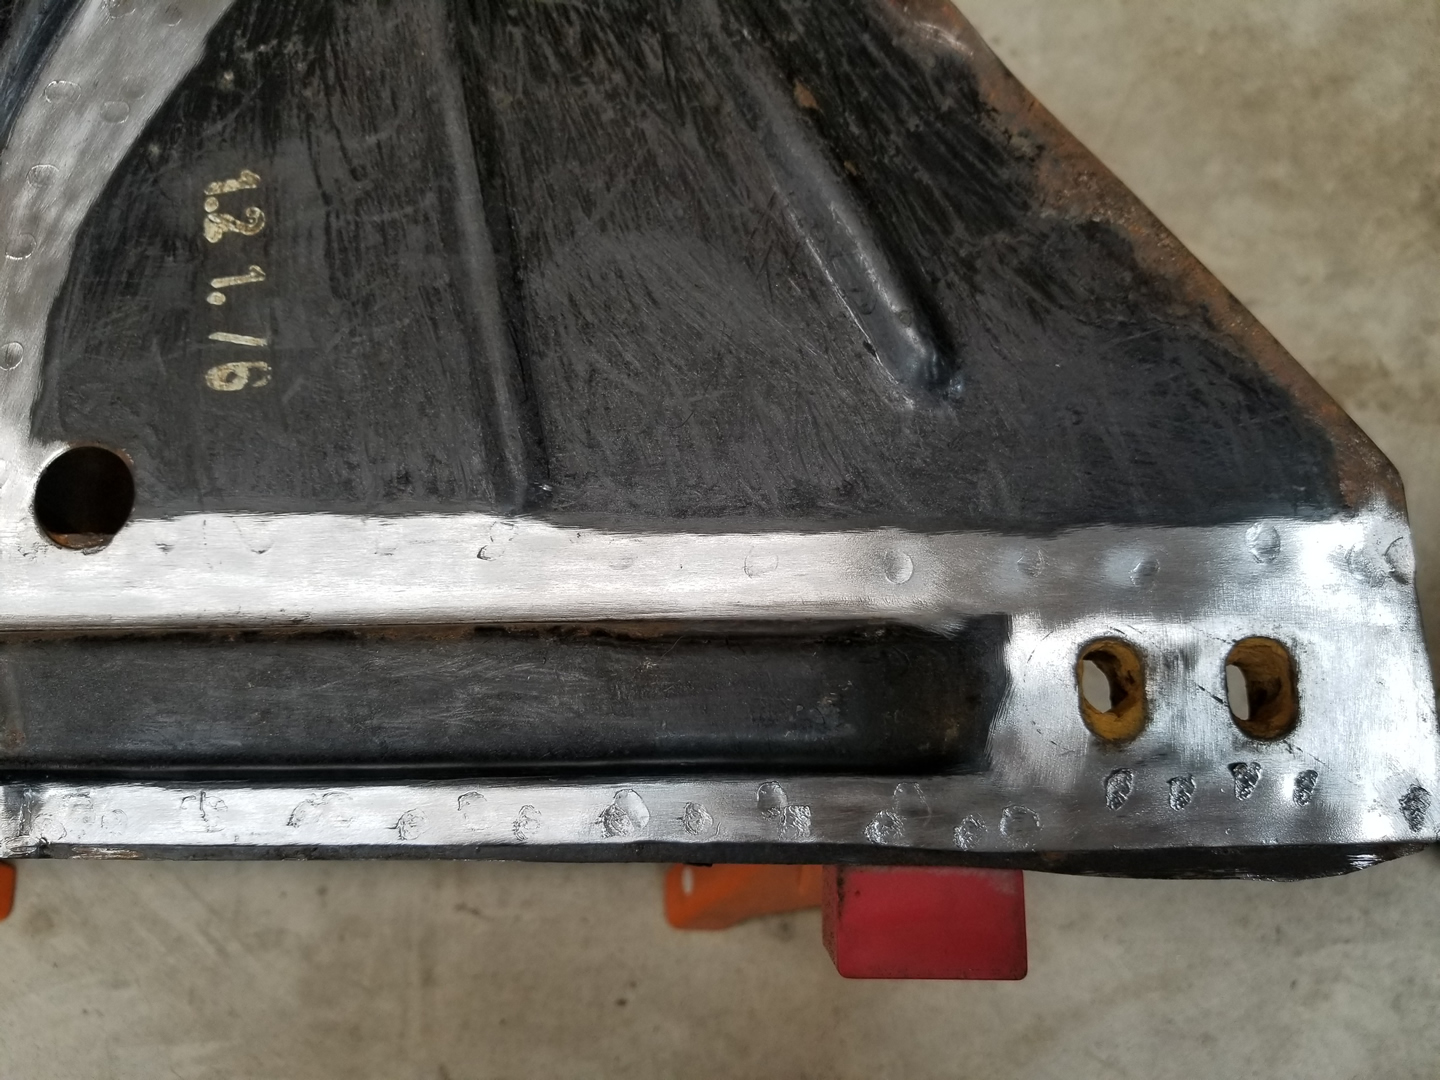
|
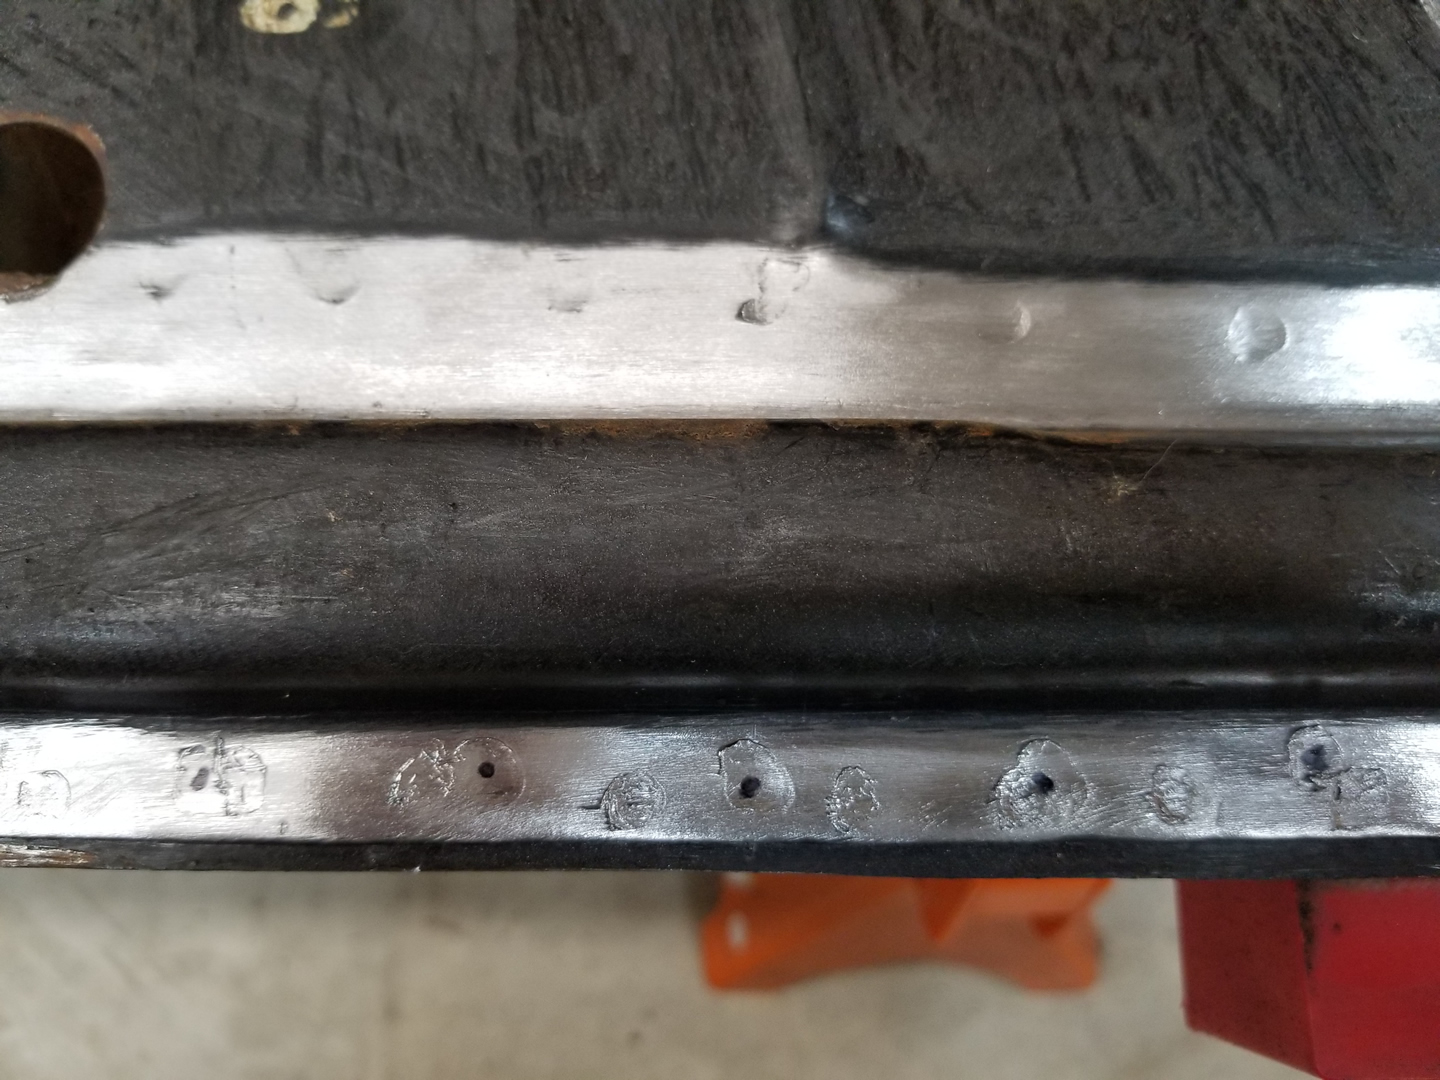
|
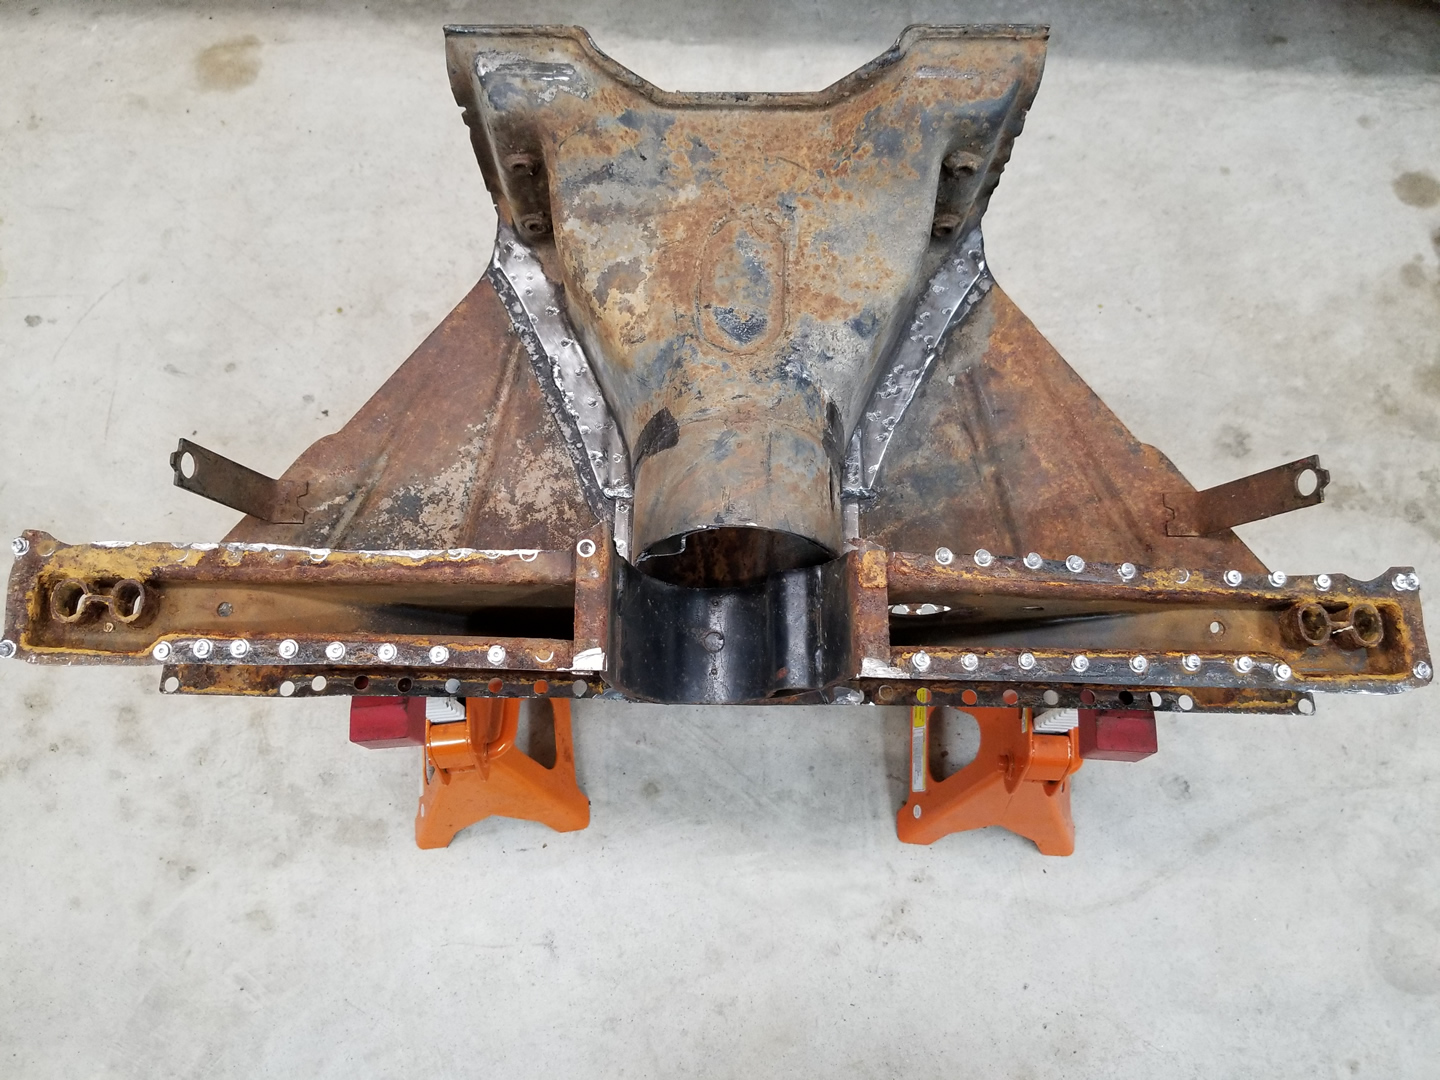
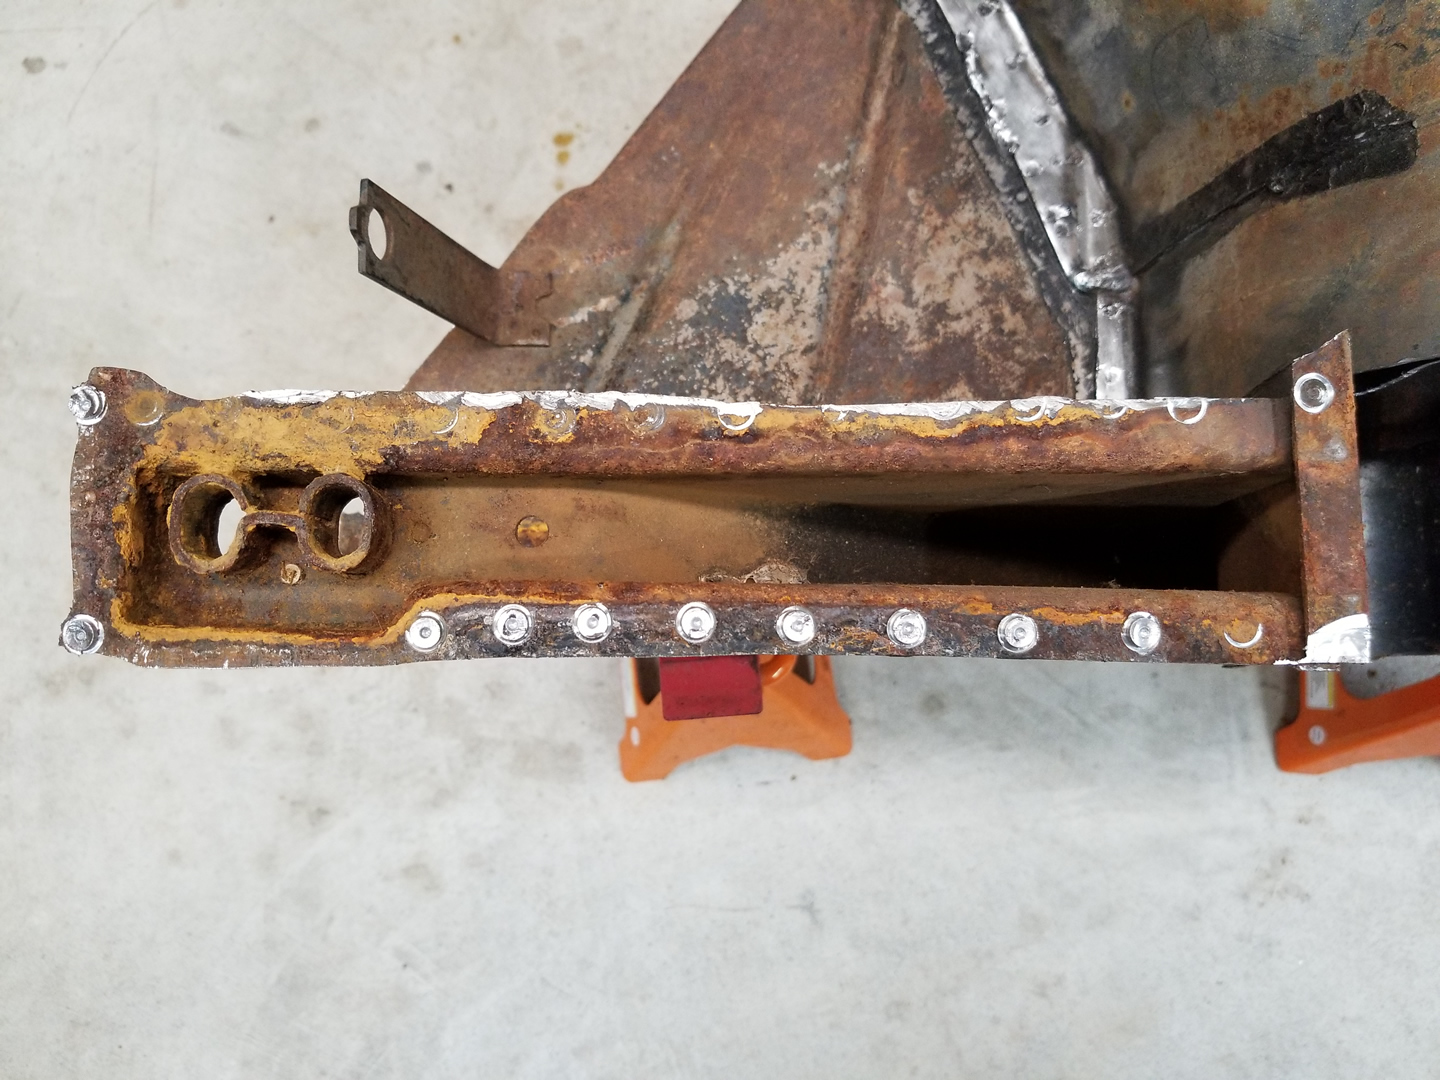
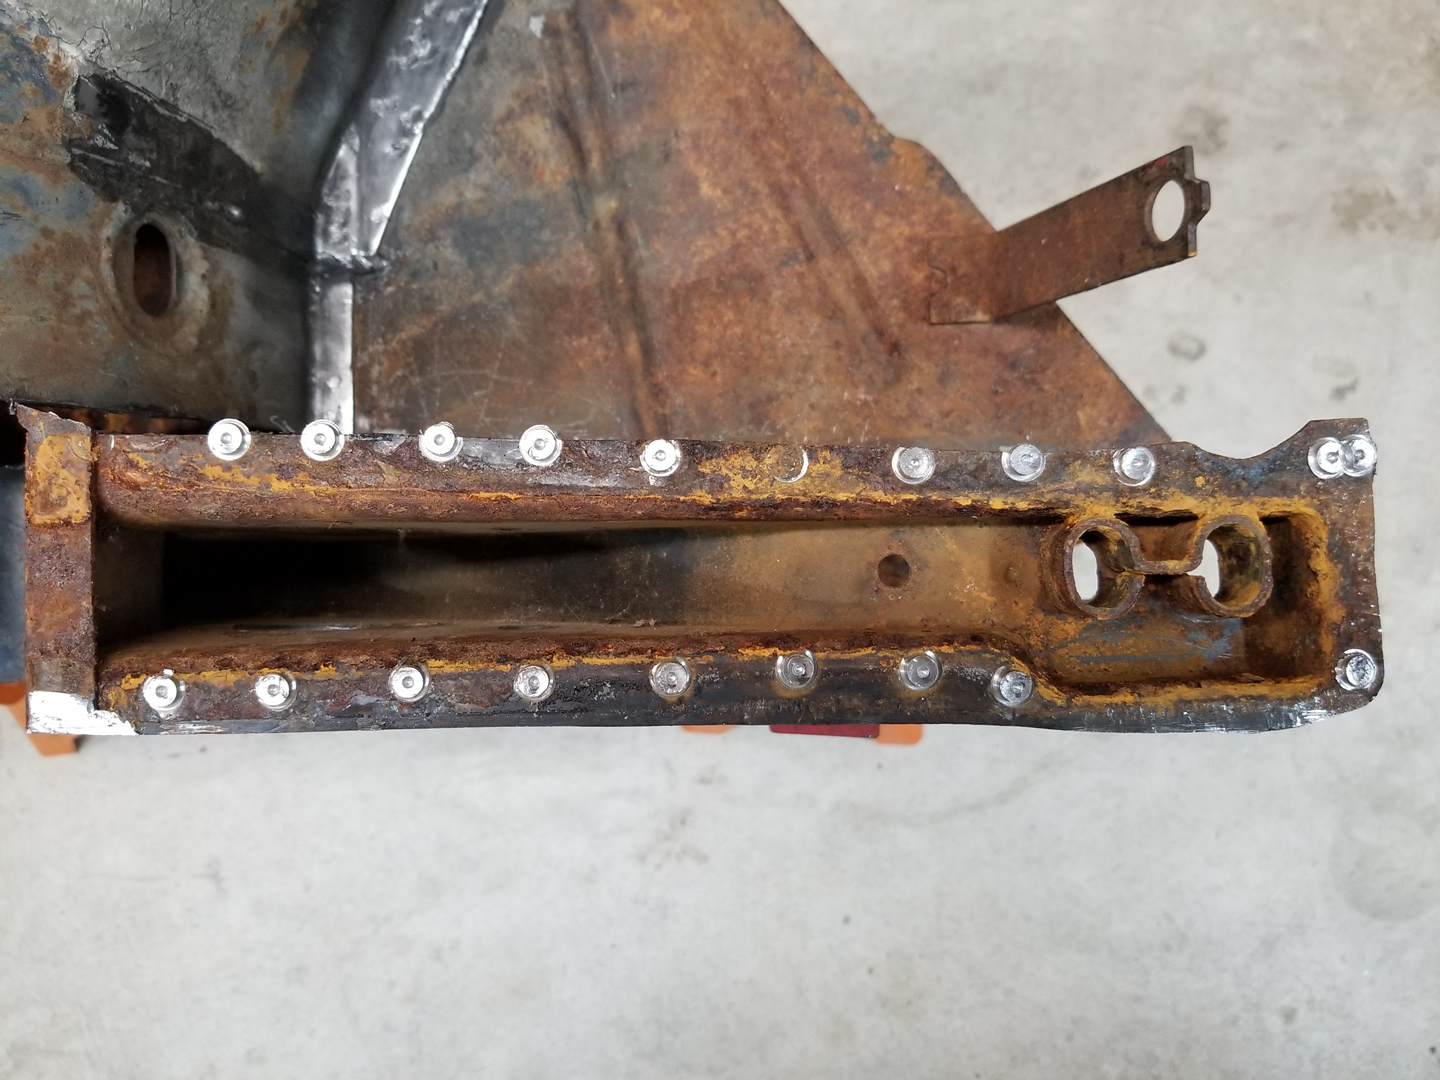
I then drilled out the spot welds that attach the Napoleon hat to the bottom plate. The hardest areas to separate were where it was seam-welded together. On one side of the Napoleon hat, almost none of the spot welds penetrated because there was too much space between it and the bottom plate. They apparently seam-welded it in that area to compensate. Because of that space, I was able to get a thin cut-off wheel between them and cut through the welds. With the Napoleon hat heavily seam-welded to the tunnel, I just cut through the tunnel so that I could remove it. With the Napoleon hat off, I was both pleased with the condition of the inside of it and not so pleased with the heavy pitting in the matching area of the bottom plate. Apparently, a lot of water was able to get inside the frame head over the years.
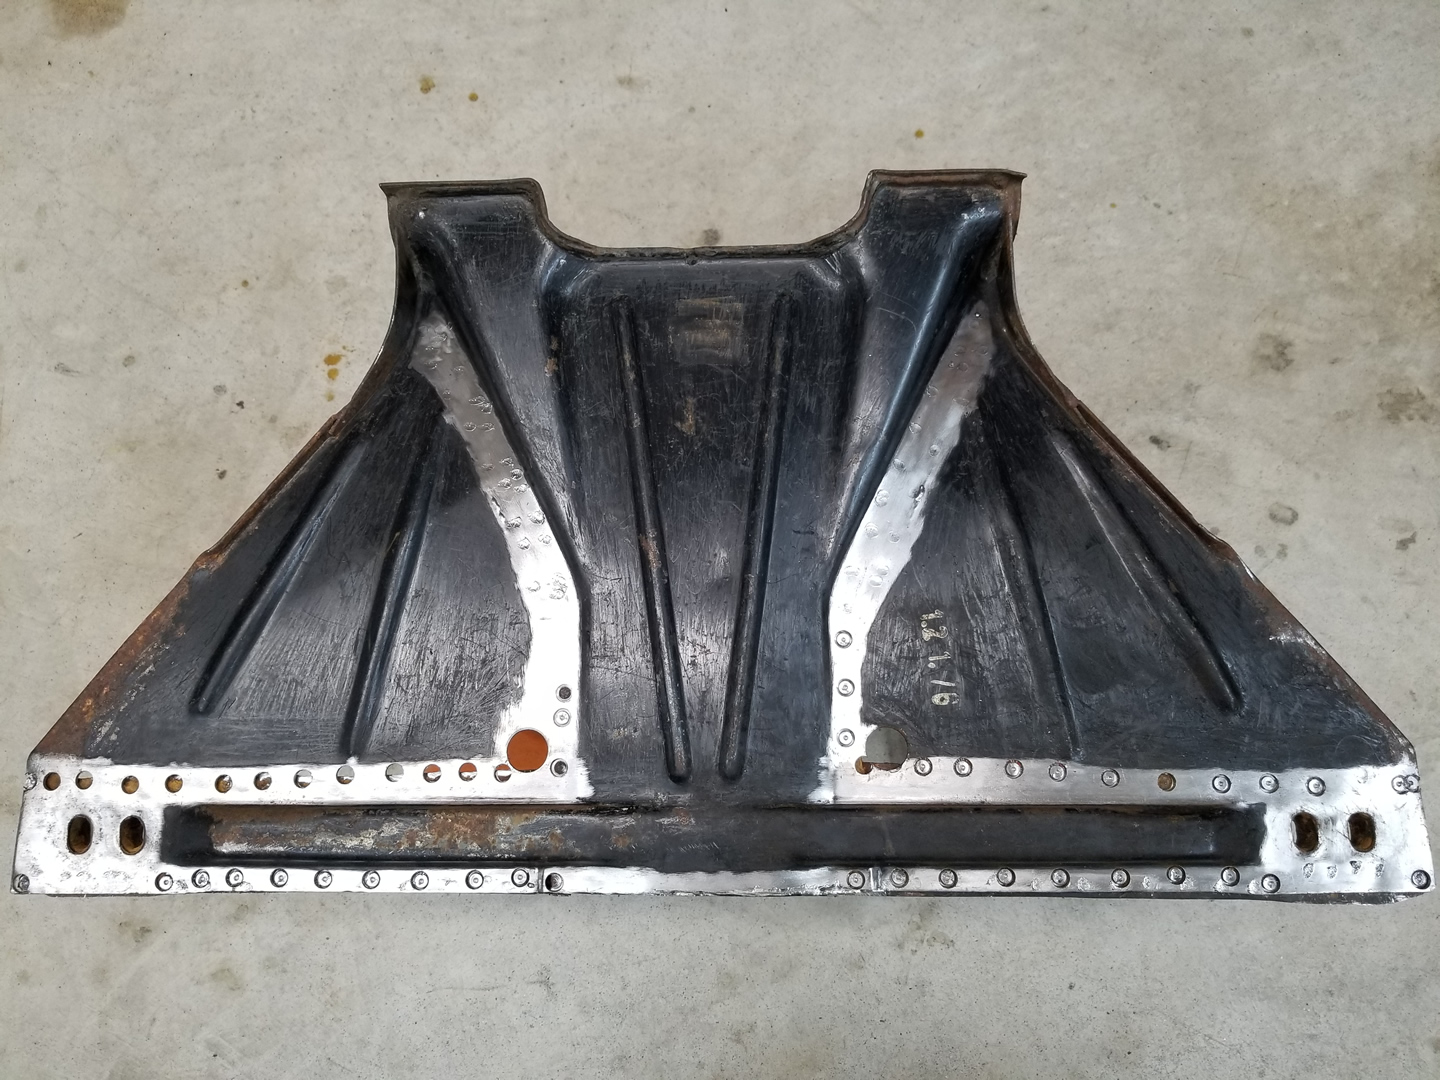
|
|

|
|

|
|
|
|
|
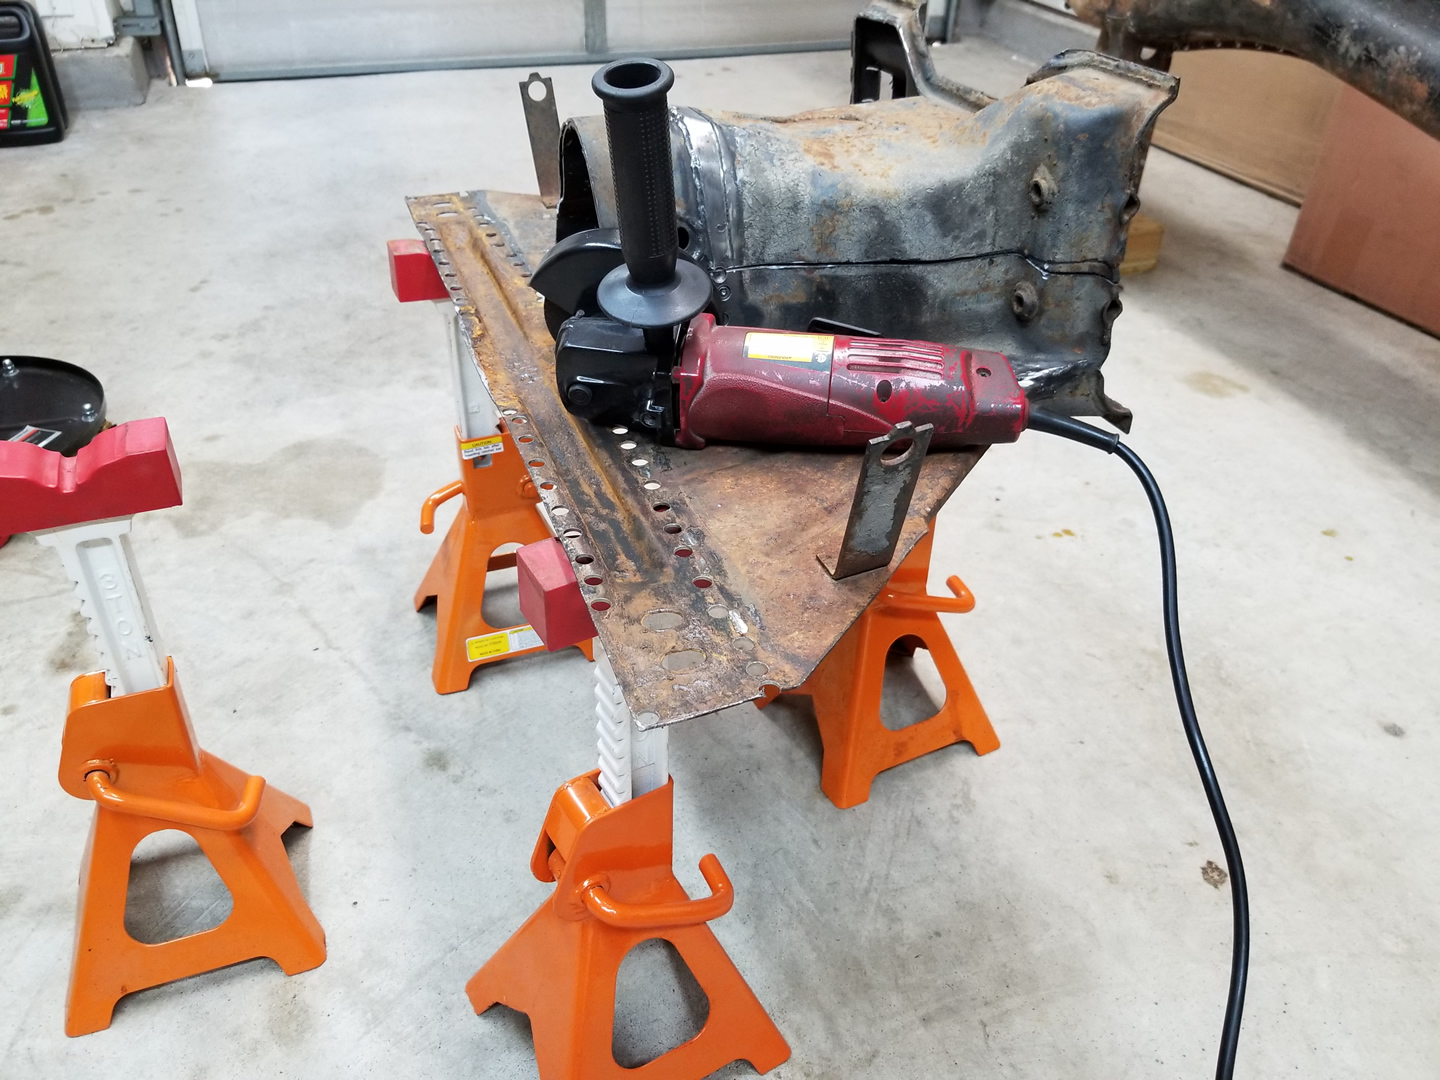
By the way, I found that my jack stands worked great for supporting the frame head while I was working on it. The rubber pads grip it and keep it from moving around.
|
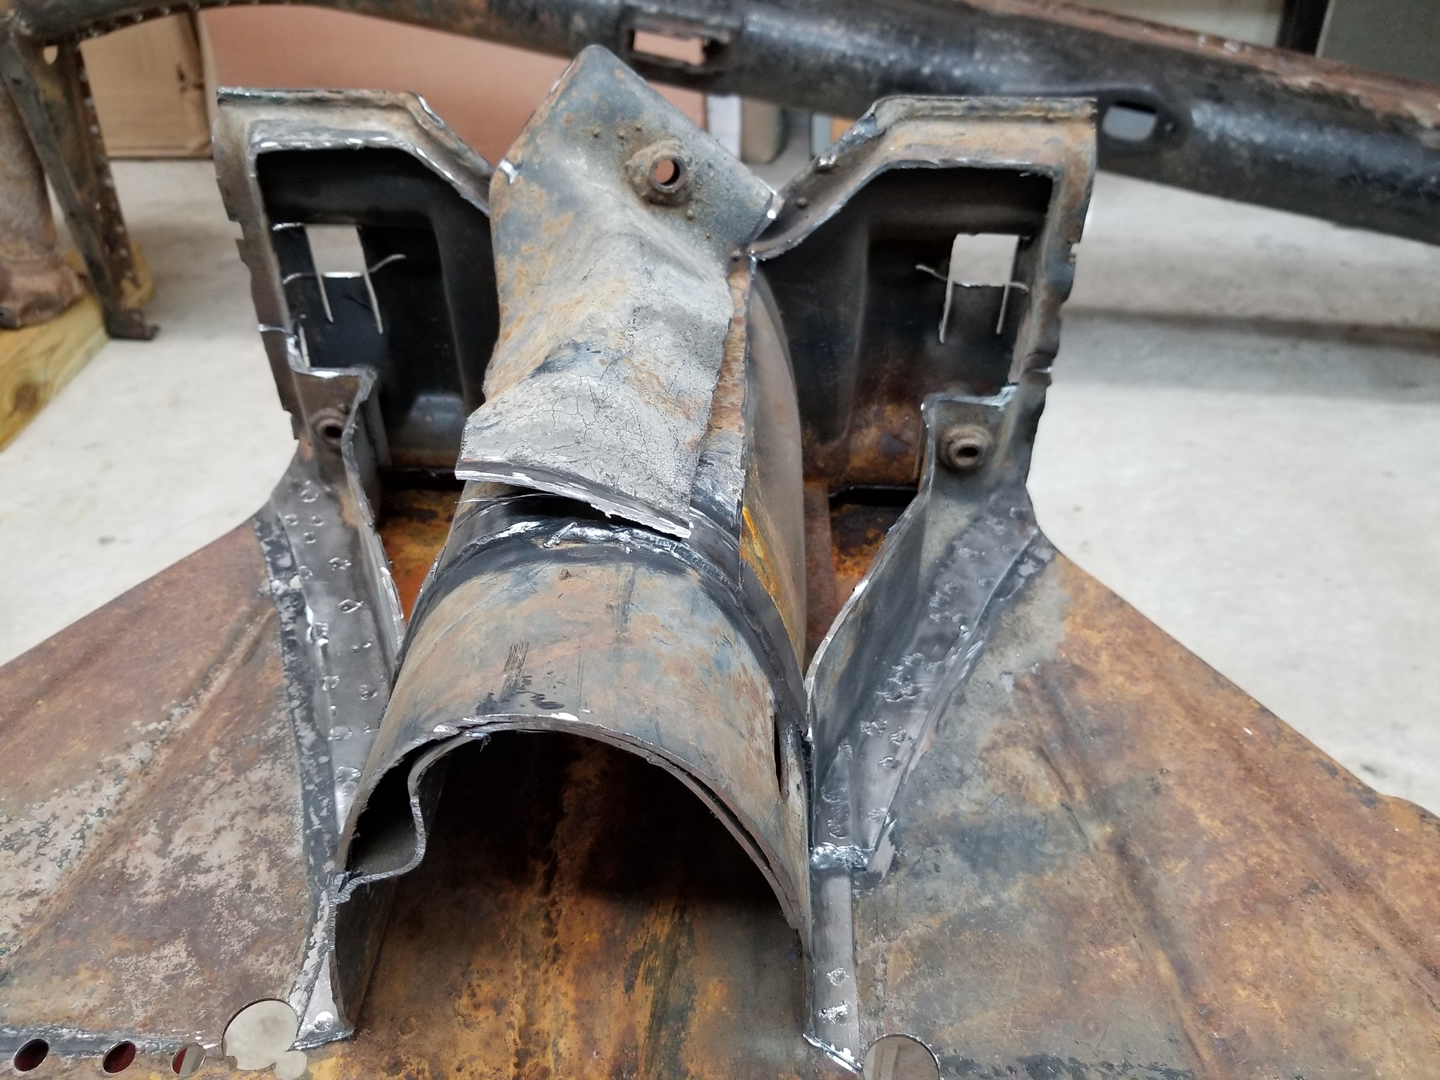
With the Napoleon hat removed, my next task was to remove the lower sides of the frame head body where it is attached to the bottom plate. To do this, I first cut off the areas just above them on both sides and then cut through beam mounting plate on the front to free them there.

|

|
|

|

|
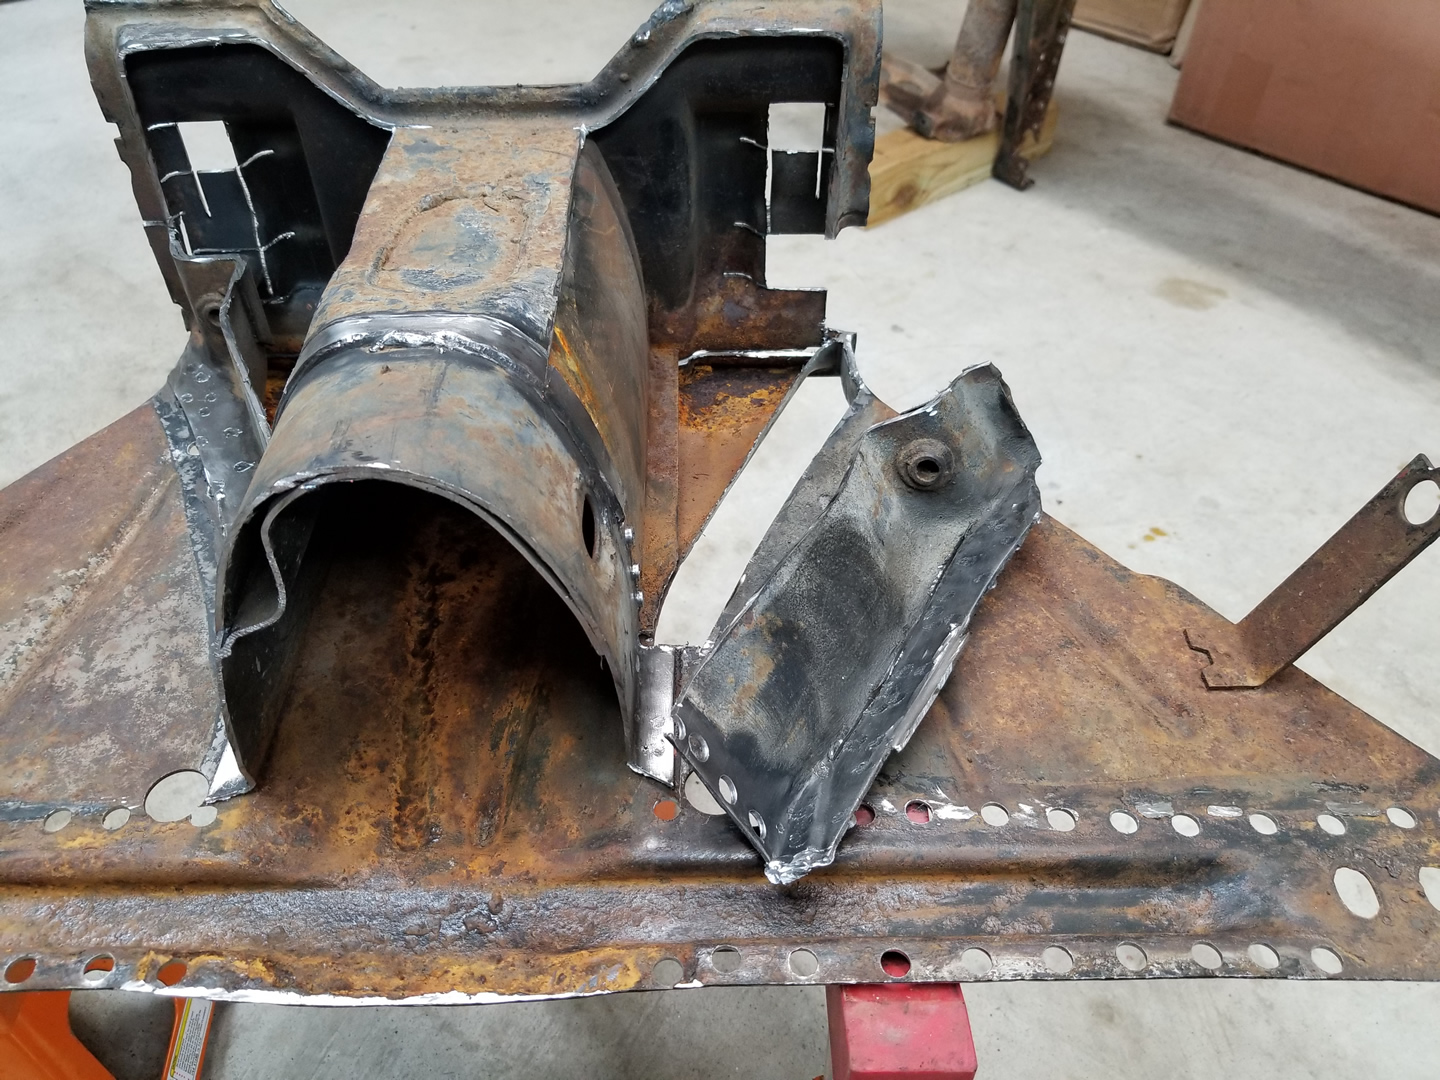
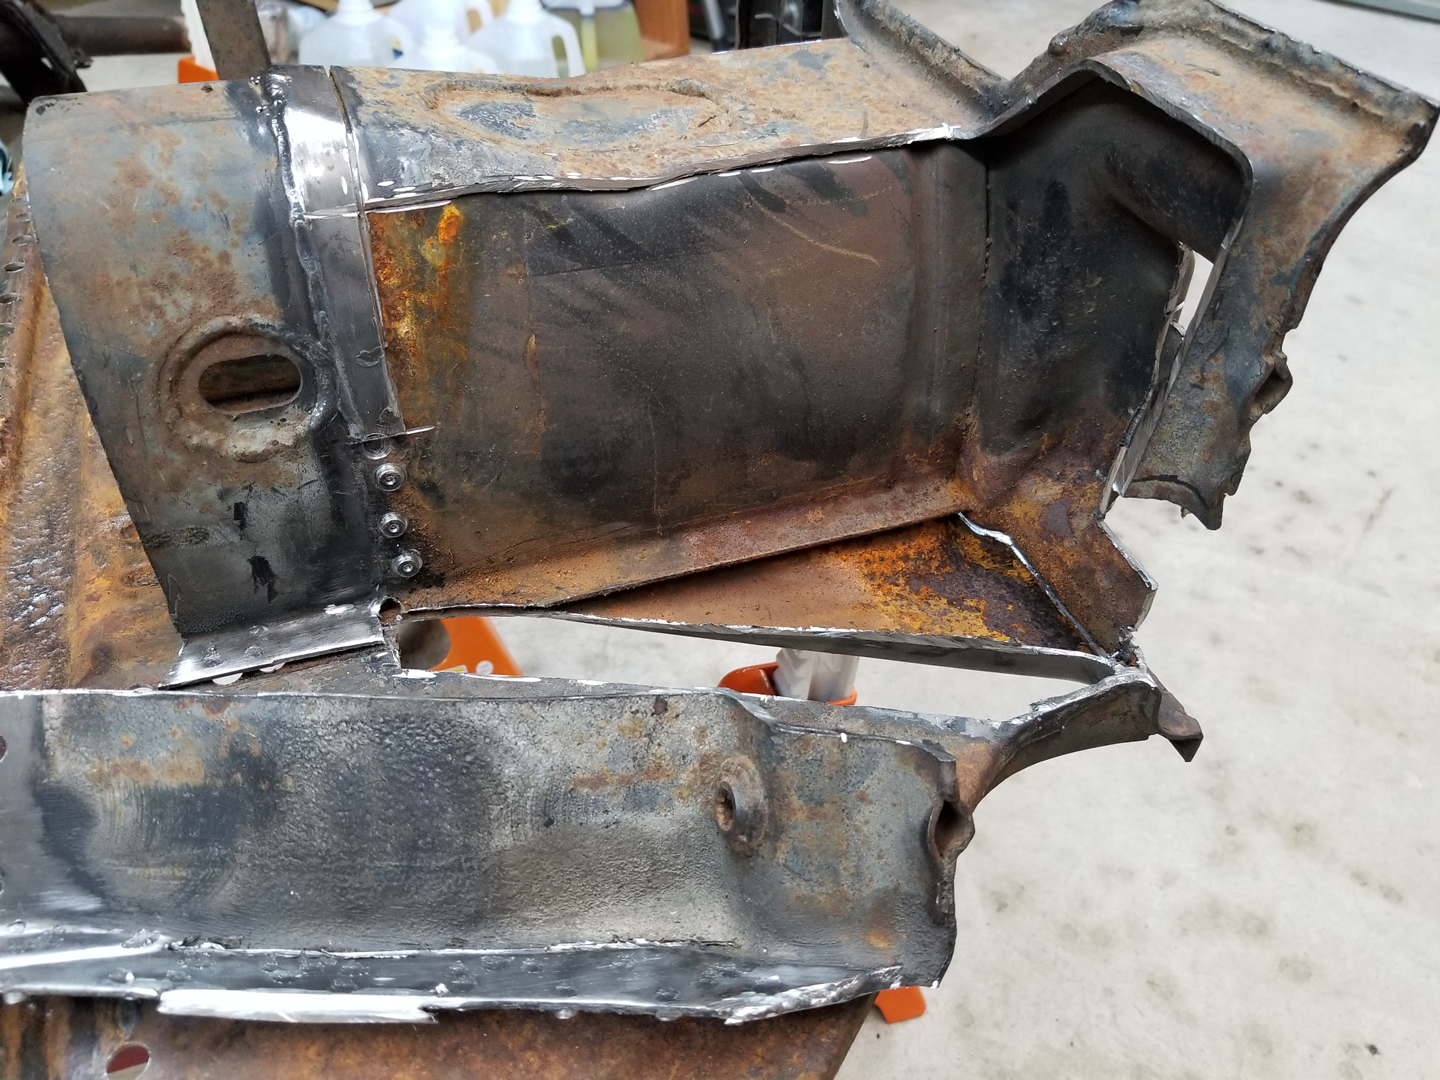
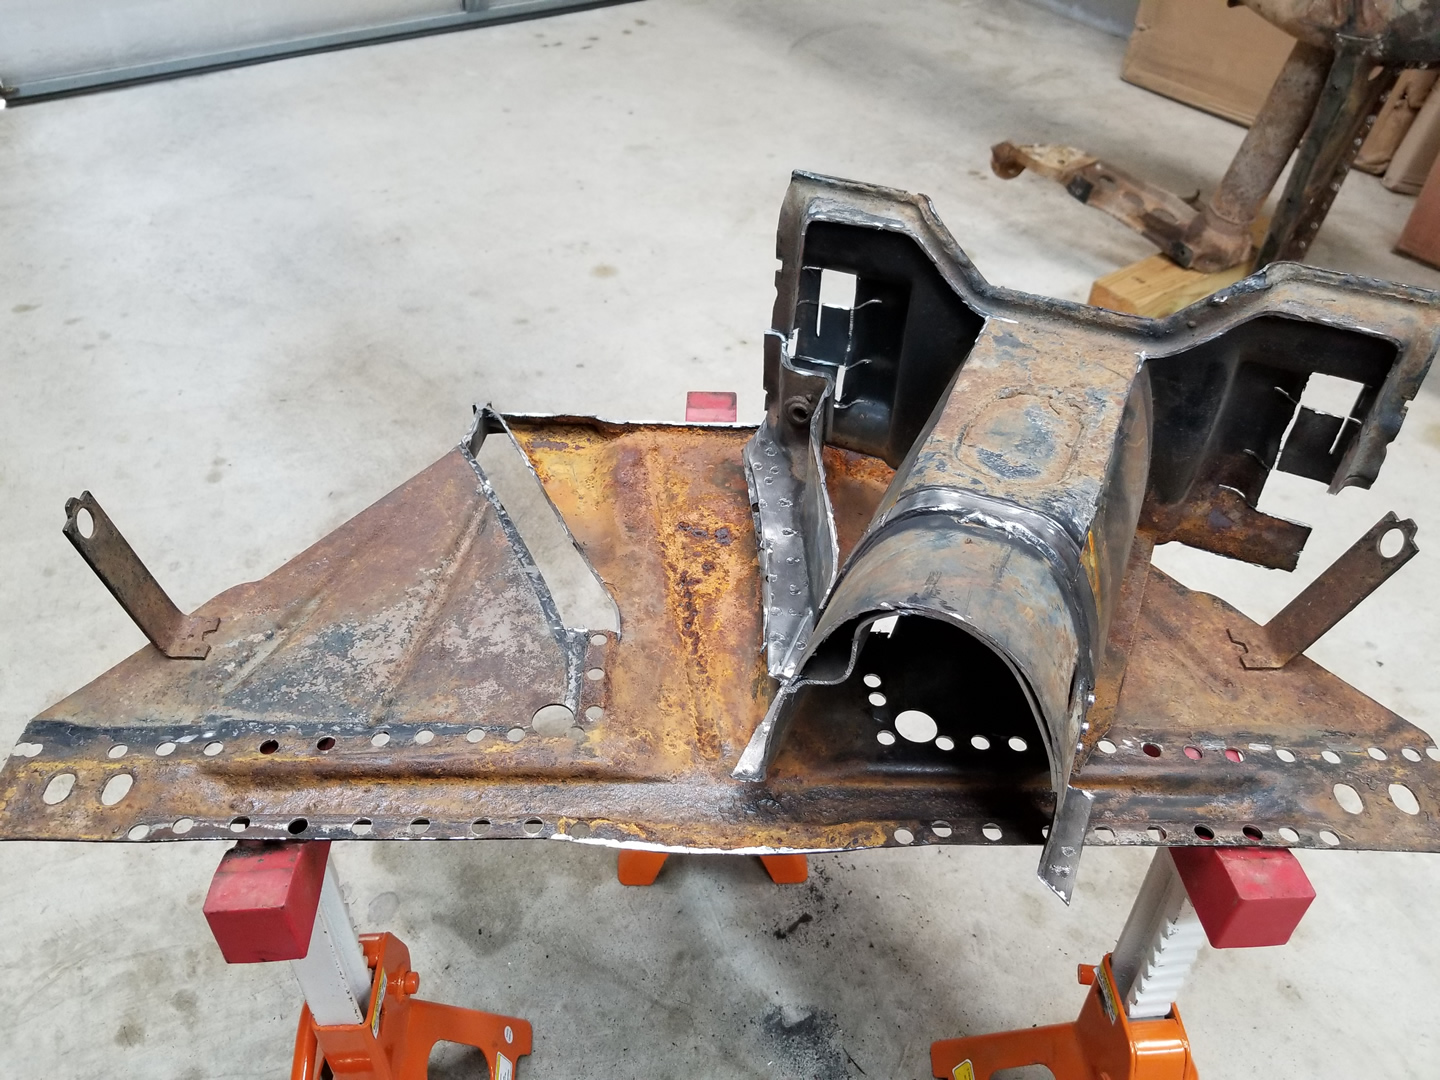
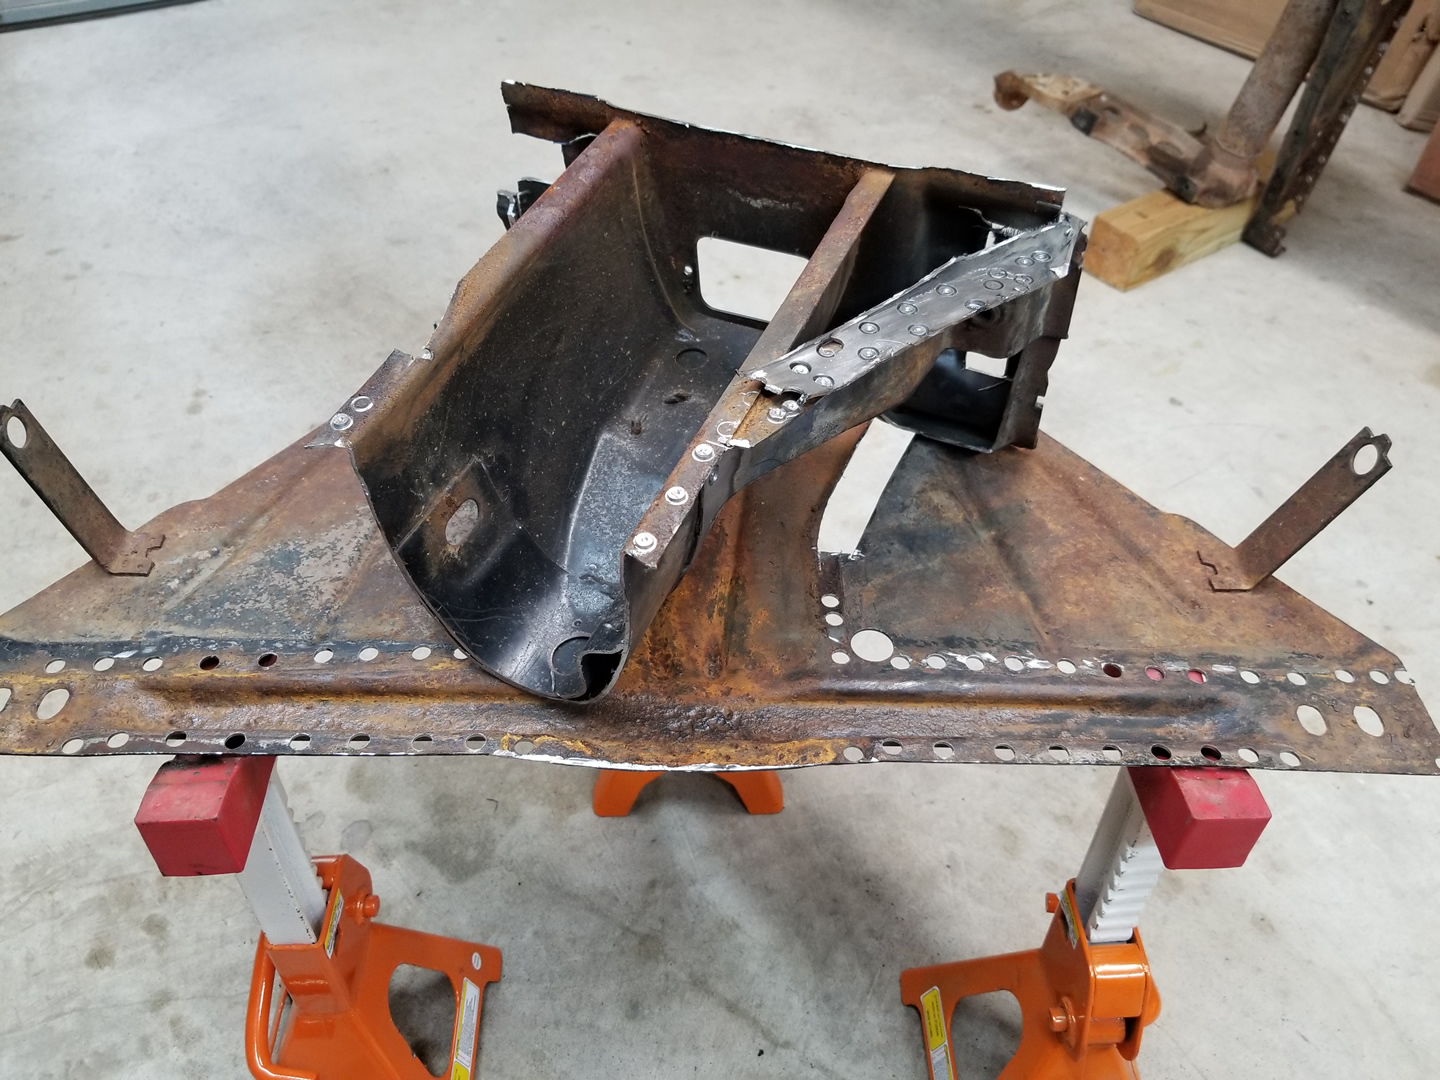
It was at this point that I realized just how difficult it was going to be to remove the lower body sections from the bottom plate. The two were seam-welded together and there were was just no easy way to separate them without damaging them both. I really just needed the body sections, so I just cut through the bottom plate in the areas where they were attached. I was a complete bonehead and didn't realize that I was cutting through both layers at one point on the first one. In fact, I didn't notice until I turned it over. I can weld the cut, but really felt sick when seeing it. When cutting the other side, I was very careful not to repeat the same mistake. Once it was cut out, the tunnel was free and I just needed to separate it from the tunnel.
|
|
|
|
|
|
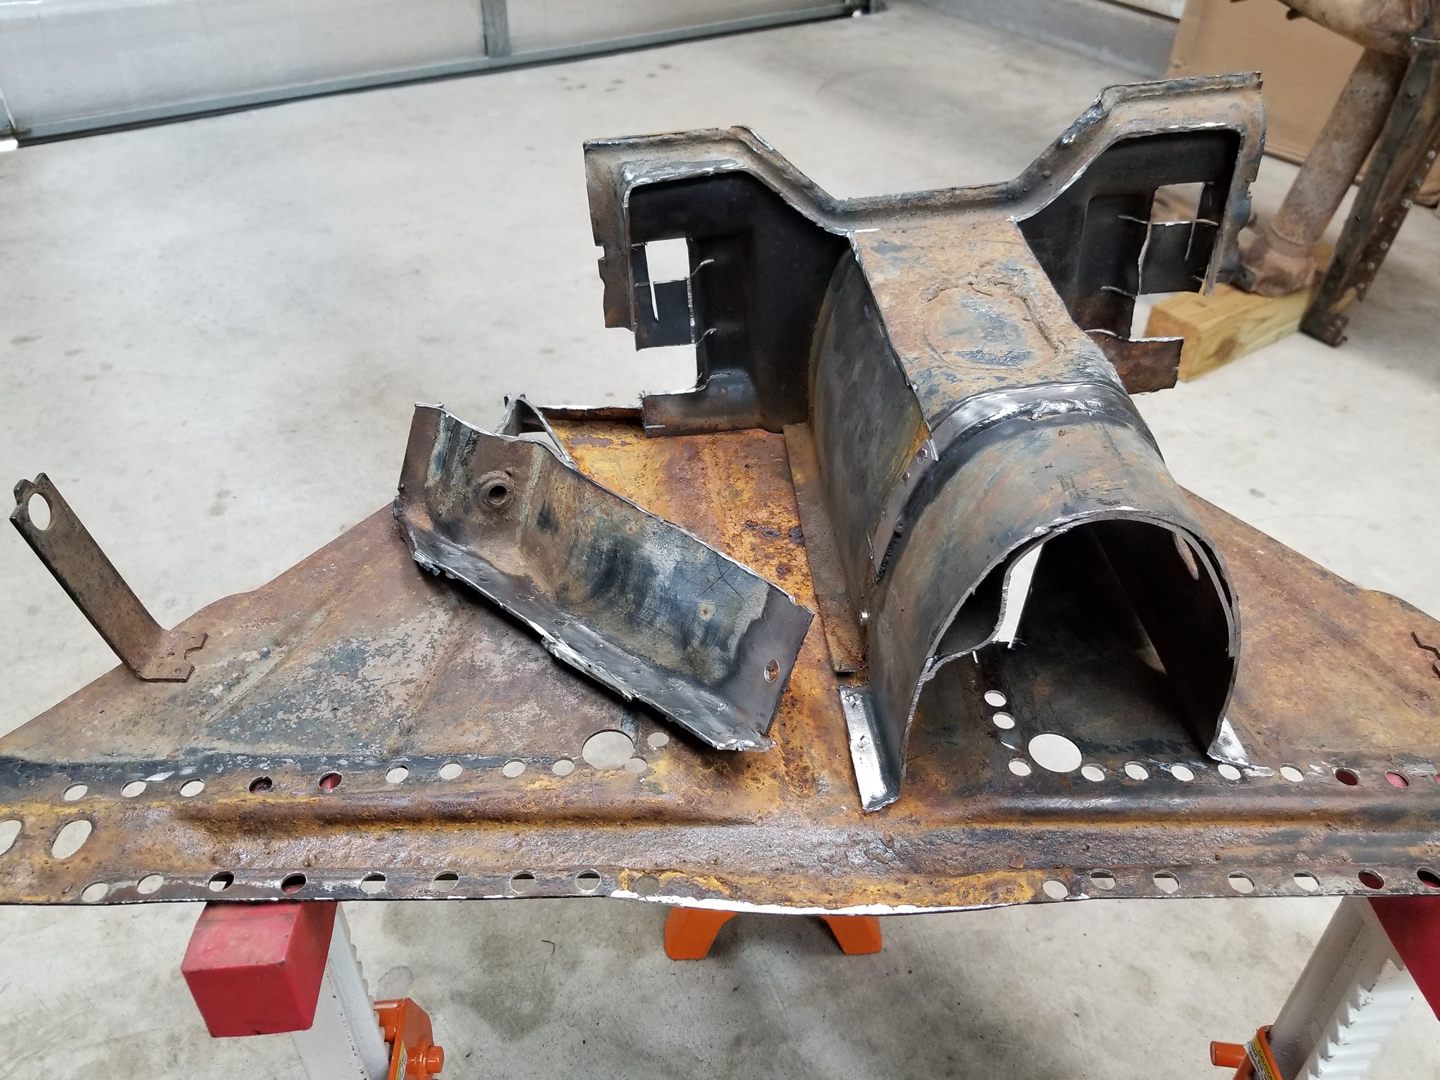
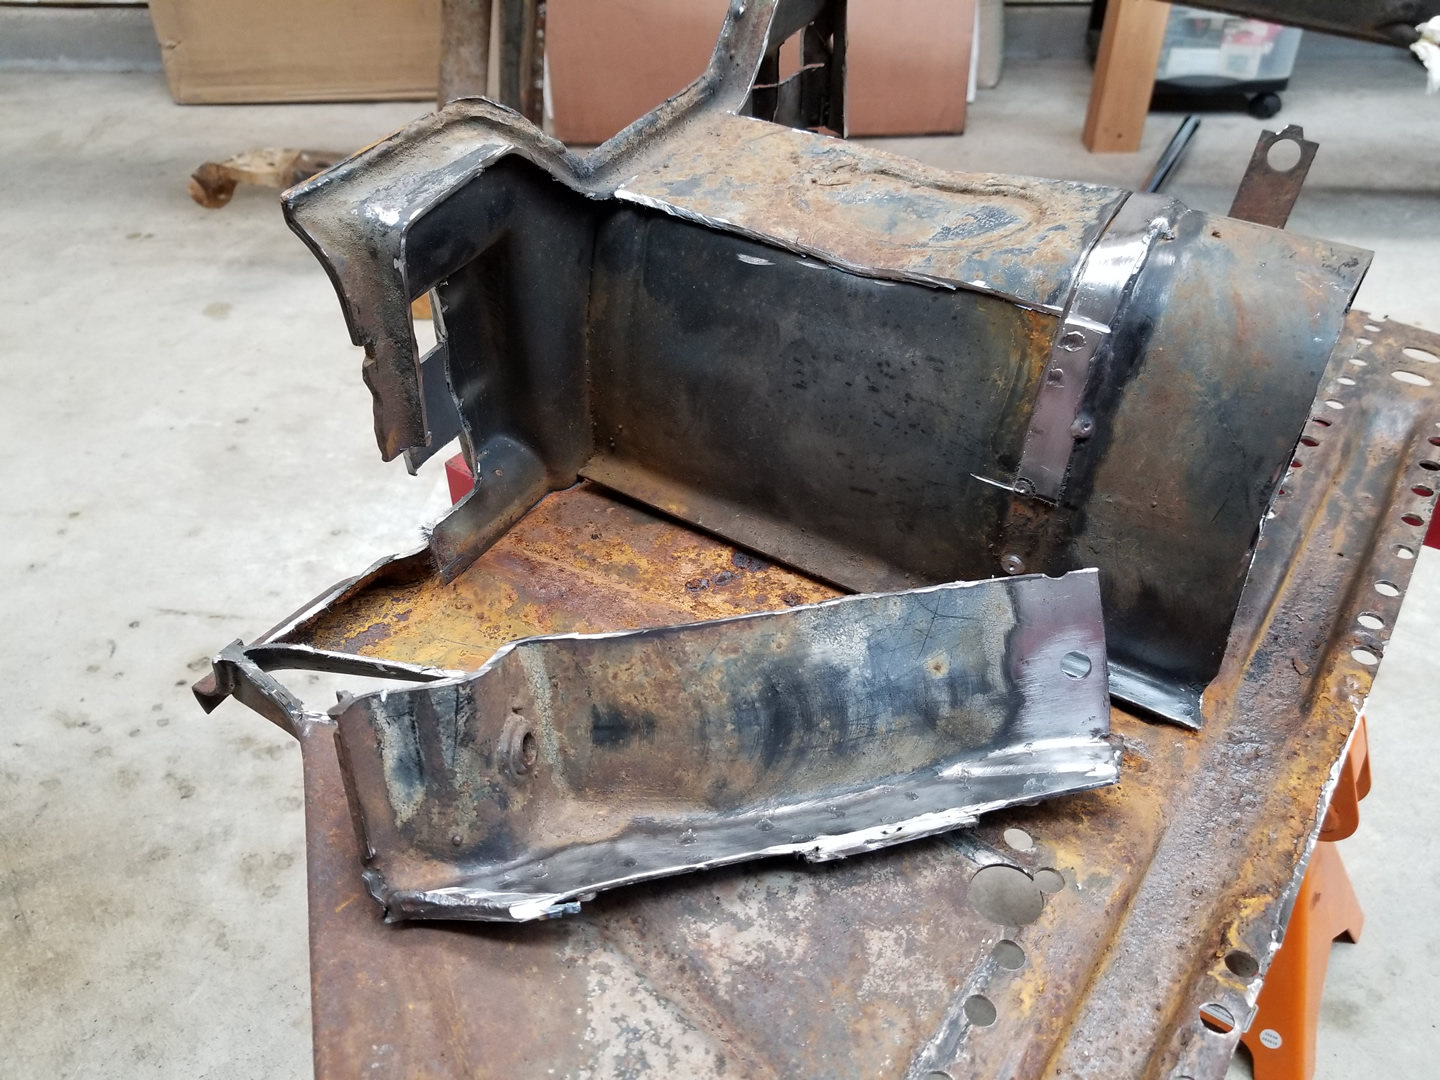
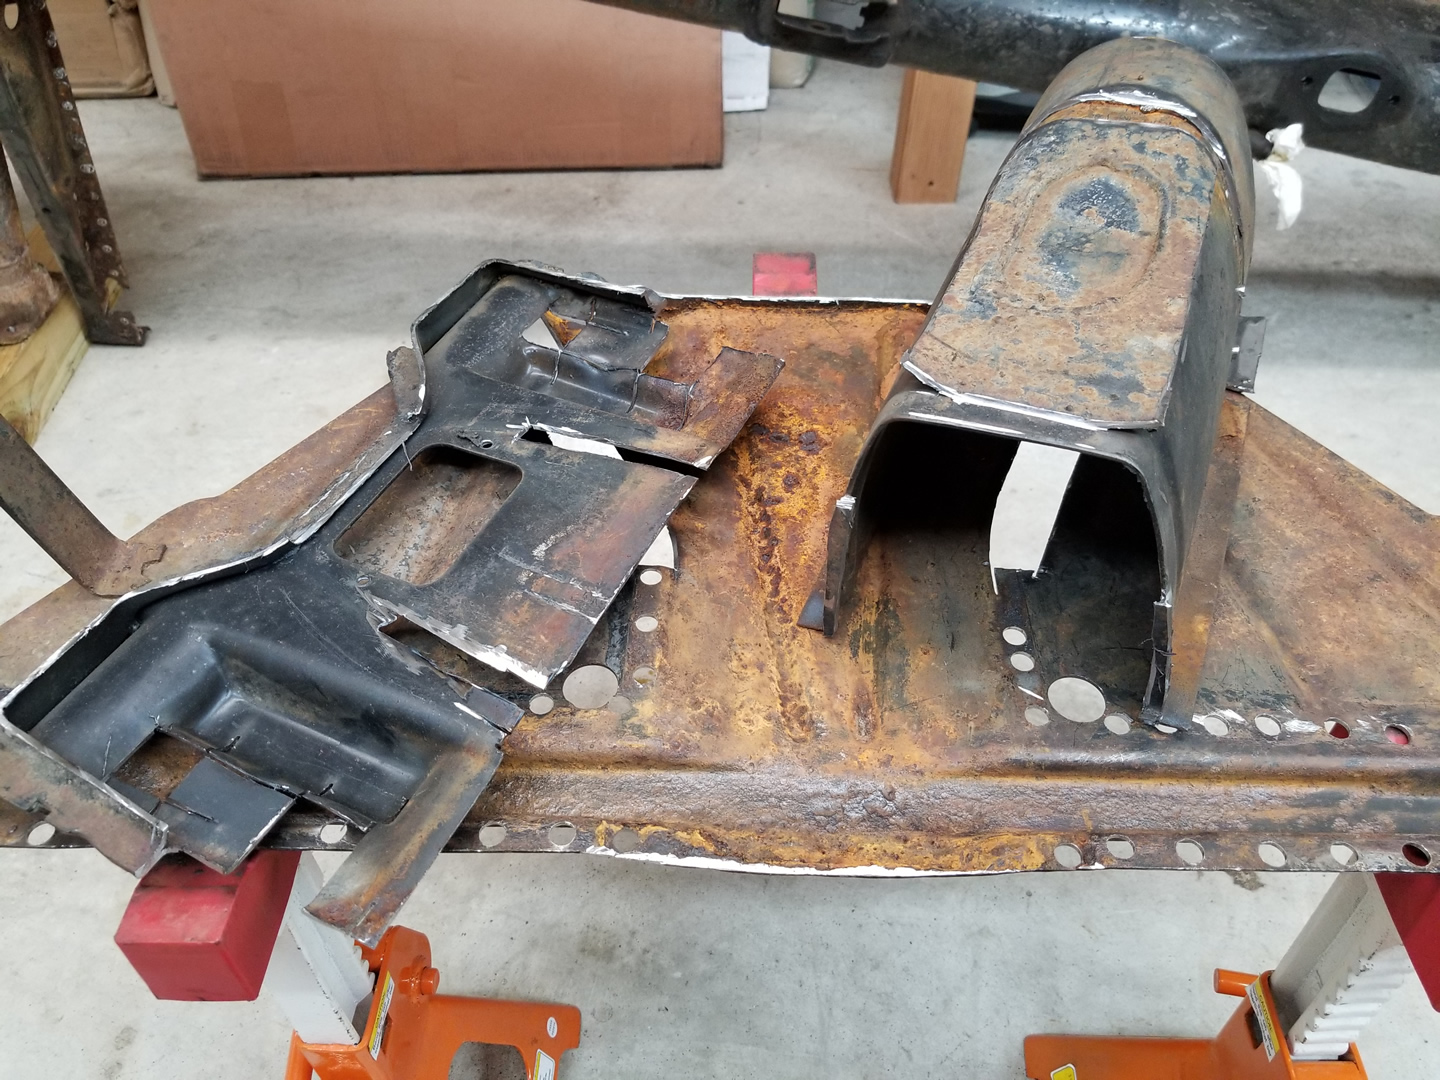
Lastly, I just had to remove the beam mounting plate from the tunnel. They were attached by seam welds, of course, and I just cut out the area of the beam plate where they were attached. Disassembled, finally. The pictures may make it look simple and quick, but I spent several hours on several evenings to get this accomplished. And I still need to clean up the parts I'm going to reuse by removing the leftover panel remnants that were cut out during the removal process and the spot welds.
|
Mission accomplished and I now have a new donor Napoleon hat, two lower frame head body sections, and a tunnel section to use on my chassis. Can't wait to get to the repair and assembly part of this project!

|
Follow-up Note (6/9/21): I determined that the parts from this frame head were just too different than my original frame head and purchased a more correct model that matches much better. More details to follow.
Fitting and Welding the Napoleon Hat
by Garage Weasel on May.22, 2024, under Chassis
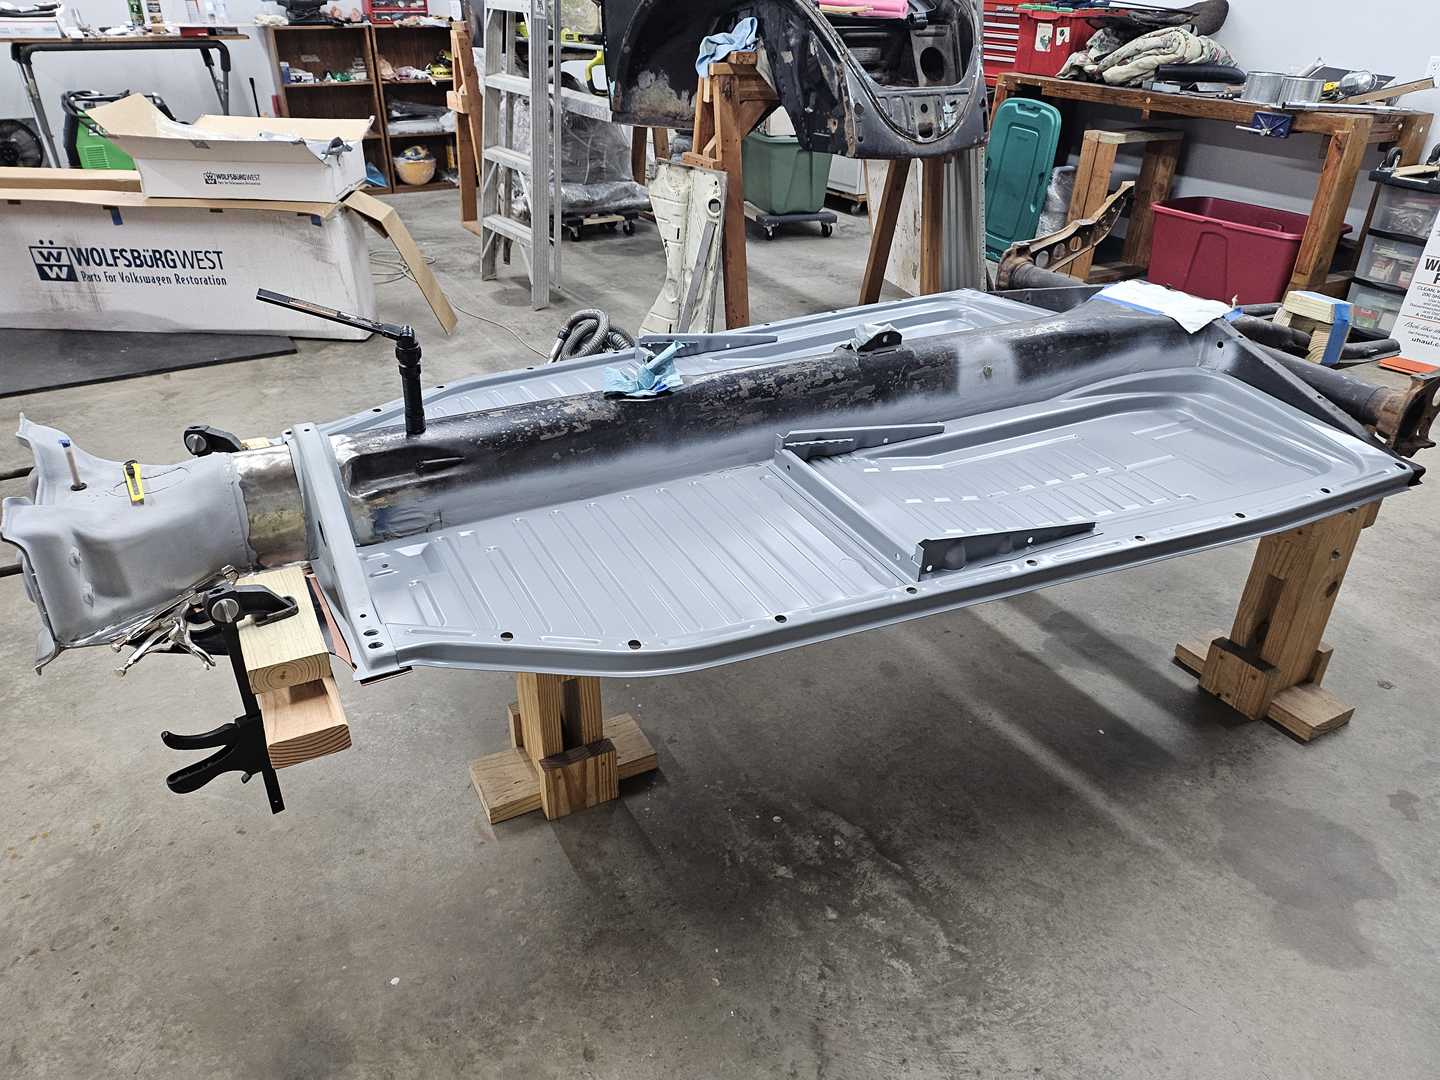
At last it is time to fit and weld the Napoleon hat! Again, this is a donor part from a 1965 Beetle and a good match for this car. I put it in the approximate position and laid the floor pans in place as well. The floor pans are Wolfsburg West pans are very close to the OEM pans in both construction and thickness. They will need to be trimmed in both width and length, but just a little mainly in the rear.

|
|

|
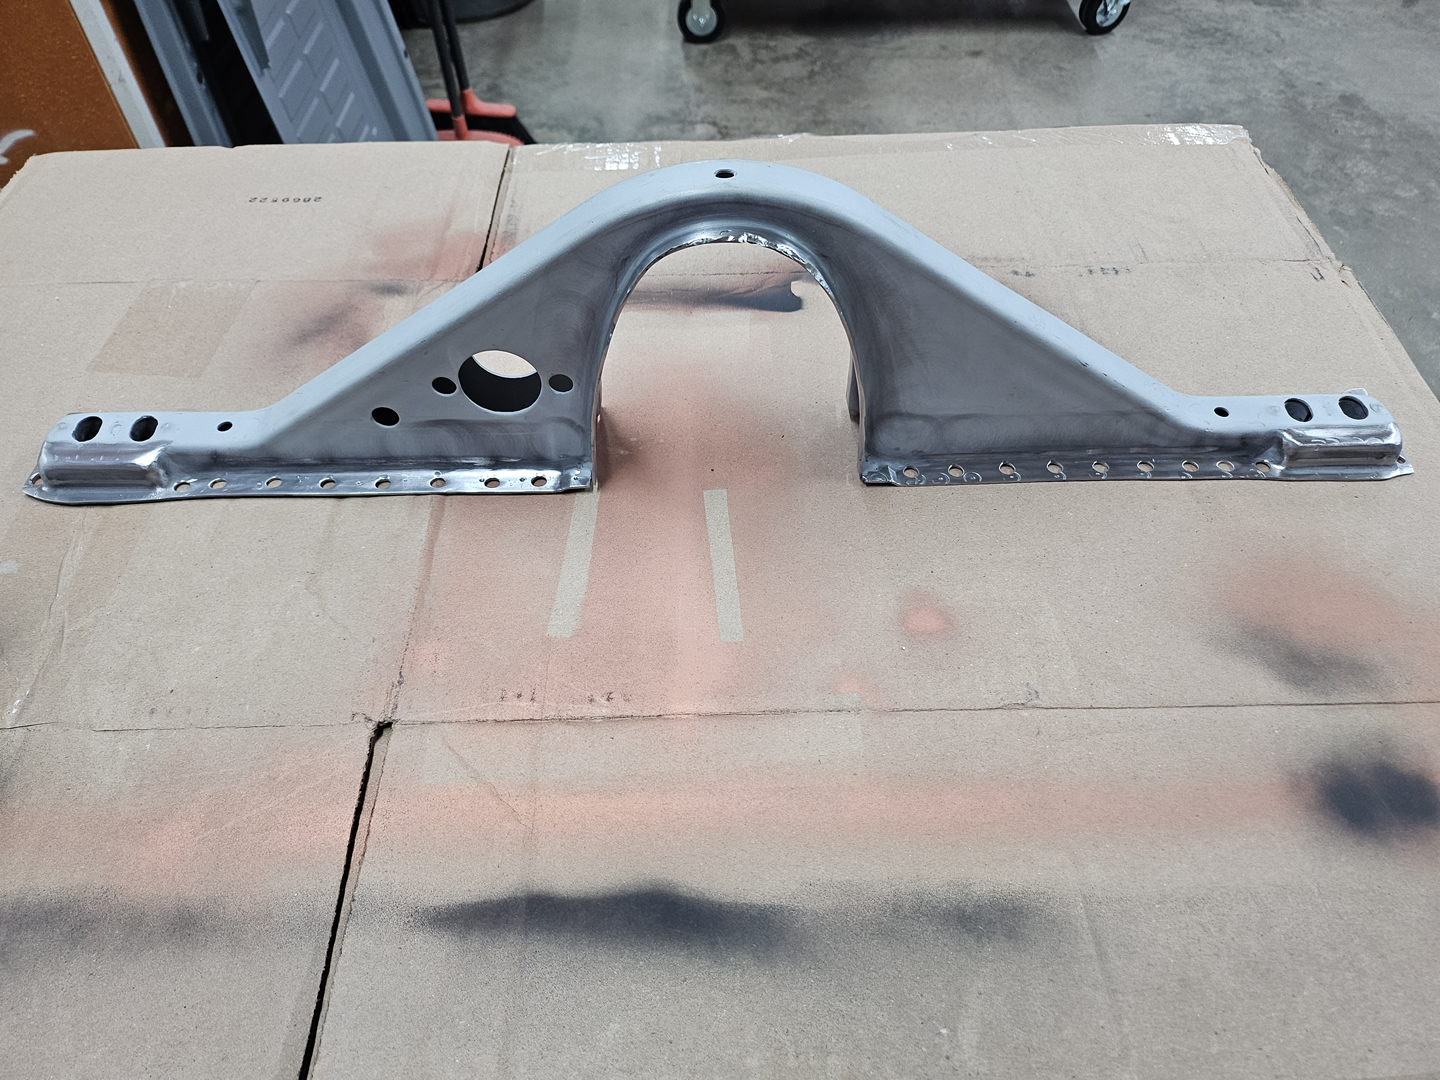
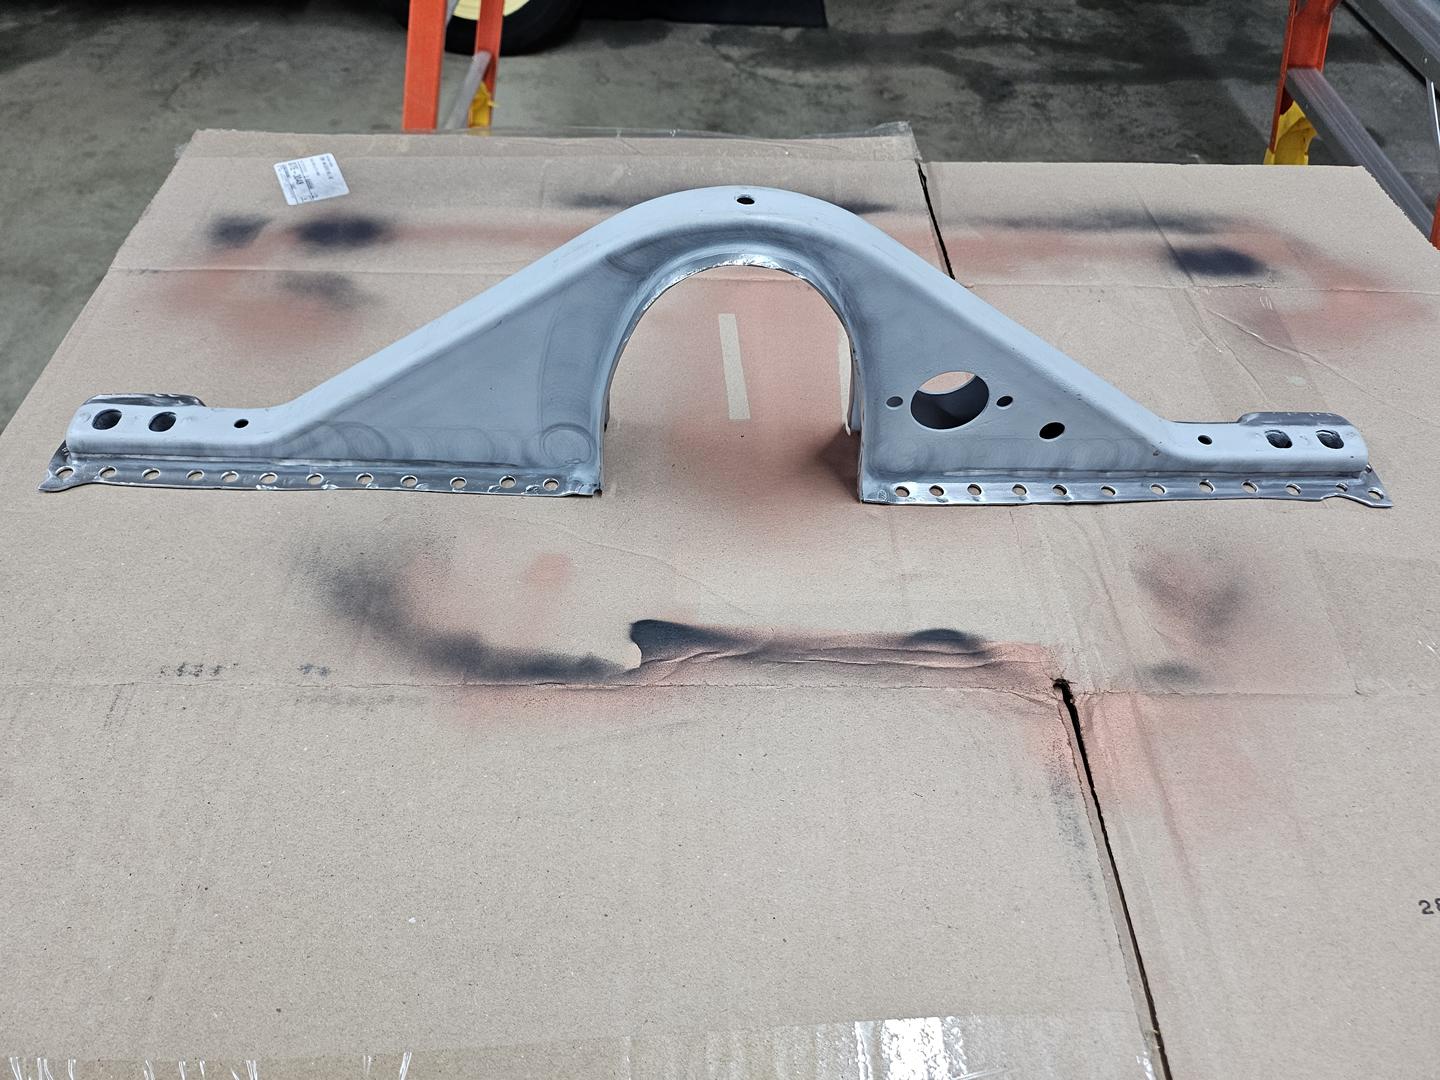
I cleaned up the weld areas to remove any primer and rust. I then drilled holes for the spot welds.
|
|

|
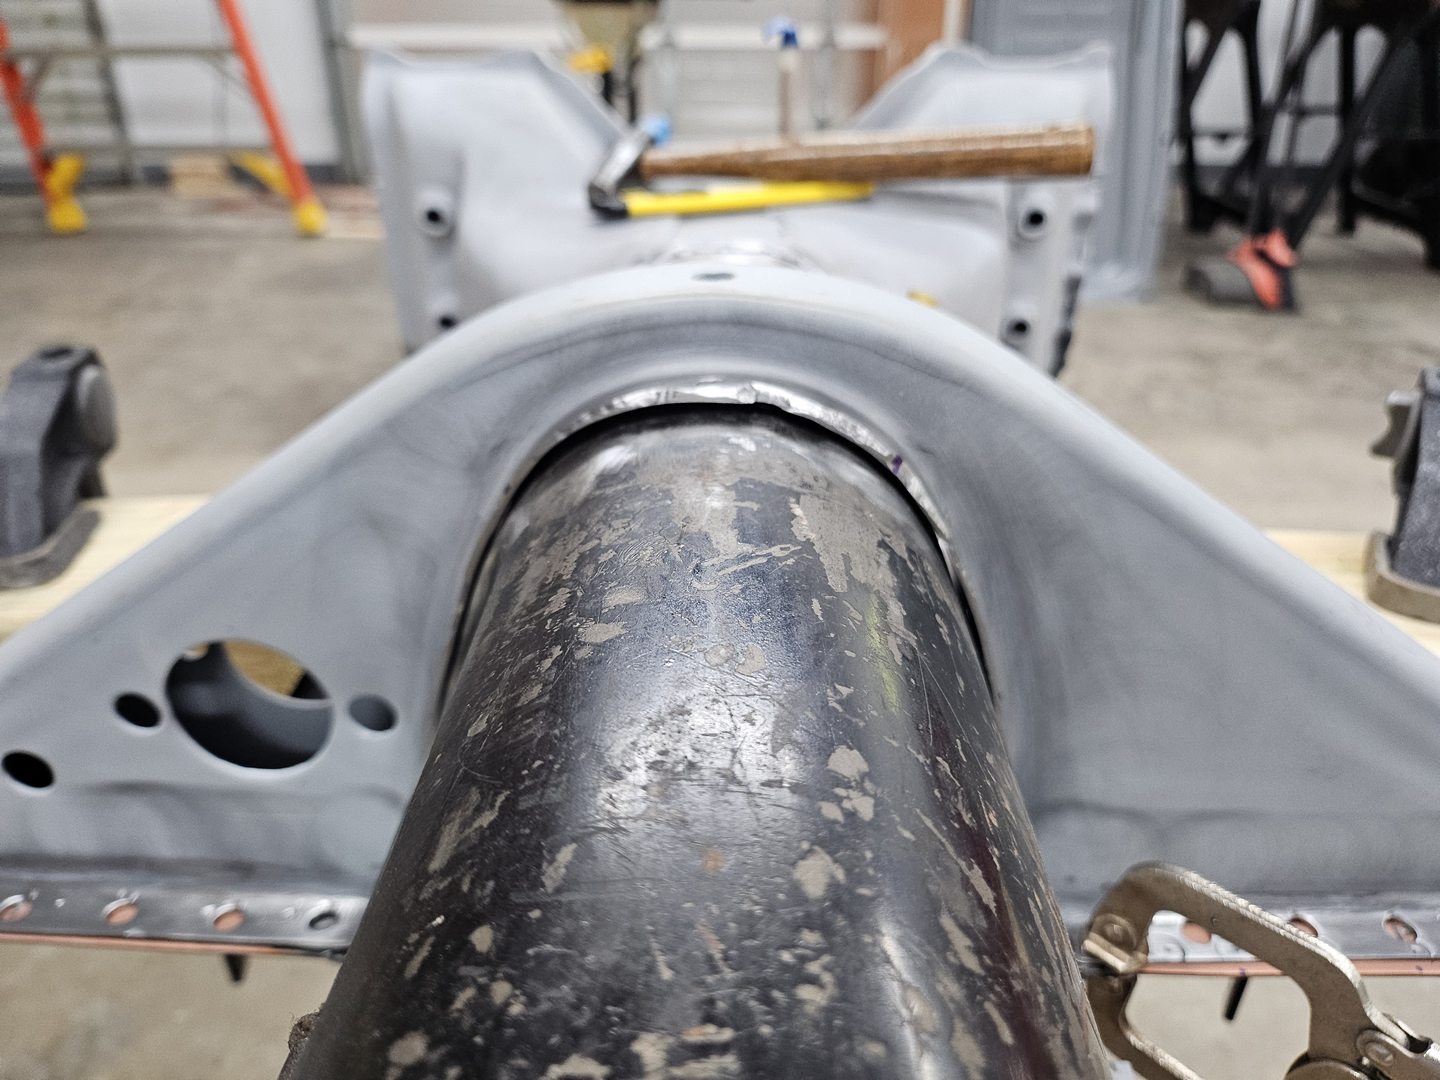
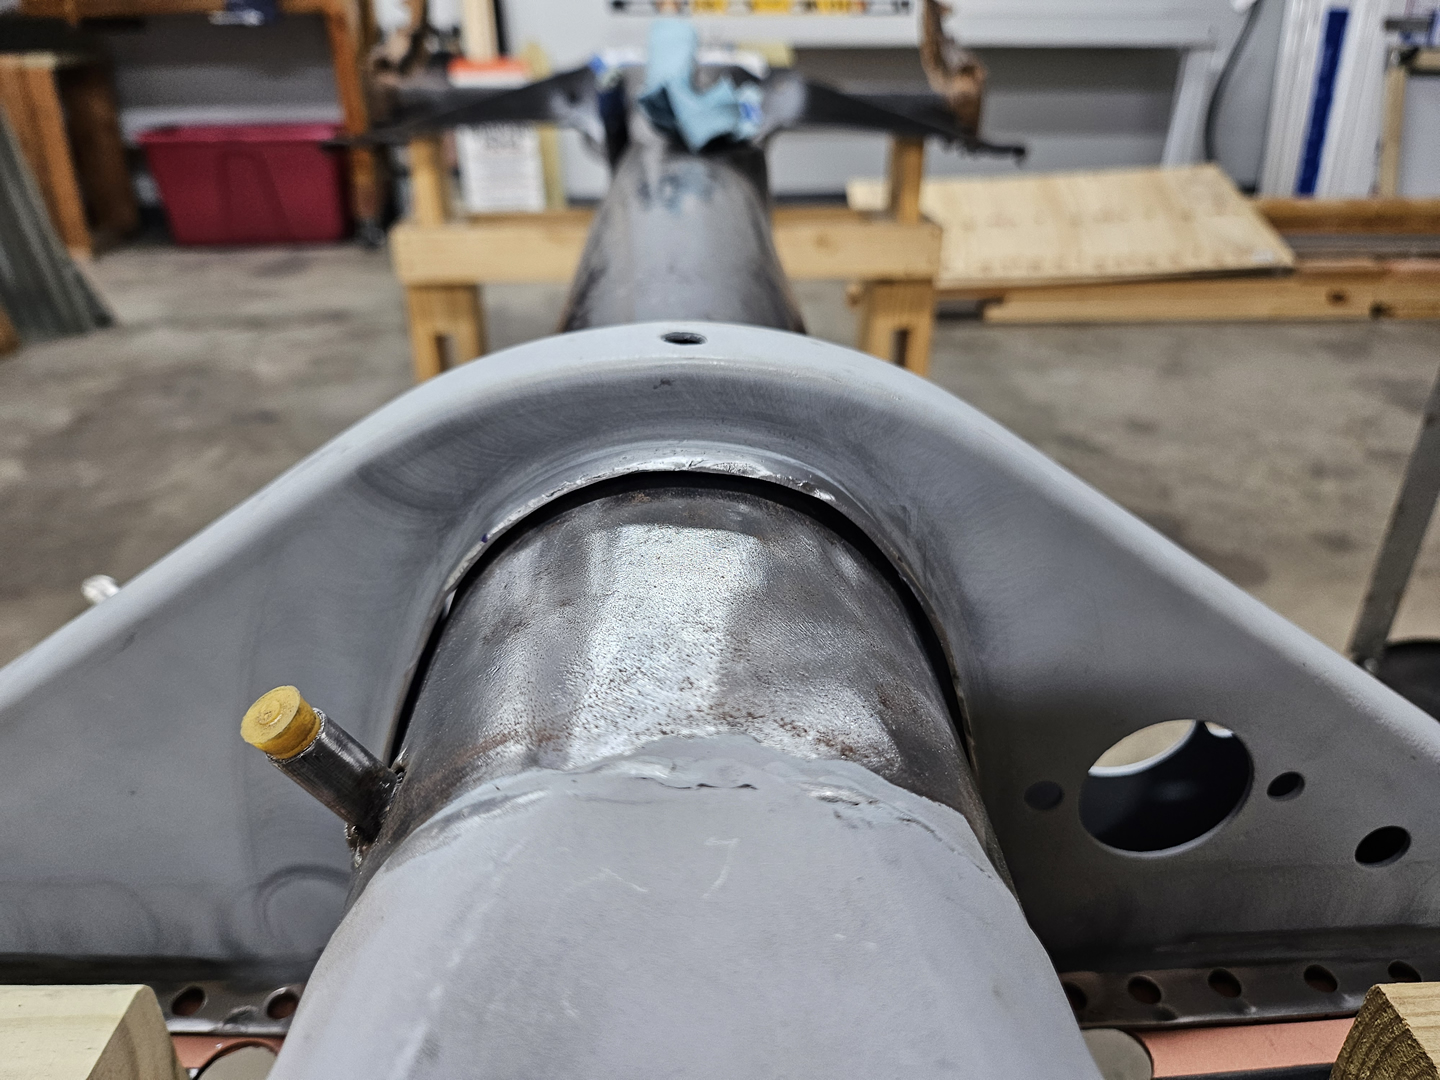
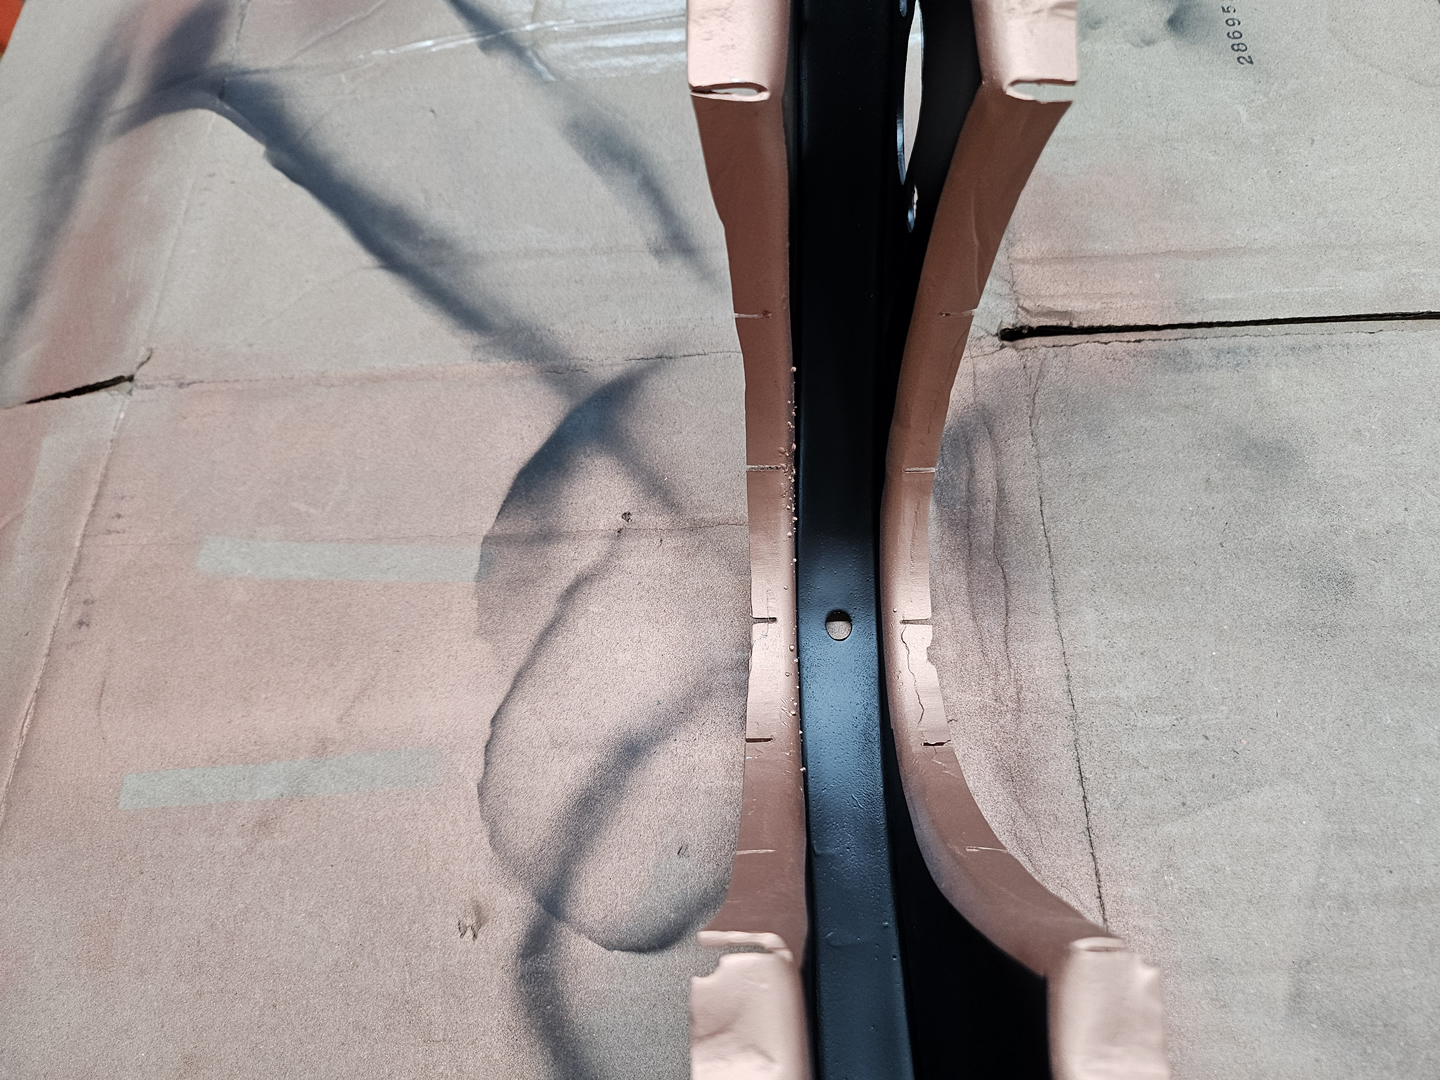
There are big gaps where the Napoleon hat fits over the tunnel. This was previously an issue when it was on the donor tunnel and the gap was filled with weld. I made relief cuts in this area on both sides to make it easier to bend it down for a closer fit.
|
|
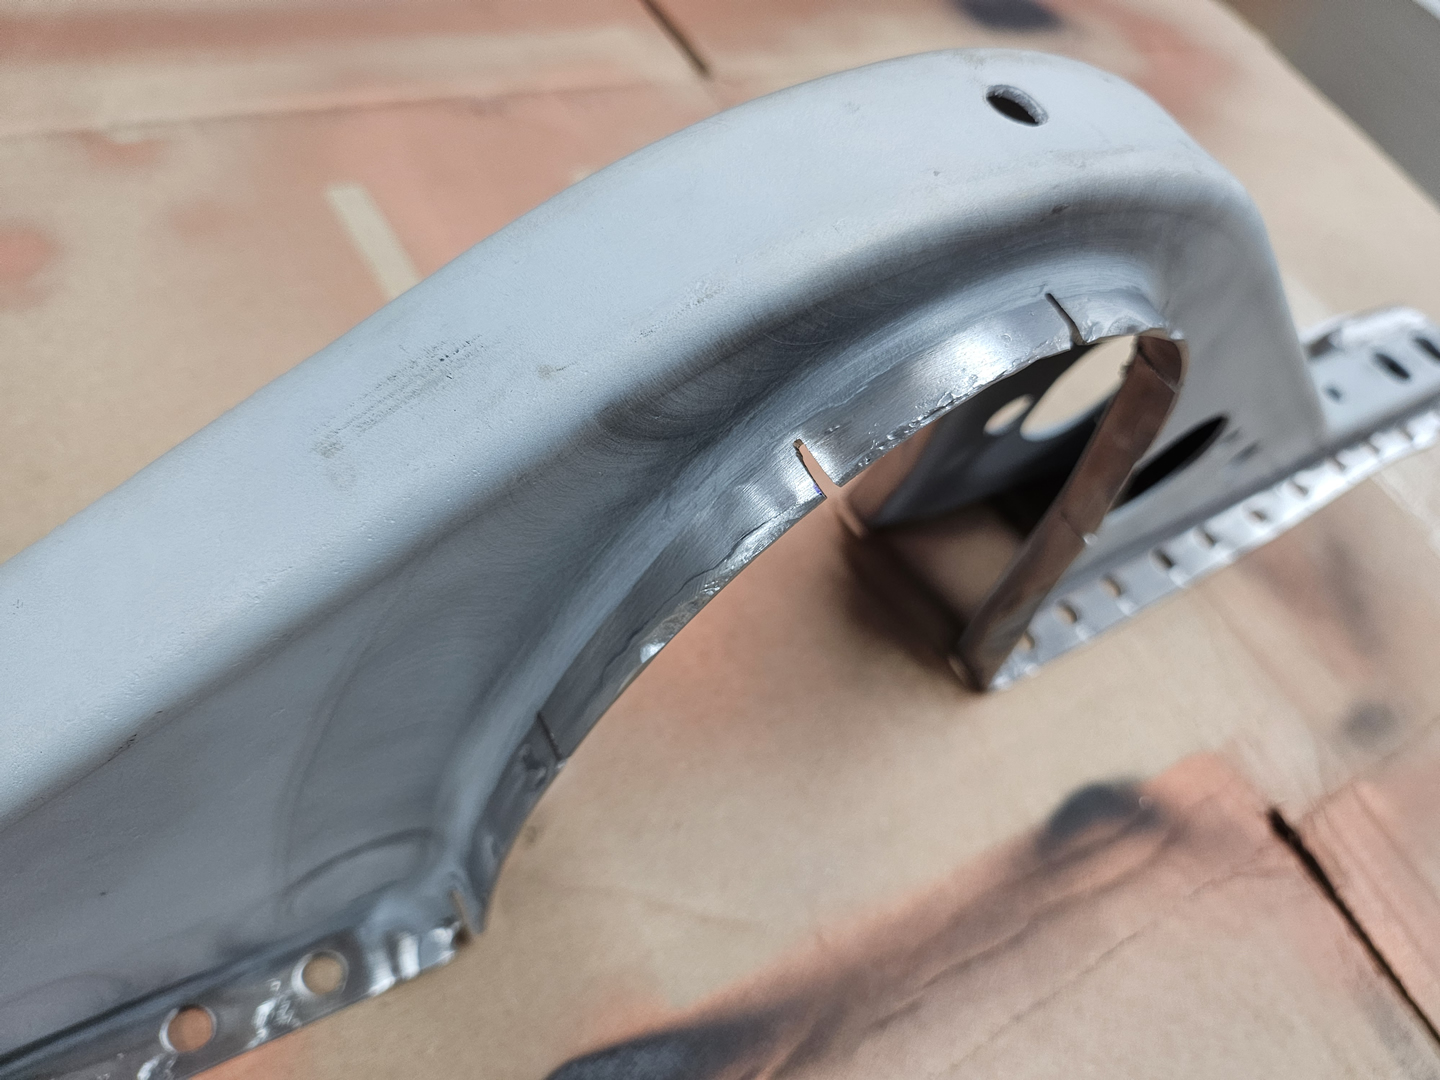
|
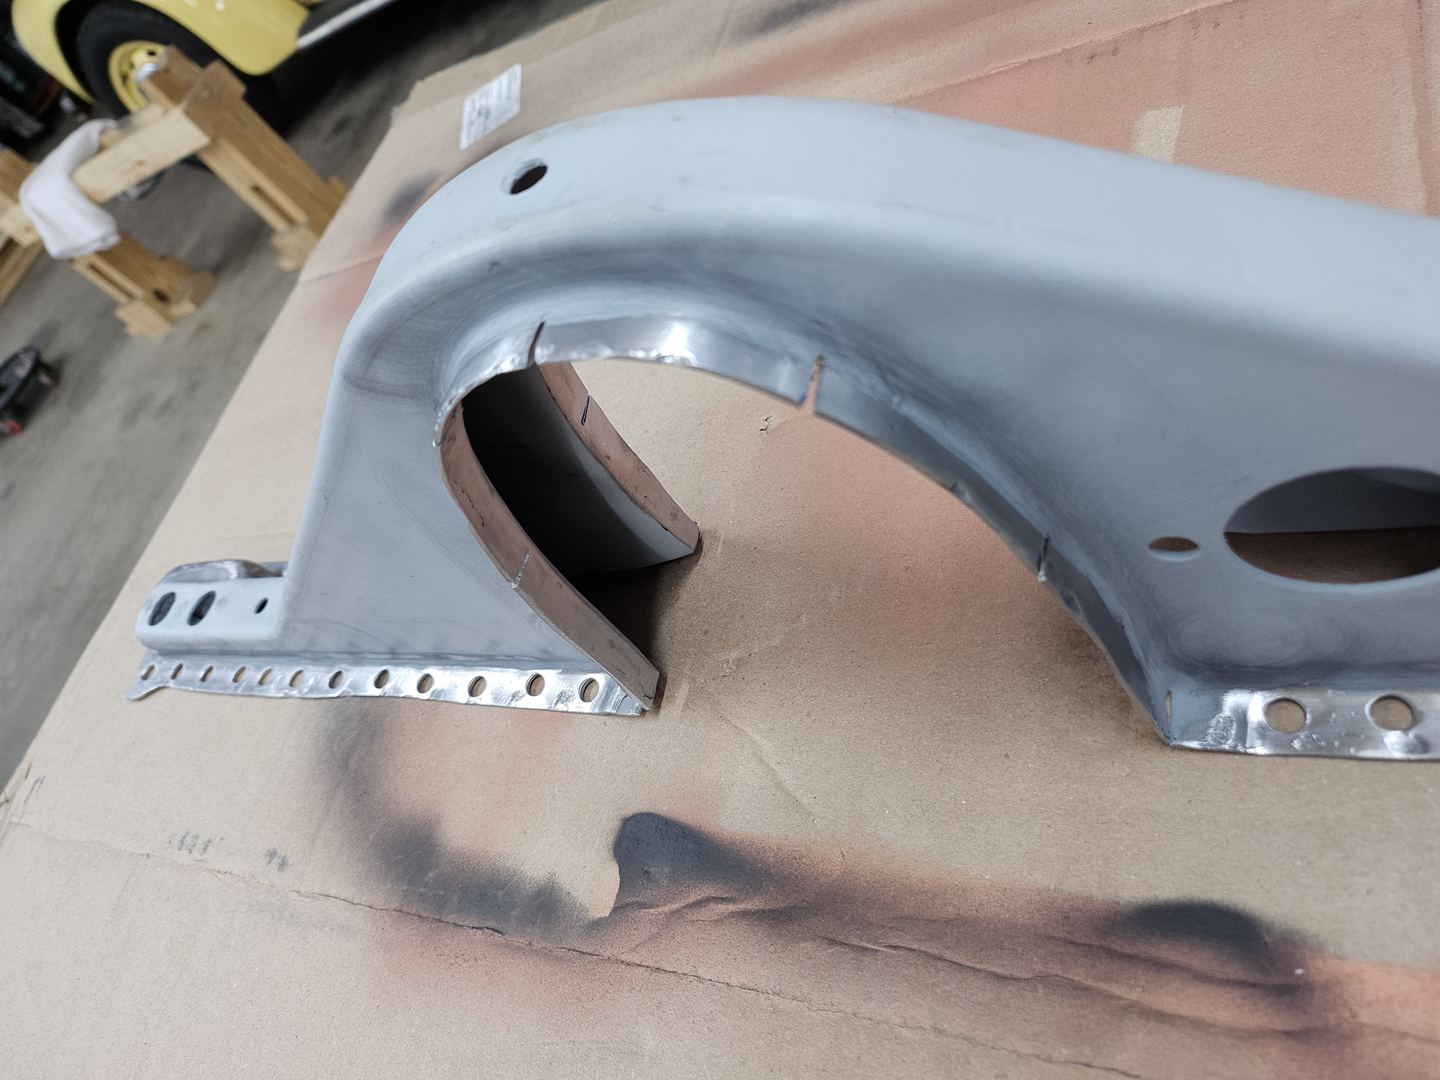
|
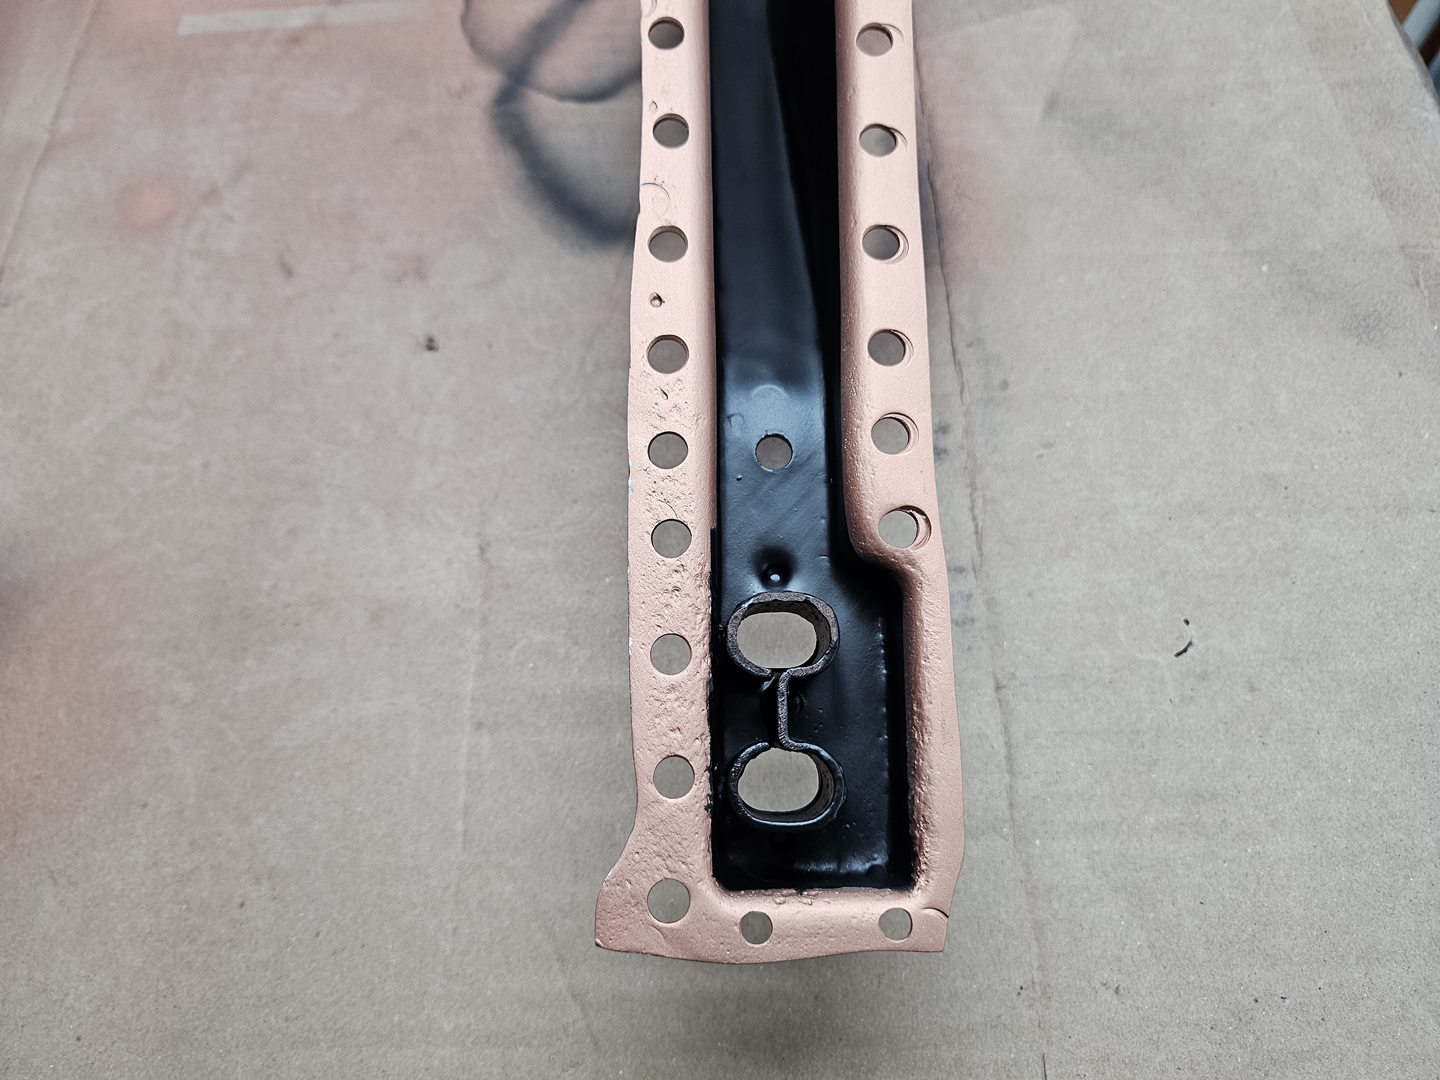
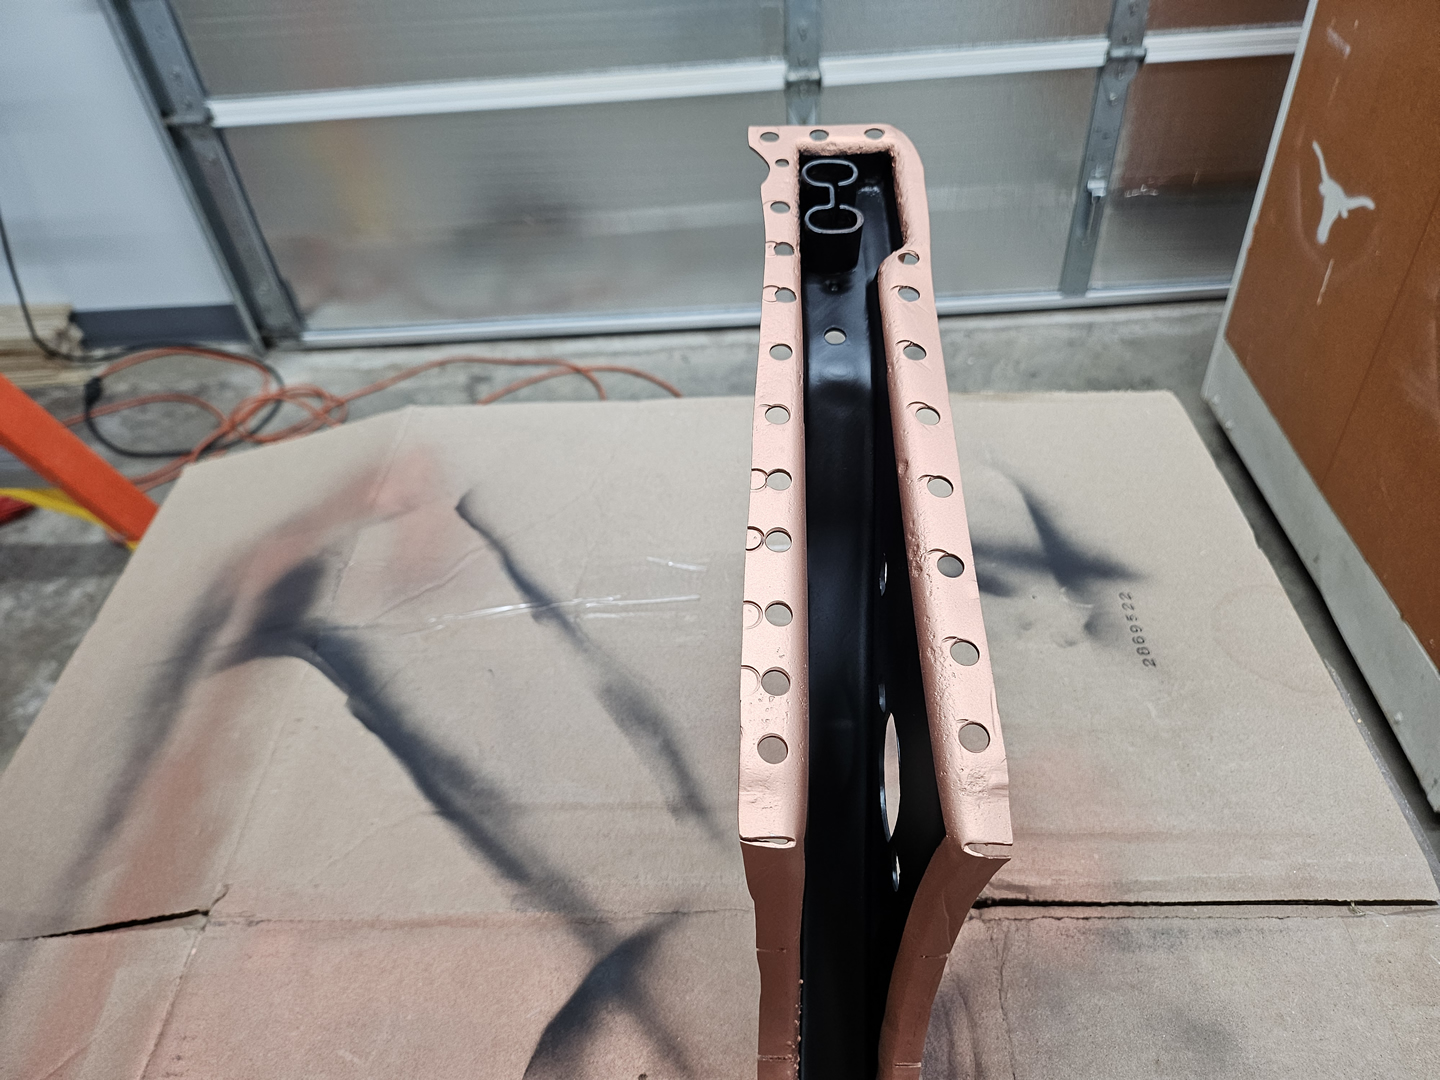
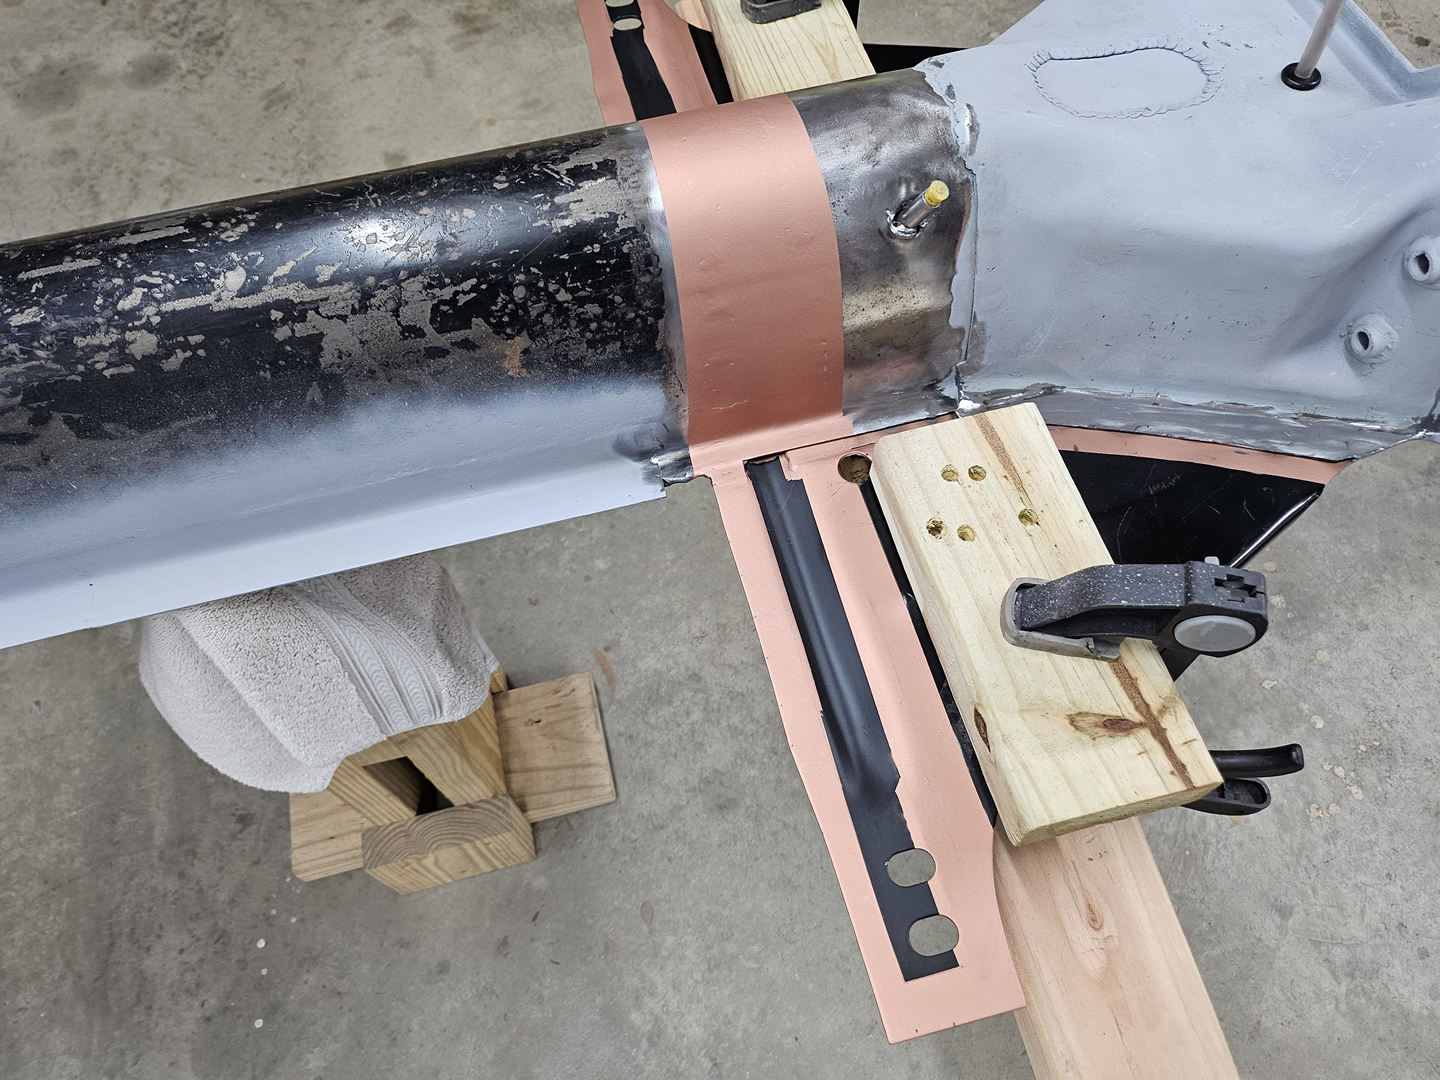
I masked off the weld areas on both the Napoleon hat and tunnel and sprayed them with U-POL Weld #2 Copper Weld Through Primer. I also sprayed the interior of the Napoleon hat with Eastwood Matte Black Rust Encapsulator just to add another protective layer to the primer I sprayed previously.
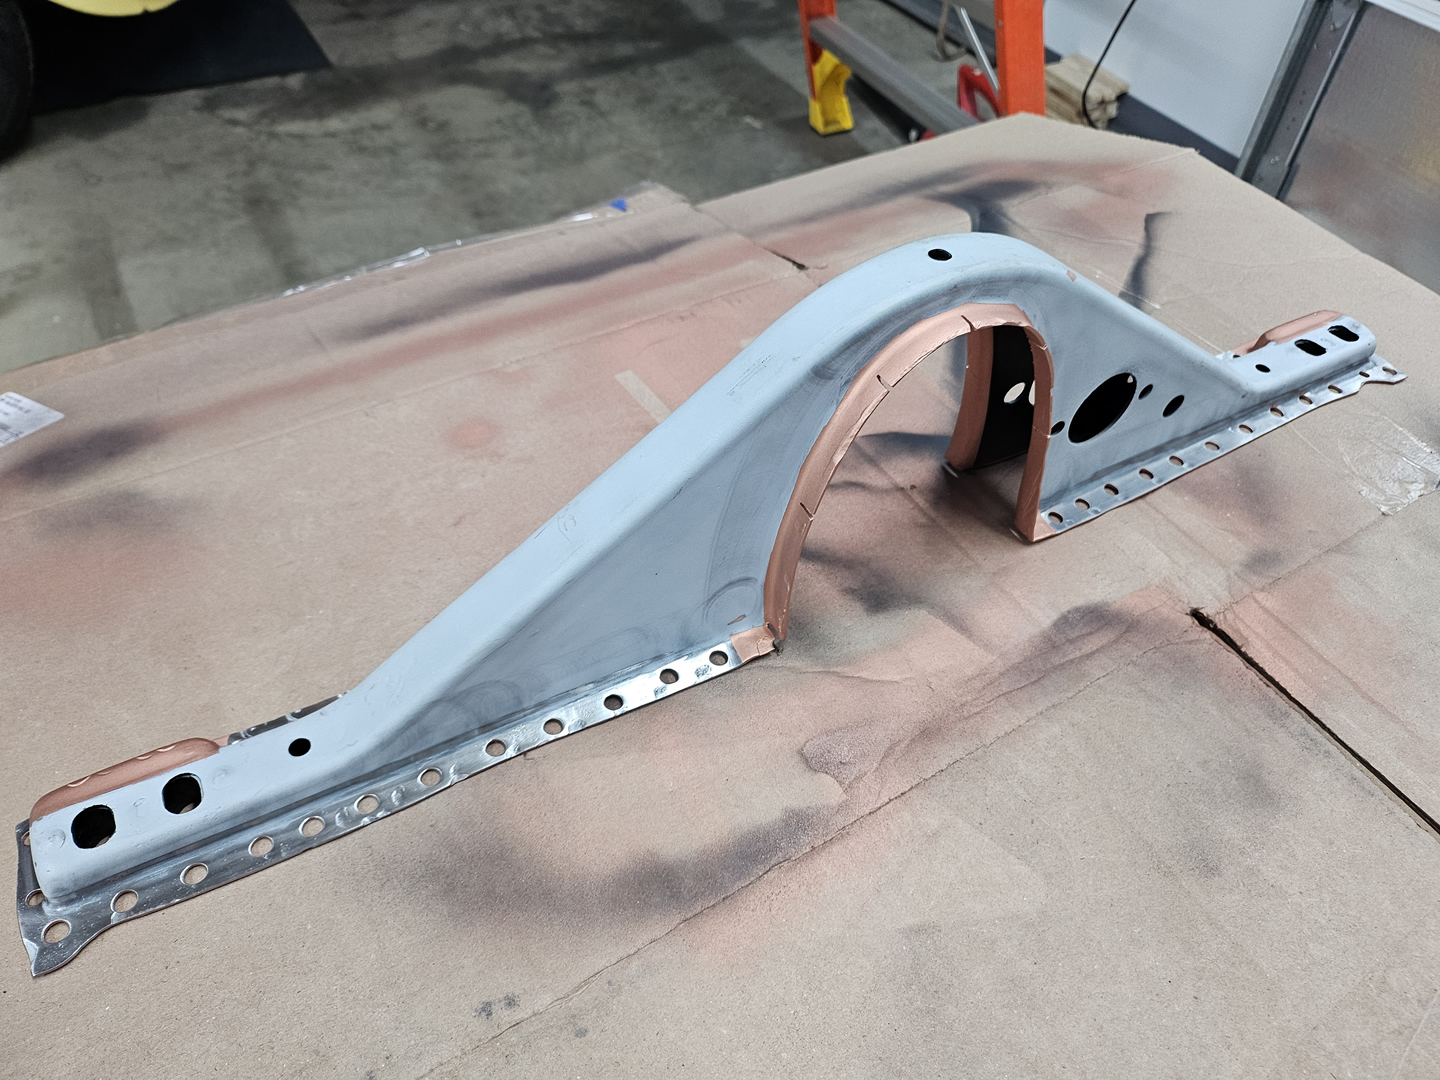
|
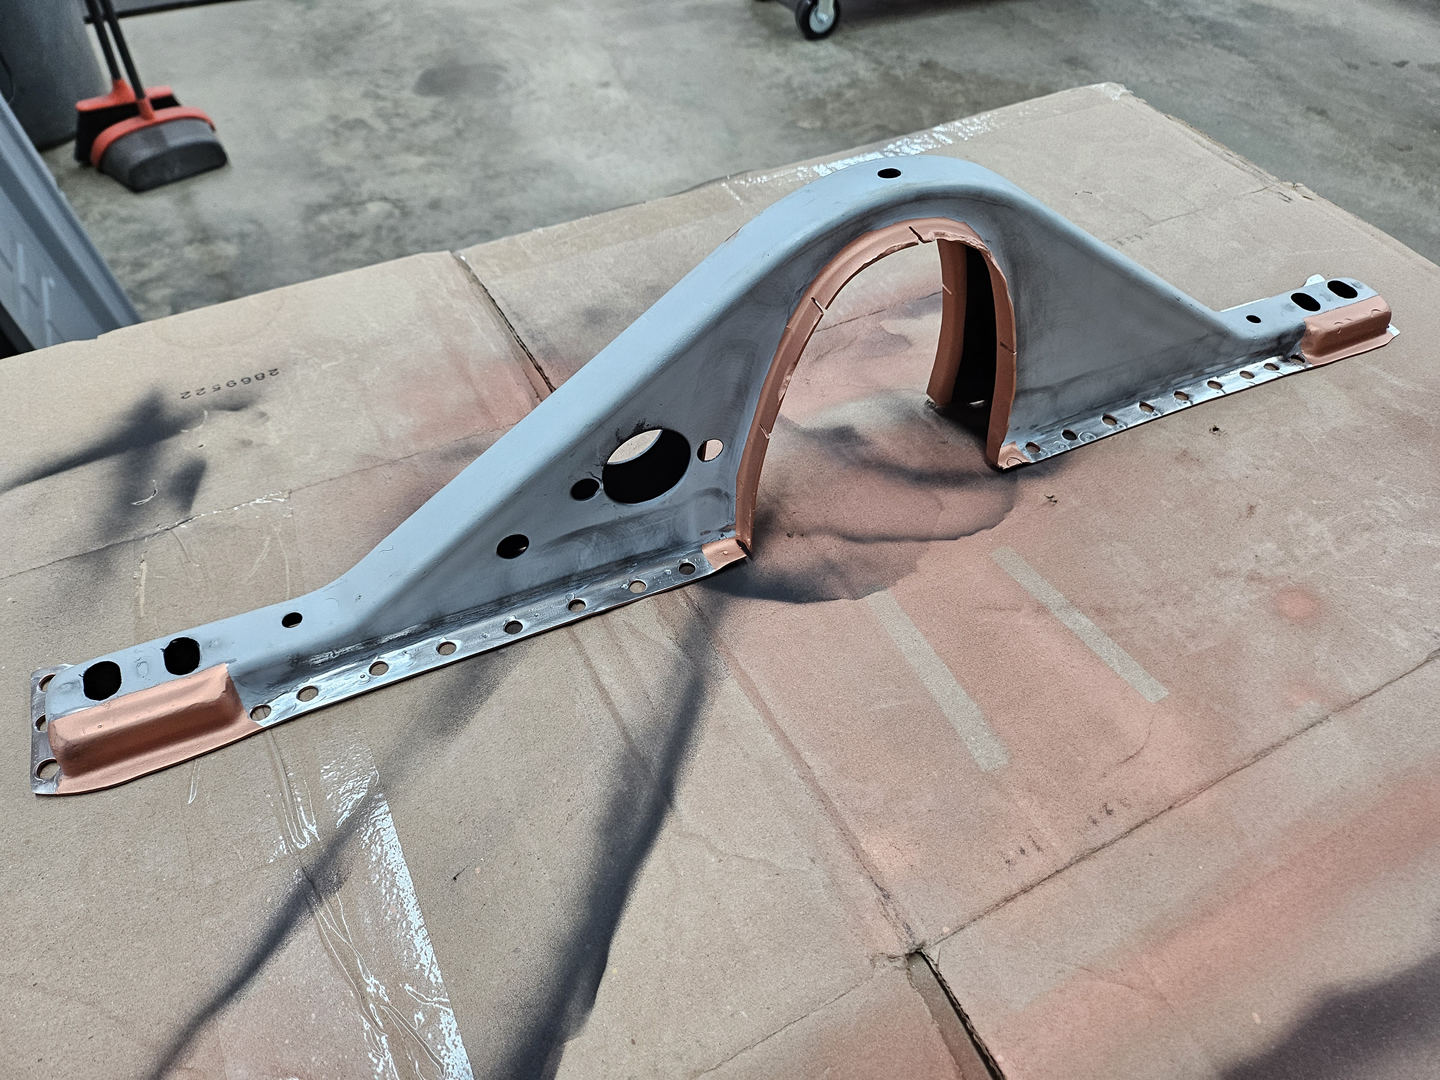
|
|
|
|
|
|
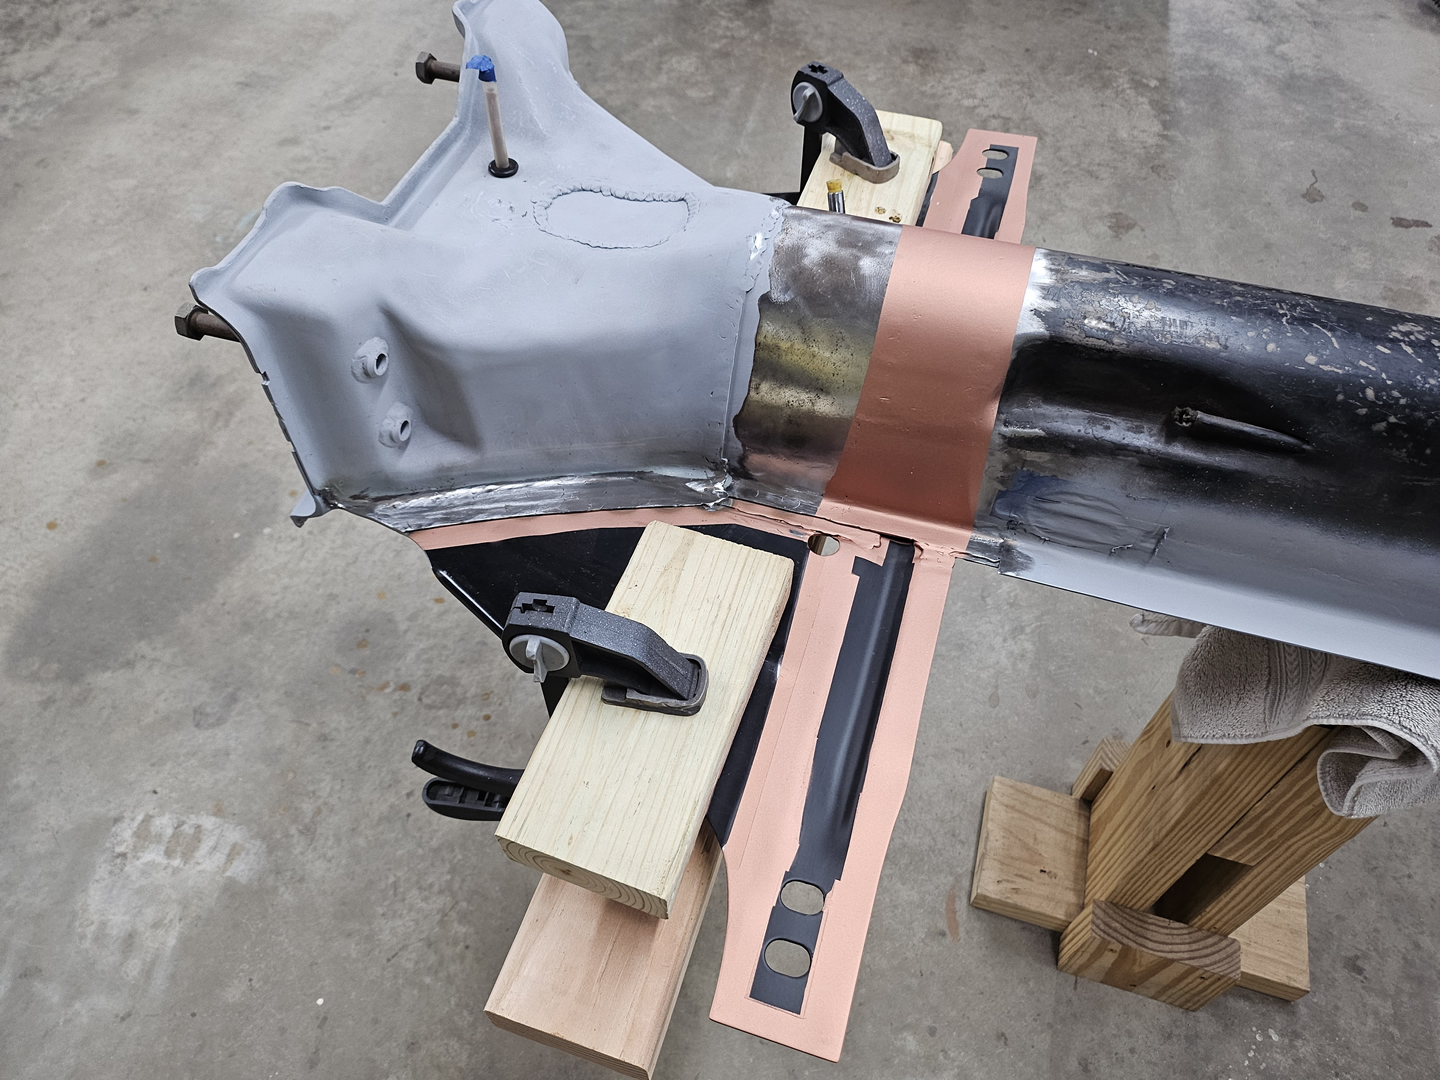
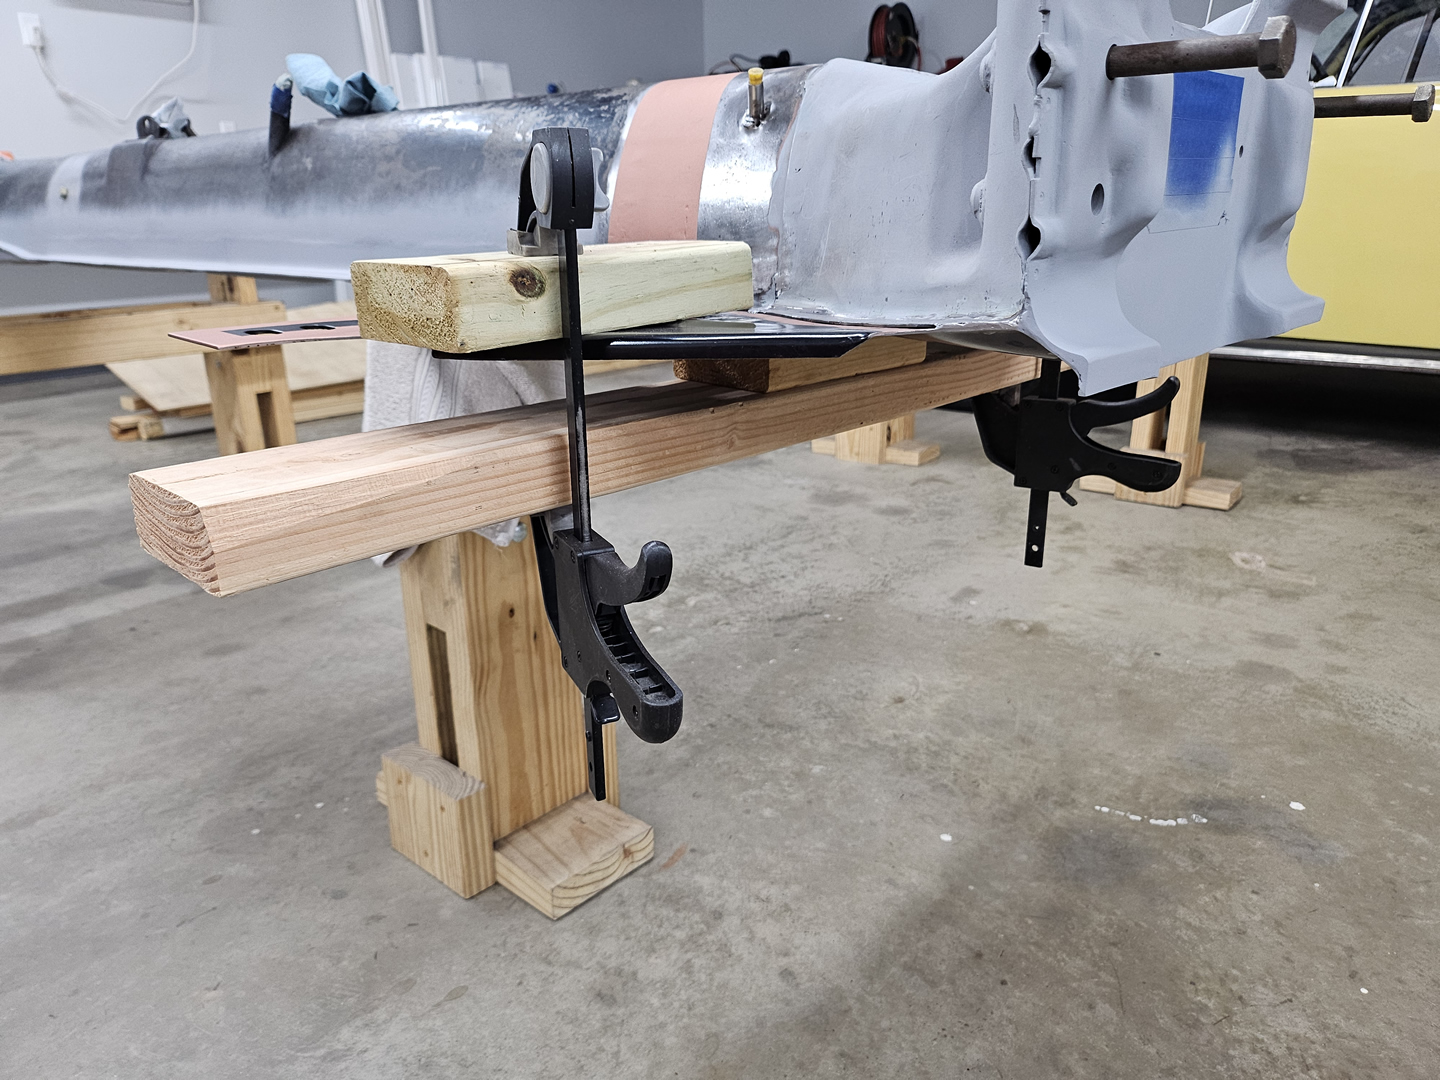
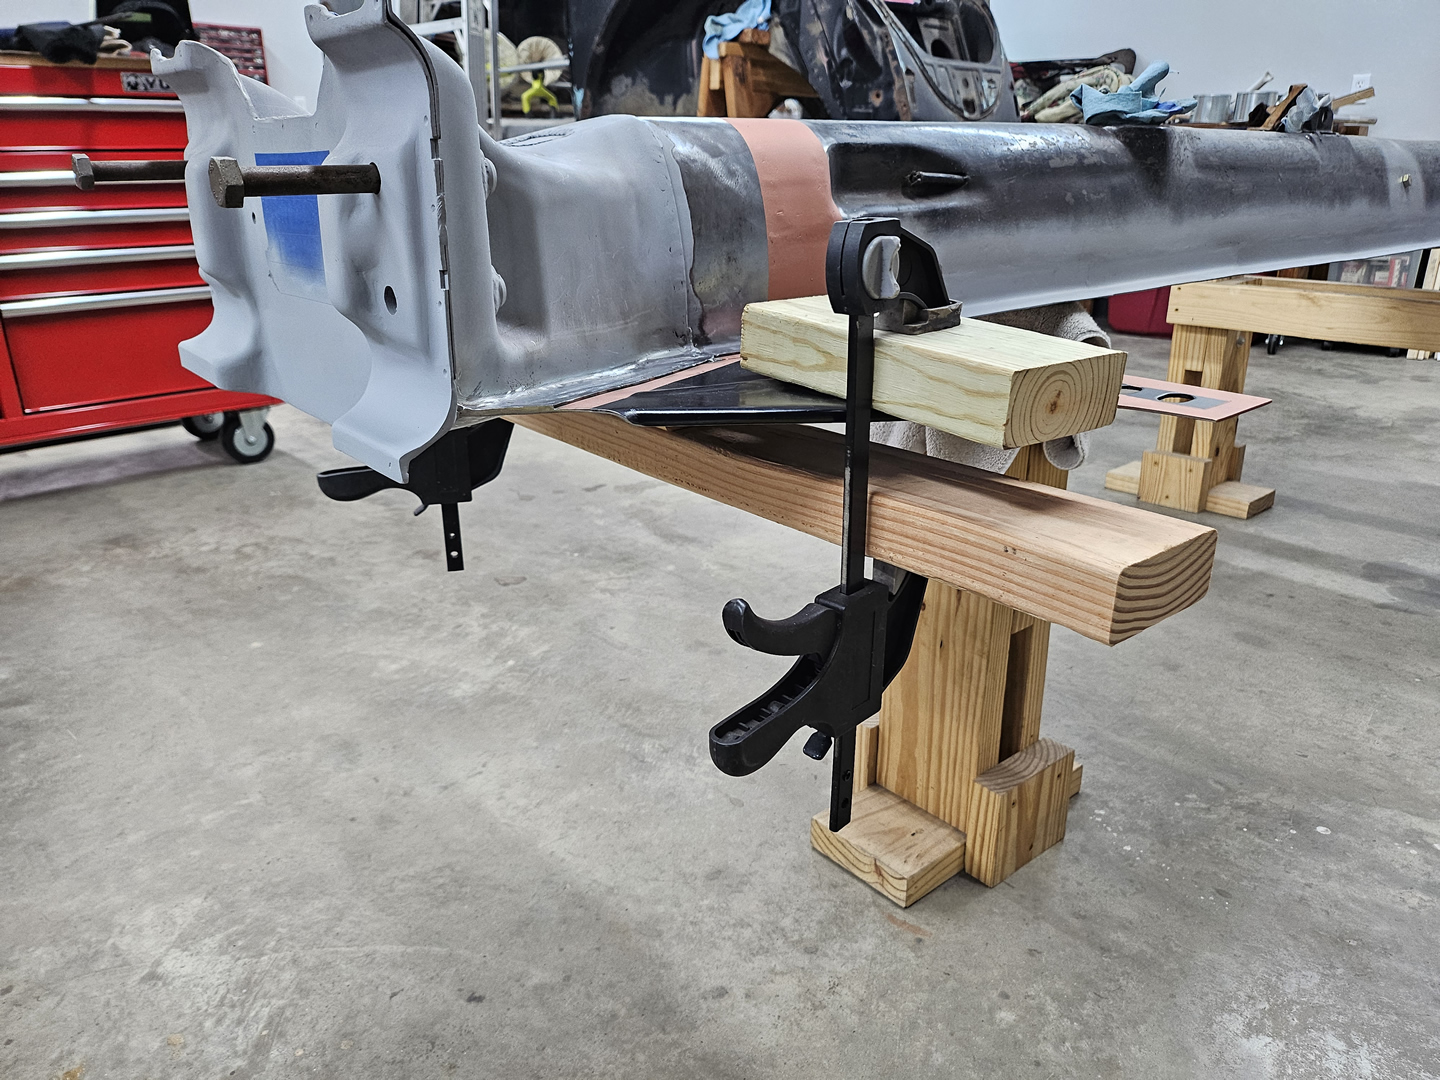
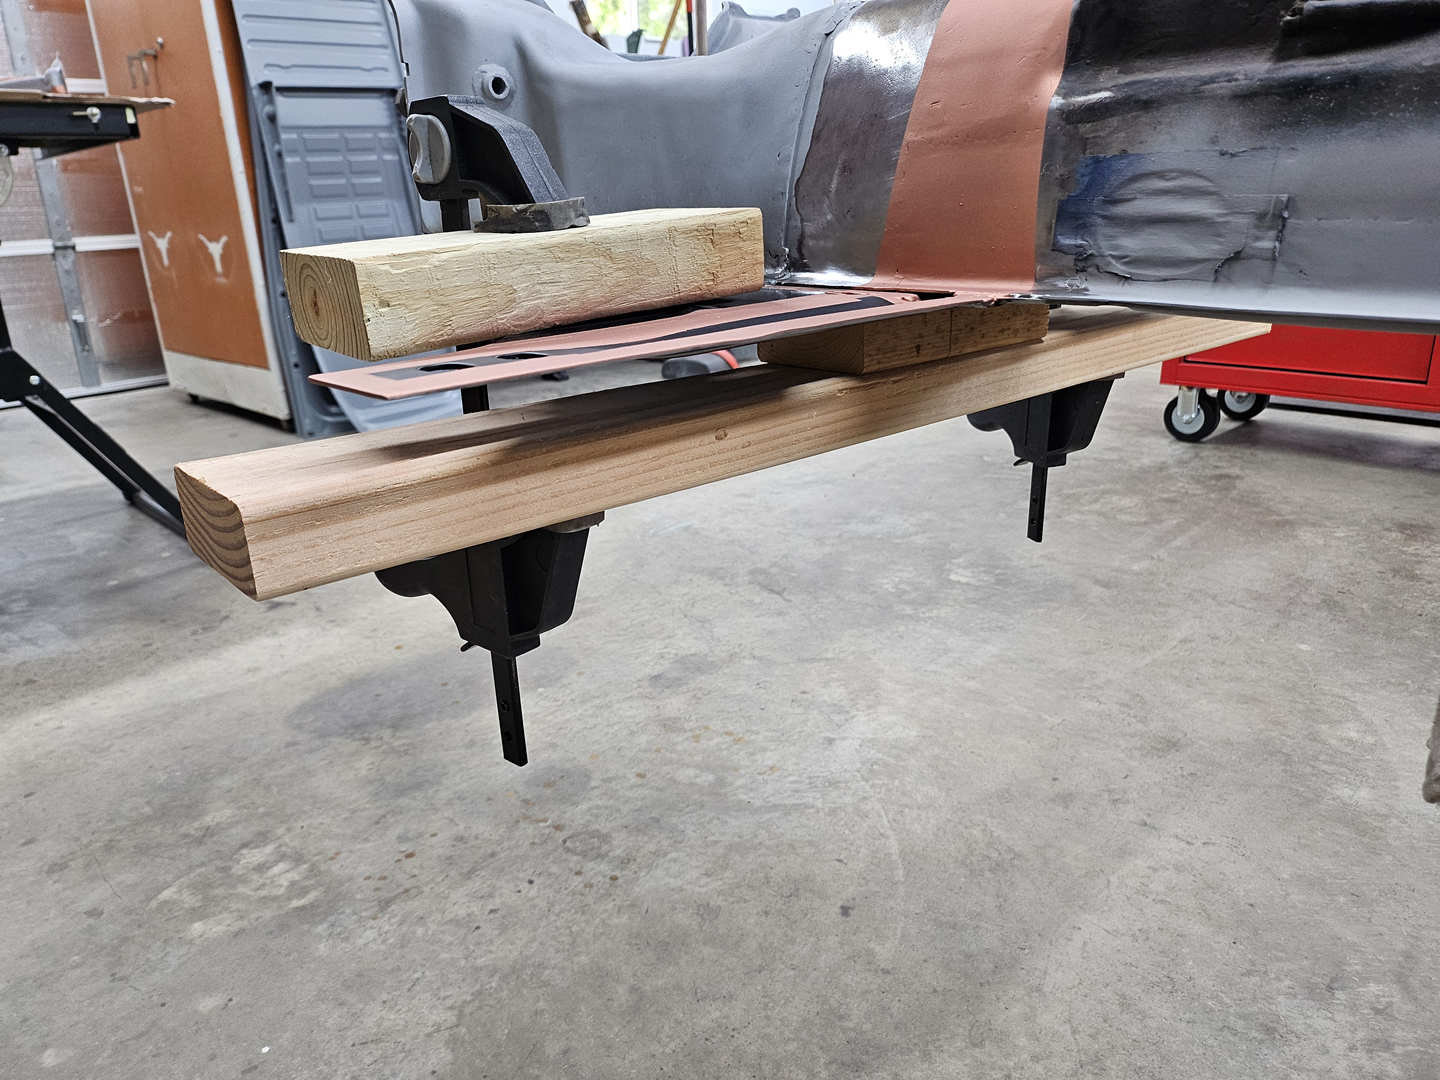
All the welding I did on the frame head bottom plate caused it to bow upwards a bit, so I used clamps and wood blocks to pull it down level to where it should be.
|
|
|
|
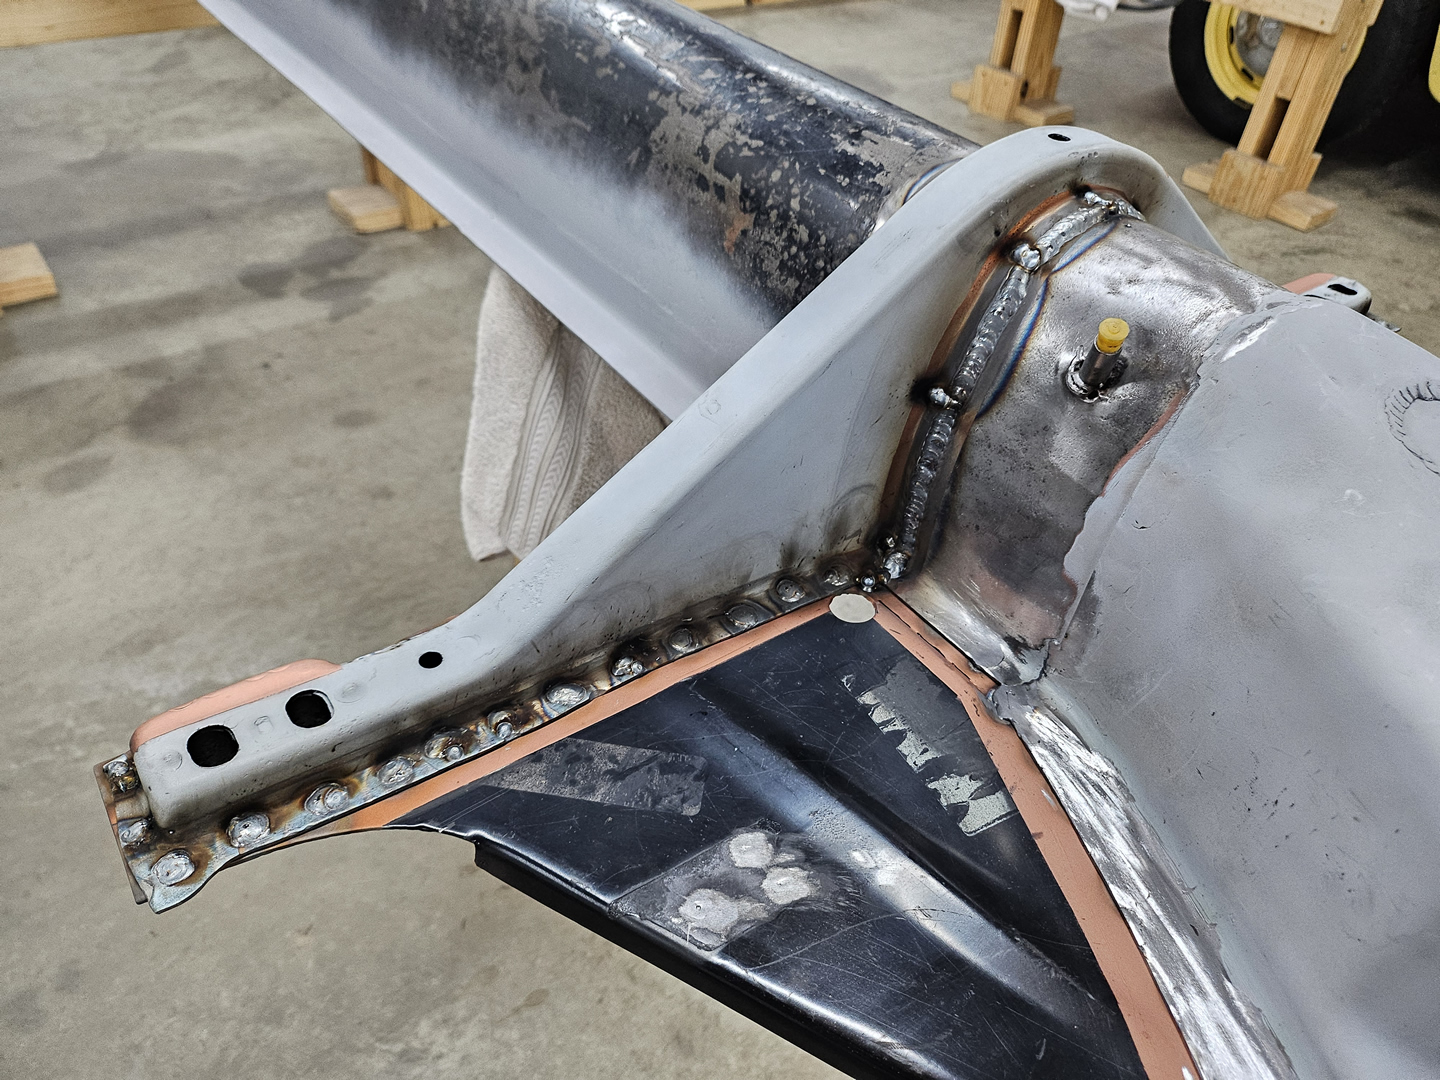
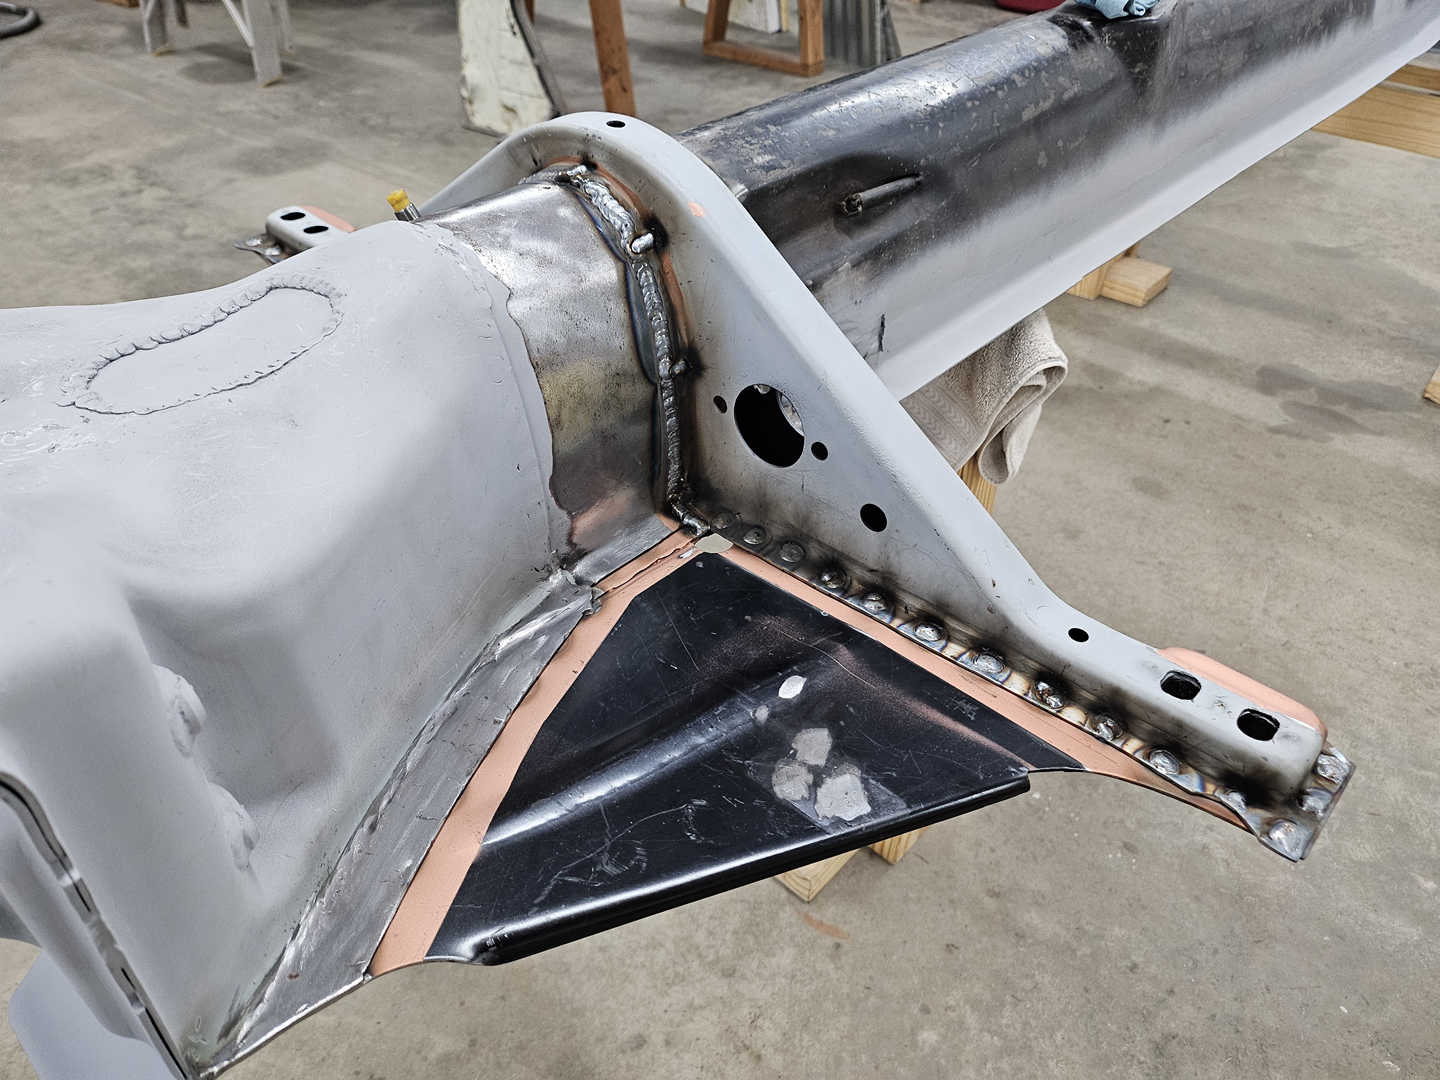
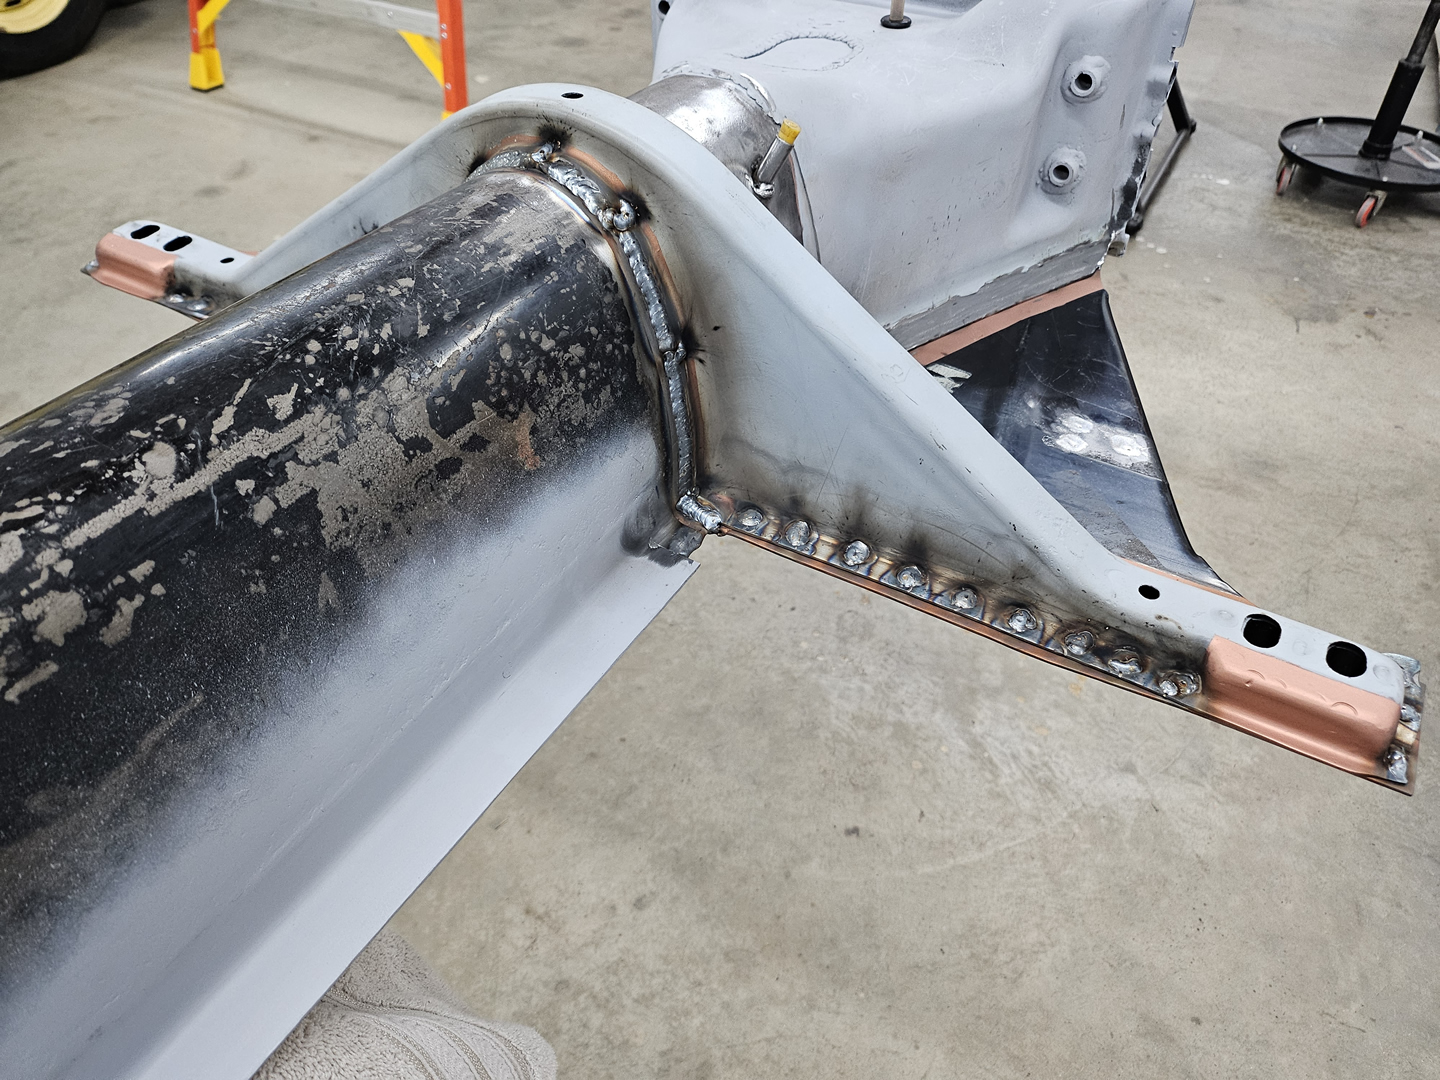
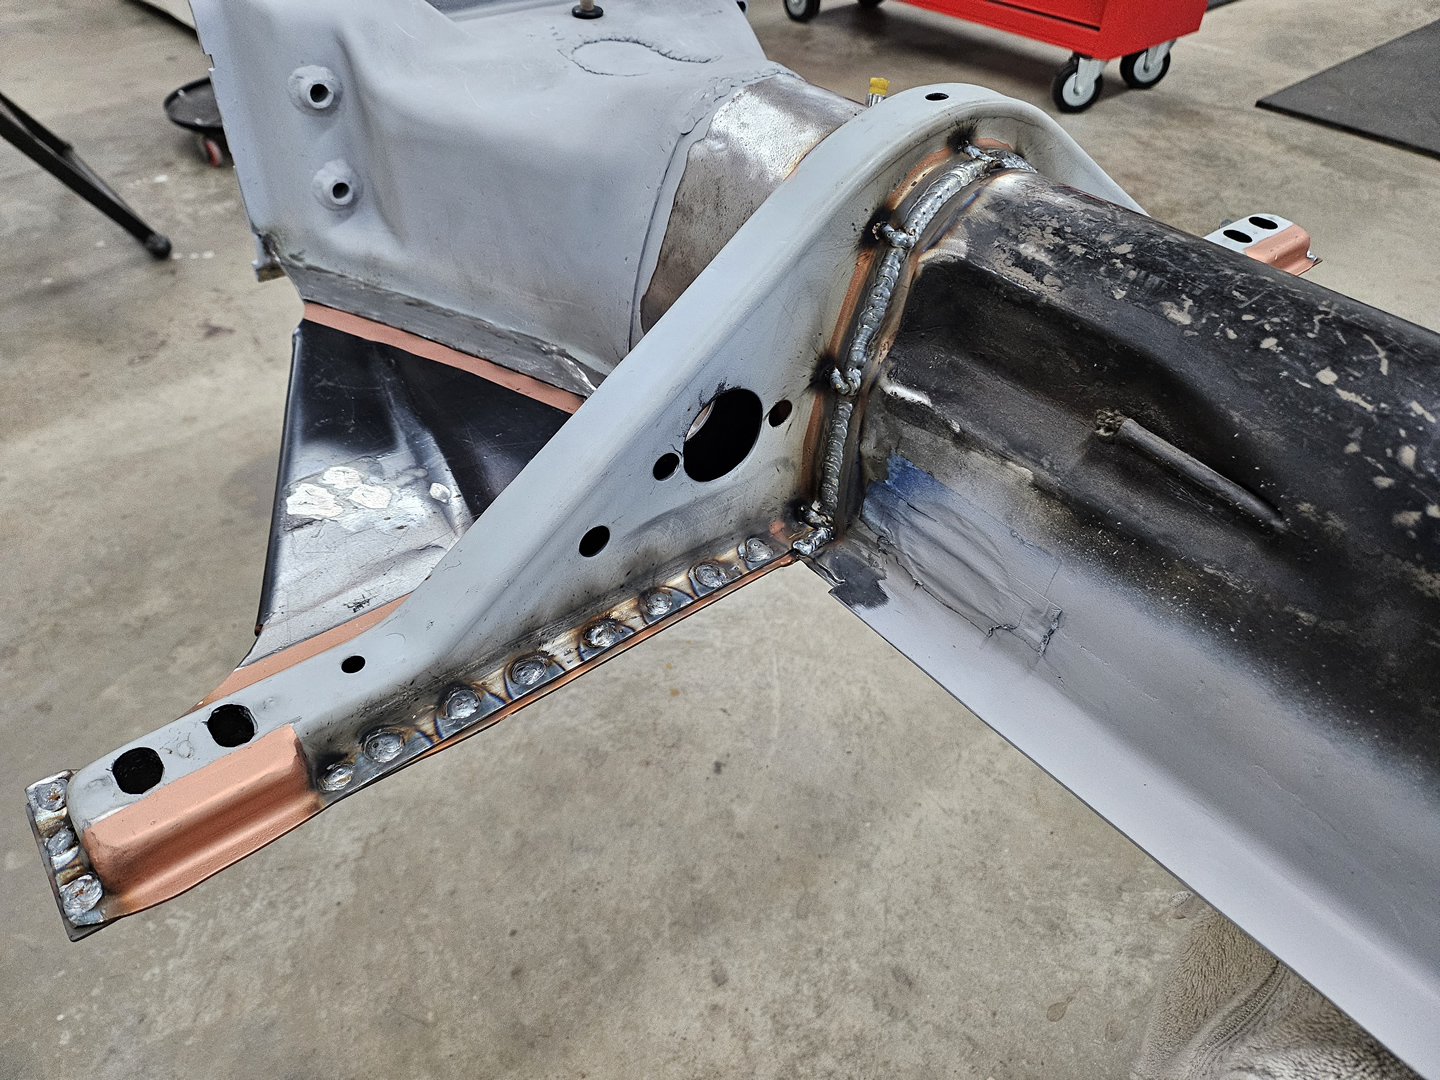
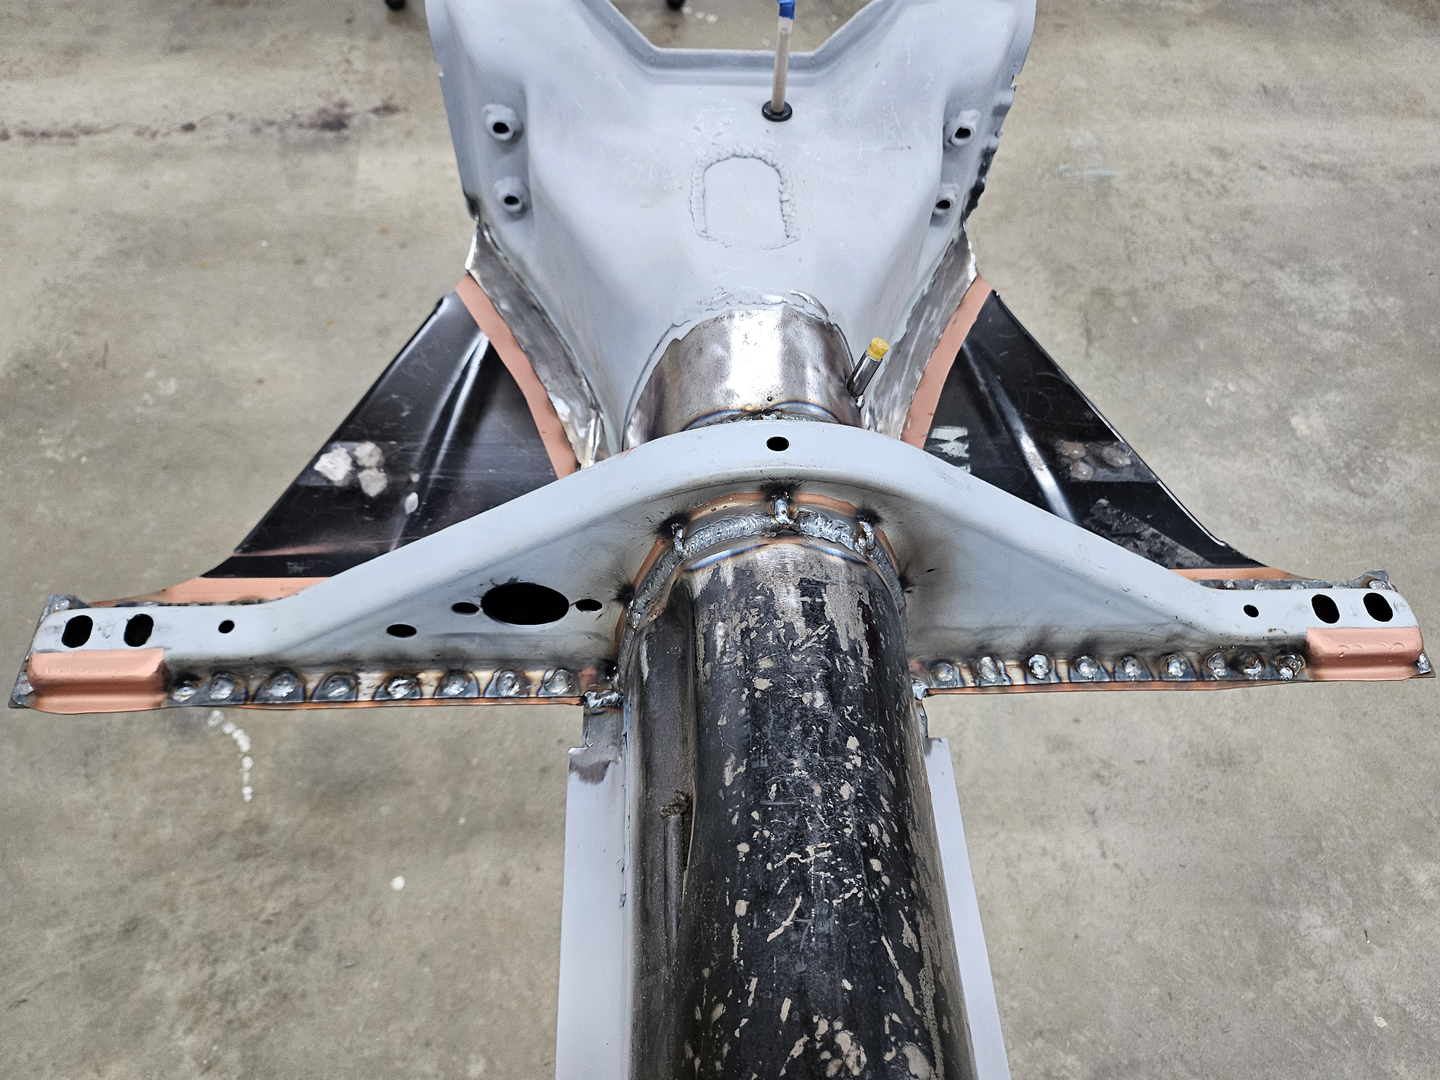
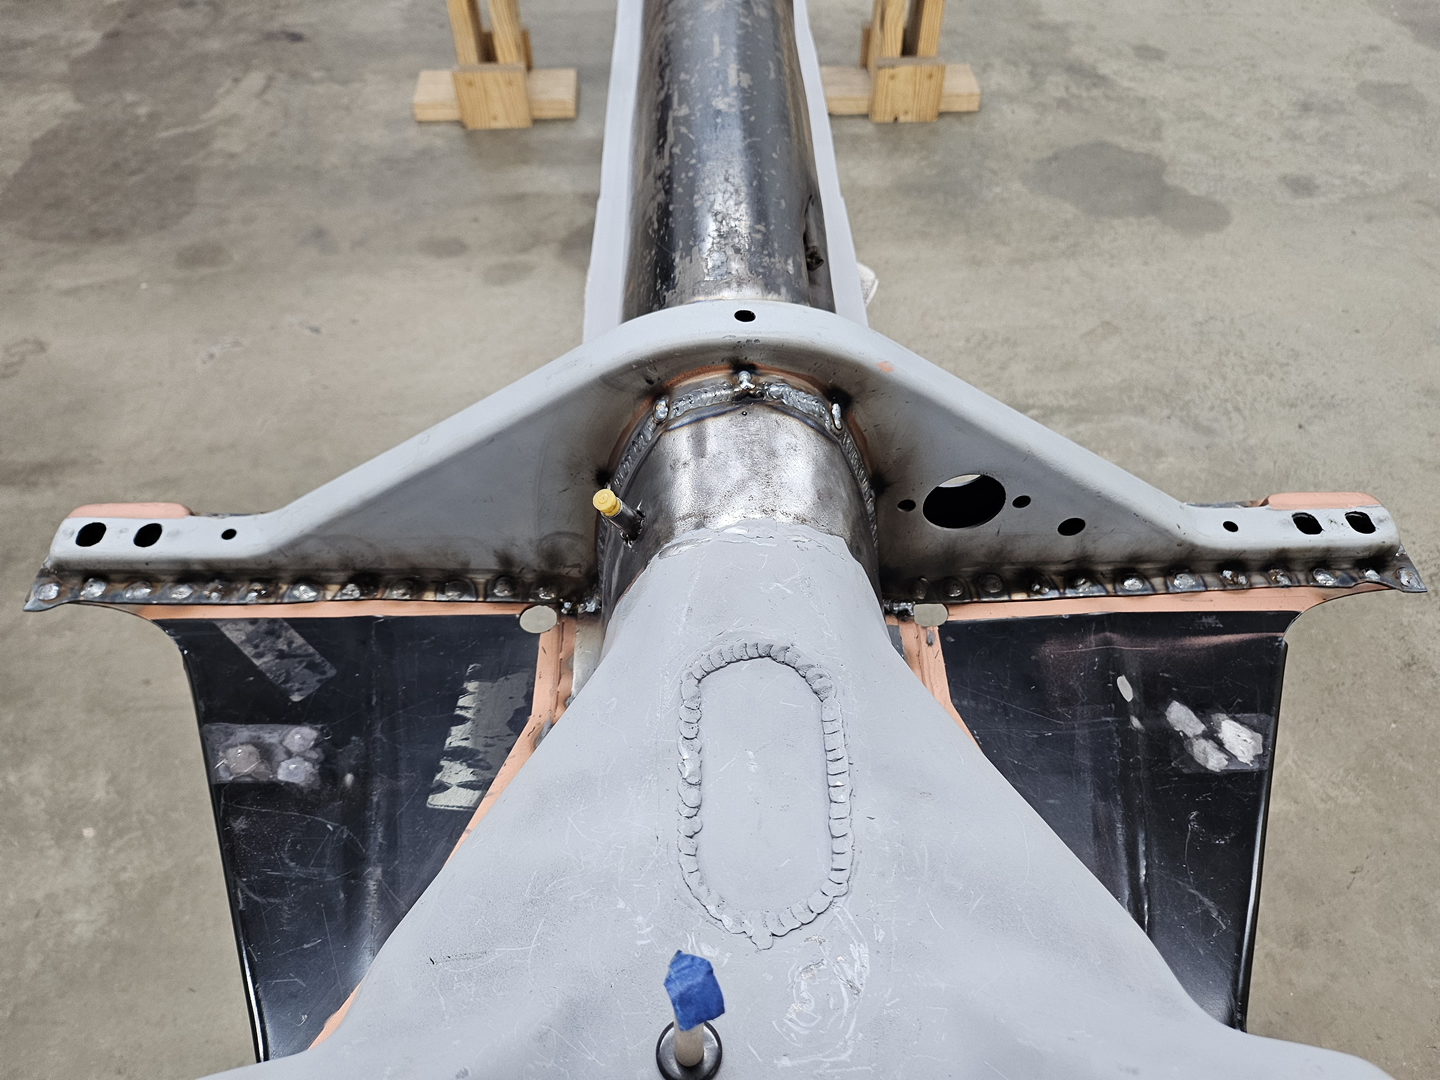
The welding process took a while as I had to keep cooling it off with compressed air to keep the heat down, especially on the long seam welds. On these seams, I could only do a couple of inches at a time. Also, the Napoleon hat wanted to tilt toward the front from the start. I tacked it at the top of the tunnel on both sides and welded all of the spot welds on the back side first, and it still drifted about 1 millimeter to the front. This was more of an aggravation than an issue. The front firewall that sits on top of it will be replaced, so that can be adjusted to match at that time.
|
|
|
|
|
|
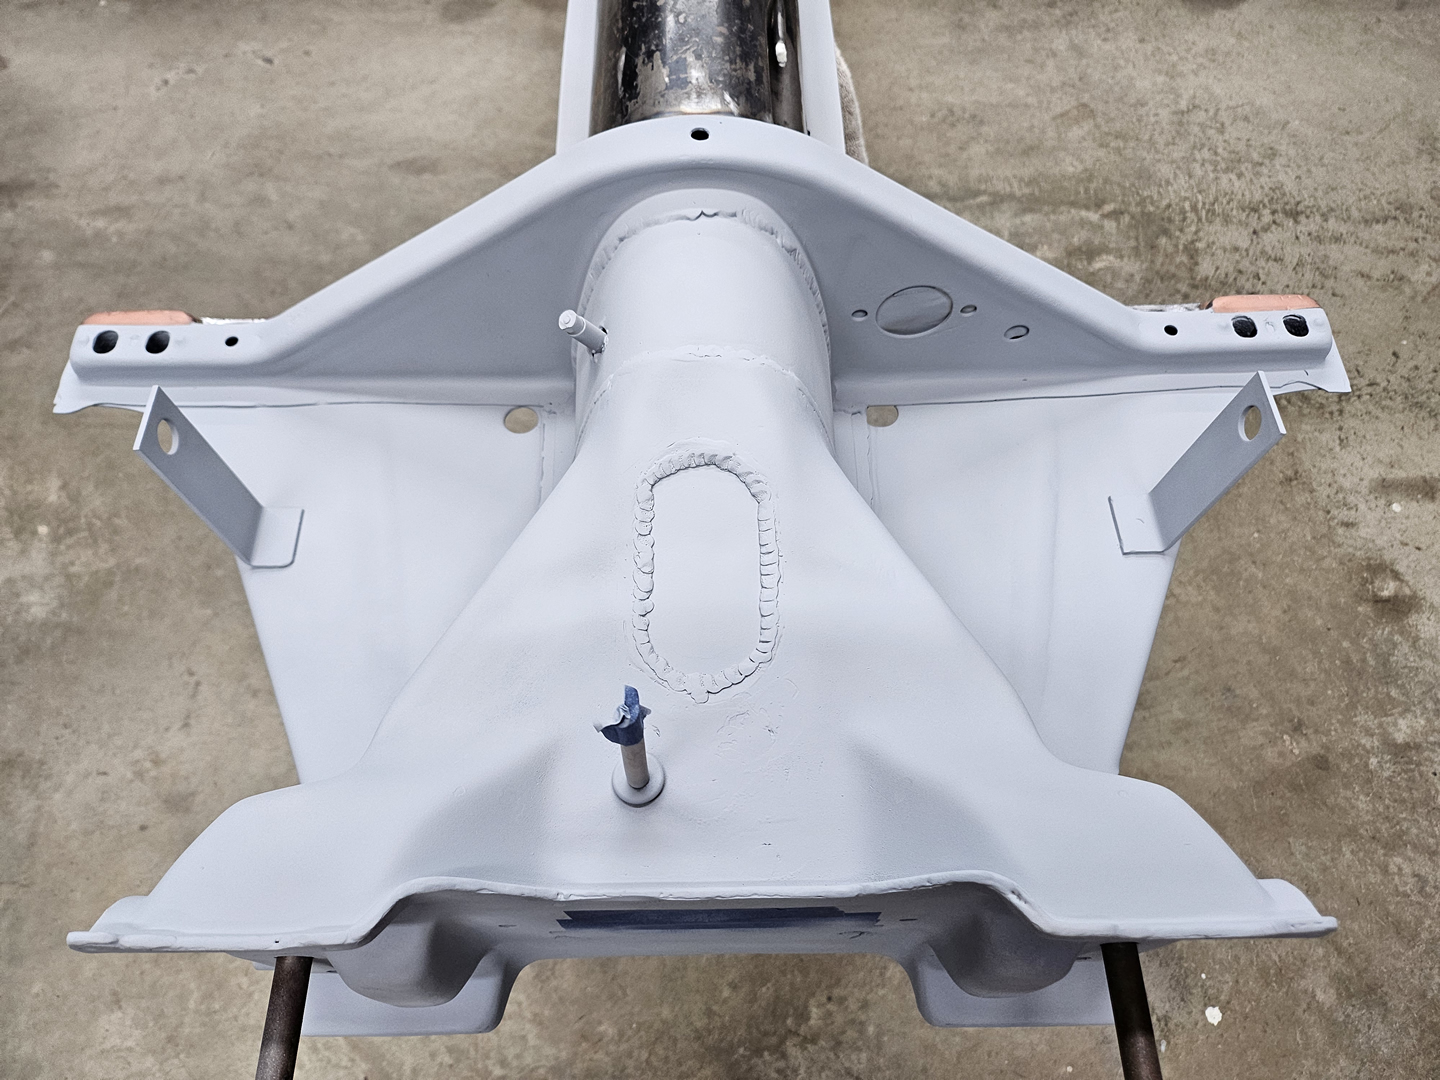
I added a seam weld down both sides of the frame head where it fits over the tunnel. There are a few spot welds in that area, but I wasn't really happy with them being the only welds there and decided that it would be better, structurally, to run seams in those areas. It may be overkill, but I don't want to find out later that the spot welds weren't sufficient. Besides, my welds have improved since I got the new welder and I feel better about that area now.

|

|
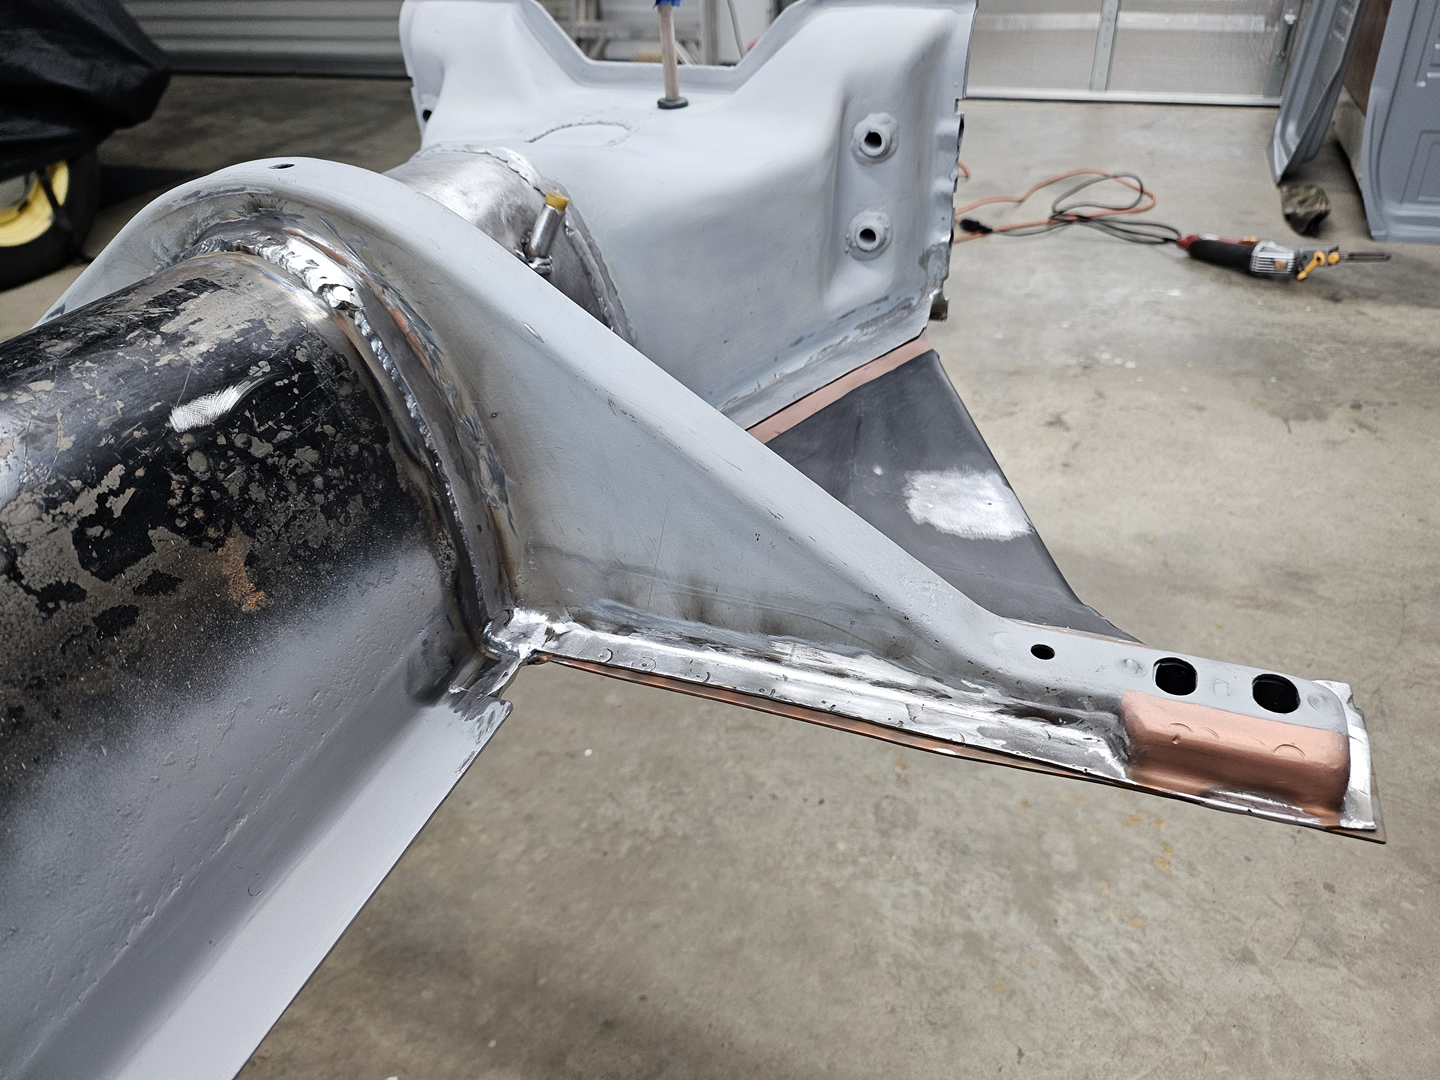
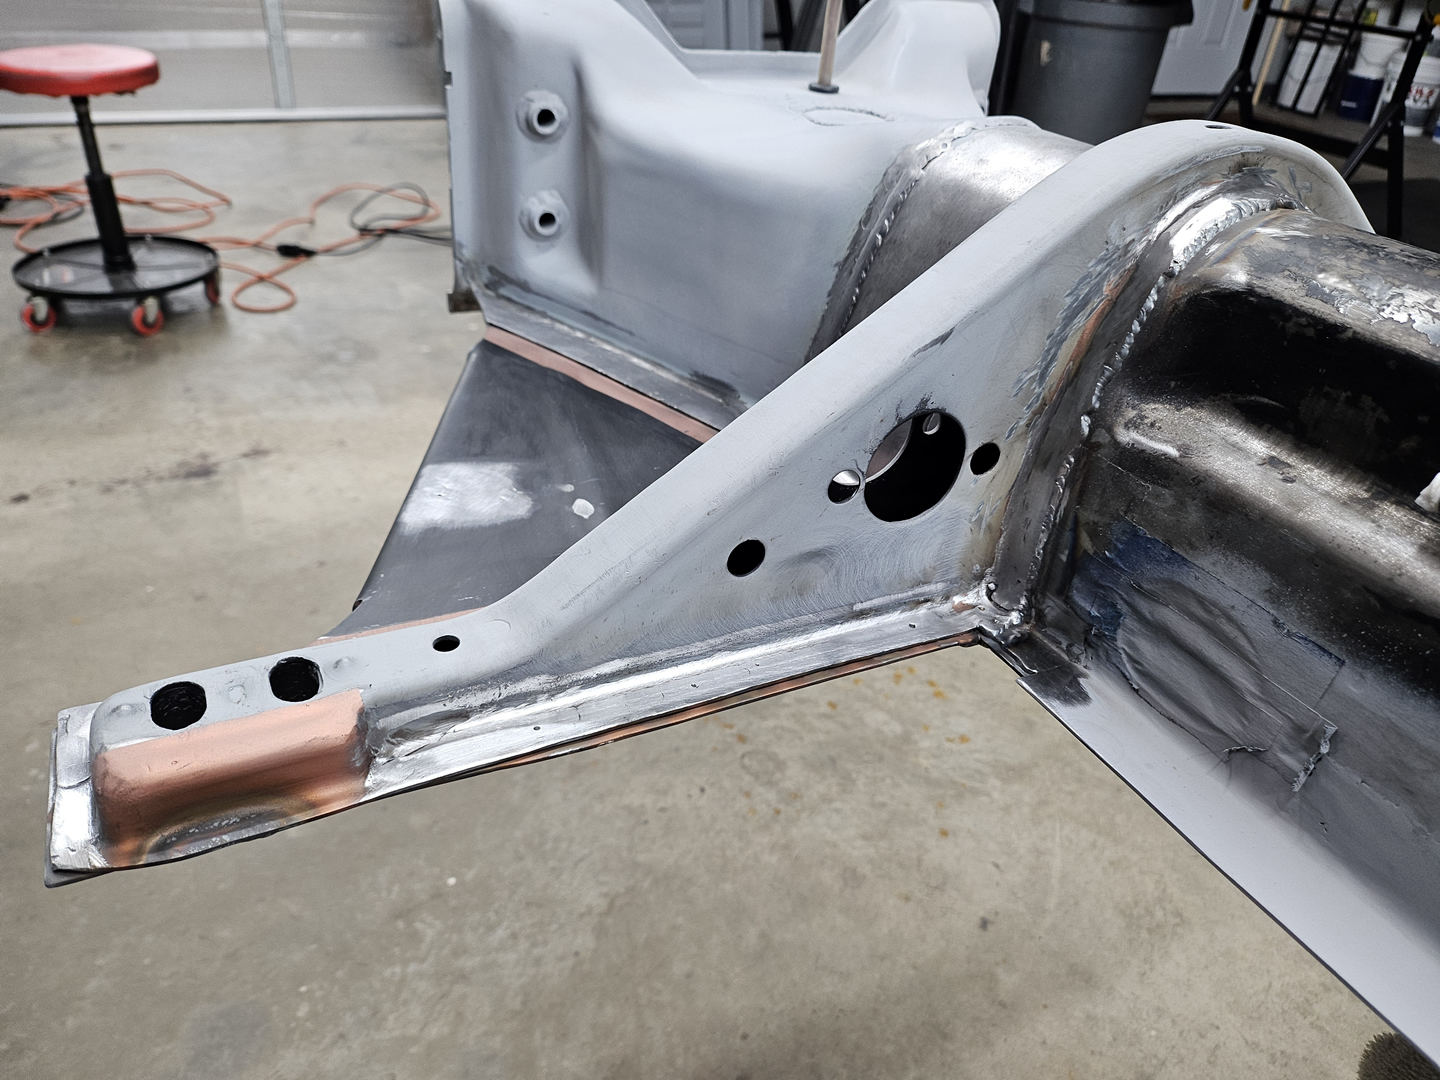
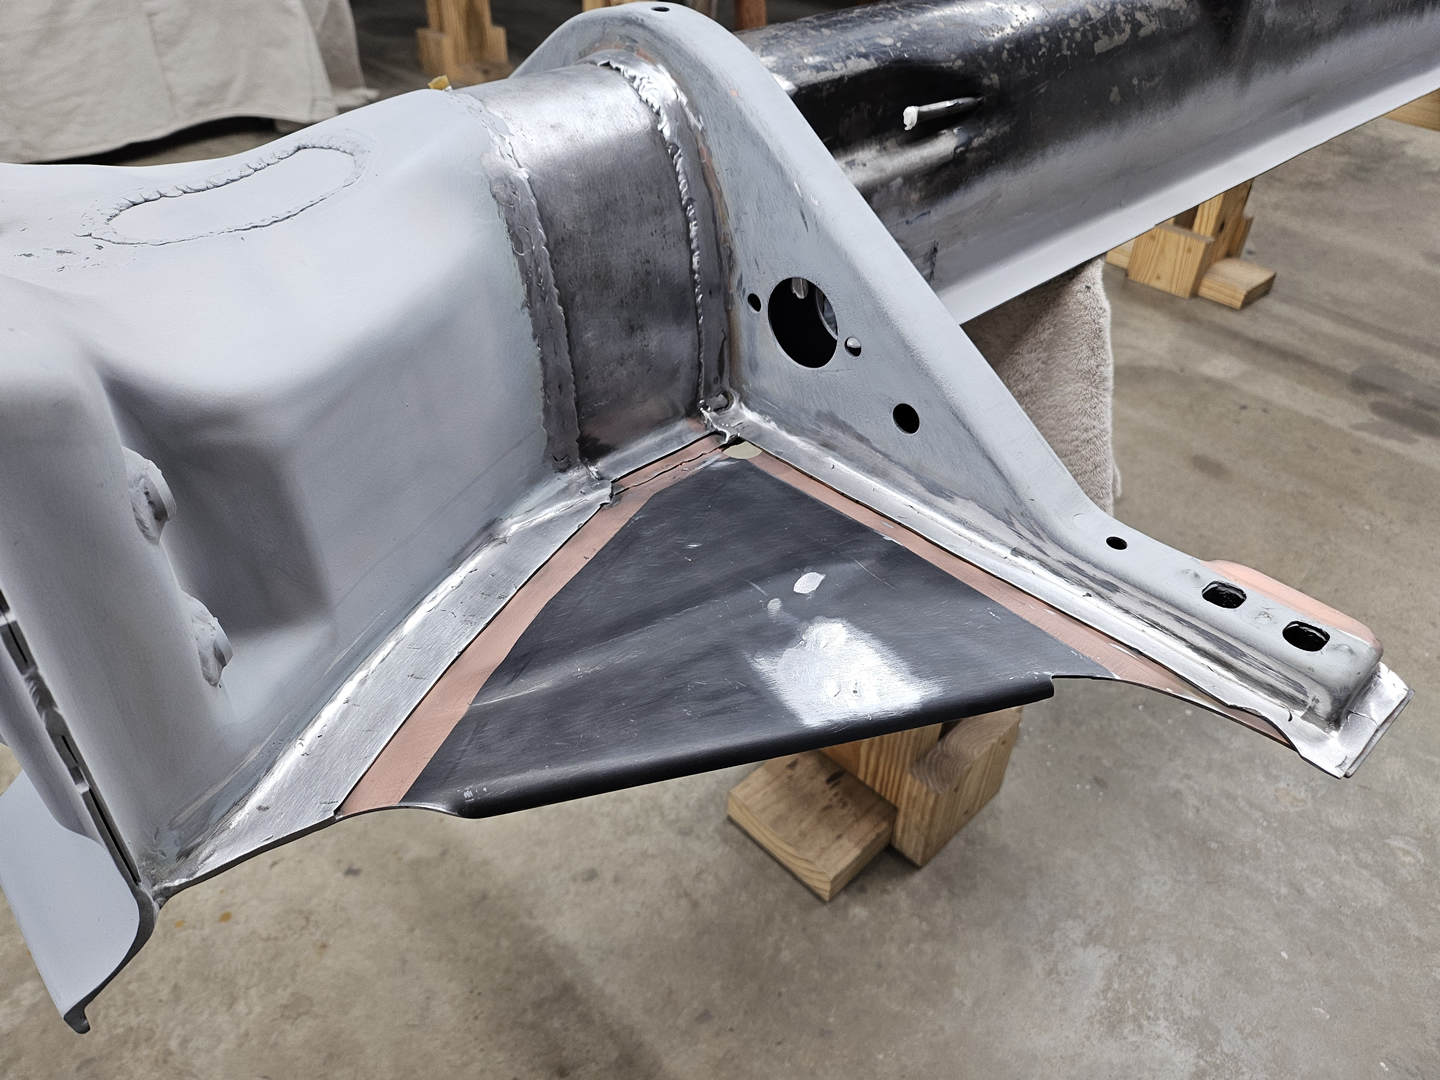
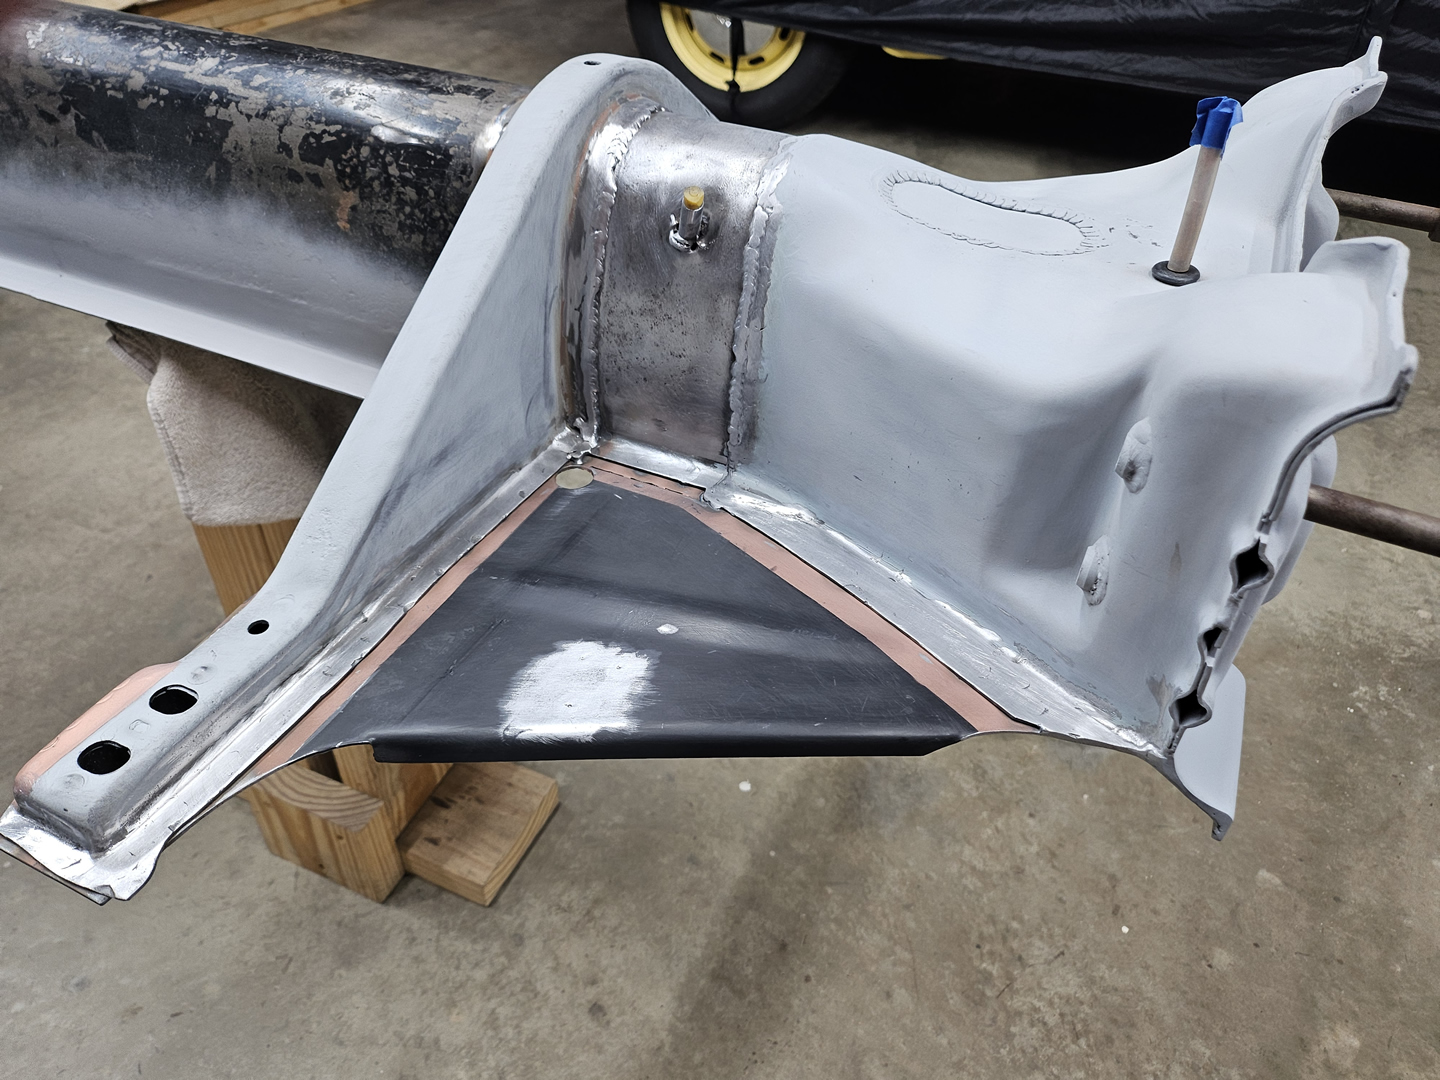
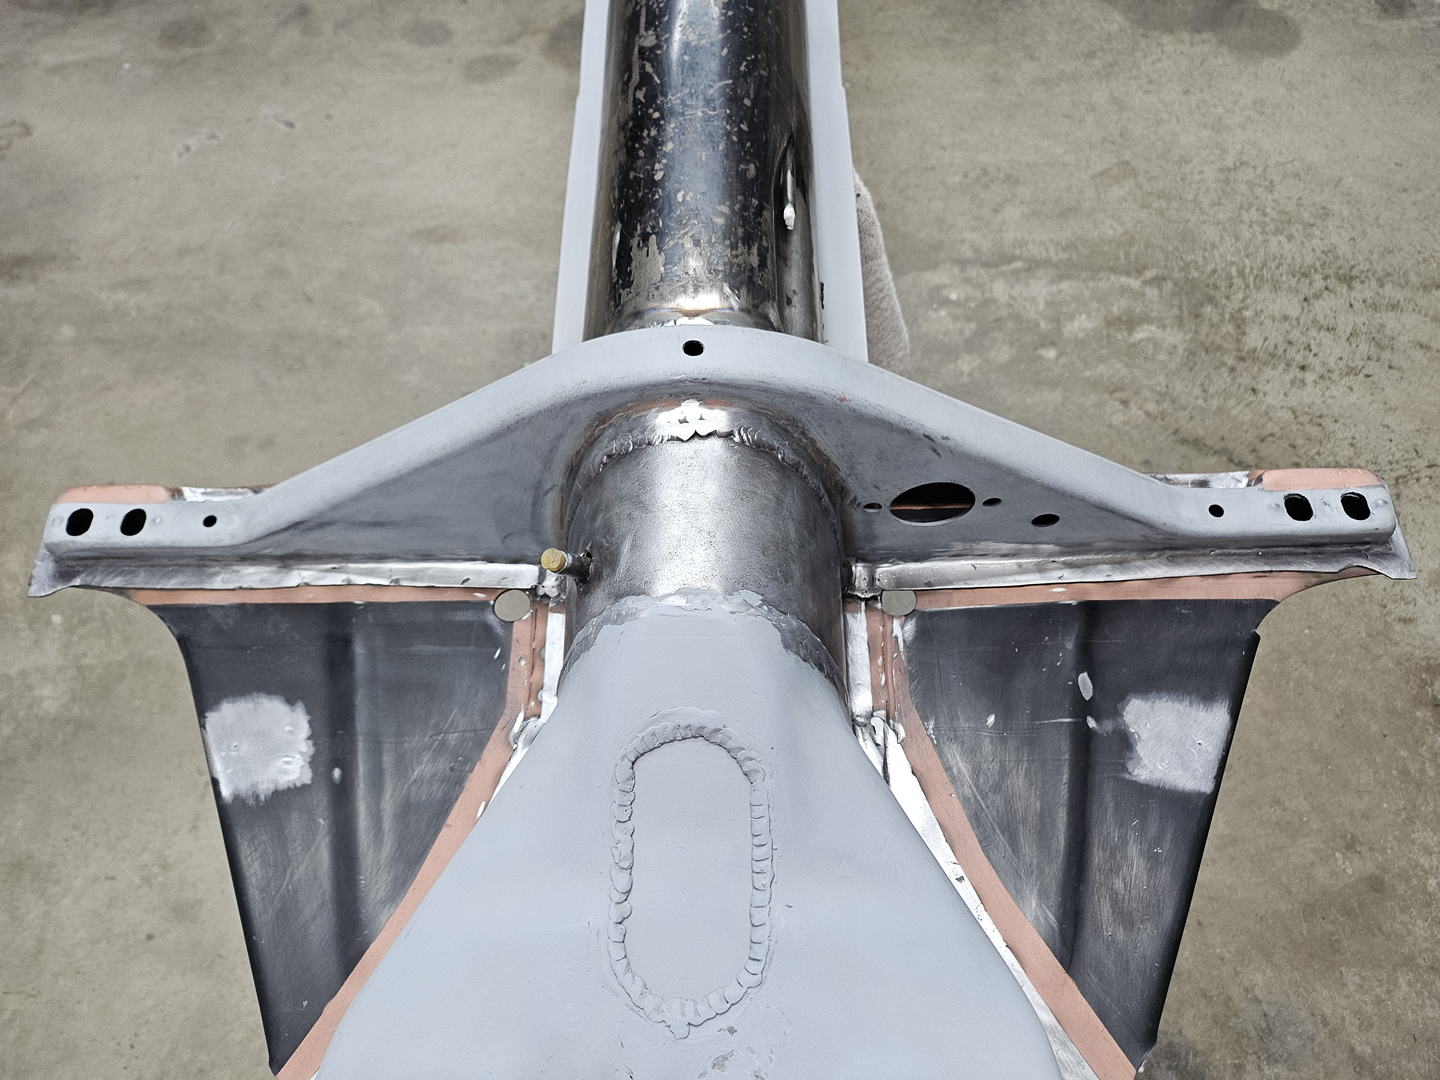
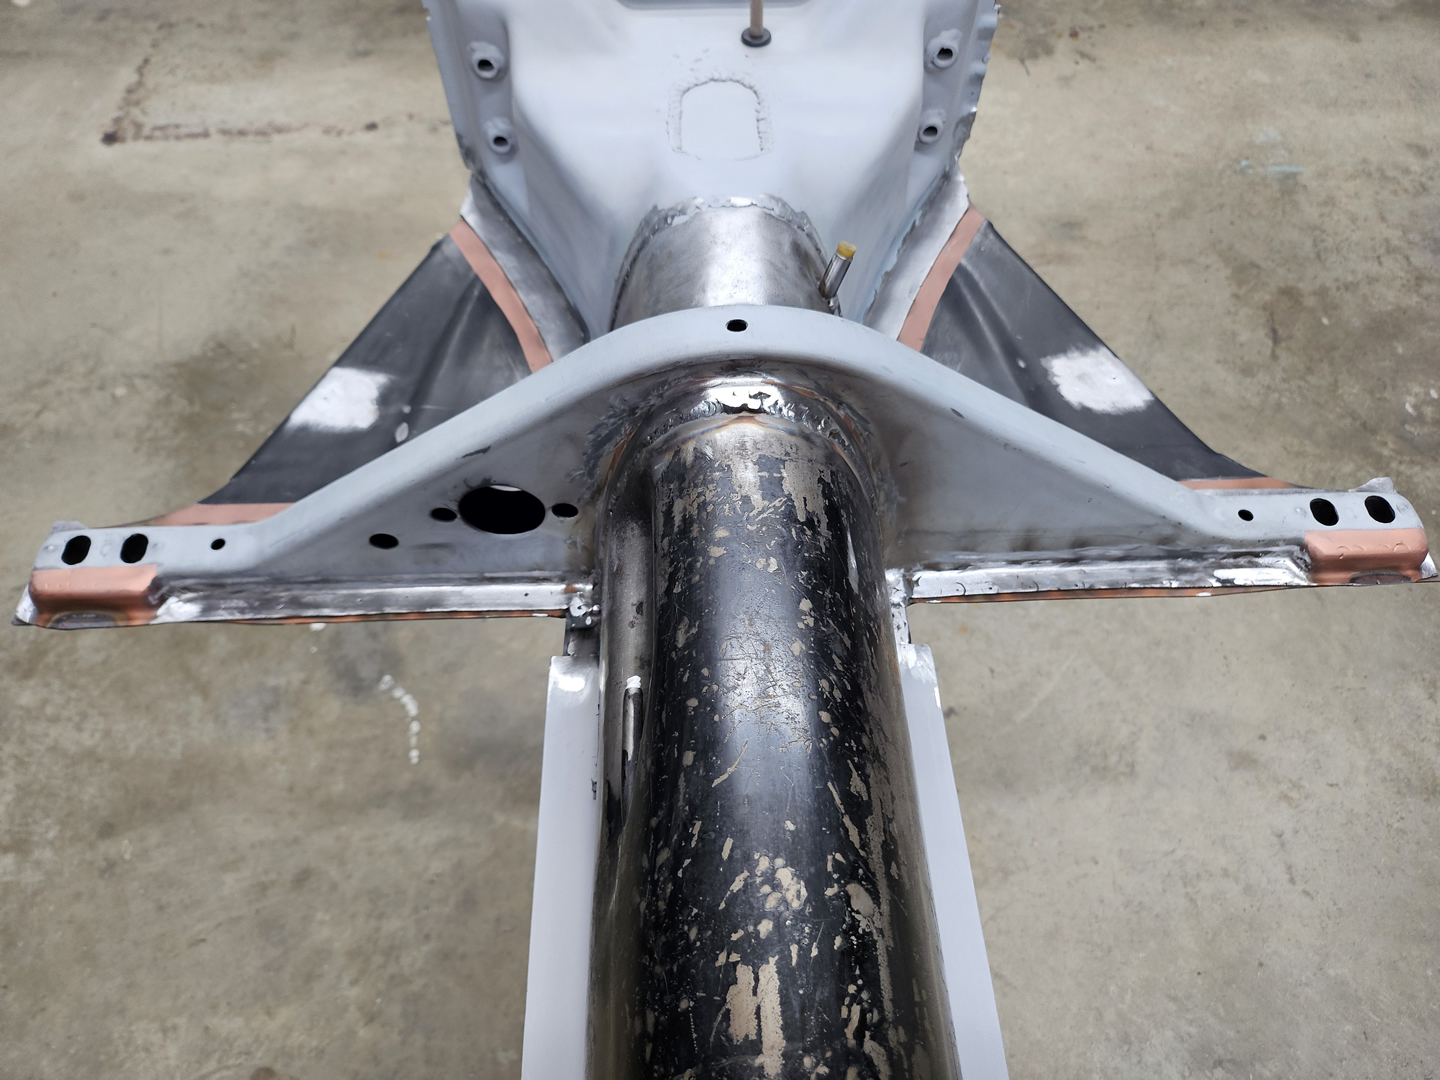
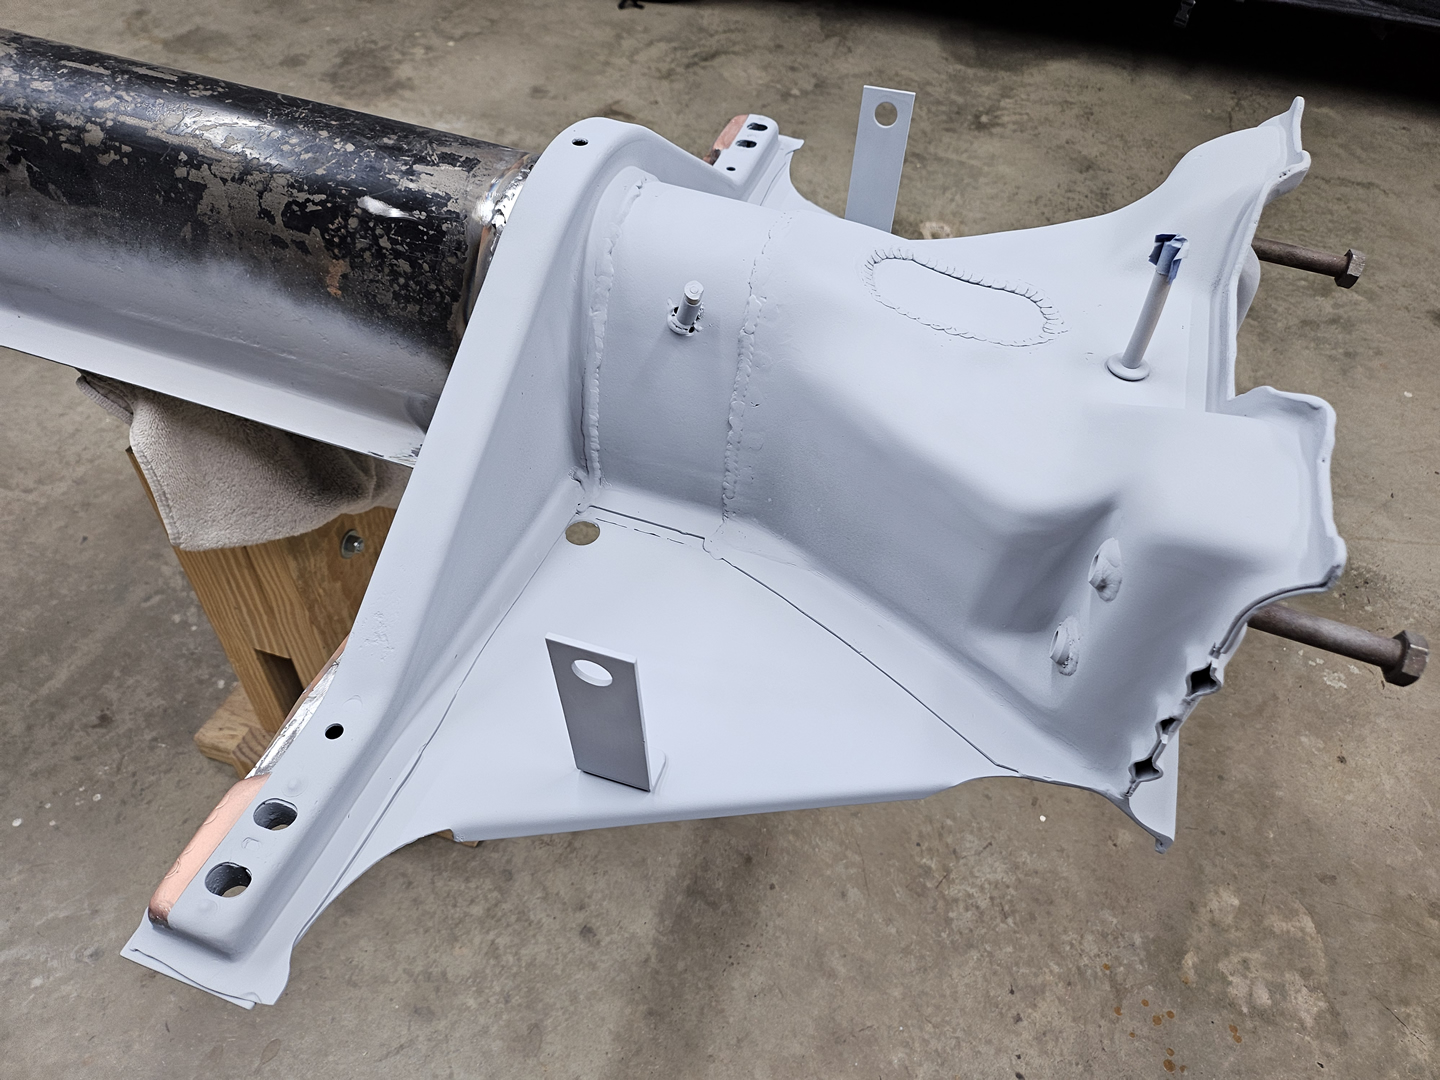
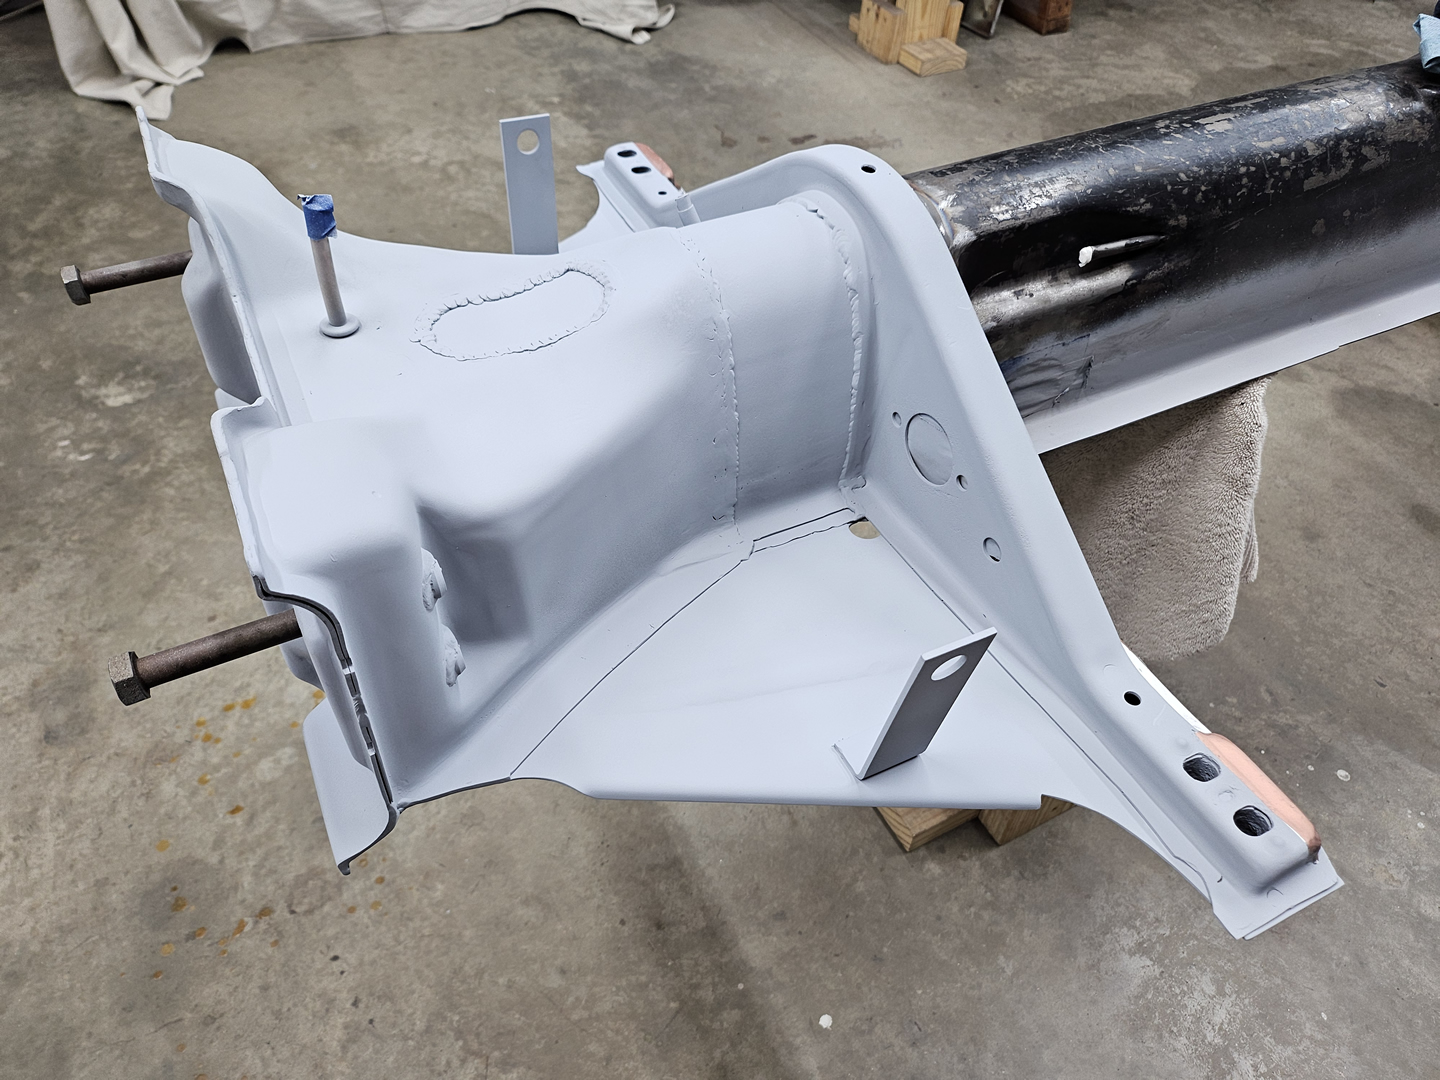
I then ground down the spot and seam welds. The spot welds on the rear side of the Napoleon hat need to be ground down flat in order to properly fit the floor pans. On the front side, I ground them down flat as well just to have them match. The seam welds were fairly tall, and I ground them down a bit, too. All of these welds will be covered at some point by either the floor pans or by seam sealer.
|
|
|
|
|
|
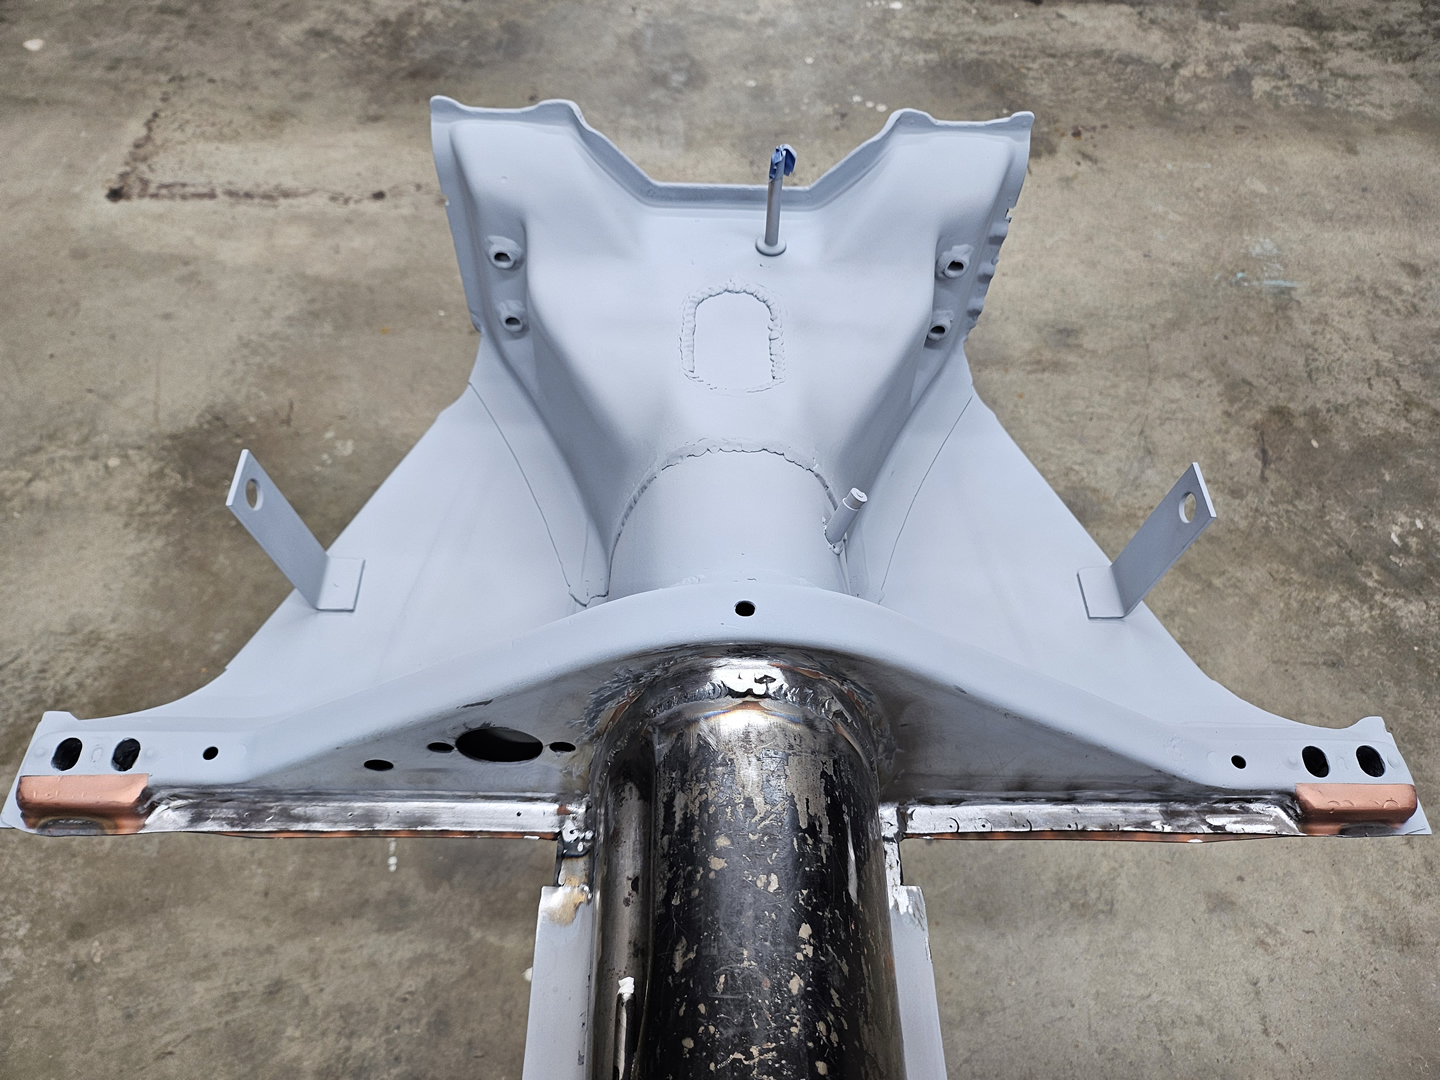
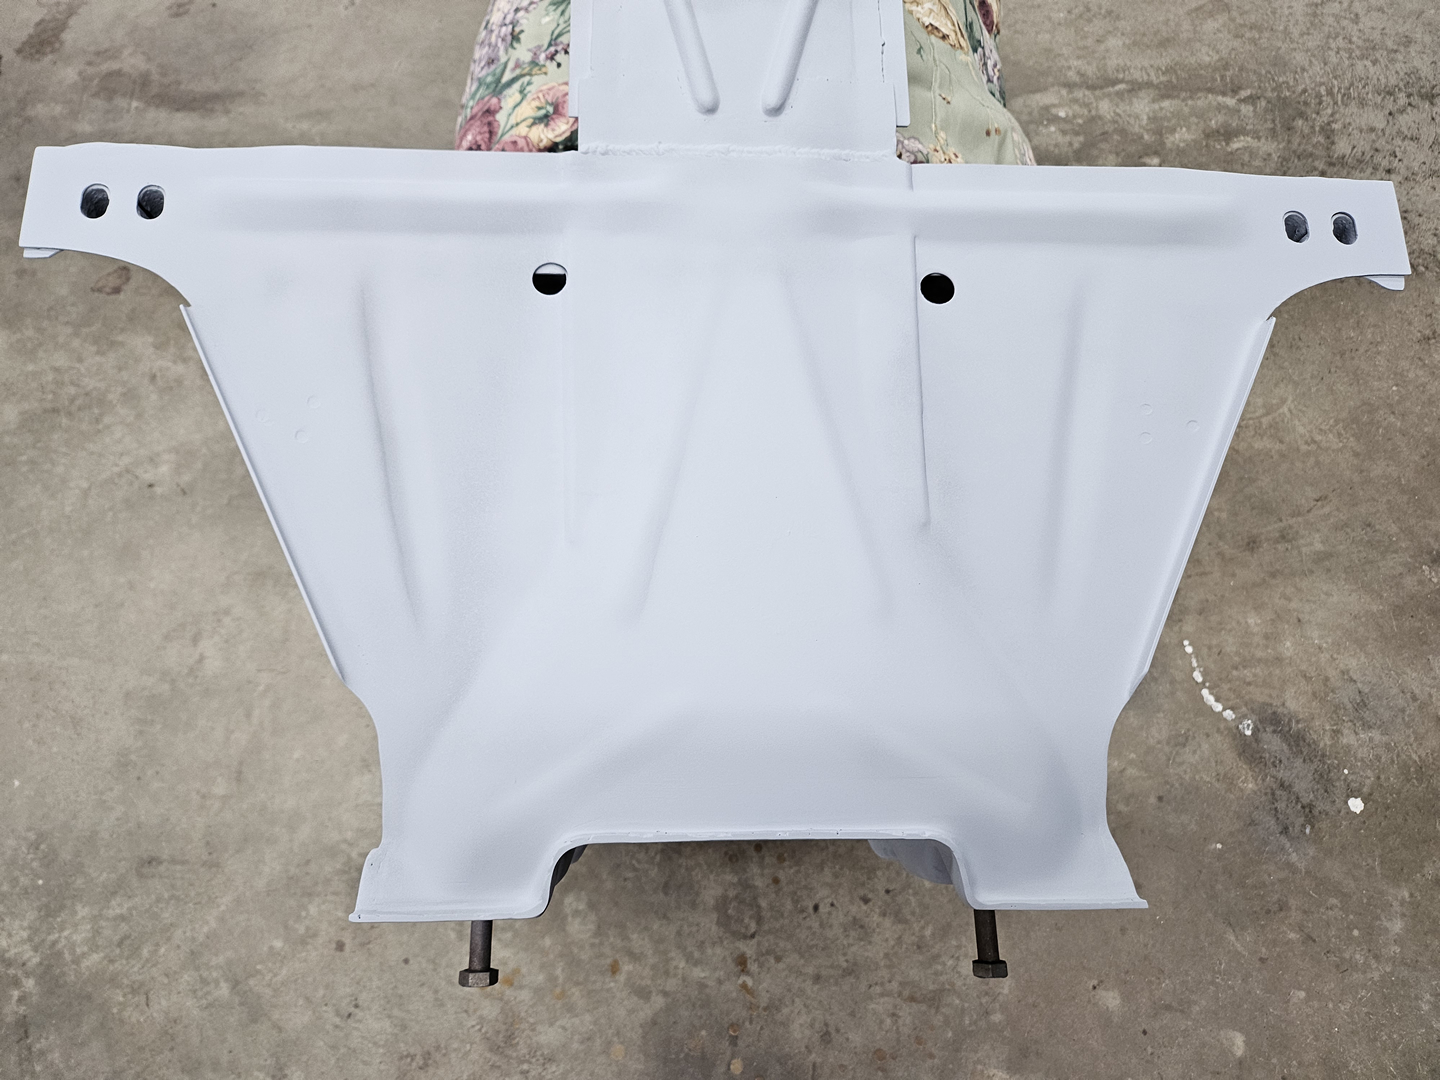
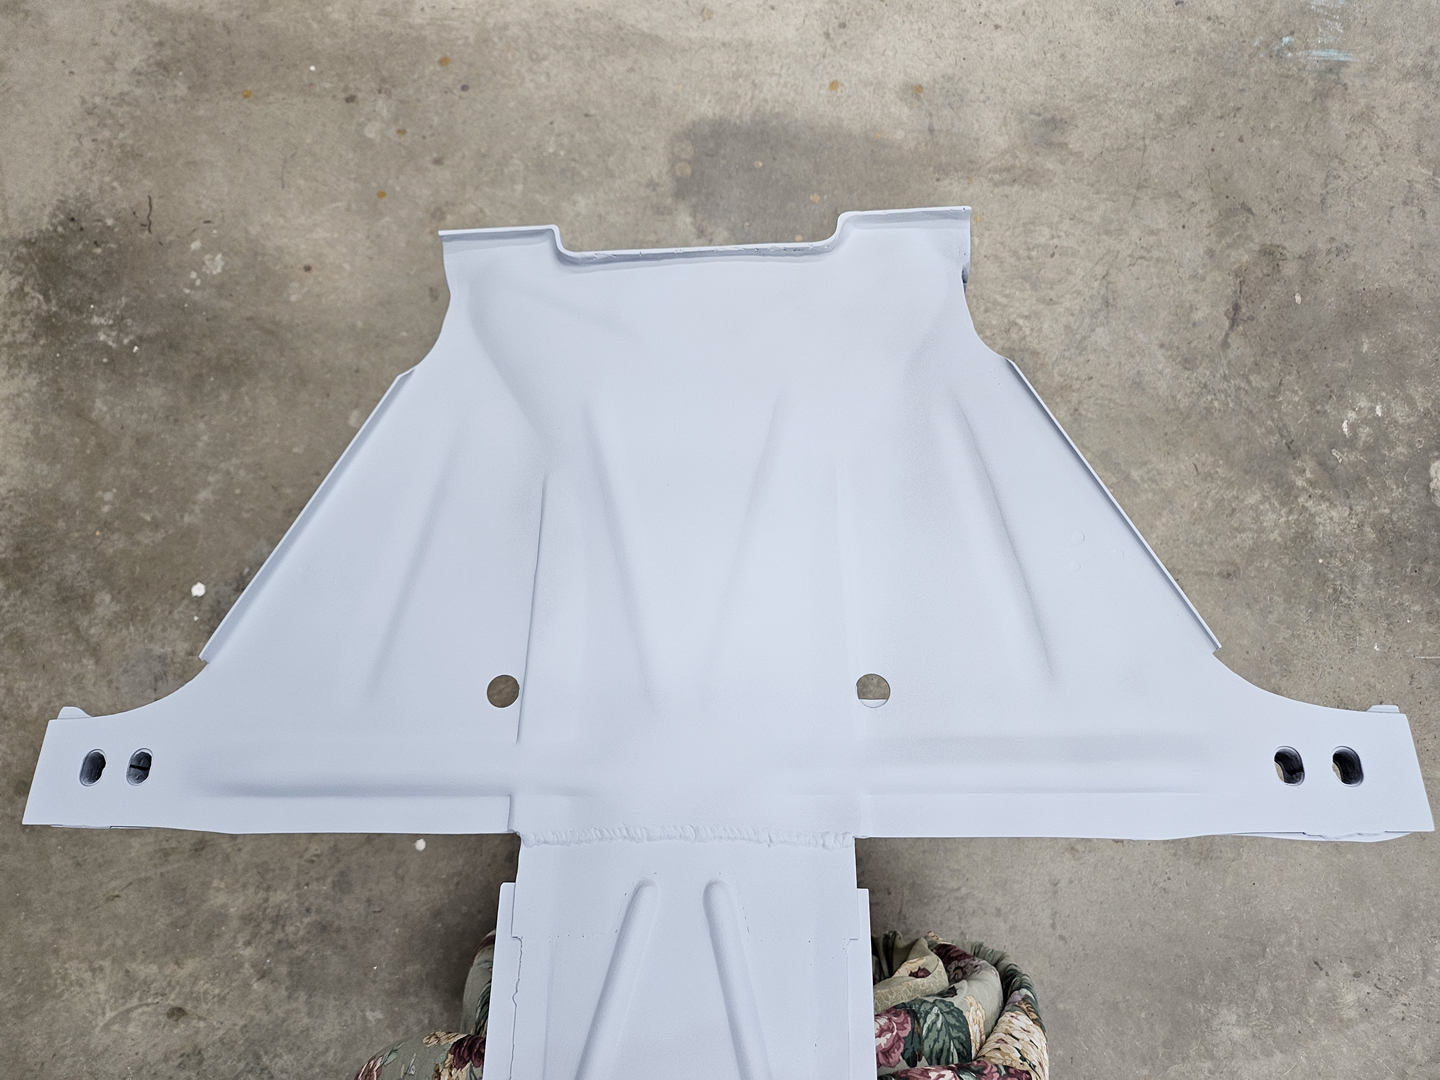
I sprayed the frame head, top and bottom, and the front side of the Napoleon hat with primer to keep it protected until I get ready to paint the chassis. This could be a while and I don't want it rust.
|
|
|
|
|
|
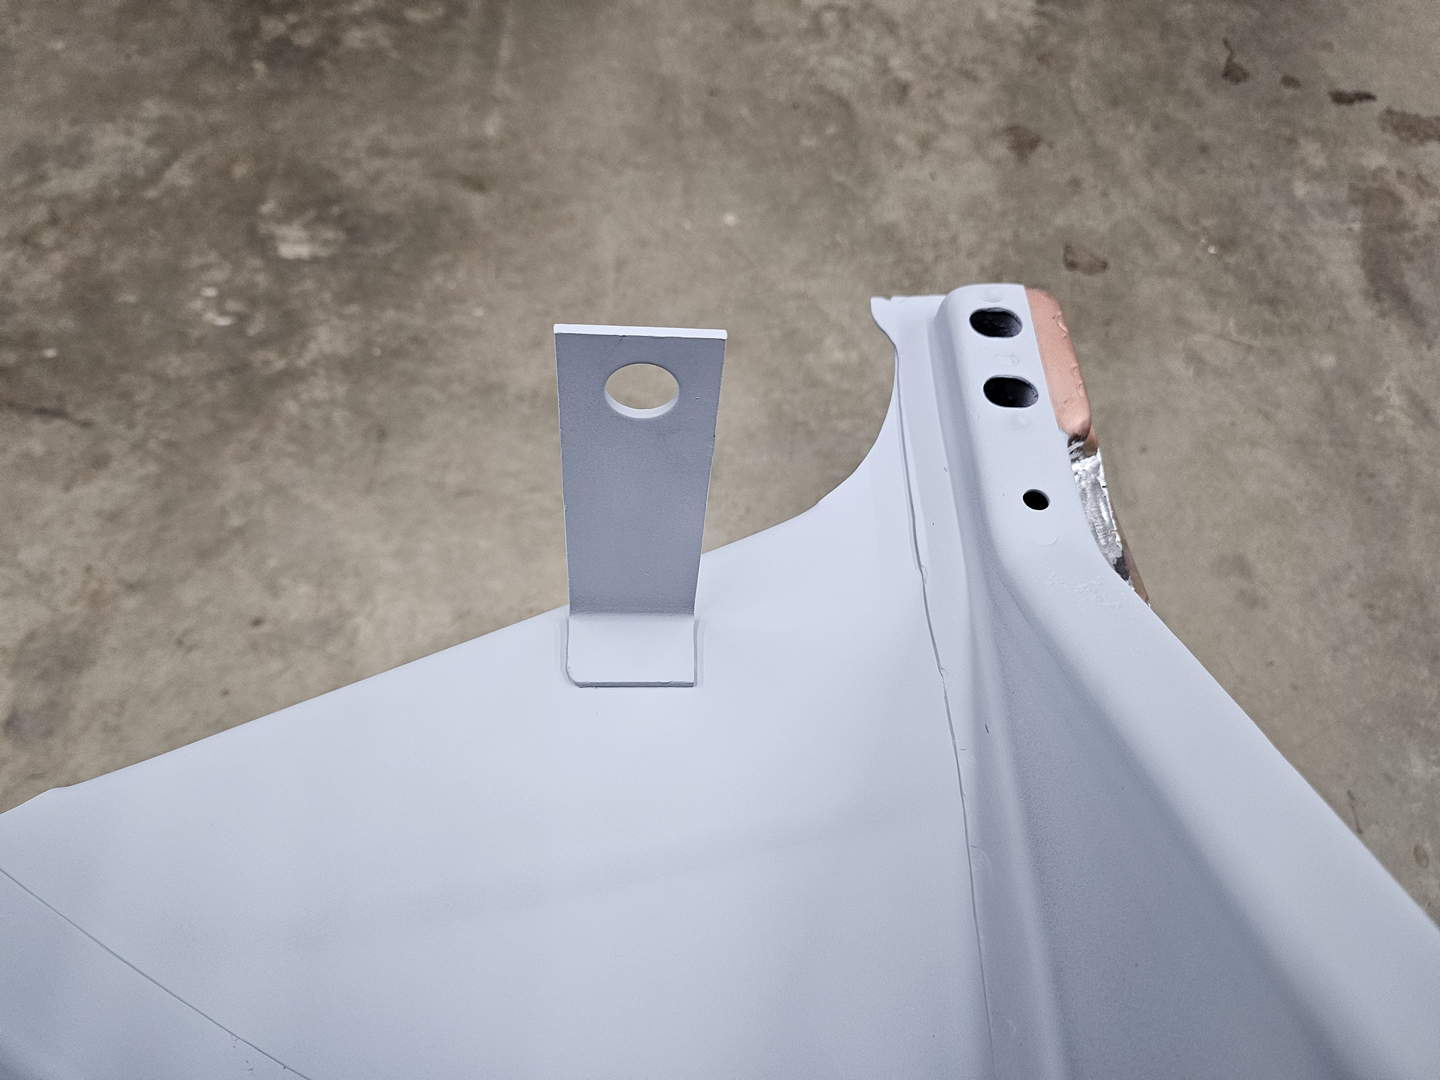
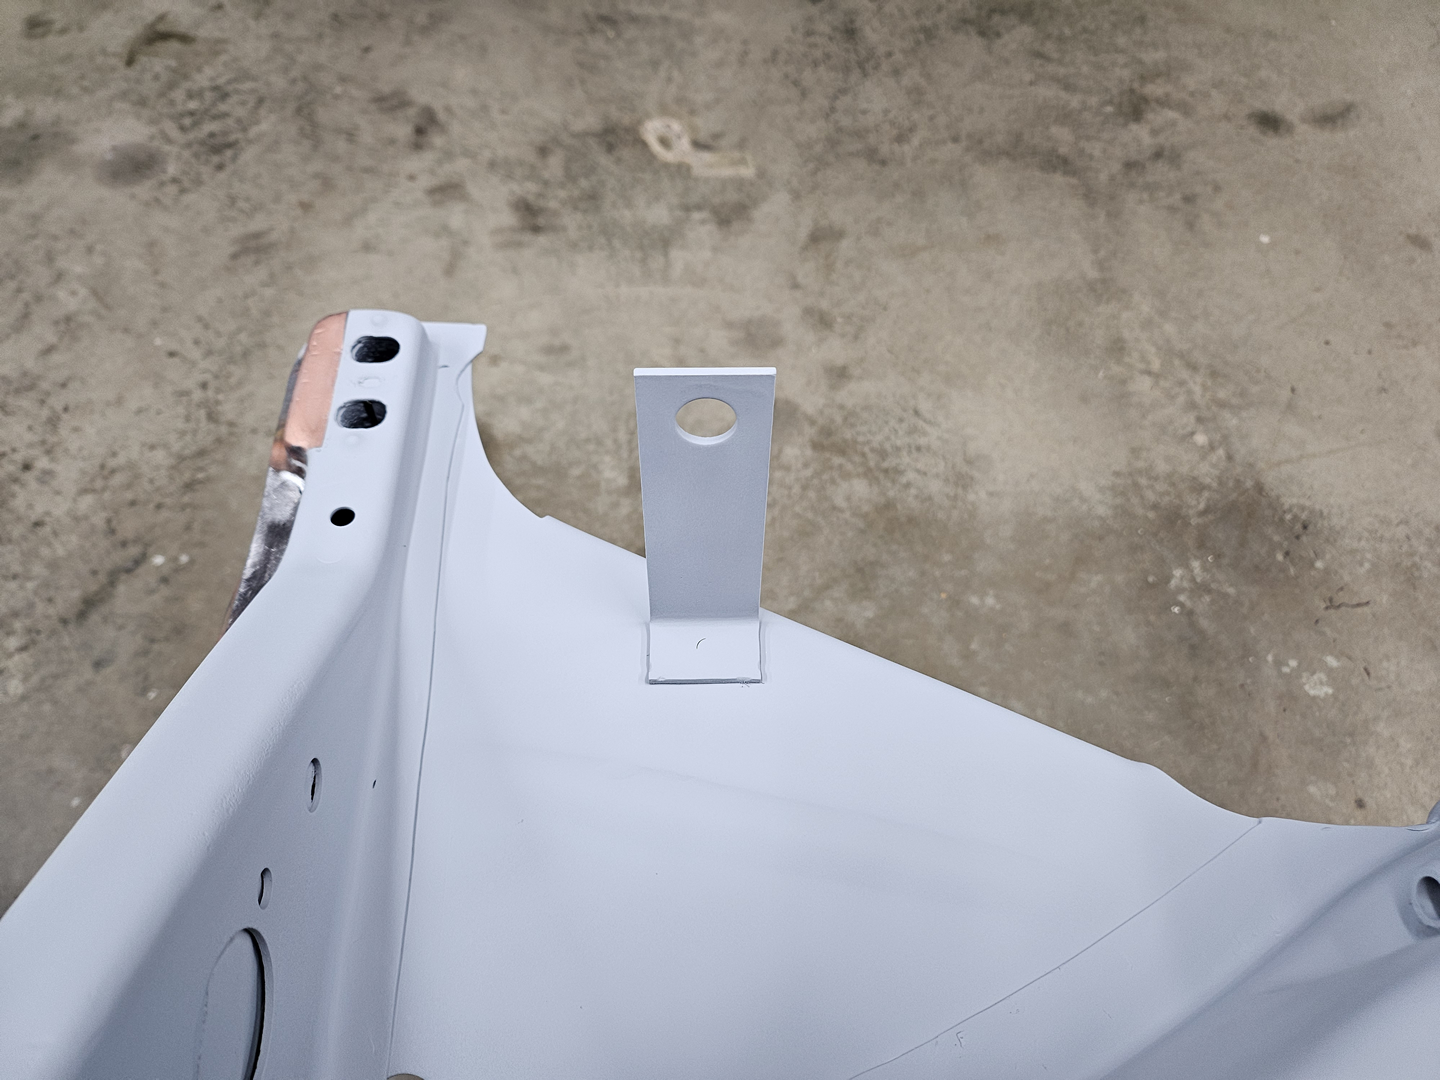
I also welded on the donor brake hose brackets.
|
|
Now on to fitting and welding the floor pans!

-
Hi! Welcome to My Beetle Restoration!
Thanks for dropping by! Feel free to add comments (preferably positive and helpful ones). See you around!
